Always greet the day with anticipation. Many great delicacies await.
2. Simplicity and a thankful heart are some of life’s greatest virtues.
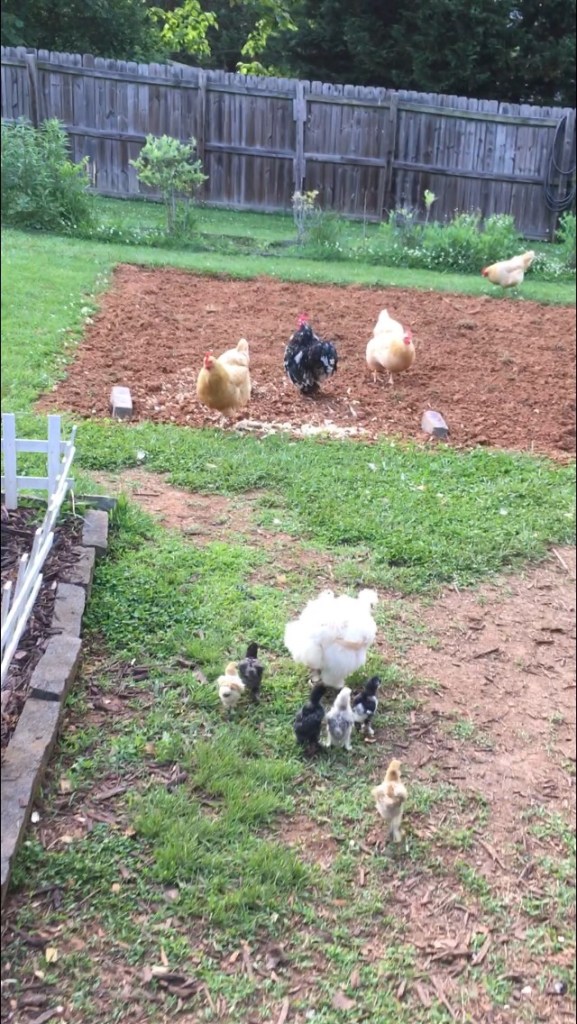
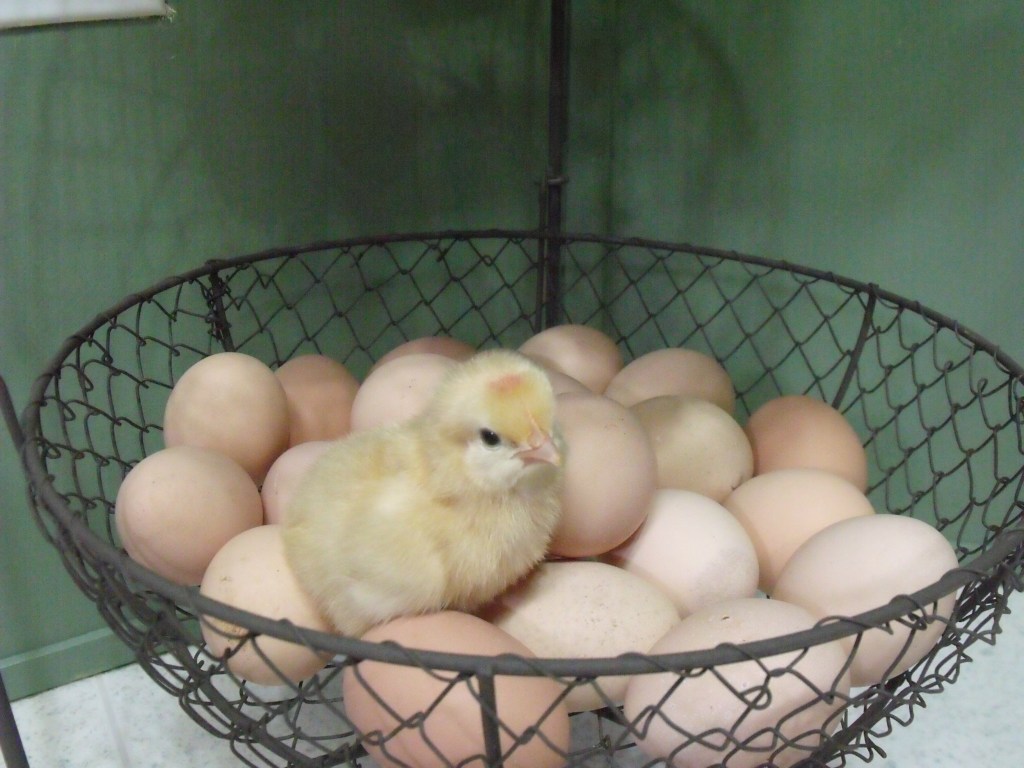
3. Bring up your young well. They are the next generation, and the key to your legacy.
4. When getting into mischief always make sure you have a buddy. Partners in crime always have more fun.
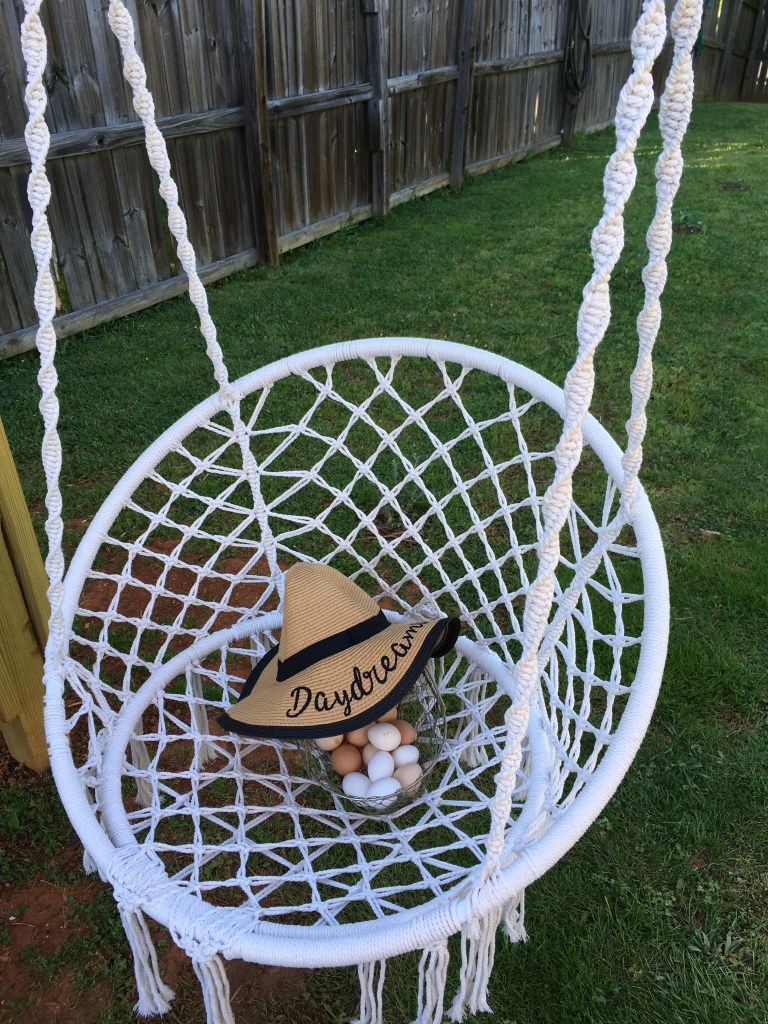
5. Make sure that you leave a little something for those who care about you. Giving is always better than recieving.
6. Try to appreciate the season of winter. Although bleak, it prepares the ground for spring flowers and other delectables.
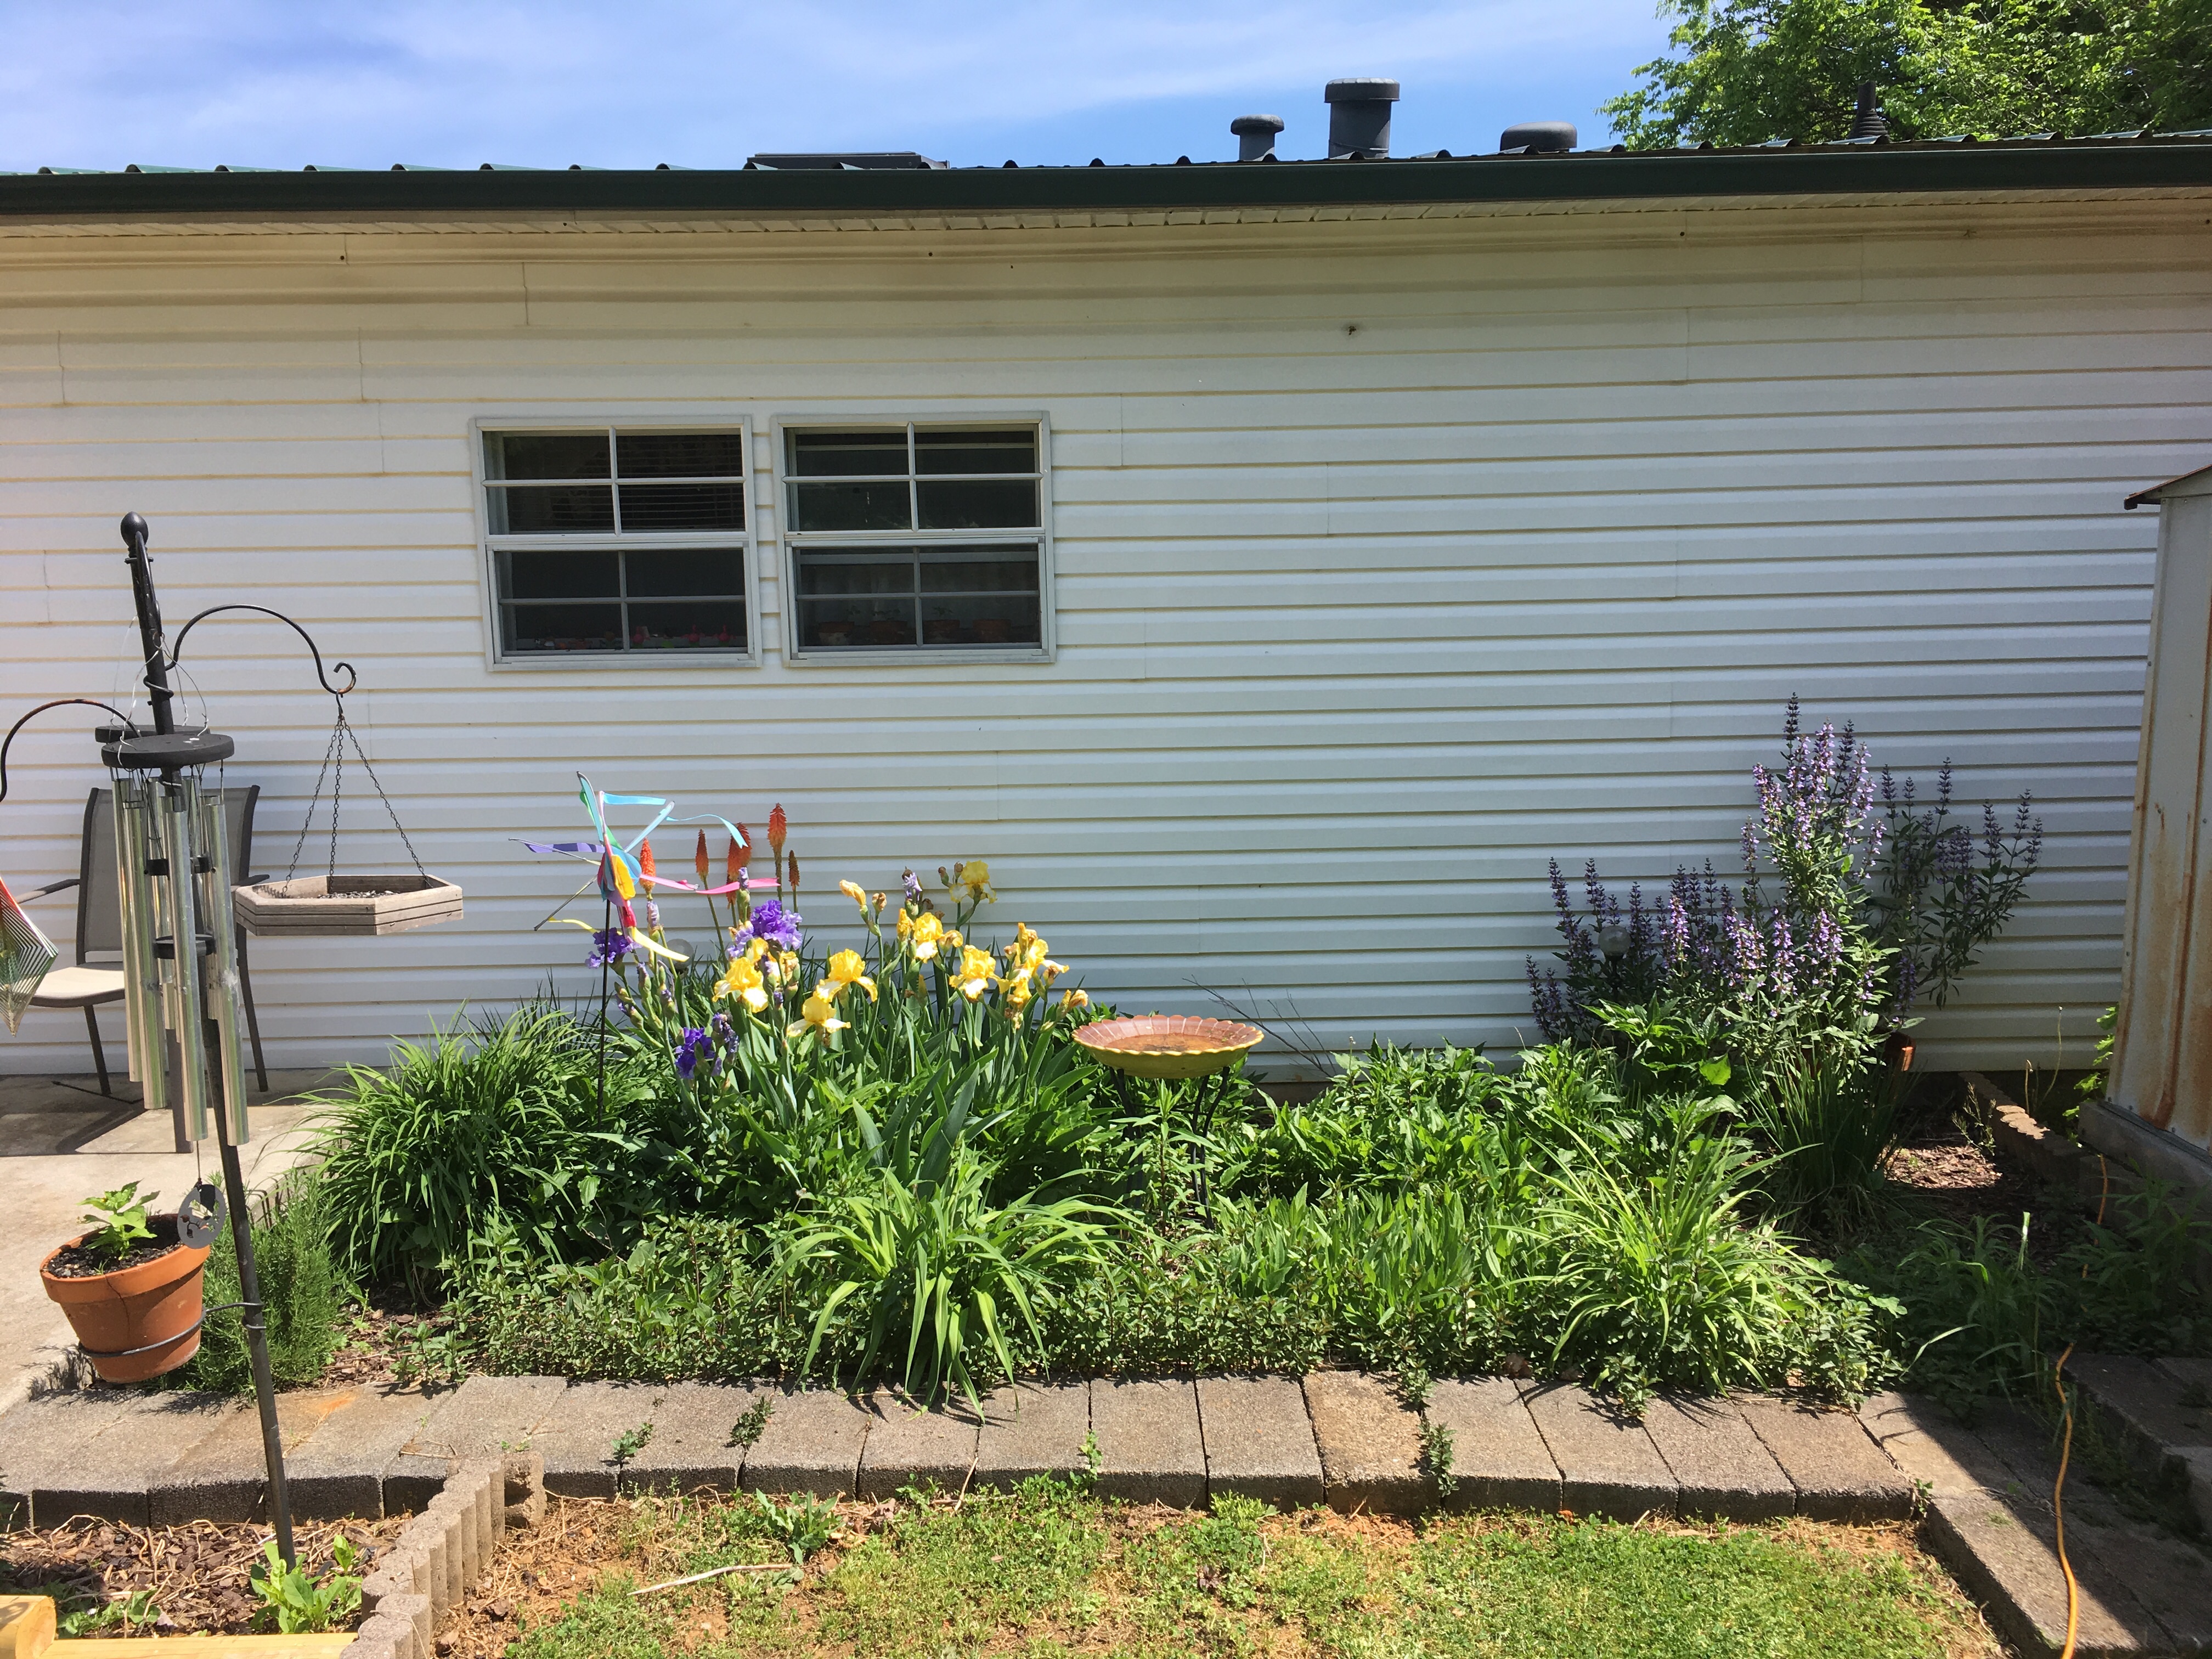
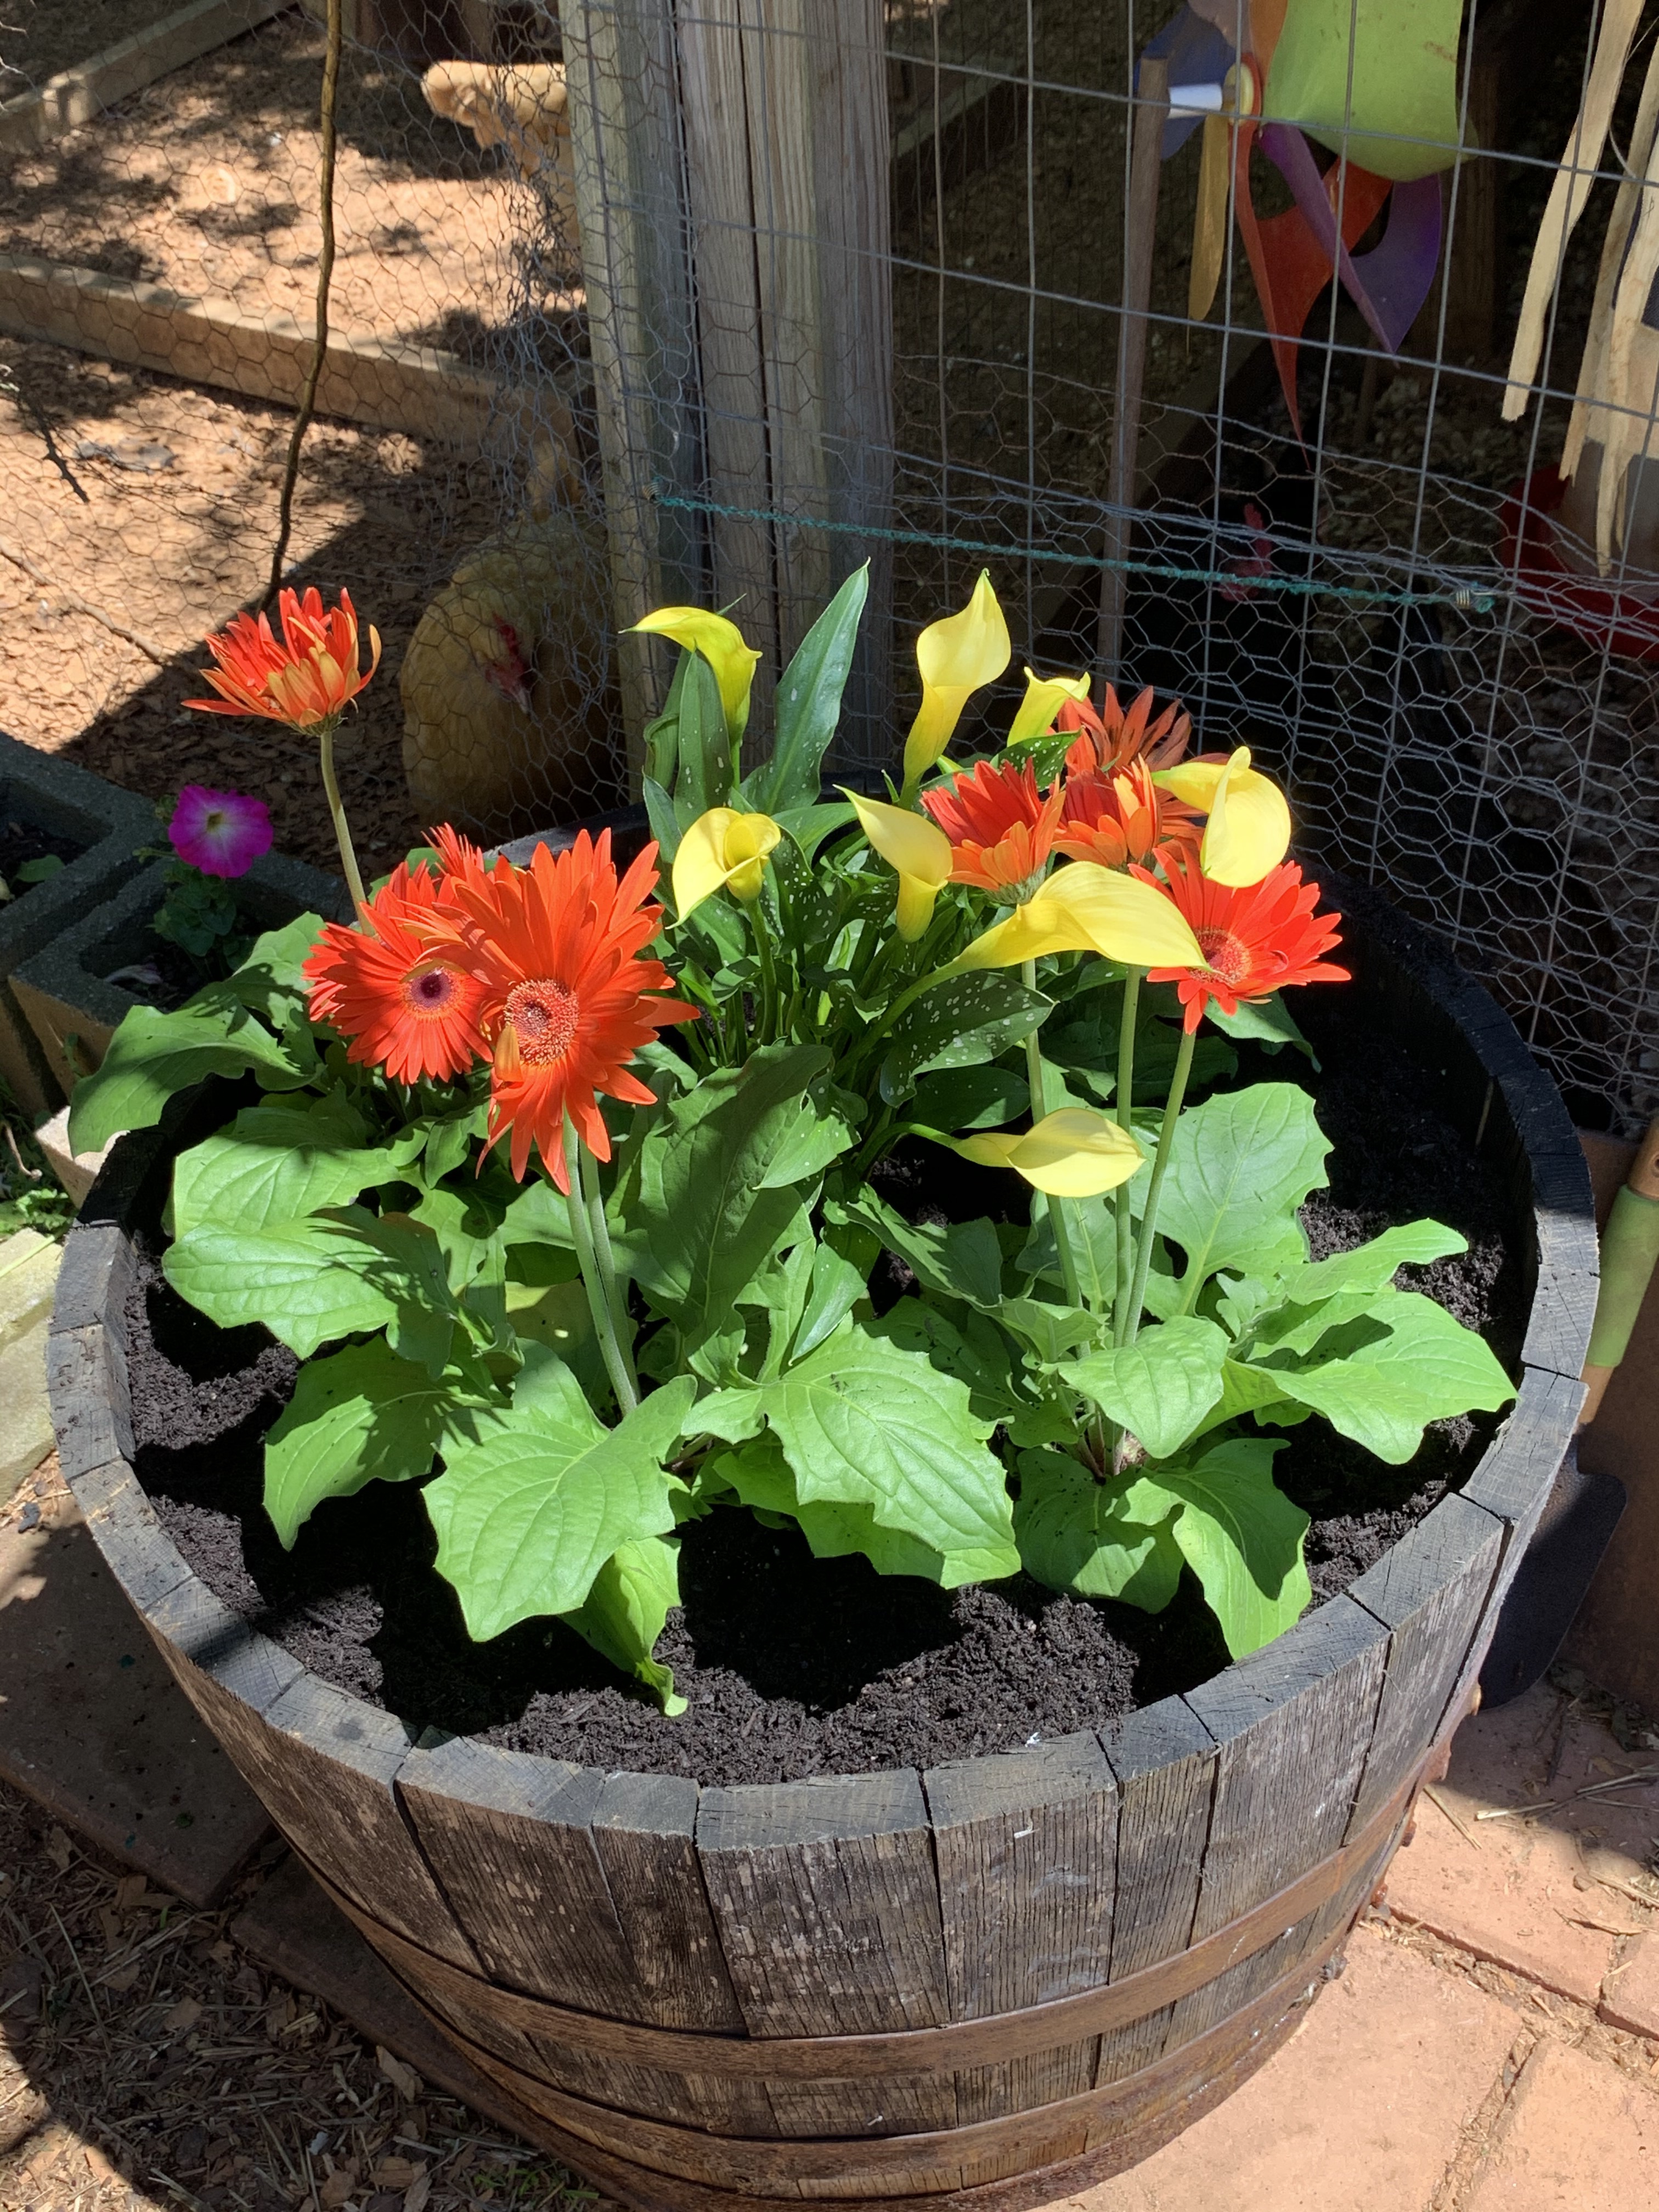
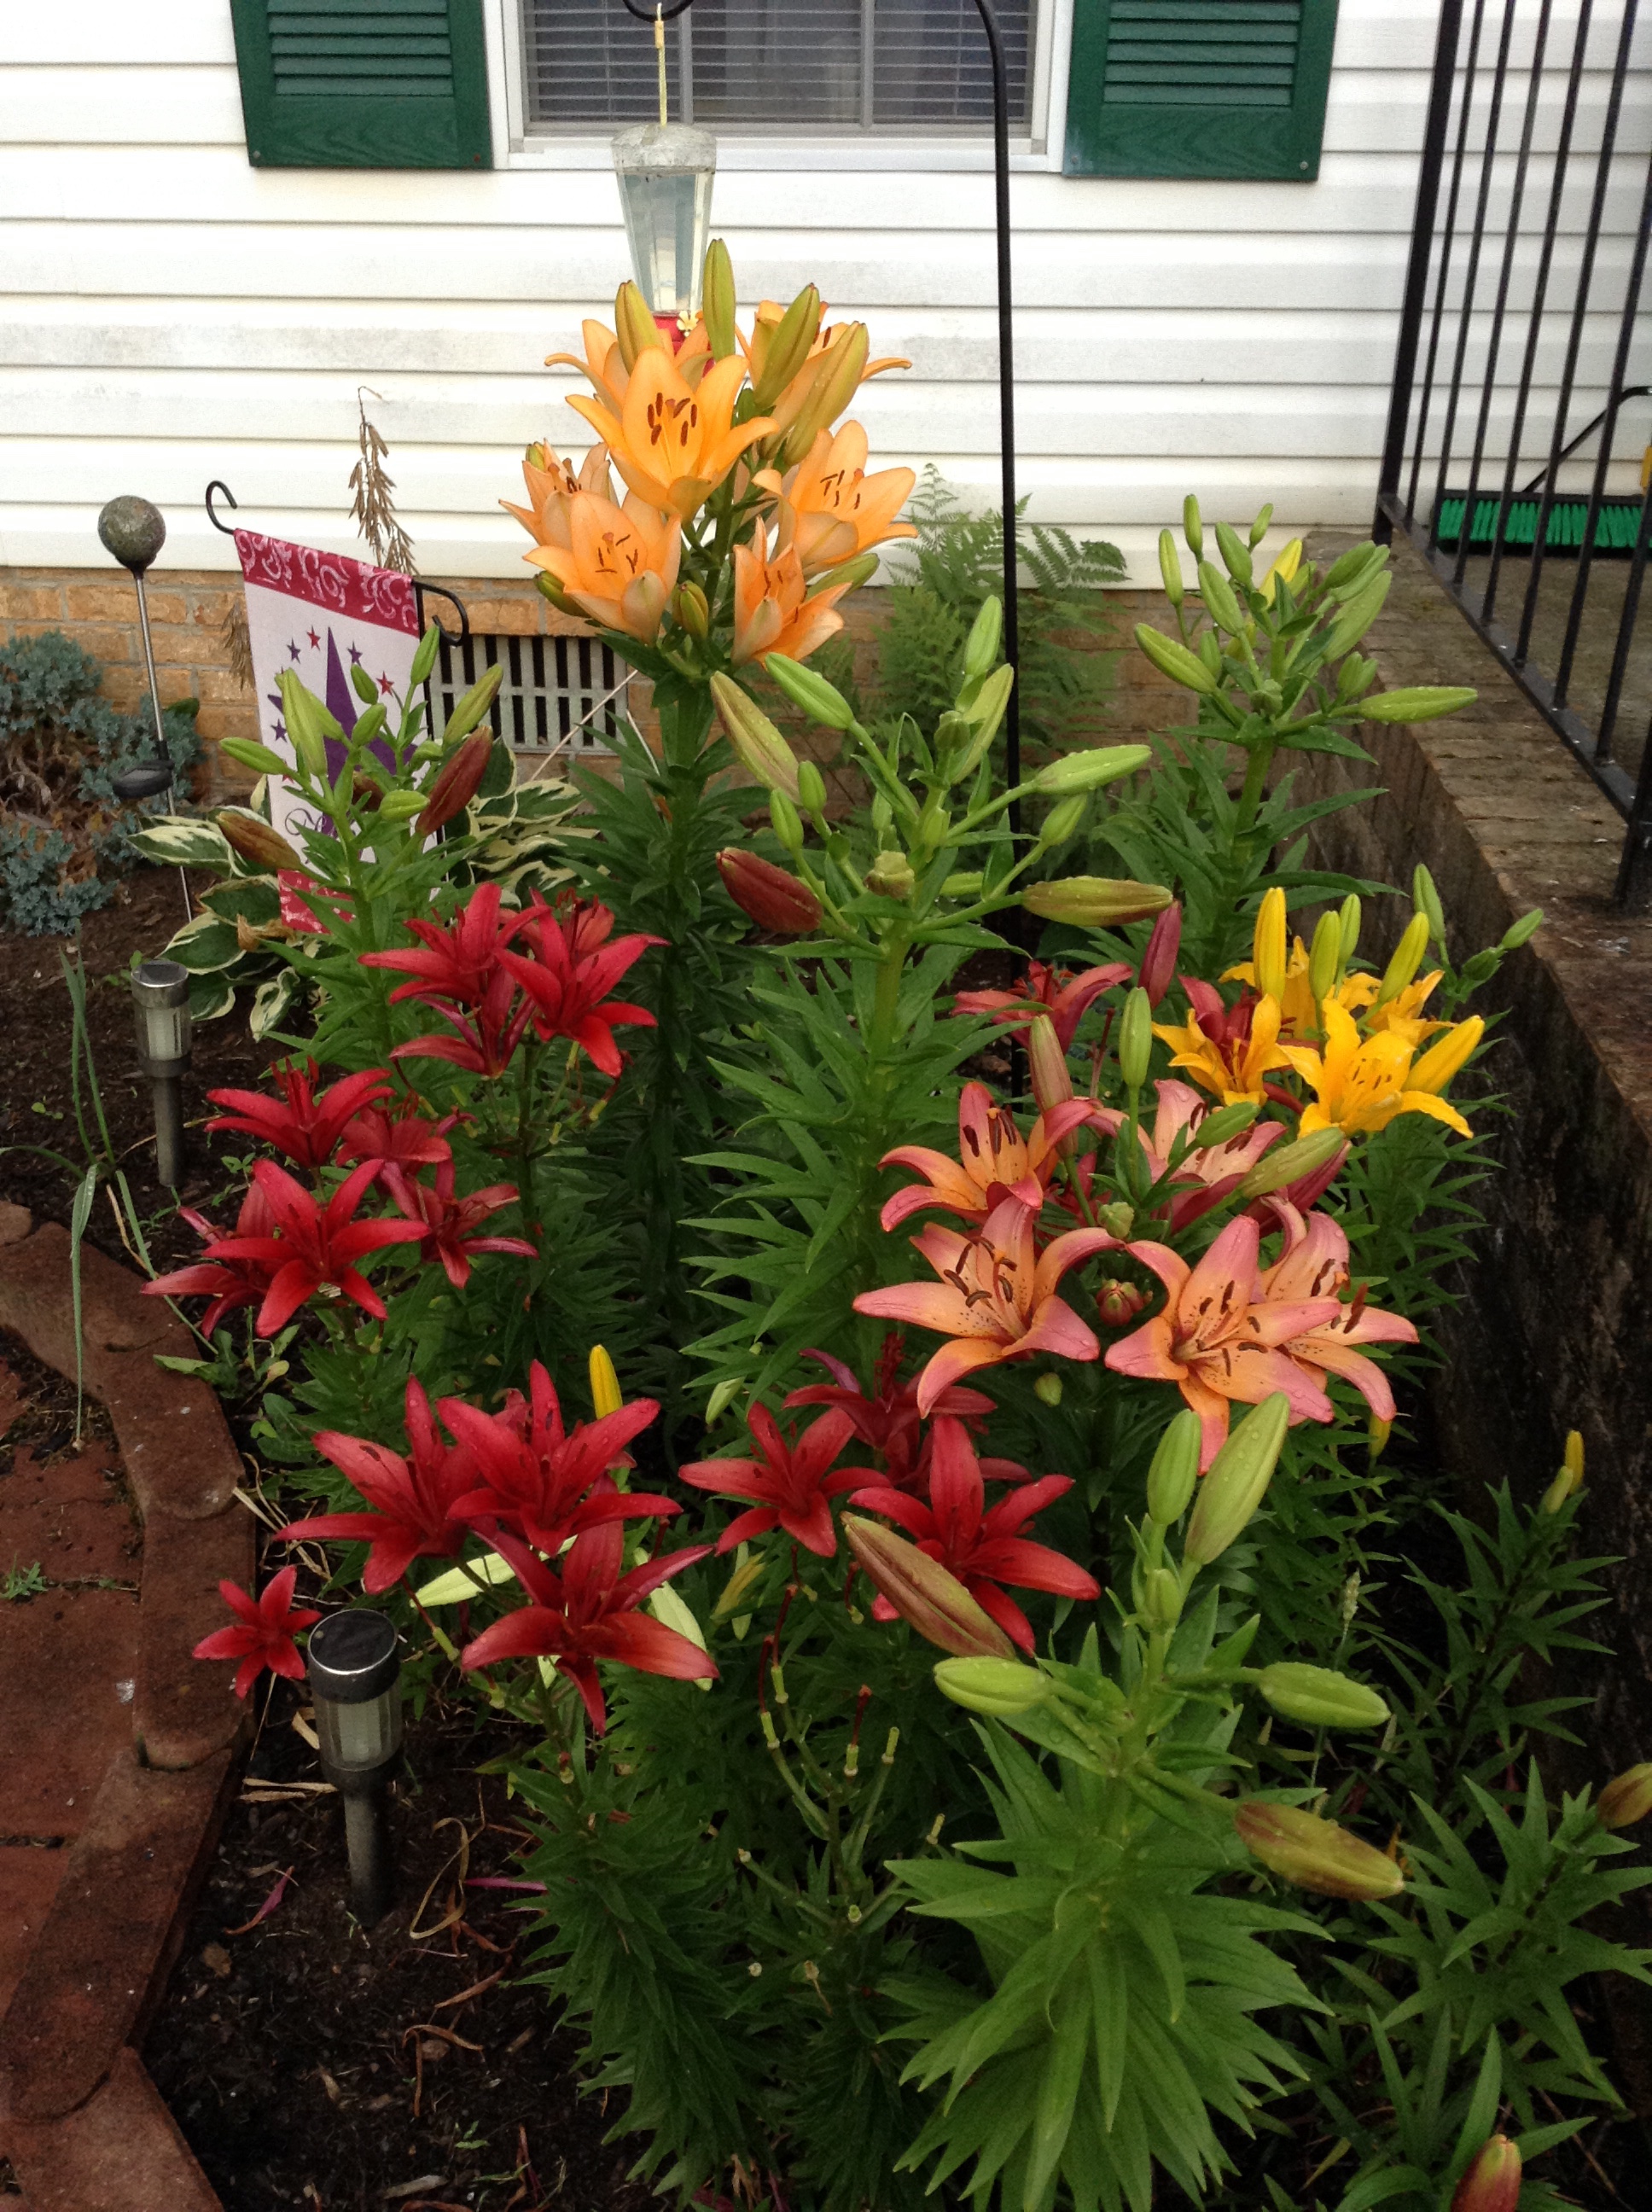
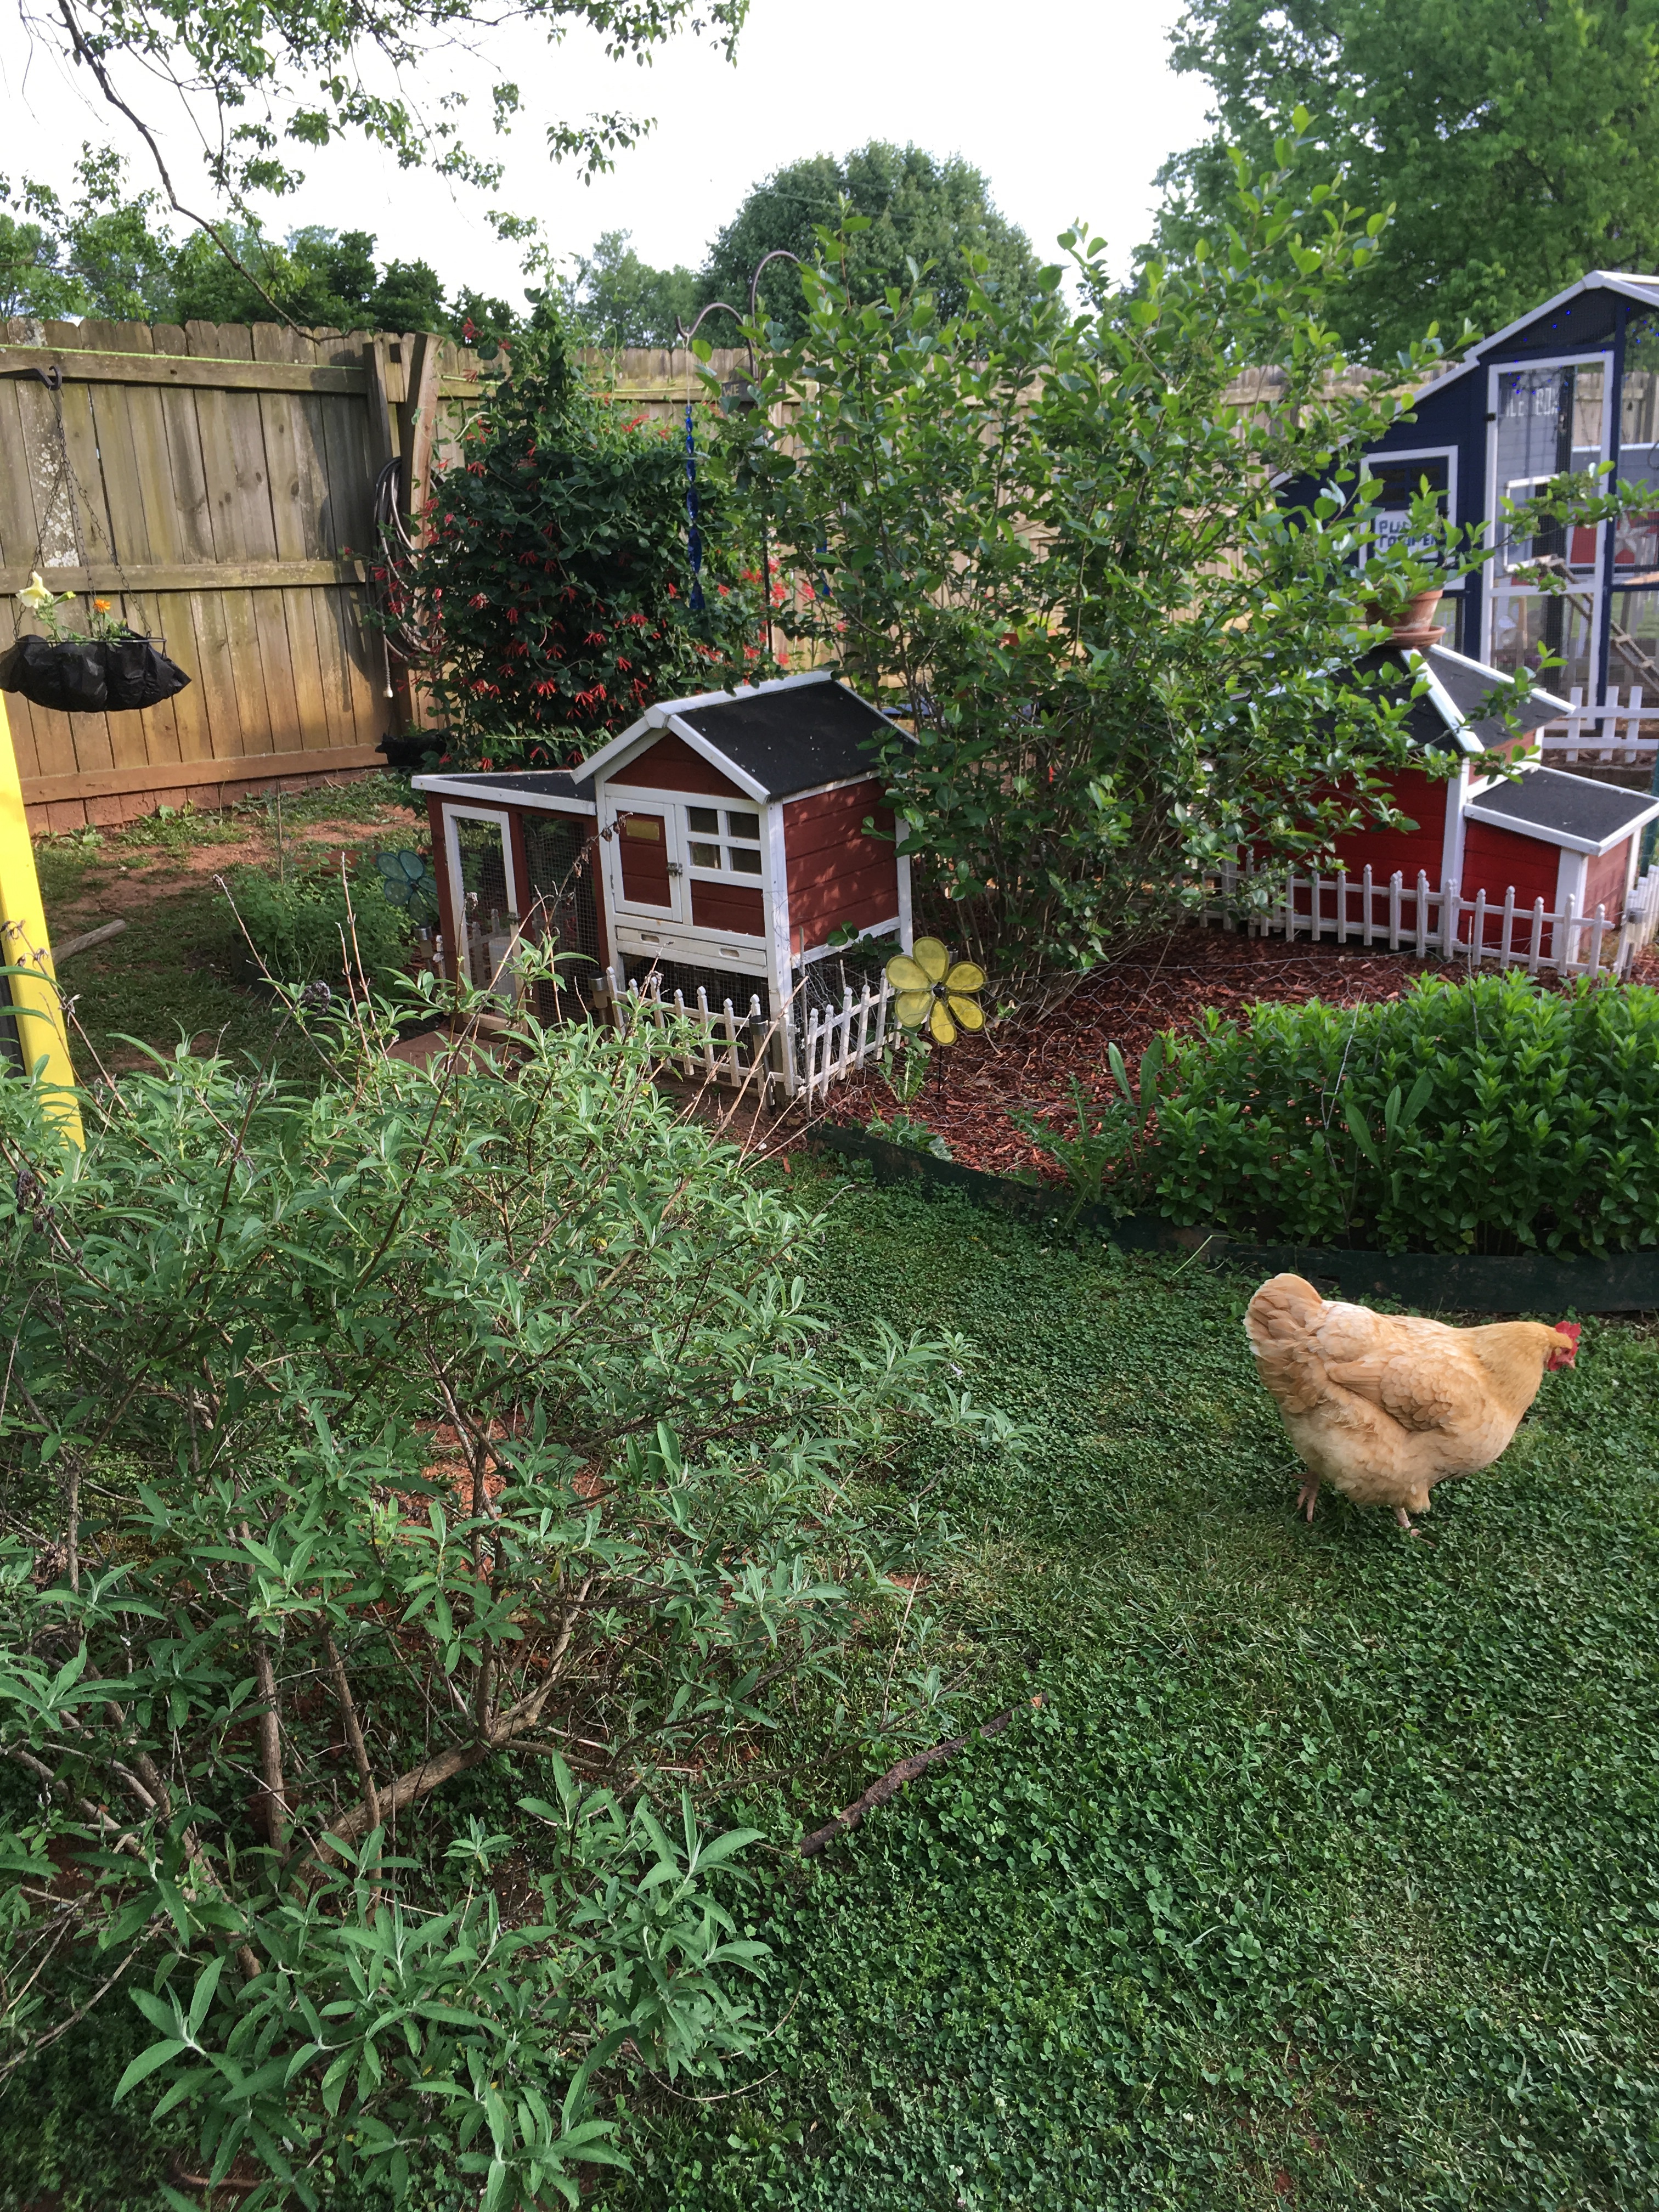
7. Tend your gardens well. A well groomed garden makes the heart sing.
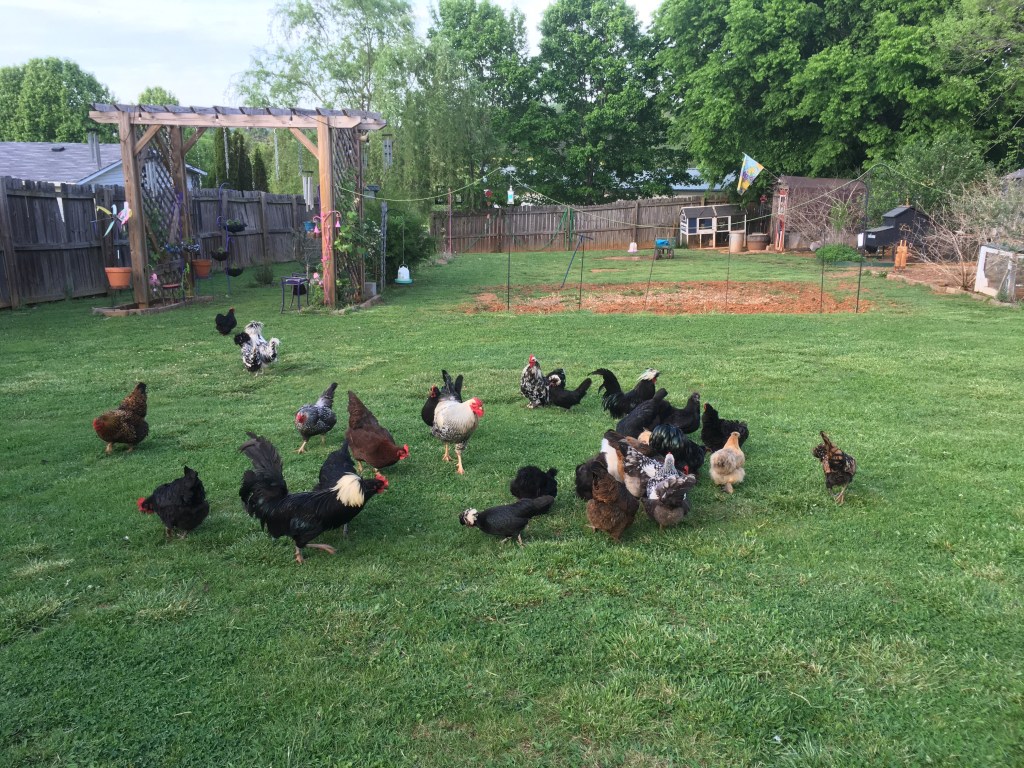
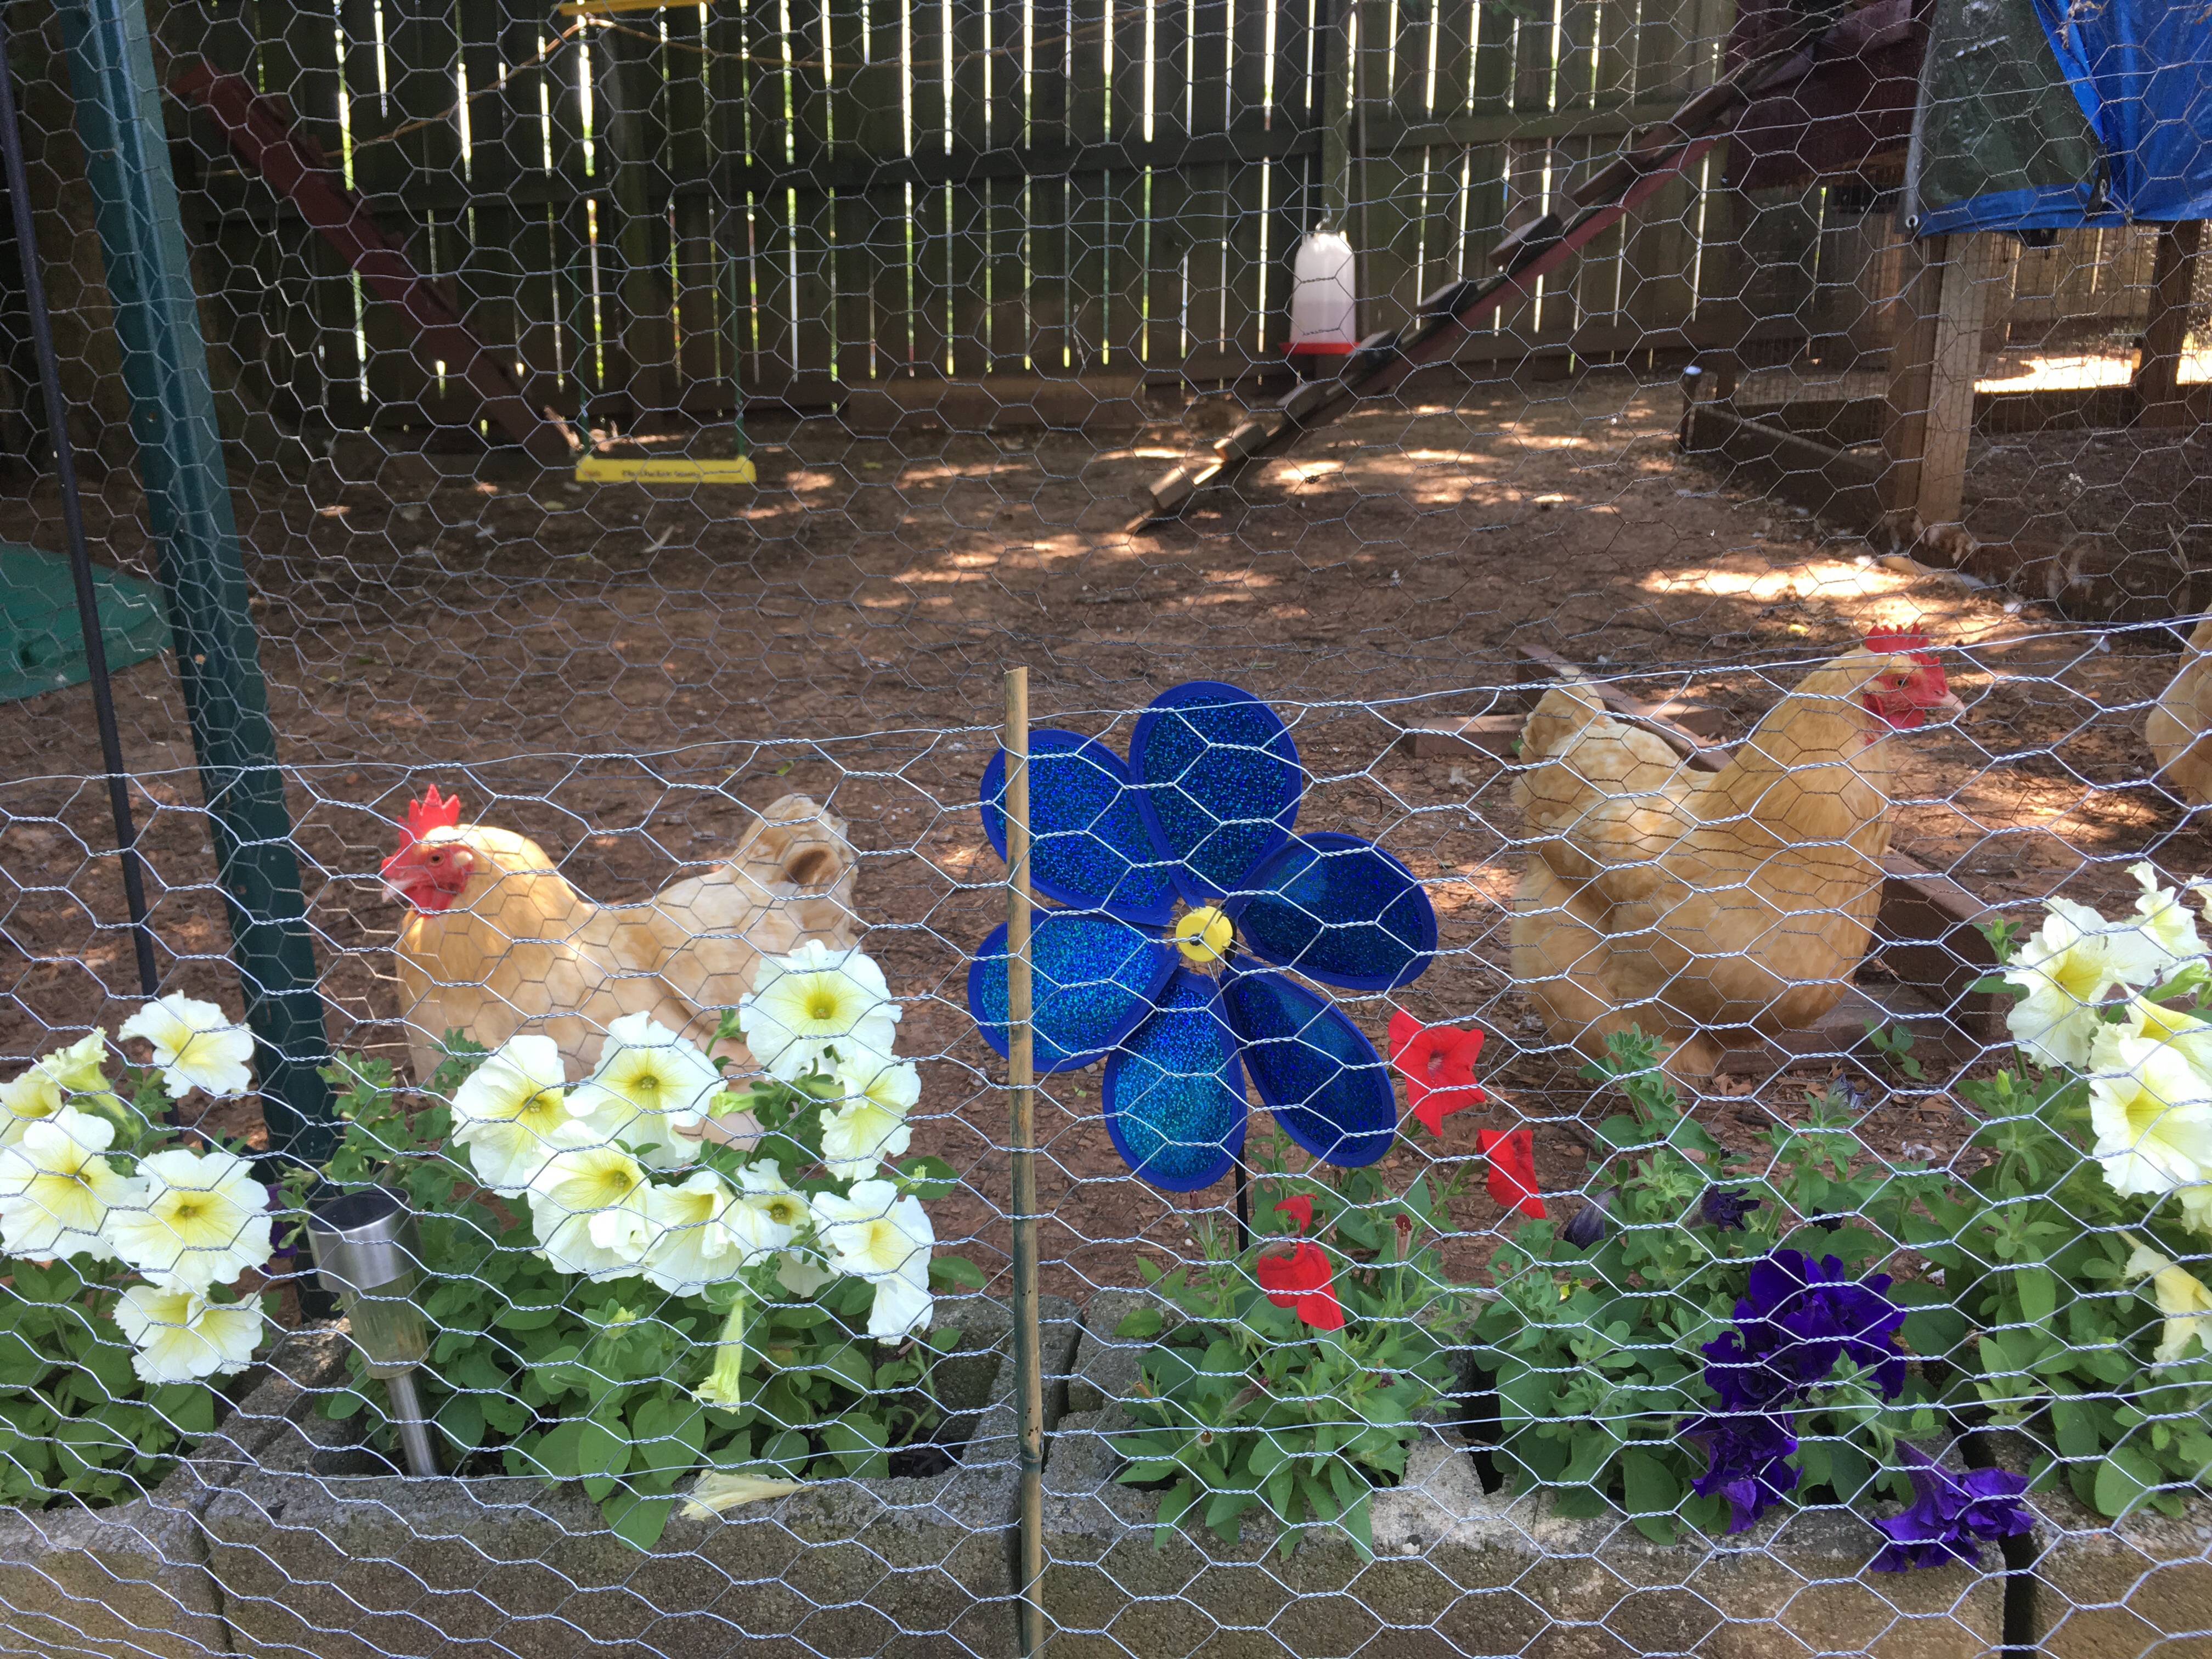
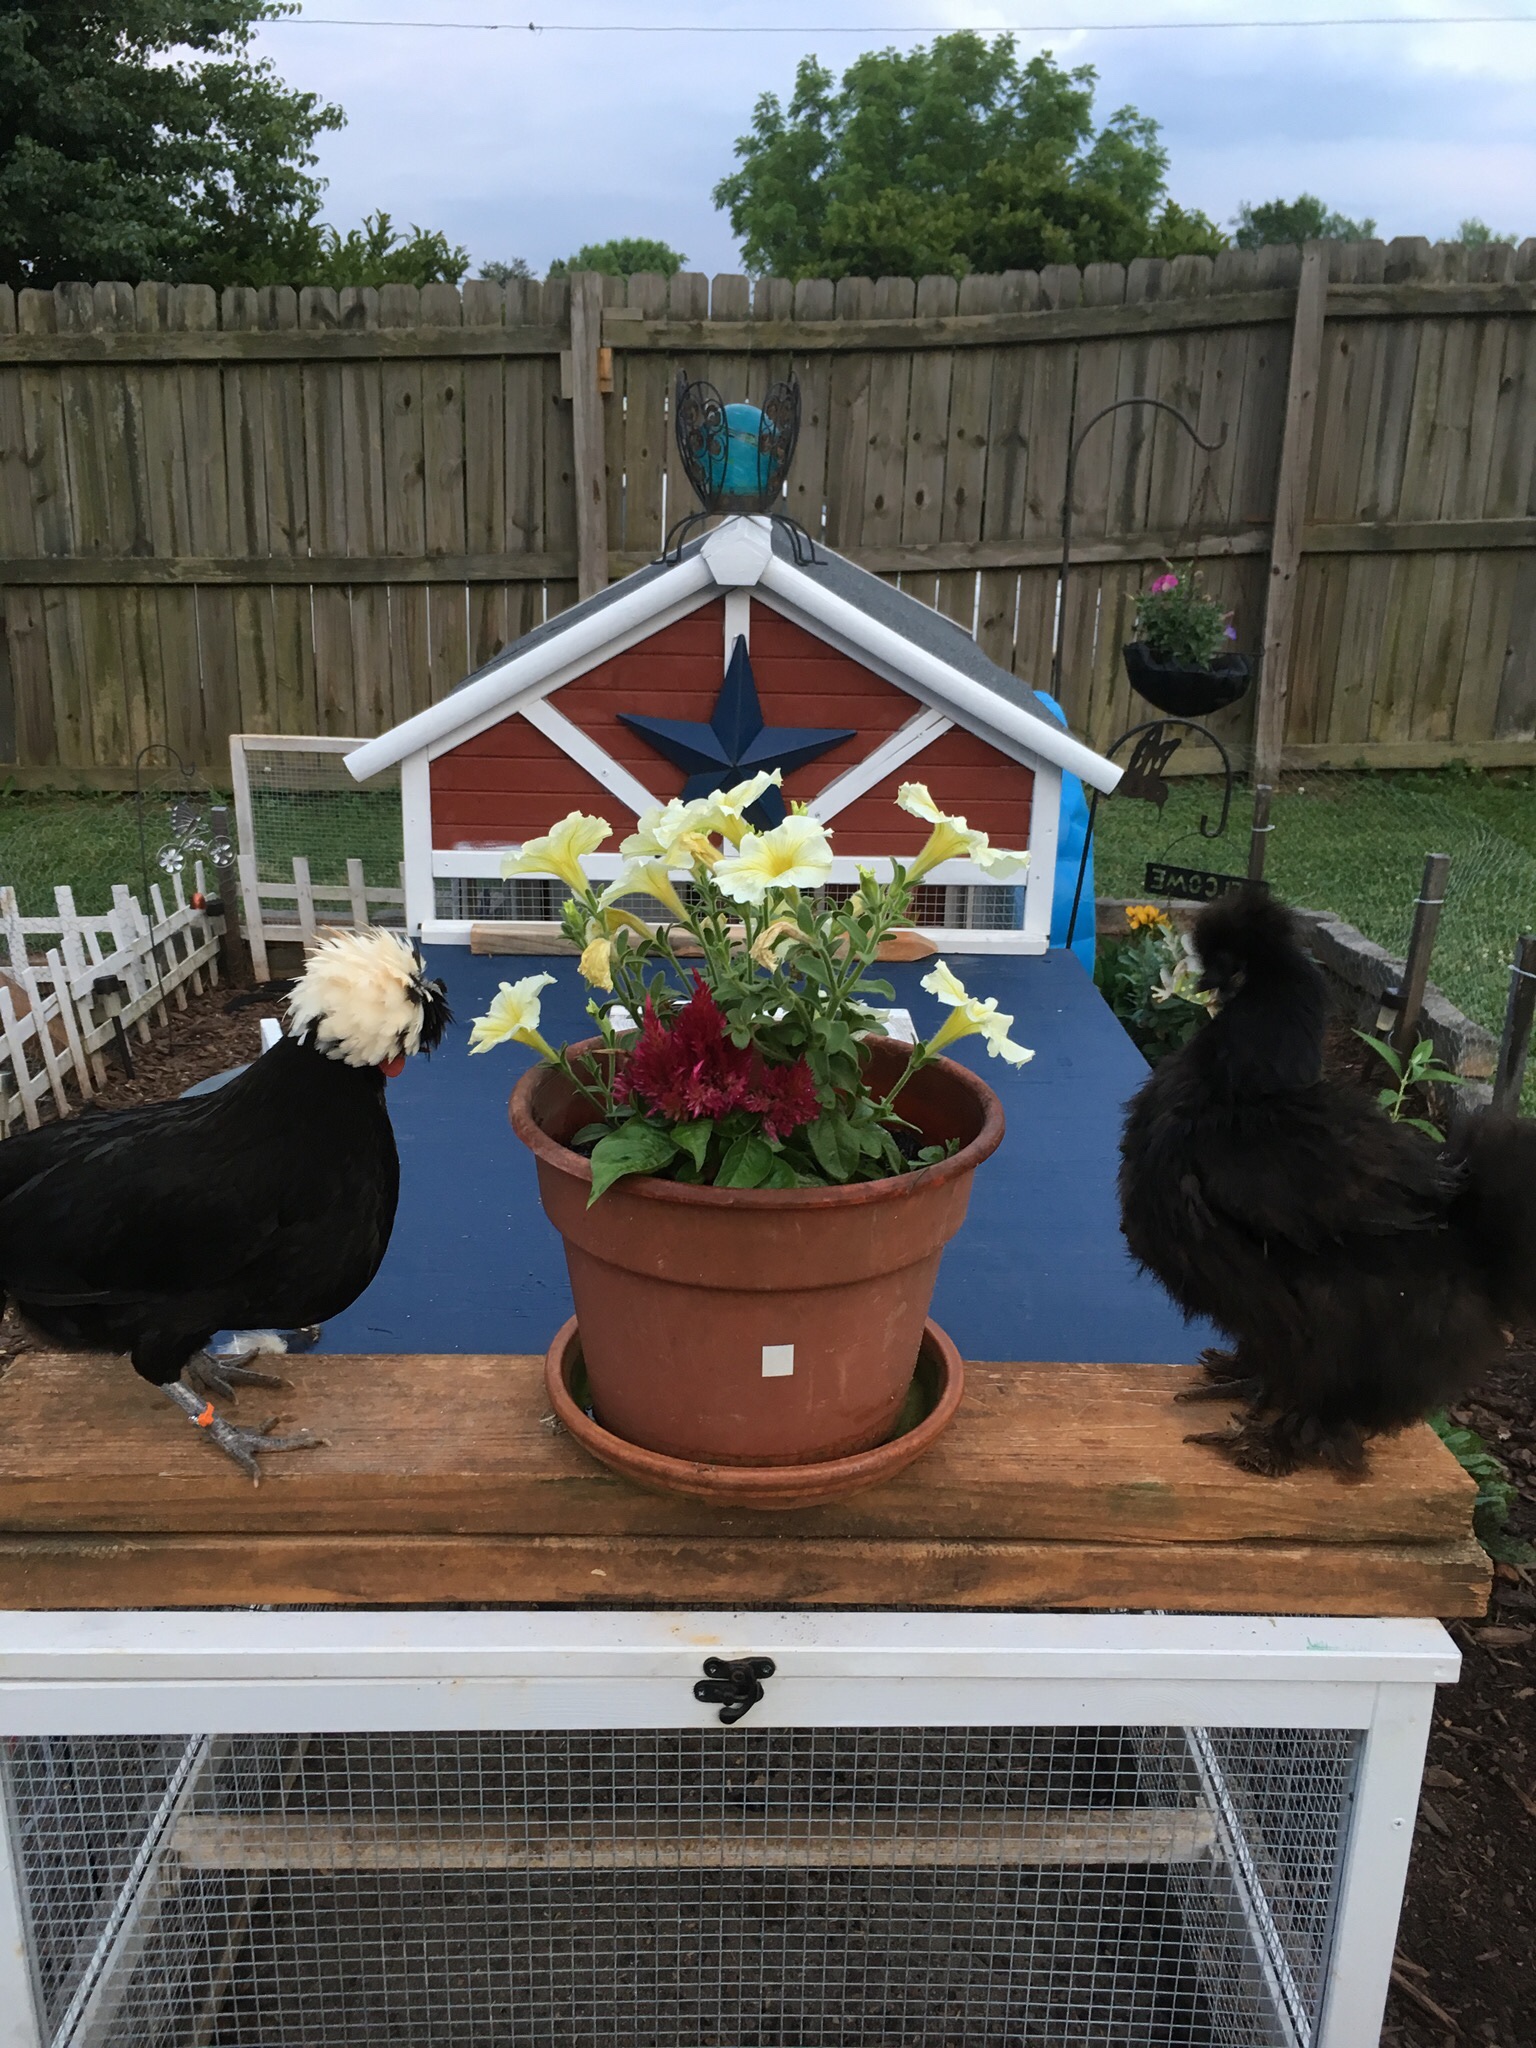
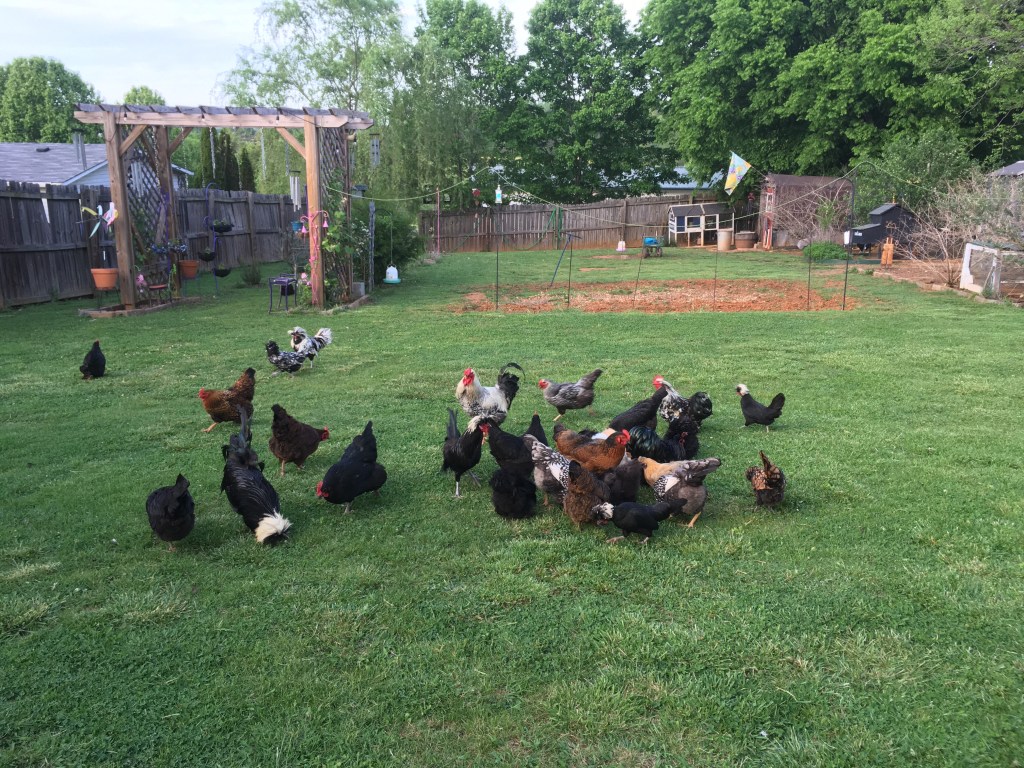
8. Choose your flock wisely, they will be your groupies for life.
9. Make time for friends. Friends make the heart happy.
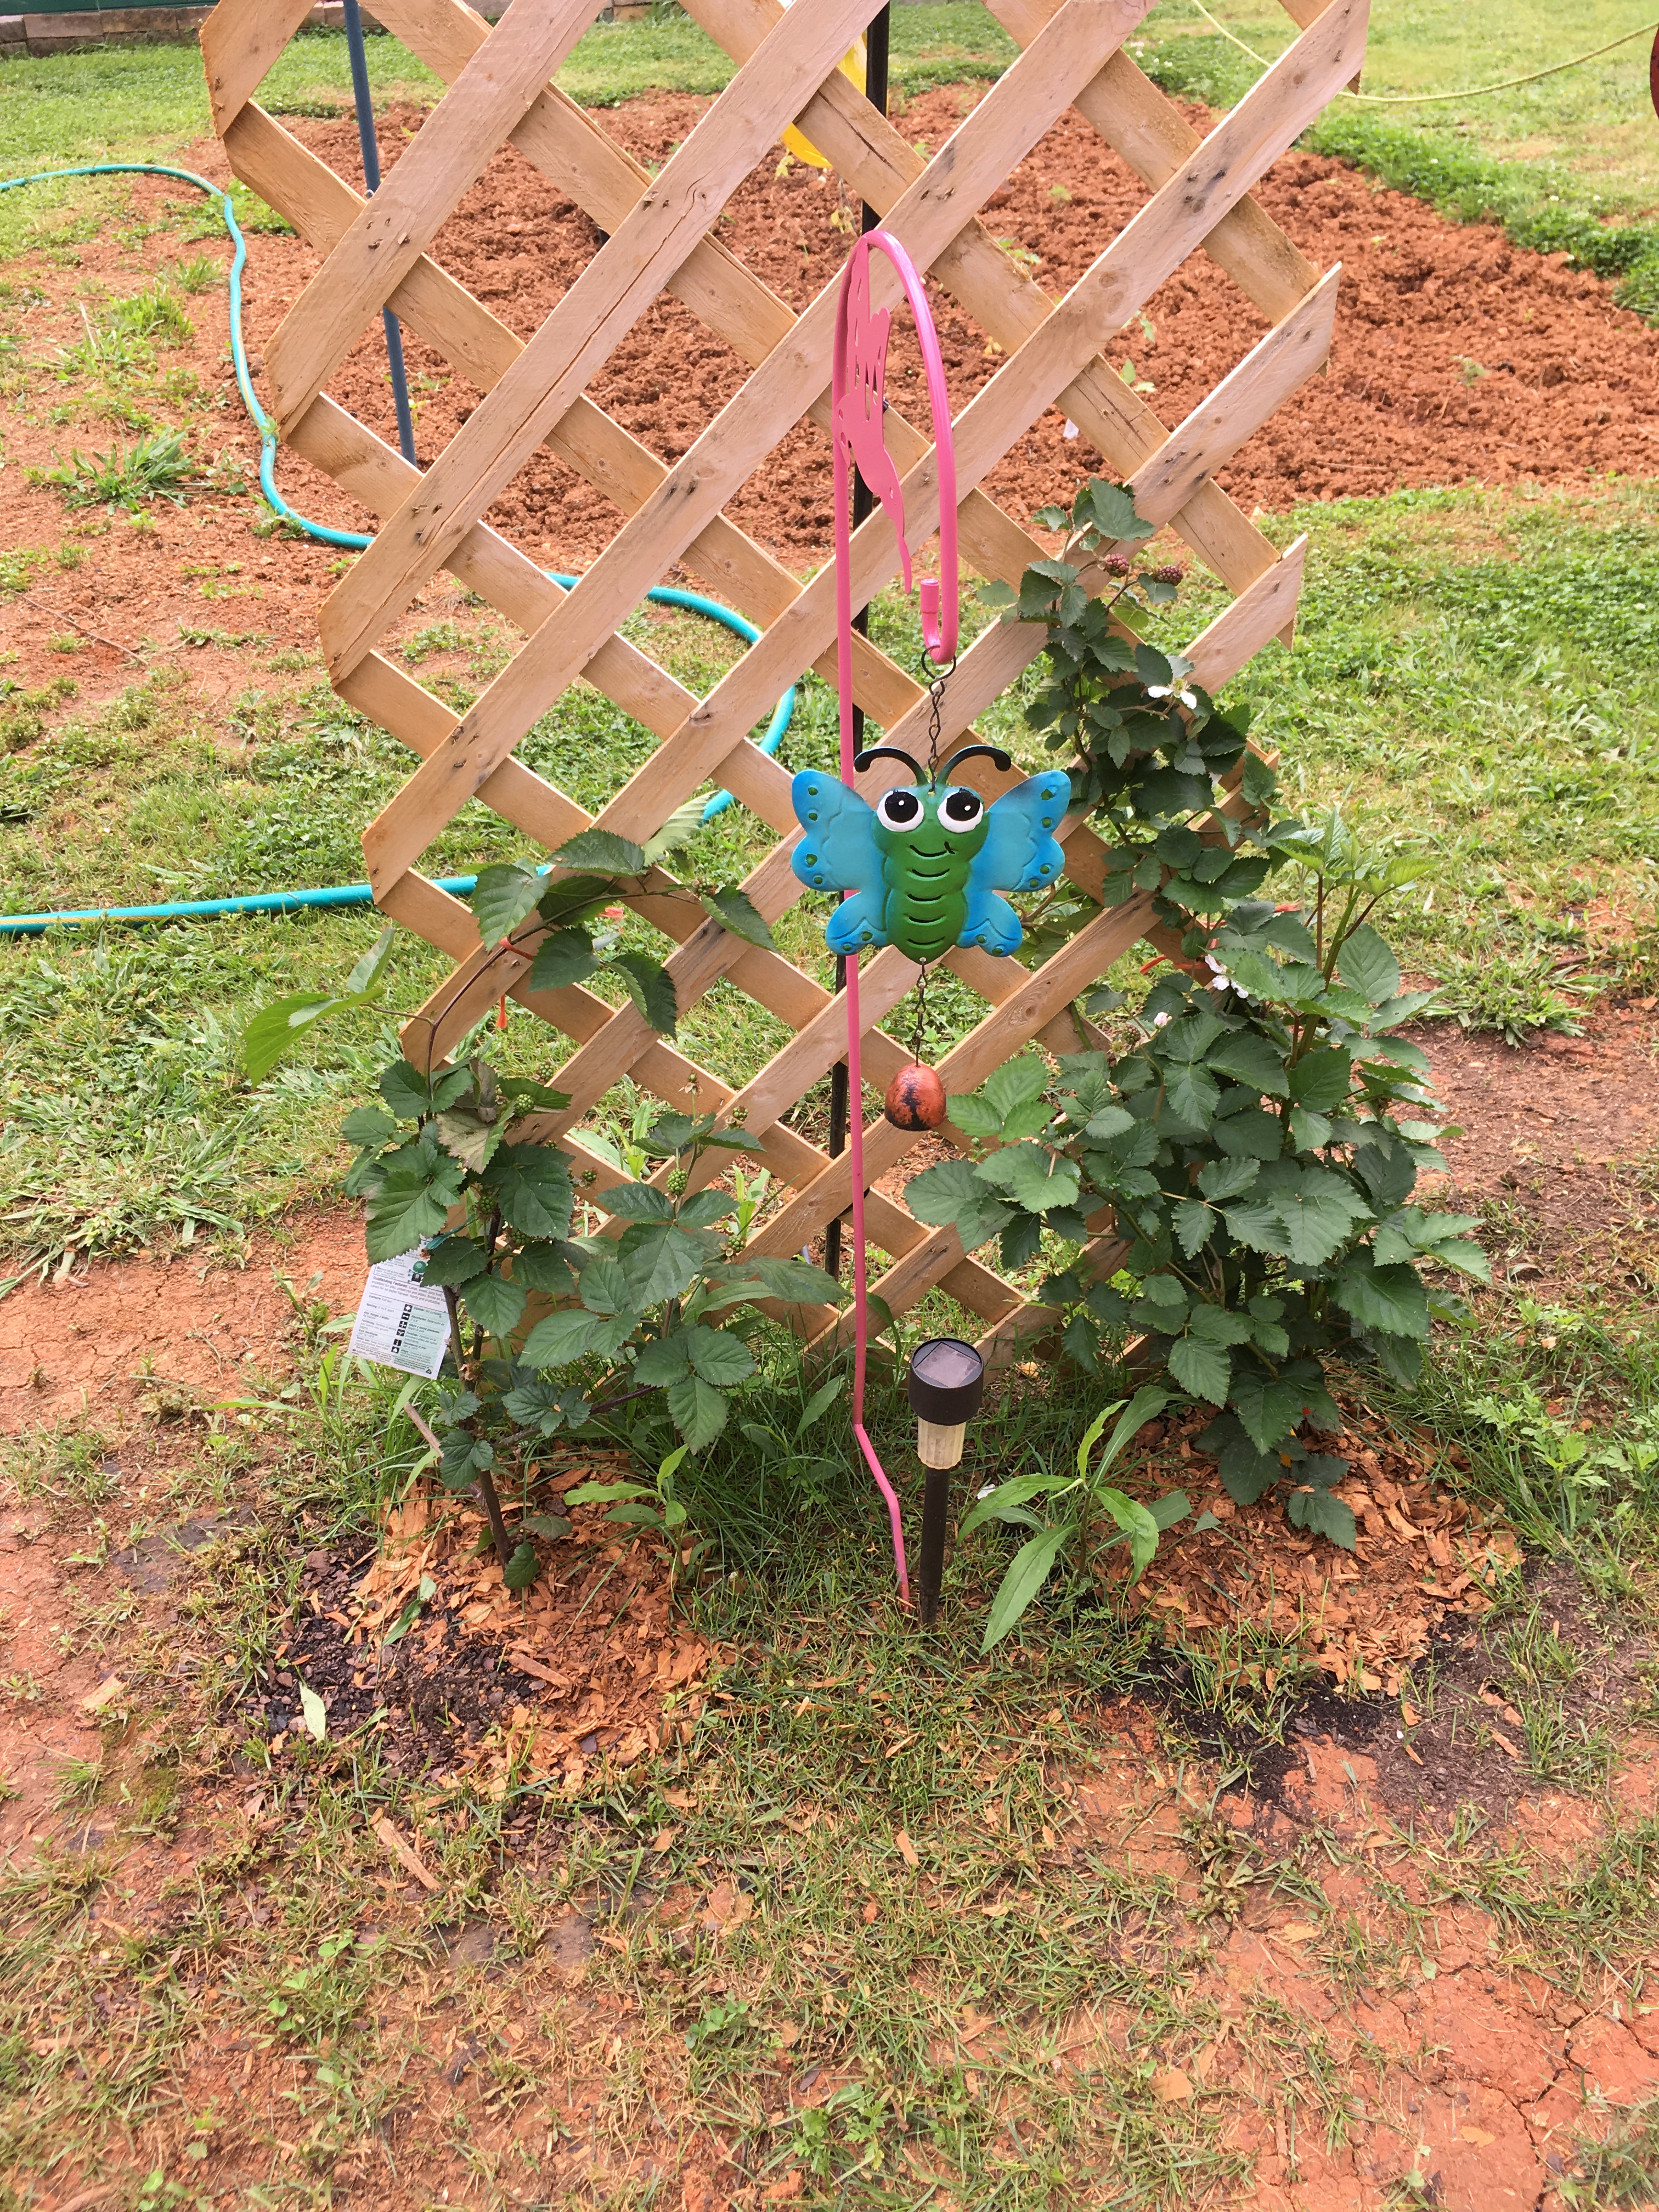
10. Above all, be like butterflies, they hold the key to true freedom.
Hens can teach you so much about the simple pleasures of life. They are simple creatures that require little. They are happiest when they are allowed to do what nature intended them to do.
I hope you enjoyed this lesson on the simple pleasures of hens. They can teach us many things if we just take the time to watch and learn.
I am a published author, multi-disciplinary writer, and web content creator. If you like this post, please visit my writing portfolio or other blogs.
The red glow of a LED bulb in The Coop De Ville bachelor pen.
As fall transitions to winter and temperatures begin to plummet, many backyard chicken keepers are looking for ways to overwinter their flocks and prepare for the anticipated cold weather. While steps to winterize the coop and pen will yield positive impacts, there are potentially dangerous mistakes to avoid when overwintering your flock. The most destructive of these is heat lamps.
In this post, I will explore the dangers of heat lamps and new and safer methods to implement in overwintering backyard chickens. While it is good husbandry to see to the needs of your flock, the most dangerous mistake a chicken keeper can make is judging the flock’s comfort level by your own.
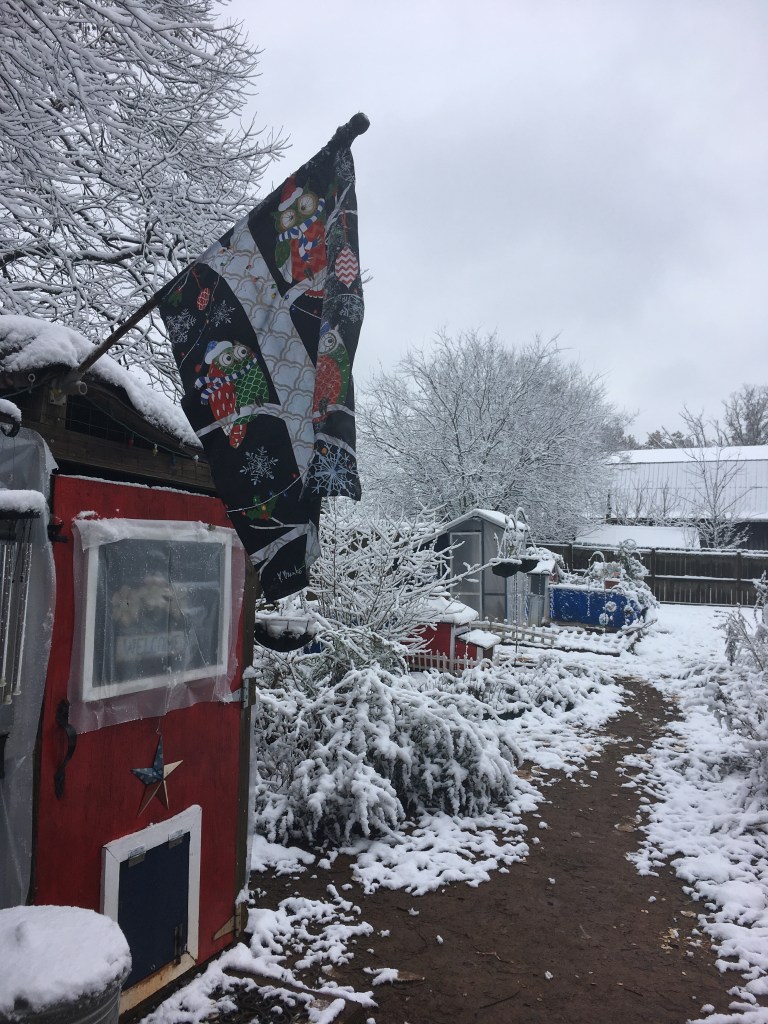
The Kuntry Klucker winterized to keep the coop and pen clean and dry.
Heat lamps-synonymous with chicken coops-began in our grandparents’ days. During the 1940s through the 1980s, heat lamps were used in brooders to keep chicks warm and then used in the coop during winter as a supplemental heat source. While the intentions of these generations of chicken keepers were good, many unfortunately suffered the consequences of using heat lamps in these settings.
During the early 2000s, better methods of providing heat to the brooder setting reduced the need for heat lamps and the associated unintended consequences. However, despite the development of safer products specifically designed for the needs of a backyard chicken keeper, the tradition of heat lamps has progressed through time.
Ganondorf (white crested polish rooster) peering out of the window in the Coop De Ville illuminated by the red glow of a LED light in the coop.
Large, inconstant bulbs, blasting long wavelength red light at an impressive 250 or 500 watts, may seem benign, harmless, or passive. However, the dangers of these bulbs when used in the coop environment are anything but innocuous. A chicken coop filled with dry wood shavings, dust, and feathers is prime kindling for a swift, vehement, and exhaustive fire.
The path of destruction set forth by these bulbs is possible in two primary ways. First, there is no assured way to mount heat lamps in a habitat where the residents can fly. Heat lamps, by the antics of the chickens, are easily knocked down. Once they fall, if the bulb does not bust, the radiating heat will quickly ignite the dry shavings, and a fire ensues.
Secondly, due to the incandescent nature of heat lamp bulbs – at the end of their lifespan – the filament within the bulb can burst, causing the bulb to explode. Releasing a burst of light, heat, and sparks, the instability of heat lamp bulbs when making contact with the kindling in the coop will result in a fatal fire.
Silkie flock roosting in the coop.
Despite best efforts to mount a heat lamp in a chicken coop, the flighty nature of the residents inside makes a coop fire an ever-present danger. Given the volatility of heat lamps in an enclosed environment, there are much safer ways to keep the flock comfortable as the winter weather rages.
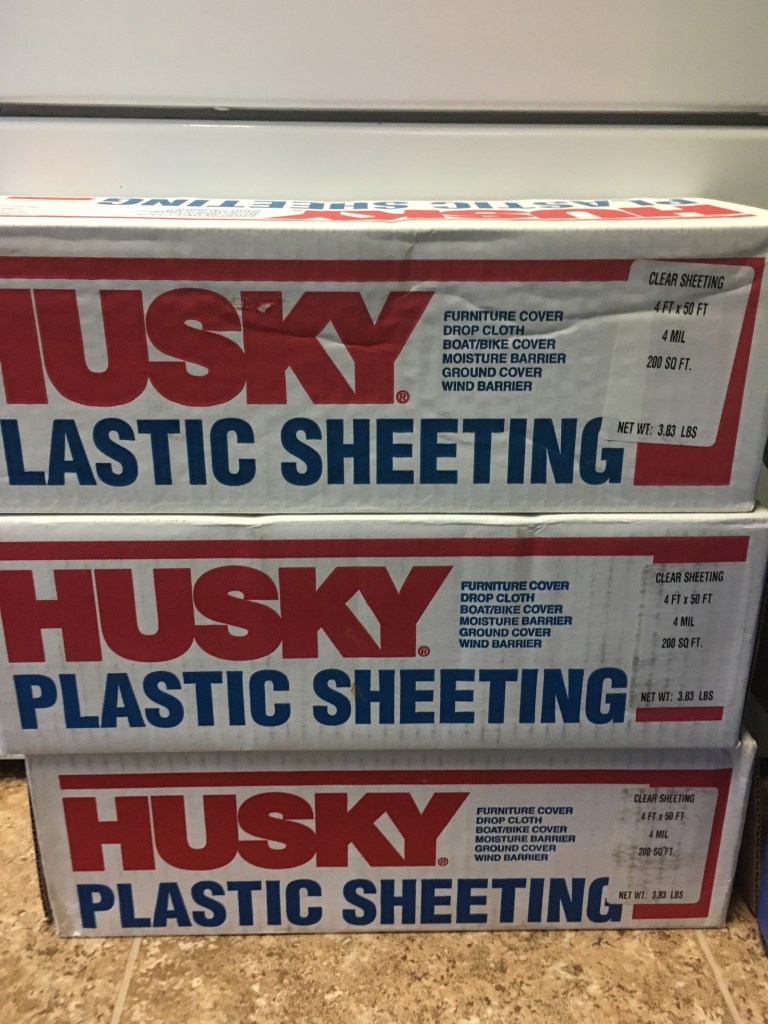
Plastic sheeting for winterizing coops.The TARDIS winterized.The Kuntry Klucker winterized to keep the coop and pen clean and dry.The flock in the Kuntry Klucker warm and cozy on a cold winter night.
To successfully overwinter a backyard flock, only two things are required – a clean and dry place to call home. Chickens are wearing down coats, factory installed. Artificially warming the coop can be life-threatening in severe winter weather. The loss of power is common in winter storms. We survive these events by wearing warmer clothes, huddling under thermal blankets, and consuming warm food and beverages. All of these creature comforts are unavailable to the freezing flock outside.
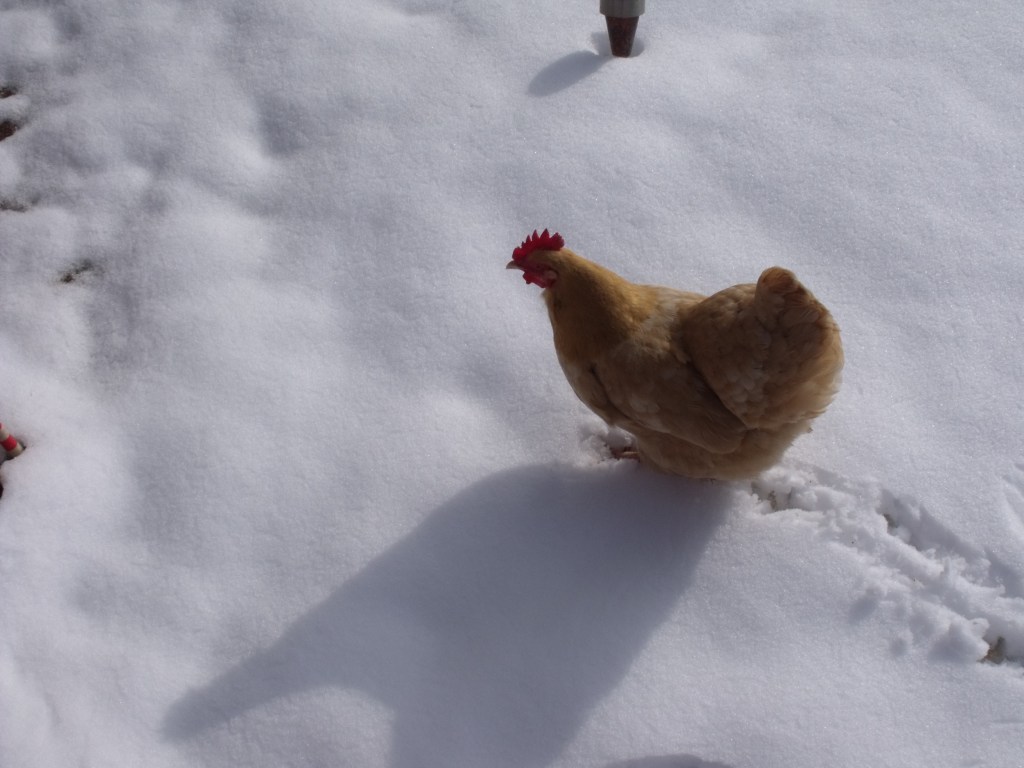
Miss Bossy (Buff Orpington Hen) trudging through the snow.
When faced with the same situation, a flock that has become dependent on supplemental heat can freeze to death. During the winter, I will receive several correspondences from other chicken keepers seeking help after a power outage that accompanied a winter storm resulted in death among their flock. In addition to sharing their sympathies, I will take the time to educate them on why this happened and how to avoid a reoccurrence in the future.
Chickens evolved to live outdoors and acclimate to the changing temperatures naturally. During molt, in addition to growing in new feathers, chickens will also grow in winter down to keep them warm during the winter. When the coop is artificially warm during this time, a variable that will cause a flock to be ill-equipped for the coming cold weather is introduced. With the added consequences of power loss during winter storms, flock’s dependent on artificial heat sources suffer when factors outside their control ensue.
The flock venturing out in the snow.The flock following paths cleared of snow.The flock investigating newly fallen snow.
Installing plastic sheeting around the coop and pen does two things. First, the plastic is a wind barrier. Secondly, winter precipitation will stay outside the pen and coop area. This simple improvement will keep the flock’s living habitat clean and dry, which makes cleaning much easier in the winter.
The natural body temperature of a chicken is between 107- and 109-degrees F, fatal for us but necessary for their survival; chickens are little furnaces wrapped in down feathers. A wind barrier is crucial for overwintering a flock because it allows the chickens to trap this heat next to their body where they need it to keep warm. Exposure to winds will lift their feathers, and they will lose the heat they worked hard to maintain. Given a draft-free place to call home, the chickens do the rest.
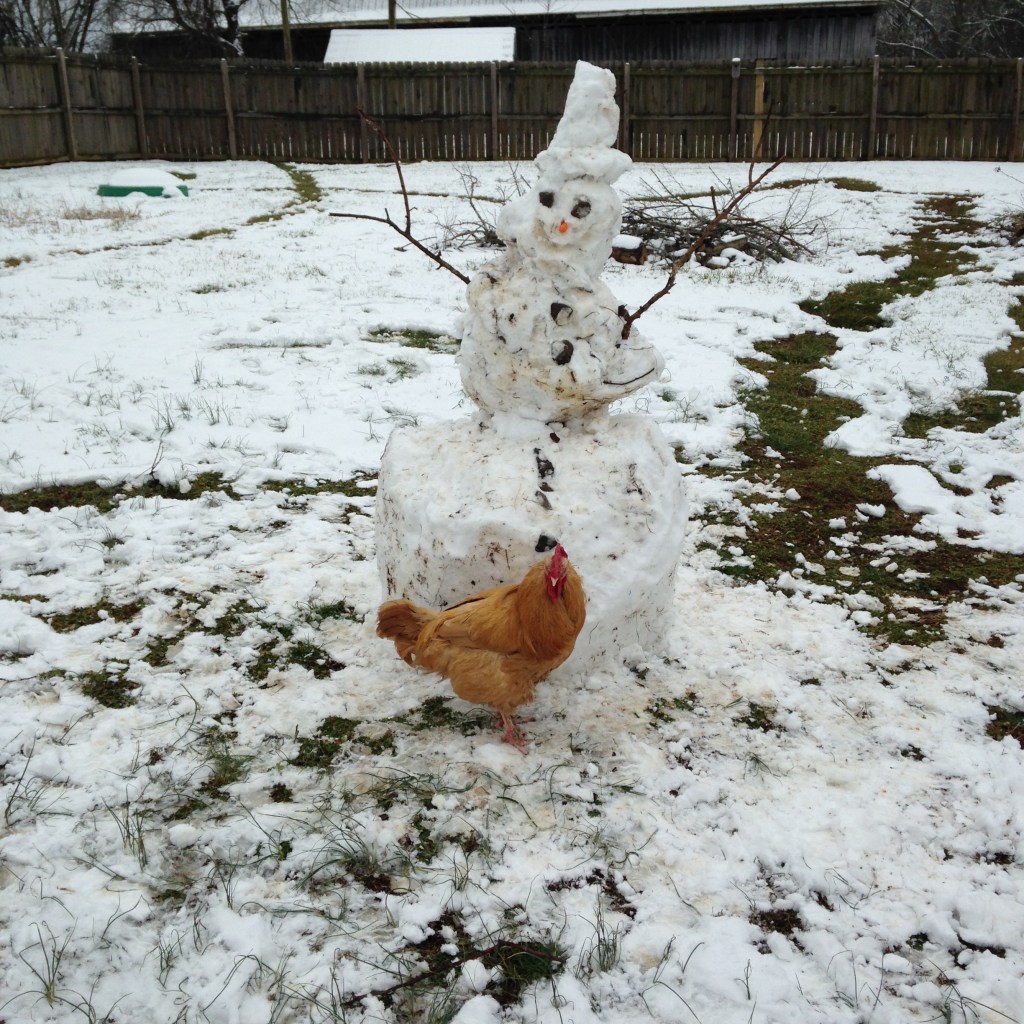
Roy (Buff Orpington Rooster) inspecting a snowman in the backyard.
Is it safe to free-range the flock during the winter? The answer to this is absolutely yes. A winterized coop and pen protected from the wind, elements, and temperatures will allow flock members to determine their comfort level. Given access to the outdoors, individuals will spend some time free ranging, if they get a chill from the wind or precipitation, they will come to the coop, warm up, and then continue free ranging. Access to the outdoors will keep a flock happy and healthy as they have natural resources such as sunshine and fresh air.
While it may seem daunting, overwintering a backyard flock is simple and affordable. Providing a clean and dry coop and pen stocked with fresh water and feed is all that chickens require. Keep it simple and let the chickens do the rest.
I hope this post was helpful and made the process of winterizing your coop and overwintering your flock much easier. If you have any questions, feel free to leave a comment. You can also reach me as the following e-mail address: kuntryklucker@gmail.com
I check my e-mail often and will respond as soon as I can.
To watch a YouTube video on my procedure of winterizing The Kuntry Klucker, please click here.
To watch a YouTube video where I go more in depth on overwintering my flock, please click here.
Image Credit: Noelle K. Moser. A male cardinal perching on a snow-covered tree.
I am a multi-disciplinary writer, blogger, and web content creator. If you like this post, please peck the subscribe button.
If you like this blog, please visit some of my other blogs and online writing portfolio.
Flowering bushes and gardens are most definitely atheistically pleasing. I have flower gardens plenty but edible landscaping is a joy that is unique in and of itself.
Just about everything in my backyard is edible. Going to my backyard is like going to a farmers’ market on my property. There are lots of options when it comes to landscaping.
In this post, I will reveal how I use plants to landscape my backyard into an edible mini paradise.
Blueberry Bushes:
Blueberry bushes loaded with berries.
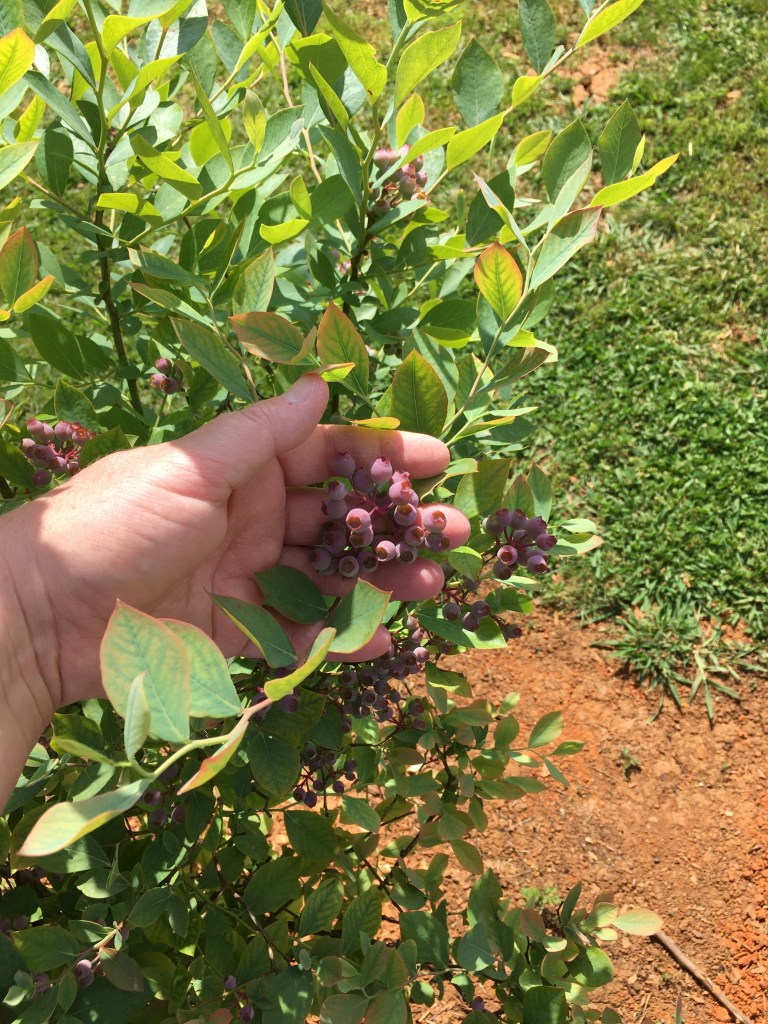
There are lots of ways to add edible landscaping to your property. Blueberry bushes are not only producers of wonderful deep blue berries but have beautiful spring green leaves. When planted in a row, they create a hedge of greenery and goodness. In the fall, their leaves turn to a beautiful red that is stunning in the fall landscape.
Blueberries ripening on one of the blueberry bushes
As the blueberries ripen throughout the season, they add a lot of beauty to the yard. They turn from green to deep blue or purple depending on the variety.
When planting blueberry bushes, plant at least 6 of 2 or 3 different varieties. Doing this will ensure adequate cross-pollination and a large yield. Blueberries need a few different varieties nearby to cross-pollinate well. If too few are planted, the harvest will be reduced as they will not be as prolific.
Arona Berry Bushes:
Arona Berry Bush. Related to the Acai Berry, Arona Berries are a superfood high in antioxidants and are great additions to smoothies. –Arona Bush loaded with berries Arona Berry bush. 8ft tall.TARDIS in the background behind Arona Berry bush.
Arona Berry bushes are another great way to add edible landscaping to your property. Topping out at about 8-10 ft tall and a spread of 5 to 6 ft wide, these bushes are showstoppers.
In the Spring they are filled with white delicate blooms that turn into dark purple berries around mid-summer. They have a sweet/tart taste, somewhere between a cranberry and a cherry. They are dense little berries that are great to add to smoothies or other berry dishes. My chickens love the Arona Berries. They will readily pick all the berries they can near the bottom, luckily these bushes are tall so there is plenty to go around.
Arona berry blooms
Unlike blueberries, Arona Berry bushes do not need another bush to cross-pollinate. Given their size, 1 or 2 will be enough. I have two of these bushes in my backyard, both are beautiful and produce a lot of berries come mid-summer.
Black Berry Bushes:
Another beautiful trailing berry bush to add to an edible landscape are Blackberries. Unlike Blueberries or the Arona Berries, Blackberries do best on a trellis. While they can grow independently of a trellis, they do better if they have support to keep the branches off the ground. If too low to the ground the berries tend to rot before they can be picked.
Fresh Black Berries and Raspberries picked from my backyard. After dinner, for dessert I serve my family and guests fresh berries.
If you have tasted Blackberry jam or Blackberry pie, then you know exactly what to do with these prolific little berry producers. Blackberries are great in many things from smoothies to jams to pies. If the bushes produce an abundance, then frozen berries are a treat in the winter months when all the bushes are dormant.
The possibilities are limitless with what one can do with a bushel of Blackberries. I have my Blackberry bushes near the Grape Arbor. They climb the trellis along with the grapes as they grow taller. Instead of keeping them pruned to a smaller size, I allow them to grow long and attach them to the Arbor as they need more support.
Grapes:
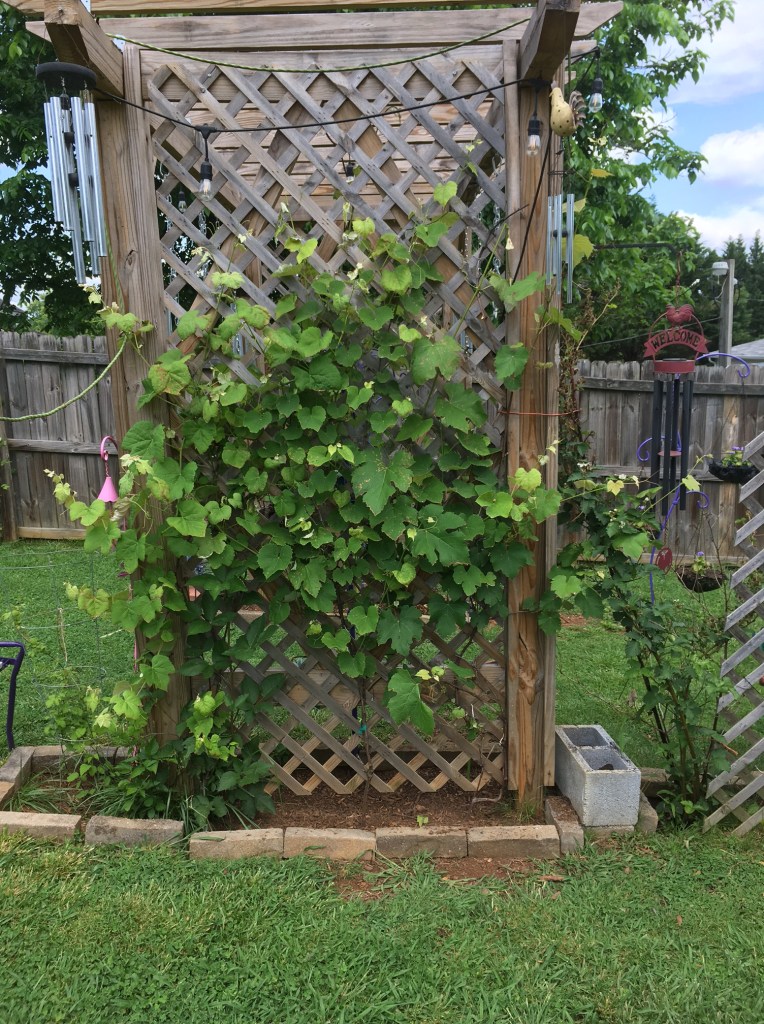
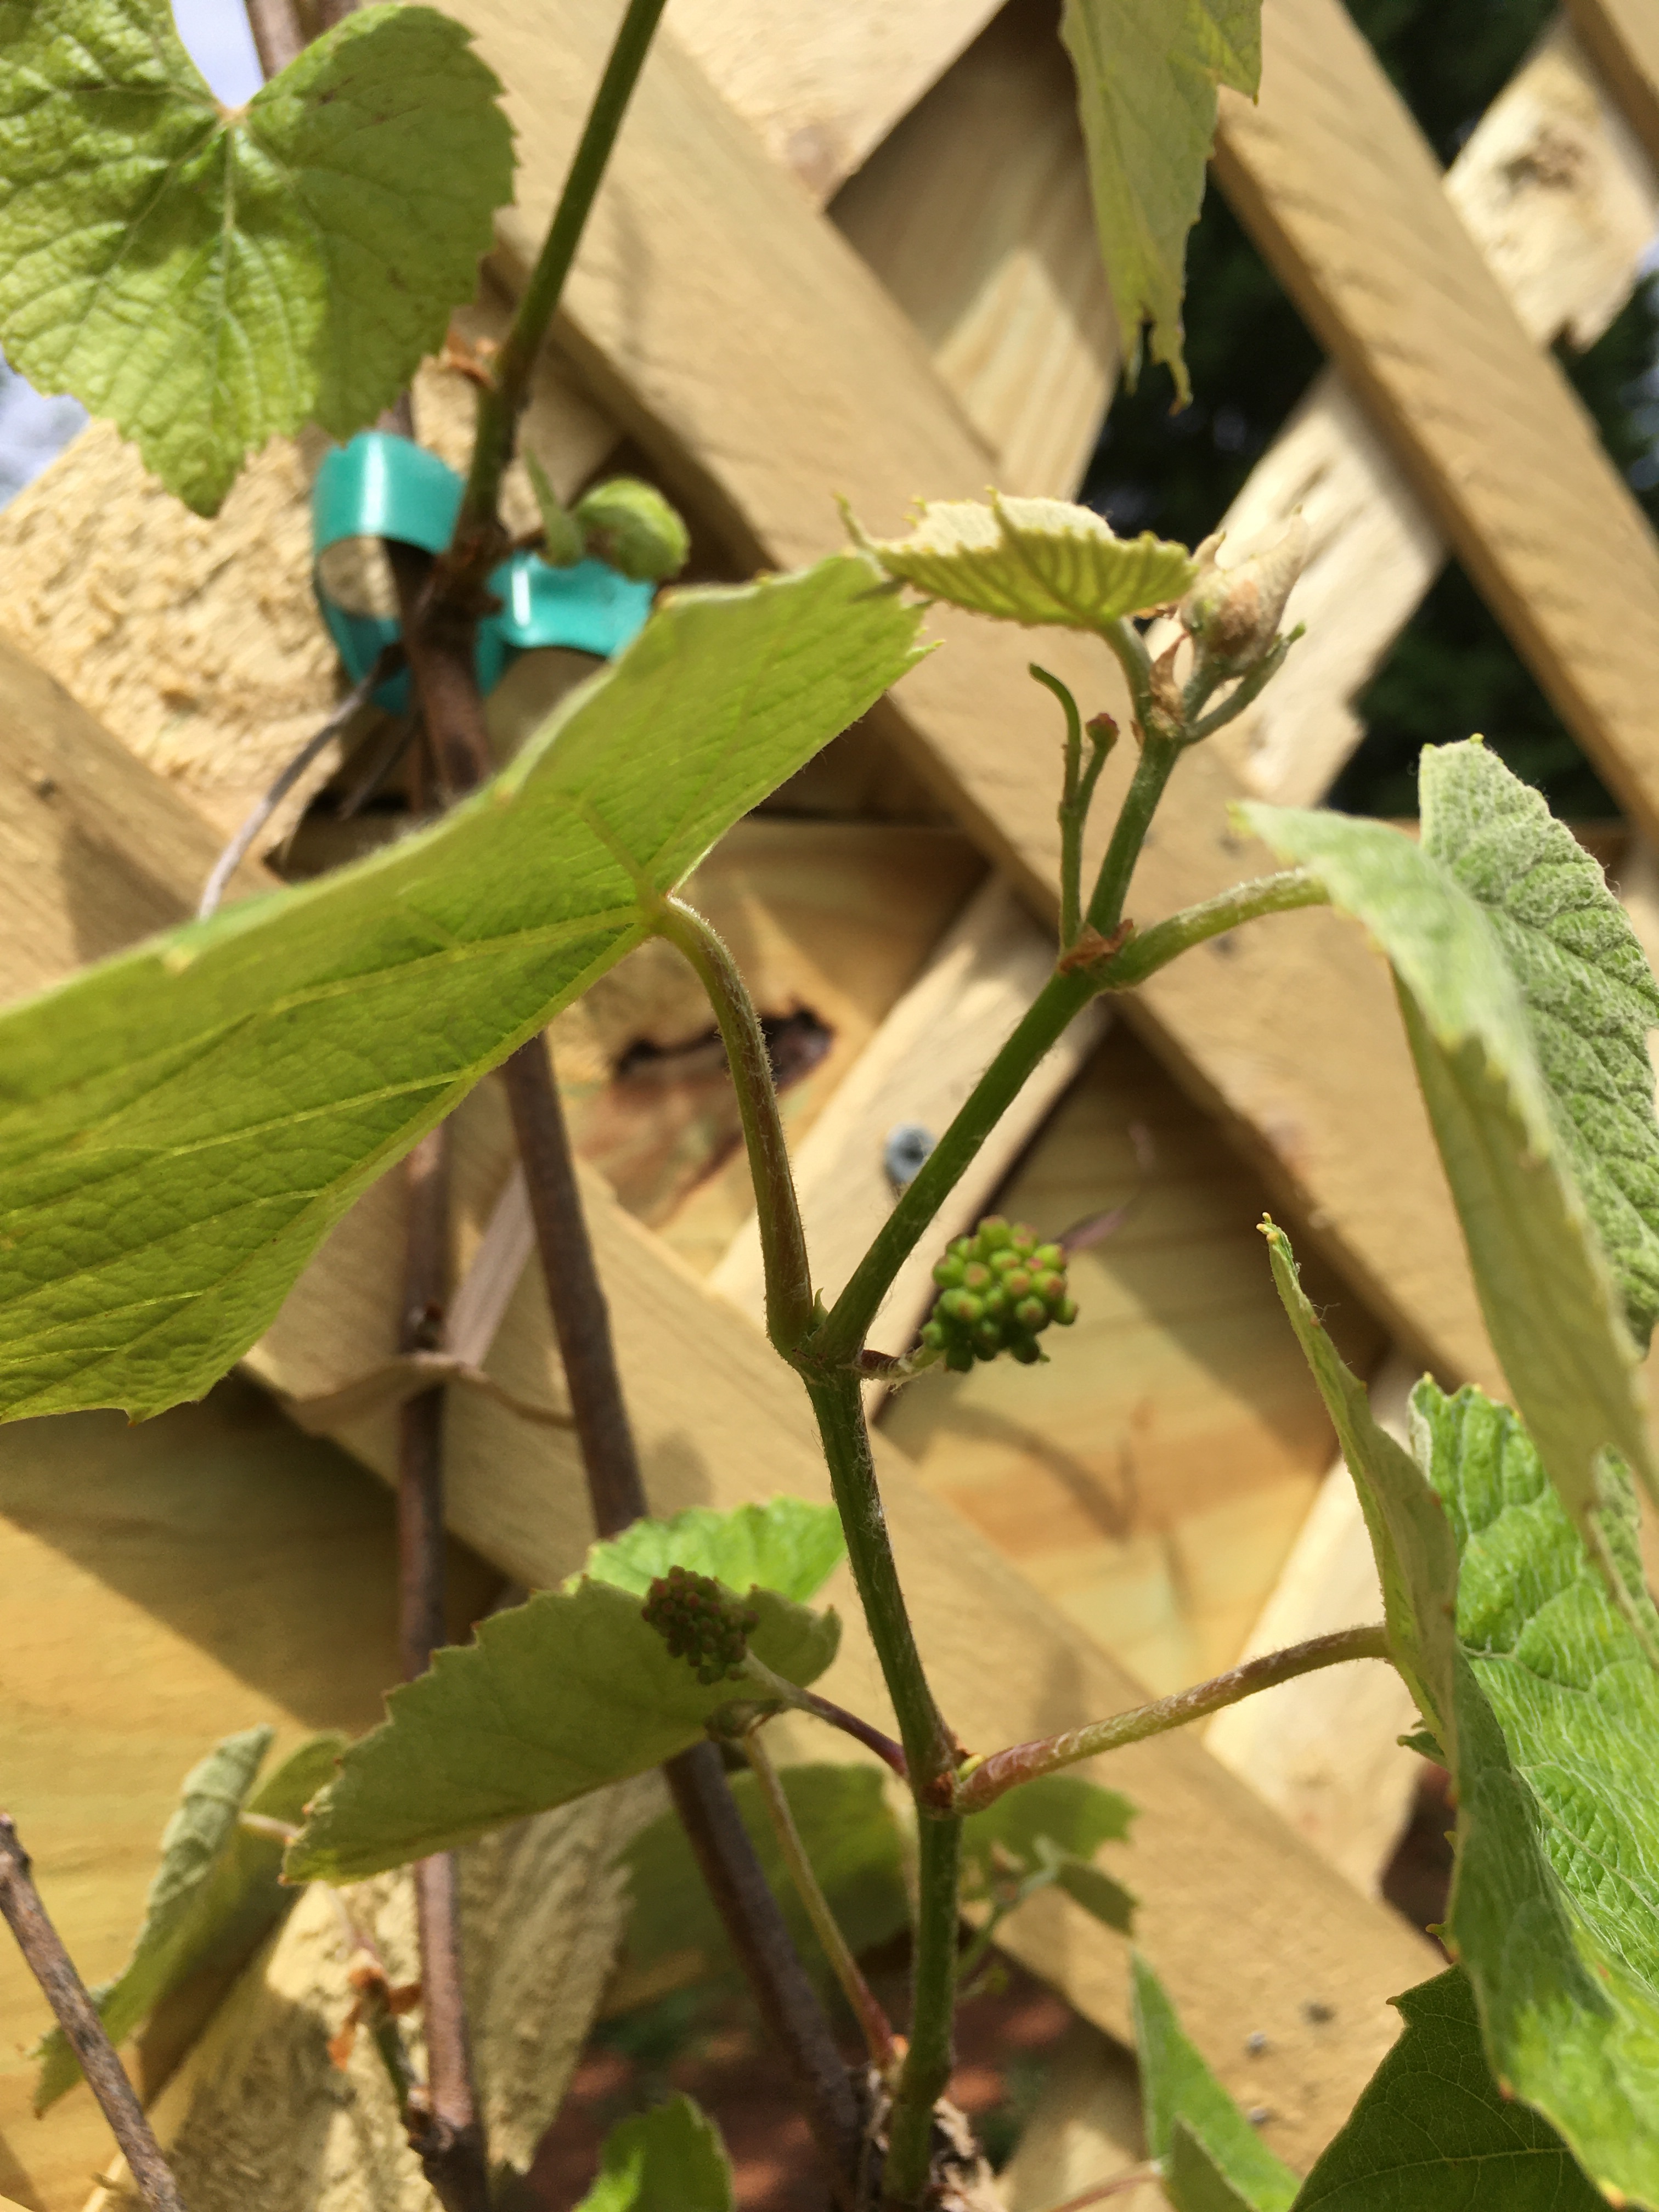
Grape vines attached to arbor.
If you are granted the room, grapes are another great plant to add to your edible landscape. Grapes are very versatile, they can grow on fence posts, poles, trellis, or even chain link fences. As long as whatever they are growing on can support the weight of the vines, grapes are a possibility. Uncultivated, grapes vines will grow up trees and other vertical shrubs that can support the weight of the vines.
A Grape Arbor is not necessary to grow grapes just the method that I chose. But if you are interested in building a Grape Arbor, a Pergola Arbor is a great asset as it can double as a place to hang a Hammock swing, porch swing, or even a hammock. If you are interested in how we built our Grape Arbor I will link that post here.
Grape clusters on the grape vines.
Unlike Blueberries and other berries, grapes need something to trellis on. To have a successful grape harvest, the vines must be kept off the ground. Grapes also need lots of pruning. I prune my grapes every January, cutting off the dead vines and securing the previous season’s growth to the trellis. Come March/April when the grape vines come out of dormancy, they will grow from the dormant vine and continue their journey up the trellis.
Horticultural/mineral oil spray that I use on my grape vines and other vines that need a hand in dealing with insect loads. Found at Tractor Supply and other feed/farm stores.
You will need to spray your grape vines to keep insects at bay. I use an organic gardening spray that works well at keeping the bugs off and will not harm the chickens or other wildlife in my backyard (just the bugs). It can be found at Tractor Supply or other farm/feed stores.
Neem oil is also a good option but will need to be sprayed more often. I spray my grape vines 3-4 times a year. Once as the grape vines start to bud, then again after they leaf out, again in the mid-season (June-July), and a month or so before harvest. This spray schedule keeps the bugs from eating the leaves and stripping my vines throughout the growing season. Make sure to spray early in the morning or late evening to keep from burning the leaves.
Raspberry:
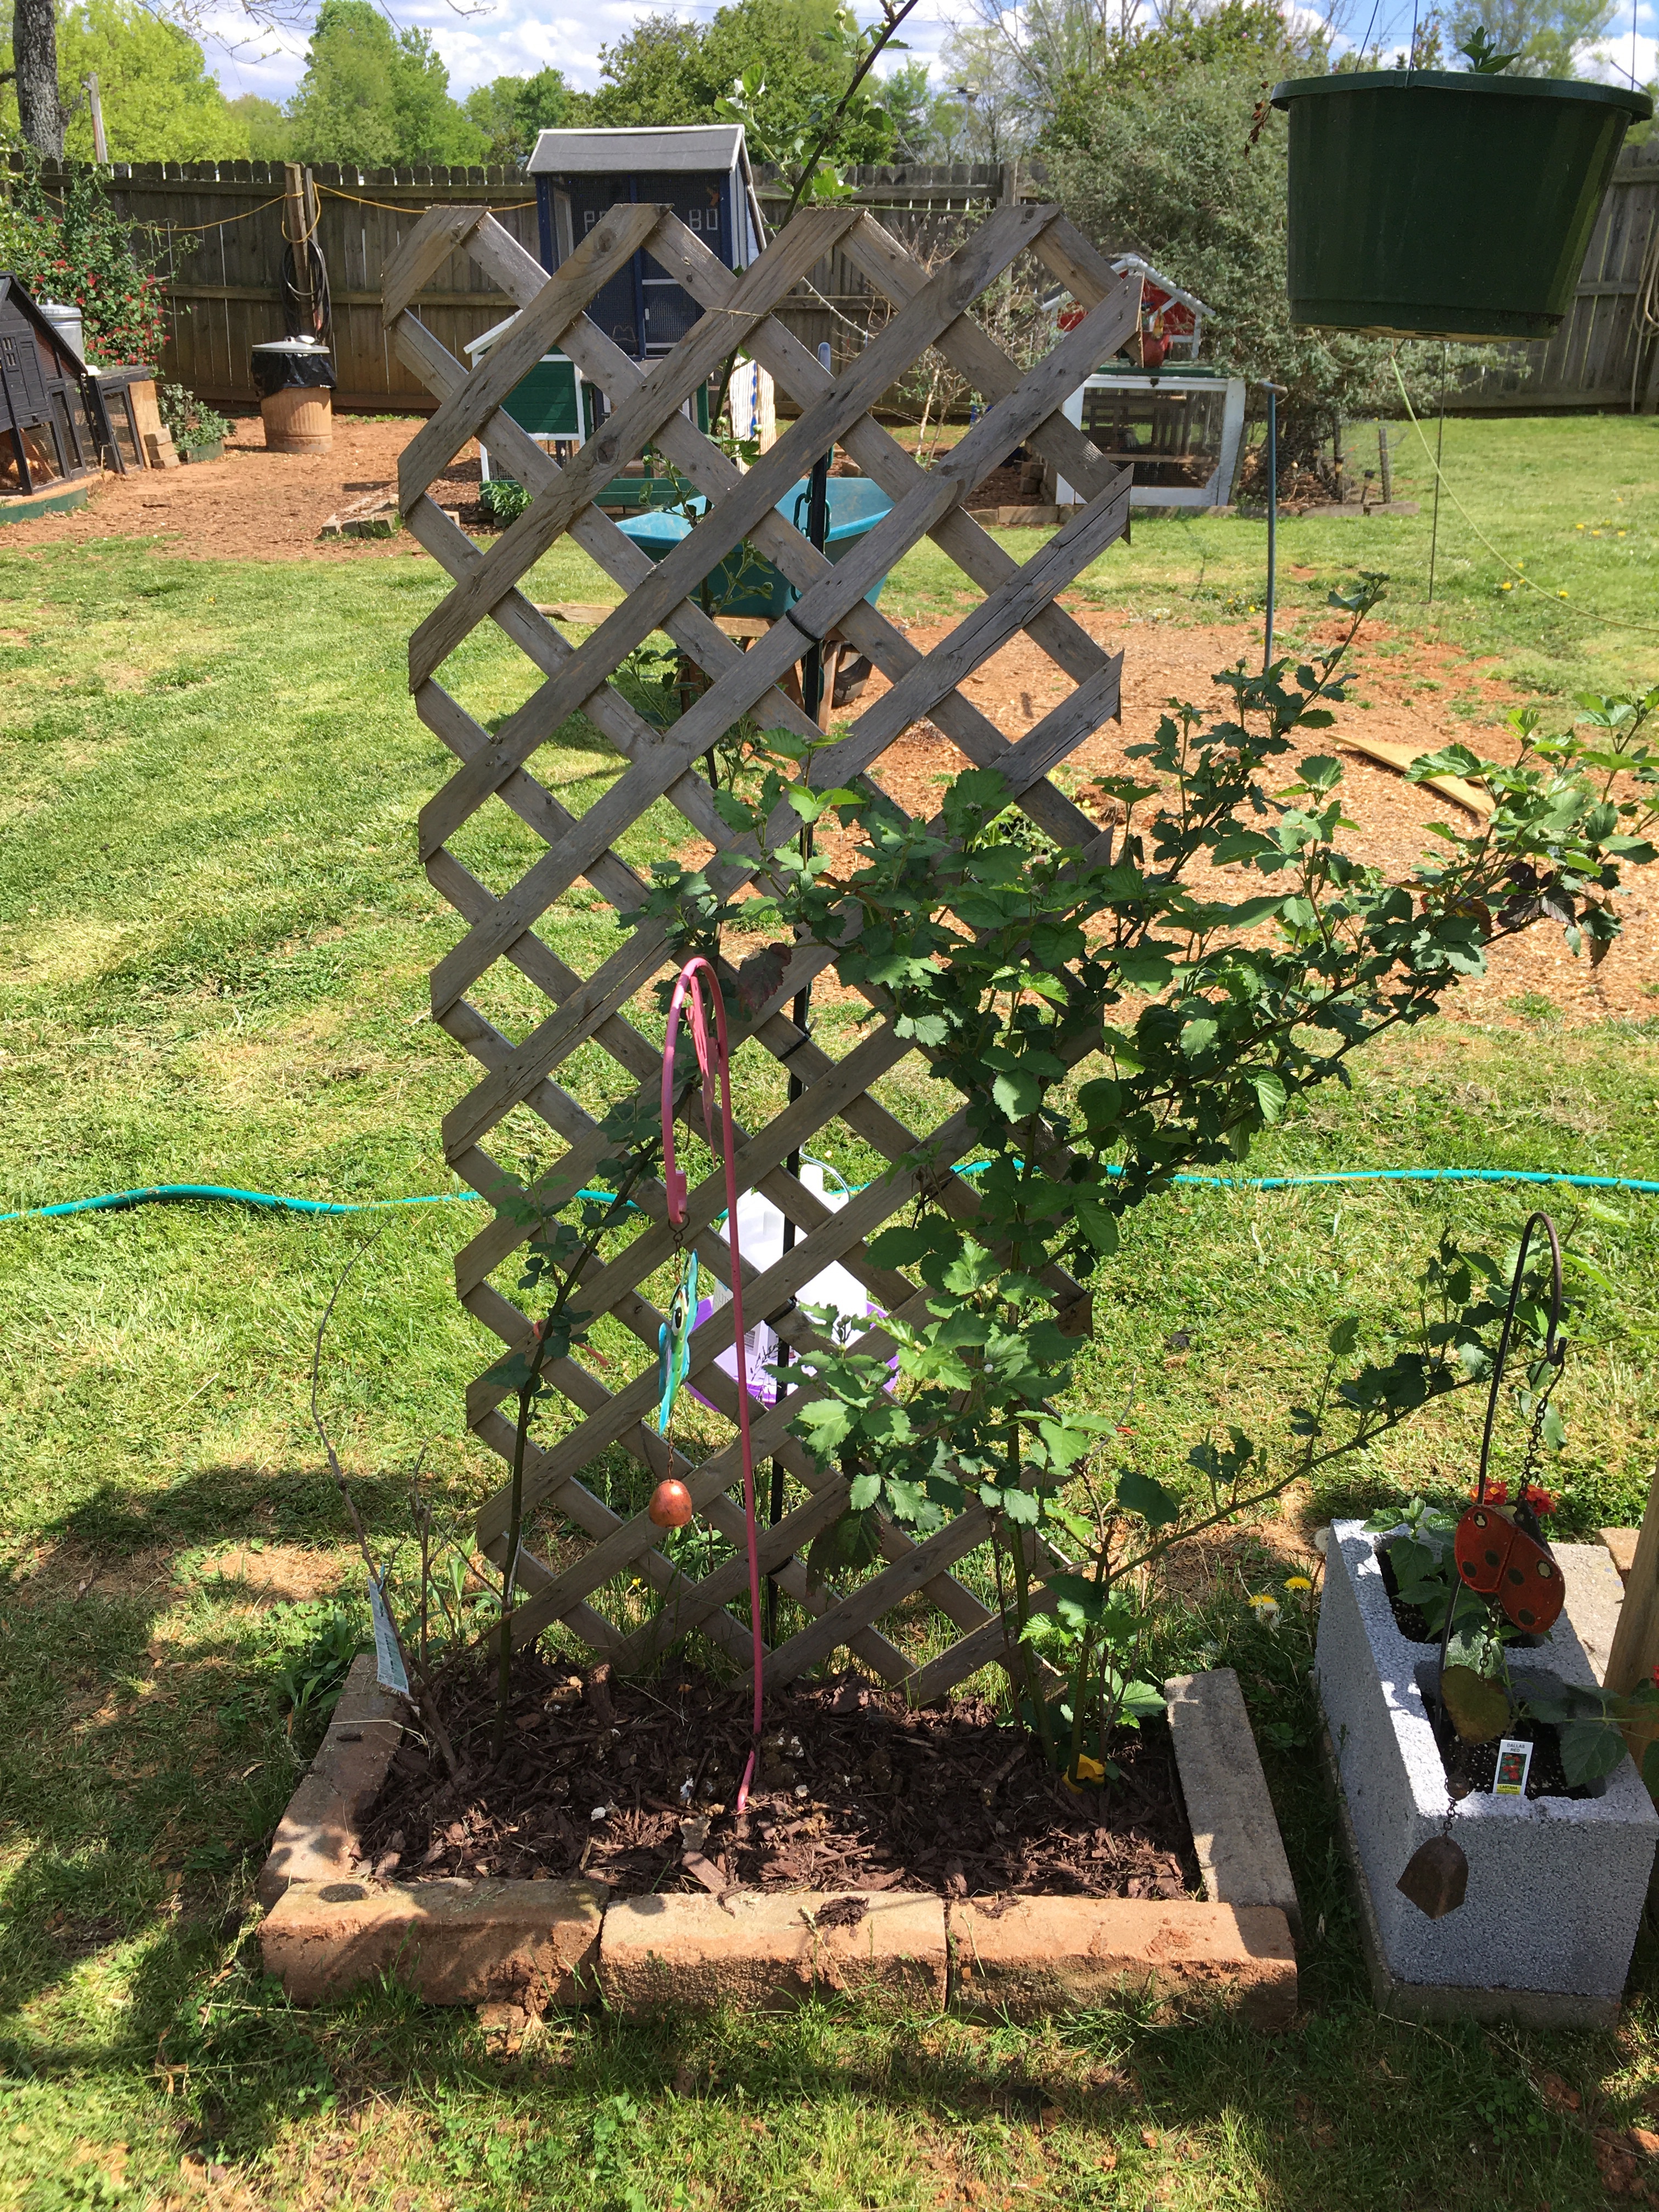
Raspberries planted at back of the Grape Arbor.
Another beautiful plant to add to an edible landscape is raspberry bushes. Newly planted this year, I have the raspberry bushes planted at the back of the arbor. As they grow (like the blackberries, raspberries need a trellis) I will attach them to the grape arbor and let them trellis up the arbor along with the grapes and the blackberries. I have one raspberry bush that survived our cold winter, the rest sadly perished. This year I bought a hardier variety that is cold hardy down to -20. Hopefully, with these new varieties, I will not suffer any more losses of my raspberry bushes.
Butterfly Bushes:
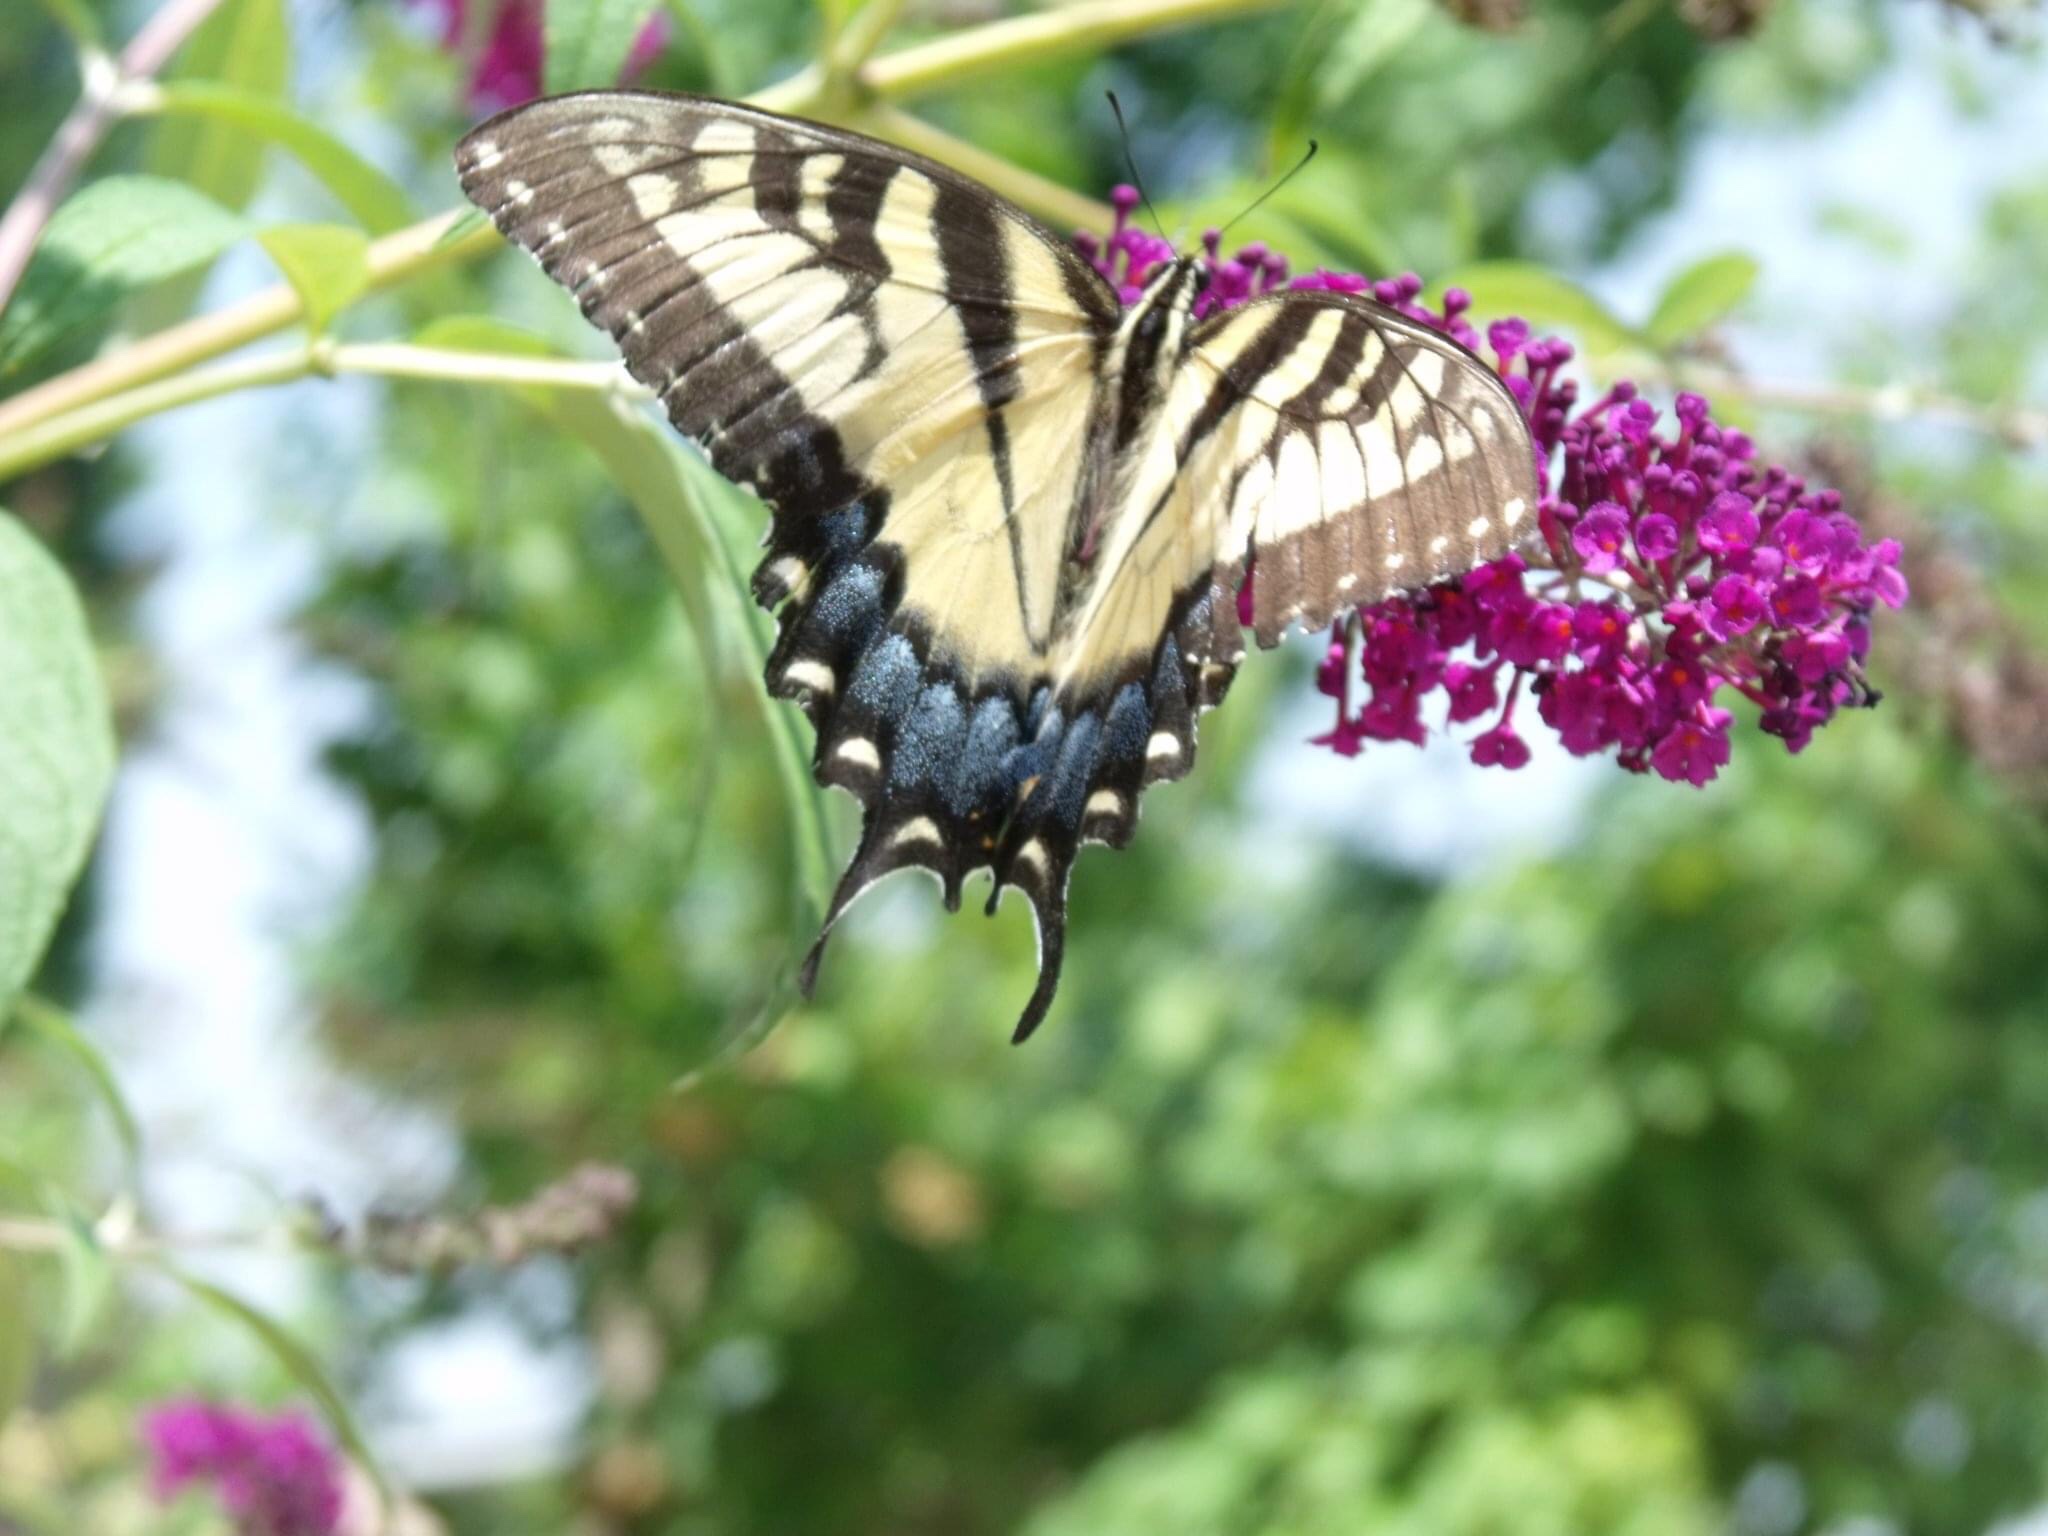
Butterfly bush row opposite the berry row heading to the Grape ArborYellow Swallow-tail butterfly grazing on a Black Night Butterfly bush bloom.
Although not edible (by humans anyway), butterfly bushes are a great plant to add to an edible landscape. Not only are they beautiful, but a stately butterfly bush will attract pollinators to your yard. Everything from butterflies, hummingbirds, bumble bees, honeybees, and hummingbird moths will flock to the butterfly bushes to feed off the nectar of the large blooms.
In mid-summer when the bushes are in full bloom, there is a frenzy of activity around the butterfly bushes. Near the berry row, many of these valuable pollinators visit the neighboring berry bushes and continue to pollinate creating a high yield.
Spices and Herbs:
MintKitchen Patio Herb container GardenChocolate mint, rosemary, and sage grow in my kitchen window gardenMintSageKitchen spice gardenSageDill and other spicesSpice and Herb gardens surround my home and property. I grow just about all the spices and herbs that I use in cooking and insincere making.
Another way to add edible plants to your property is that of herbs. Most herbs are flowering plants that have beautiful blooms that attract bees, butterflies, and other important pollinators.
I grow just about all the herbs and spices that I use in cooking and for incense making. I rarely have to buy herbs because I harvest and dry the herbs from my property. Everything from Basil to lavender I grow in my gardens.
In the fall, I harvest the spices and herbs and use them in cooking, teas, baking, and incense. At the end of this post, I will share one of my favorite dried herb incense recipes that I have to fragrance my home.
Vegetable Gardens:
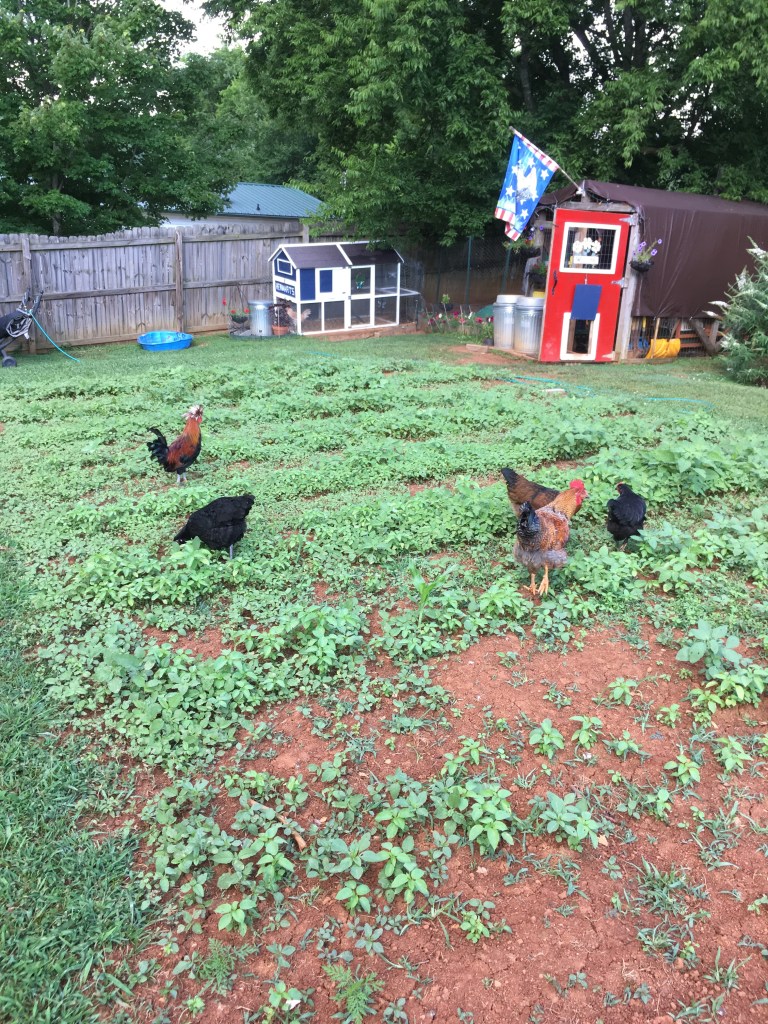
Veggie garden patrolled by my the extermination crew.
Veggie gardens need no introduction, these gardens no matter the size is a great way to add edible landscaping to your property. I have several veggie gardens. One functions as a kitchen garden, and the other I grow corn, pumpkins, sunflowers, and other fall/winter goodies.
The girls patrol all my veggie gardens, eating bugs off the plants and tilling the soil in search of worms. My girls are a great asset in organic gardening, their natural talents reduce my need for any bug-eliminating regimen. I may lose a tomato or two to a curious chicken, but I plant enough for everyone to get a fair share.
Flower Gardens:
Flower Gardens
Although not edible (by humans) I do have an abundance of flower gardens that surround my home and property. These gardens provide food for necessary pollinators such as butterflies and bees which in turn assist me in increasing a high yield from my edible landscaping. It is through these beneficial insects that we can feed our families and put food on the table.
In an attempt to aid the bee populations, I do not spay any insecticide near my home. Many of my gardens contain herbs and spices which naturally deter many pest insects that would otherwise enter my home.
Chickens:
Given that this is a blog that is primarily focused on raising backyard chickens, how do my girls factor into edible landscaping?
The simple answer is composting. The girls create a very nutritious compost in their coops through their digestive processes. Due to the presence of a gizzard in their digestive system, chickens process everything they consume. When added to the gardens, litter from the coops is the best plant food that money can buy. Because my girls are fed an organic diet, their compost is also chemical free.
Every spring I spread the compost the girls have made in their coops throughout the winter. Chicken coop shaving and poo are high in nitrogen and other minerals, beneficial to plants. Due to the compost from the coops, my gardens are lush and produce high yields.
Many visitors to my farm ask me what I feed my gardens to produce such beautiful blooms and large vegetables. My answer is chicken poo. My homestead is powered by my girls. They are the secret to my success.
Recipe:
As promised, I leave my recipe for natural incense that I created using spices and herbs from my garden. This recipe is very versatile and can be tweaked given aromatic preferences.
The Kuntry Klucker’s Home Herb Insence
For this recipe, you will need an electric wax warmer or a wax warmer that is warmed by a tea light or other source of heat.
1/8 to 1/4 tsp olive oil
1-2 TBS dried rosemary
1-2 TBS dried sage
1-2 TBS Dried lavender
1 TBS Basil
Other things that can be added: Tree resins such as frankincense, dragons’ blood, myrrh, copal, or benzoin. Drops of essential oils can also be added.
In the wax warmer, place a small amount of olive oil, just enough to cover the bottom of the wax warmer. Mix all the dried spices in a small bowl and add to the wax warmer on top of the oil. Turn on the wax burner or light tea light under the warmer. After a few minutes of heating, a spicy yet calming aroma will be released by the herbs simmering in the oil. You can add other aromas as well, such as essential oils or resins to bring the aroma to your liking. This is an all-natural way to fragrance your home without releasing harmful substances in the air such as chemicals that are often added to candles and other wax or oil fragrances.
During the winter, and for culinary purposes I grow herbs indoors under grow lights so I can make my special insence and have fresh herbs at my fingertips.
Dried spices and herbs in a tea light heated cast iron wax warmer.
I am a published author, multi-disciplinary writer, and blog contributor. If you enjoy this blog, please visit some of my other sites.
If you enjoyed this post, please peck the subscribe button. As always, thanks for reading. Till next time, keep on crowing.
If you have any questions about raising chickens or edible landscaping, feel free to post them in the comments or drop me an email. Kuntryklucker@gmail.com.
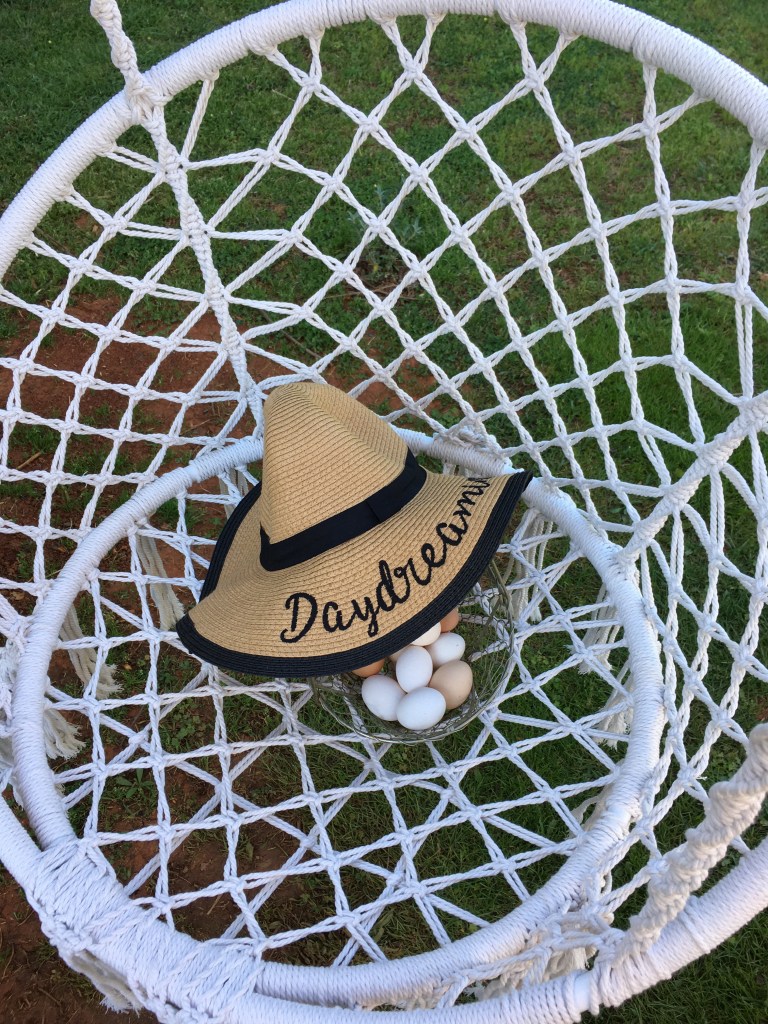
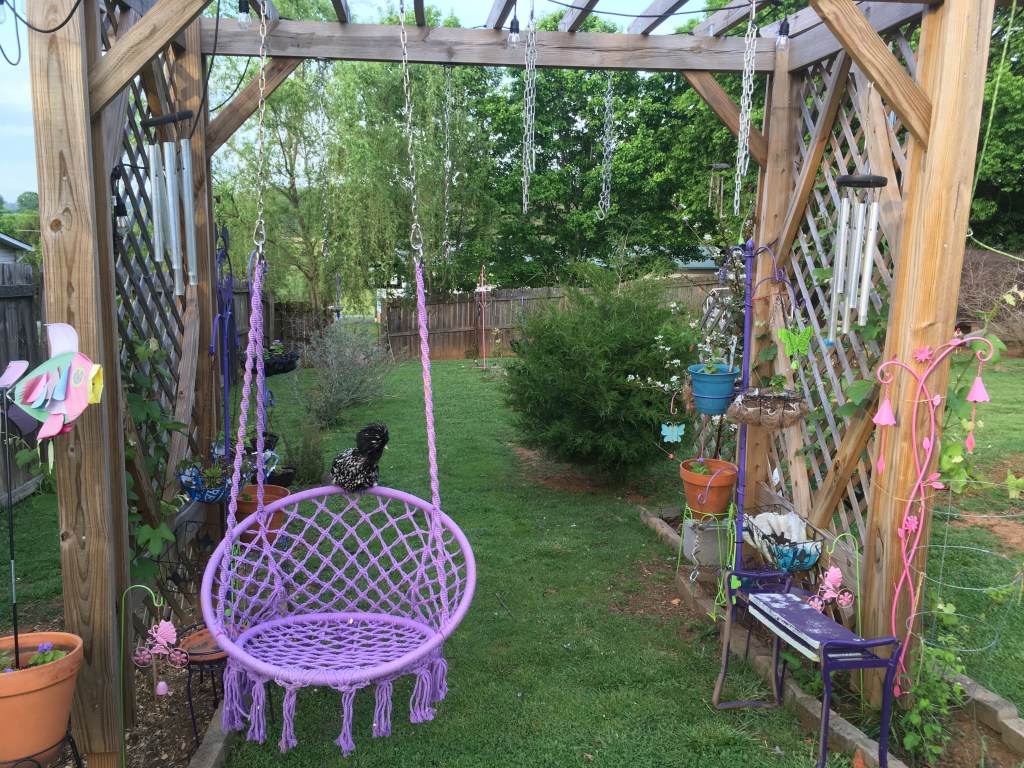
Basket full of the days eggs resting on a hammock chair hanging from the Grape Arbor.
There is just something about color that brings happiness to our souls, whether it be the soothing color of flowers or the majestic masterworks of a sunset. As spring transitions to summer, Mother Nature’s paint brush explodes with colors that ignite our inner artist and imagination. Although this blog is primarily dedicated to raising backyard chickens and the backyard chicken enthusiast way of life, I like to mix in a few gardening hacks as I discover them. Today I will share with you a few very simple and inexpensive ways to add a pop of color to your backyard or garden. All that is needed is a can of spray paint and a bit of imagination.
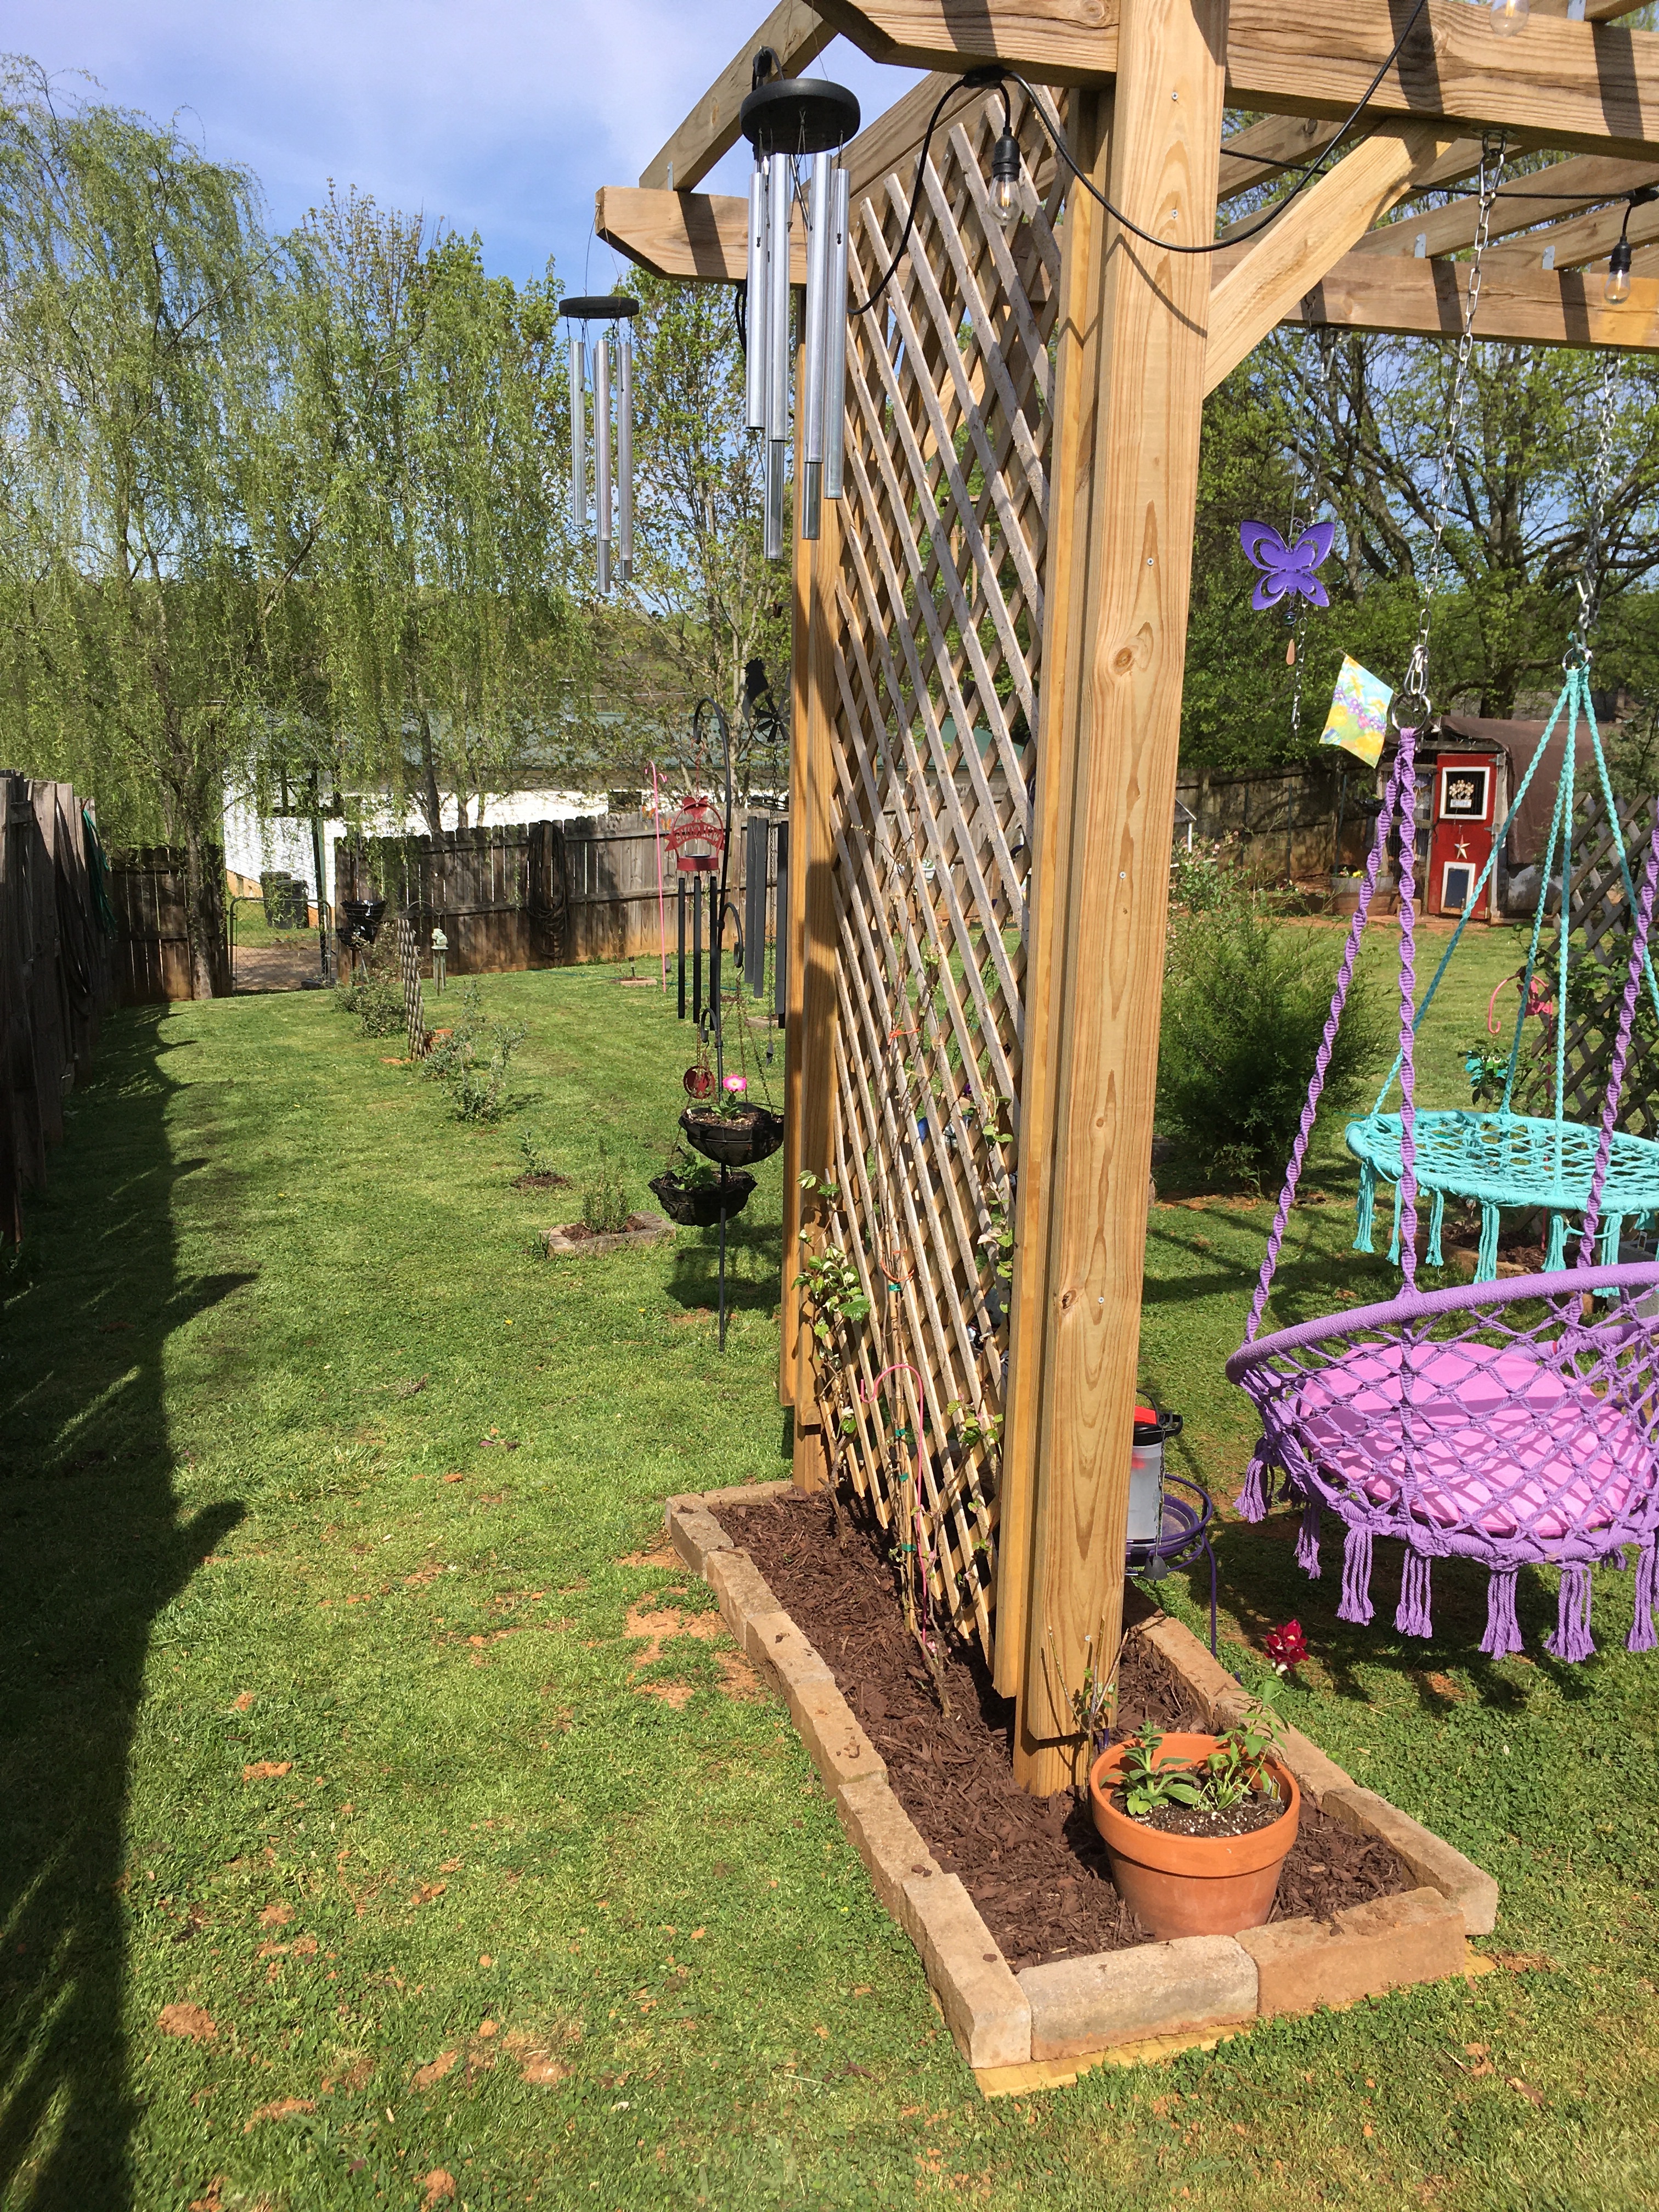
Most gardeners are familiar with these iron stakes sold at garden or home improvement stores. They go by a myriad of names such as shepherd staffs, hanging basket stakes, garden stakes and so on. As a staple of any well-tended garden, they serve a multitude of functions. I have them all over my property and use them for a host of purposes. Plant stakes, tree stakes, chicken wire stakes, lattice board stakes, plant hangers, and so on. I lost count of how many I have years ago. As a decorative accent to any landscape, the uses are endless. But for the purposes of this post, I am going to show you how you can use these little wonders to add a pop of color to your Gardenscapes or backyard. Typically sold painted an iron black or dark charcoal, they can be painted to fit any preference.
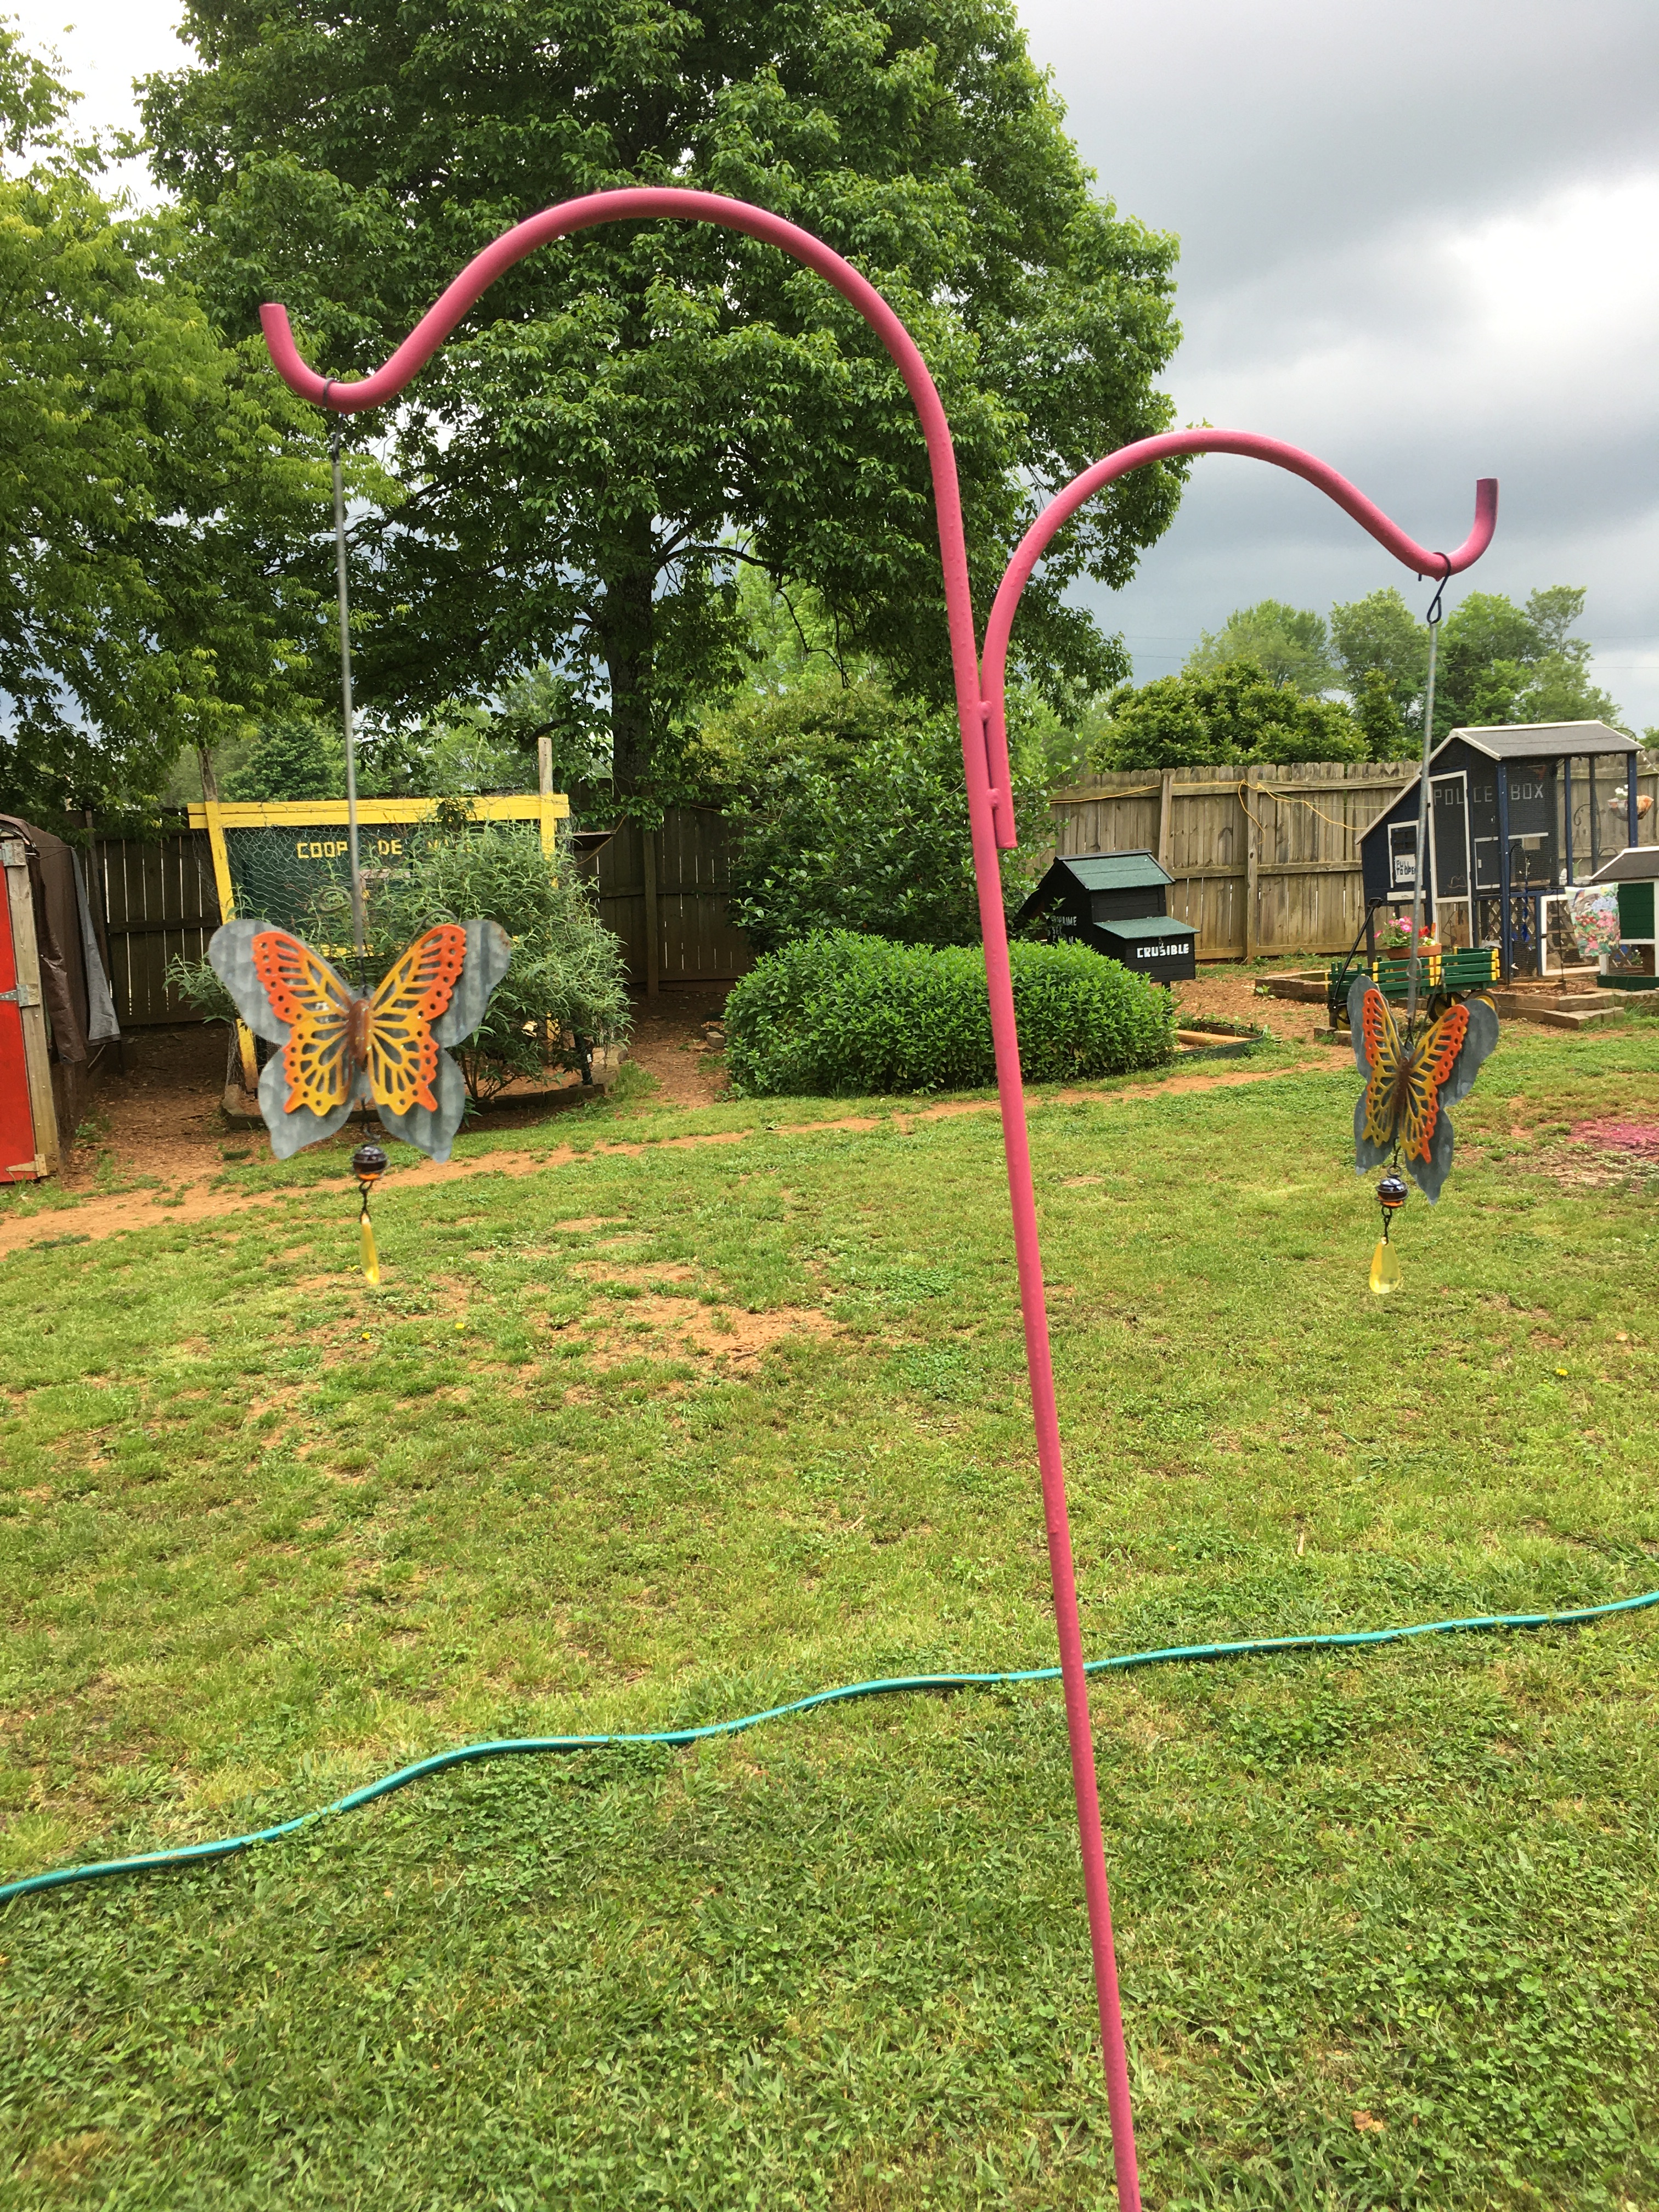
Hot pink garden accent. This pop of color adds a bit of fun and personality to the garden or backyard setting.
My favorite colors are pink and purple. Armed with a can of hot pink spray paint, I formally endorse, adding a pop of color to this garden accent. Situated in my blueberry row adjacent to the Grape Arbor, it stands out against the backyard colors bringing a bit of personality to the berry row.
Again, with the same can of hot pink spray paint, I add a pop of color to this small shepherd’s staff situated between my Black Berry Bushes. These brightly colored garden accents and staffs offset the green of the surrounding vegetation, adding a bit of a boho vibe to the garden or backyard setting.
Berry row approaching the Grape Arbor.
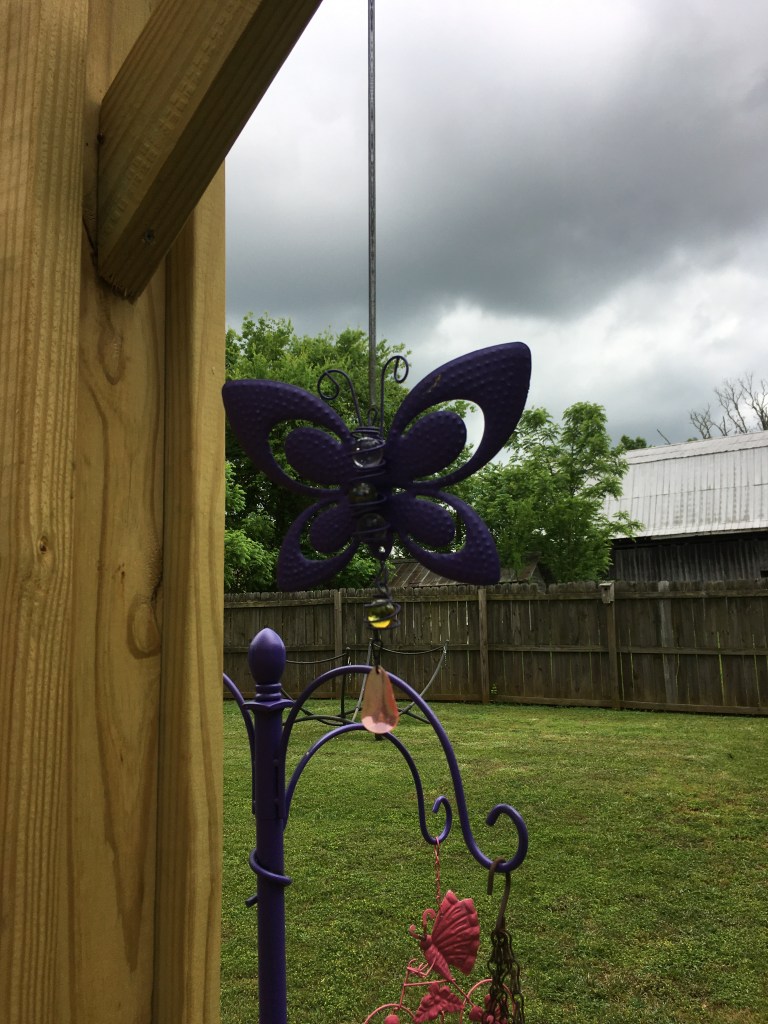
Approaching the Grape Arbor, I transition to another color to add a pop of personality to the Pergola. A fitting color for a Grape Arbor setting is a bright purple. Situated around my Pergola are numerous plant stands, garden accents and flower basket hanging staffs. Armed with a can of purple spray paint, I work my magic adding a pop of color to the Arbor setting.
Pergola Grape Arbor situated at the end of the Berry Row. Purple hanging basket staff under the Grape Arbor.
A bright purple adds the perfect pop of color to the Pergola. Standing out against the surrounding greenery, purple hanging basket staffs provide a polished look.
Purple staff with chicken feed bags as liners for the hanging baskets.
Another hack I have discovered, the repurposed use for chicken feed bags. Hanging plant baskets are usually displayed with coco basket liners. These coco basket liners are pricey and do not retain the essential water needed by the plants. Using empty chicken feed bags, I cut small drainage holes in the bottom, fill with soil and use as liners for the hanging baskets. Feed bags are tough, made of a thick material sufficient to contain 50 pounds of chicken feed or more. As hanging basket liners, they are perfect. They are tough, weather well and do not break down like the coco basket liners. Additionally, they retain the crucial moisture needed to adequately keep the plants hydrated. They add the perfect accent to a backyard farm setting.
Purple butterfly garden accent sitting on the ground under Pergola Grape Arbor.
In addition to spray painting hanging basket staffs, I paint garden accents to add a pop of color to the surrounding area. This little detail adds a fun boho vibe of the garden or backyard setting.
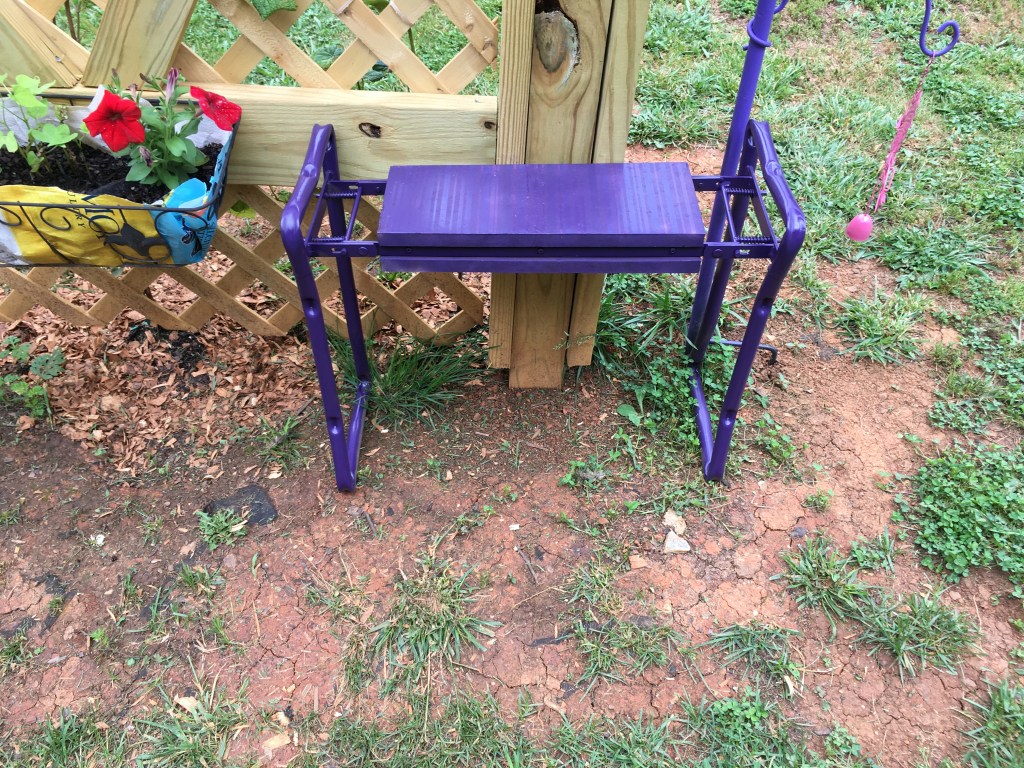
Plant stands topped with a terra cotta pot saucer serve as great drink tables. Painted a darker color of purple for contrast, these plant stands add a bit of ease and laid-back vibe to the Pergola.
painted garden bench.
Even a garden bench when painted can be used as an outdoor dining tray. Painted the same dark purple as the repurposed plant stands, these accessories add to the overall fun atmosphere of a backyard garden.
Purple garden decor accent.
Got a beloved outdoor decor item that is looking a little bit rough around the edges. A can of spray paint to the rescue. Breathe new life and love into outdoor decor items while coordinating them with your garden setting.
The final look of the Pergola Grape Arbor is stunning!! With a can of spray paint and a bit of imagination, you can transform your garden or backyard setting into a lively atmosphere. In addition to adding a pop of color to your backyard garden, spray paint with added primer will protect your garden accents for years to come.
I hope that you have found some of these hacks useful and can implement them into your own Gardenscapes or backyard setting. Adding a pop of color to your garden adds a bit of fun and personality to your space. Have fun with it and remember, there is no limit to creativity.
Deaky, Fi, and Brian (Polish Hens) perching on a hammock swing under the Grape Arbor.
If you have any questions, feel free to post in the comments or drop me a line at kuntryklucker@gmail.com
I am a published author, multi-disciplinary writer and blog contributor. If you liked this blog, please visit some of my other sites.
Building a Grape Arbor is something that has been on my to do list for the past 10+ years. Grapes are a wonderful crop to grow on your own land as they grow very fast, are fairly pest resistant and easy to grow. They do require regular maintenance, pruning being the chief requirement.
As a child I remember visiting my grandparents farm during the summer and eating ripe grapes from their vine. It is a memory that I cherish and look forward to eating from my very own grape vines once more.
Building a Grape Arbor is a DIY project that you can tackle yourself. It takes some hard work, several partners, effort and time, but if you are diligent, you can build a Grape Arbor in a week.
Why I wanted to build a Grape Arbor?
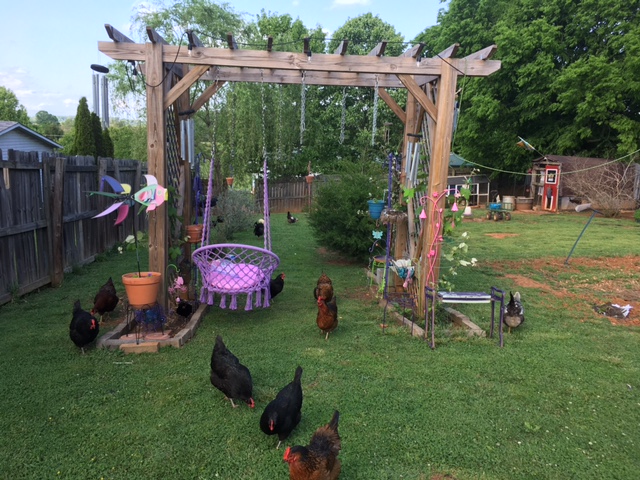
Building a Grape Arbor has been a dream of mine for a very long time. Not only functional as a trellis for the grapes to grow on, Grape Arbors add a majestic presence to your backyard or garden. They command attention as you enter their sacred space. To make the most of your time and effort, you can attach a porch swing or hammock swings. Installing solar light to Arbor creates a romantic and relaxing seating area in your backyard.
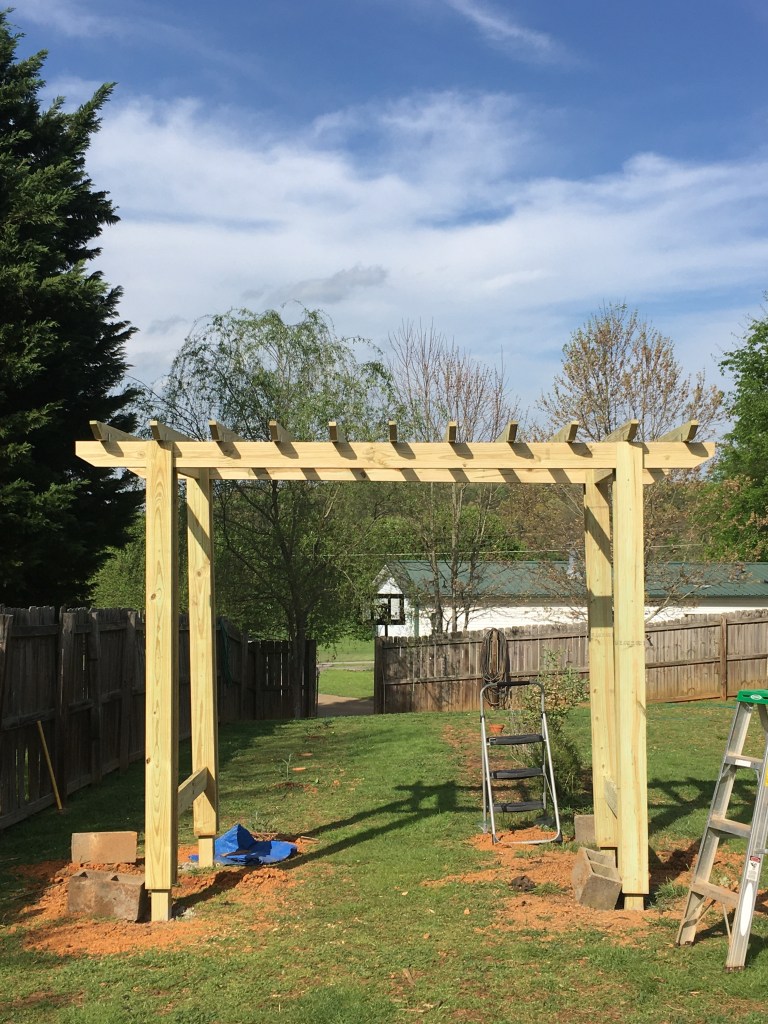
Building a Grape Arbor.
We chose a traditional style Pergola for our Backyard Grape Arbor. I wanted something that would not only serve as a trellis for grape vines, but a place that I could hang some backyard Hammock Swings. Above is the final completed project of the Arbor in our backyard. It is 8 feet tall is roughly 12 feet long.
Shopping list for a backyard Grape Arbor.
Pick up truck full of lumber for the Grape Arbor.
Posts: (4) 4×4 @ 7’6.5” and (8) 2×6 @ 8”.
Beams: (2) 4×6 @ 12’
Braces: 2×4’s
Runner on to of Arbor: (11) 2×4’s @ 5’8”. For a decorative look, cut the ends of the 2×4’s at a 45-degree angle or bevel. This is optional.
1 box of 2” deck screws and 1 box of 4” deck screws.
After we unloaded the wood, we cut the 2×4’s and 4×6 beams to size and beveled the ends at a 45 degree angle.
Preparing the wood by cutting 45 degree angles on the ends of the 2×4’s which will form the canopy of the Arbor.
Before building the Arbor, we prepared the ground by digging the footings. We dug 4 holes at the dept of 4 feet. To accomplish this, we rented an Agar to dig the depth of the holes.
Digging the holes for the Arbor support beams.
After the footings were dug, we connected two 2×6’s to each of the 4×4’s then cemented them in place.
Cementing the 4×4 posts into place.
Next, we lifted the large 4×6 beams on center over the pair of 4×4 posts. These beams sit on top of the 4×4 posts. You can screw them into place if you wish, we decided to let gravity do the work for us.
4×6 beams sitting on top of the 4×4 posts.
Next, we attached the 4×4 pairs to each other using a 2×6 cut to length. We then toenailed them with 4” deck screws connecting them to the 4×4 posts.
4×4’s forming the canopy of the Arbor. Each held in place by braces connecting the 4×4’s to the 4×6 beams.
Next, we attached the (11) 2×4’s to the top of the Arbor to form the canopy. Each 2×4 is held into place and connected to the 4×6’s using braces.
Braces securing the 4×4’s to the canopy.
Nearing the end of our construction project, we cut the remaining 2×4’s to form diamond supports connecting the 4×4 beams to one another. These braces add beauty and strength to the Pergola. They are attached to the main support beams with pocket hole screws.
4×4’s forming diamonds as supports also adding esthetic beauty to the overall look of the Arbor.
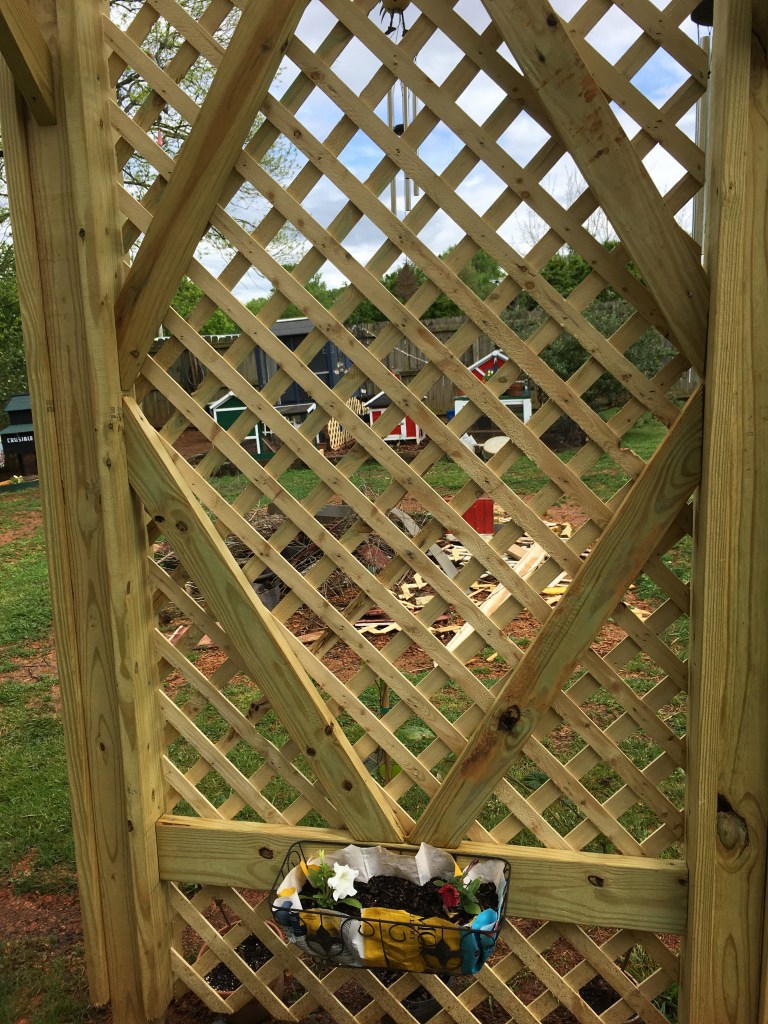
Finally, we added lattice boards to each side of the Arbor. This adds a touch of sophistication to the Arbor while giving the grape plants something to grasp onto as they climb to the canopy.
Lattice boards secured to each side of the Arbor. They add an aura of distinctive quality to the finished look of the Arbor. The lattice boards also give the young grape plants something to grab onto as they climb to the canopy.
From start to finish, it took us 1 week to build this Pergola Grape Arbor. The finished product is stunning!! It brings a sense of completion to our backyard, complimenting the “coop-hood” (a.k.a. chicken coops) with an aura of dignity.
Fi (Silver Lace Polish Hen) perched on a hammock swing under the arbor.Finished Grape Arbor complete with hammock swings.The Grape Arbor in the backyard opposite the “coop-hood”.
My favorite activity is to lay on my hammock under the Grape Arbor, read, listen to the chatter of my girls and watch the grapes grow.
Enjoying a relaxing Sunday afternoon reading on my hammock lying under the Grape Arbor.
I cannot wait for the grapes to grow and reach the Arbor canopy. Until then I will sit under my Arbor, read, sip on some wine and look forward to the day that I can eat fresh grapes from my very own grape vines.
Grape clusters on a Muscadine Grape Vine.
I hope you enjoyed this post. Building this backyard Grape Arbor was a worthwhile endeavor, bringing a completion to our backyard homestead.
You too can build a Pergola Grape Arbor in your own backyard or garden and reap the benefits of growing your own grape vines.
Me, relaxing in a hammock swing below the Grape Arbor.The girls working hard to keep the grape vines free of bugs and weeds.My “hen-helping” crew, keeping the grape vines healthy, bug, and weed free.
Today May 2022
Three years after construction, the grape vines are prolific and rapidly climbing to the canopy. This year’s harvest (2022) will be the best yet! 🍇
Grape Vines loaded with tiny grapes.Grape Vines climbing to Arbor CanapyFi (Silver Lace Polish Hen) perching on a hammock swing in the shade of the Grape Arbor
I am a published author, multi-disciplinary writer and blog contributor. If you like this blog, please visit some of my other sites.


 3. Bring up your young well. They are the next generation, and the key to your legacy.