There are four names forever written into the soil of The Kuntry Klucker Farm.
Link. Smog. Enigma. Lestat.
They are stitched into the rhythm of the land, woven into the wind that moves through the trees and the hush that falls over the coop at dusk. More than roosters, they were guardians of a small kingdom and defenders of ordinary miracles: the soft clucking of content hens and the sacred safety of routine.
Link was courageous in feather and bone. He stepped forward when the world felt uncertain, as though fear was simply a language he had already learned to translate.
Smog was quiet, contemplative, and old soul wrapped in pristine lace plumage, as if he carried the memory of an ancient world his giant theropod ancestors once roamed.
Enigma lived as a question, impossible to solve and therefore impossible to forget.
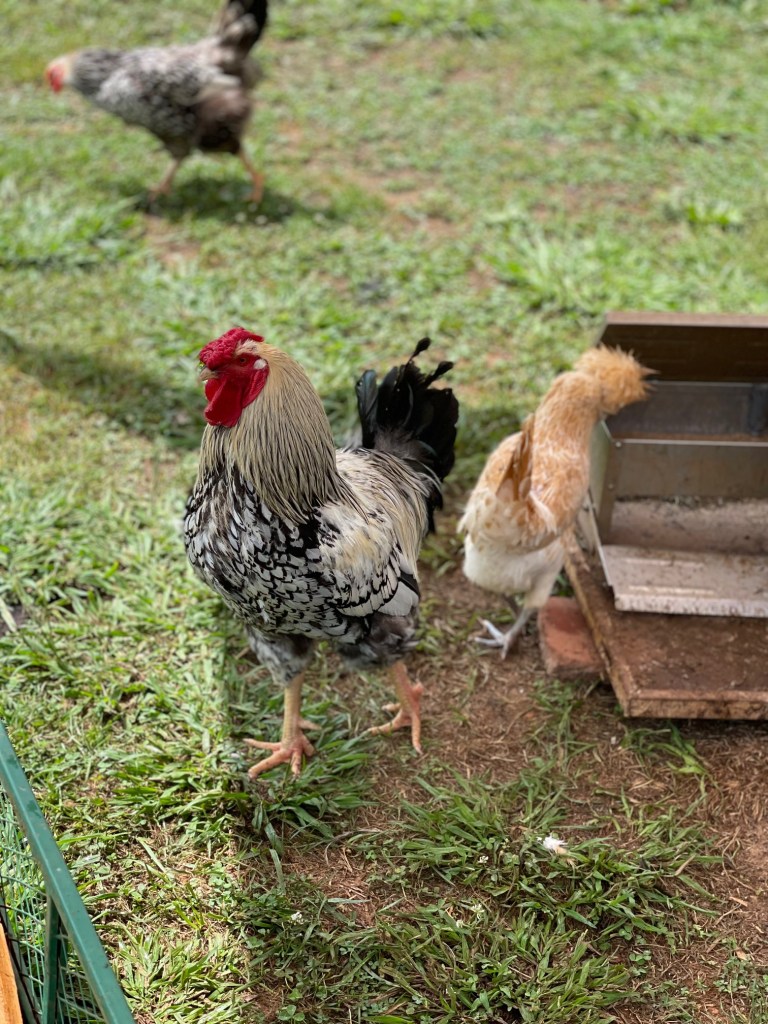
Lestat…Lestat was royal. Dramatic, He did not simply exist in this space-he ruled it, in his own peculair, meagnificent way.
In their absence, the landscape feels altered. The sky seems larger. The mornings are silent. But life on the Kuntry Klucker Farm does not end-it transforms. Even in their absence, they have not left.
Because the Kuntry Klucker is not ending. It is evolving.
The future of this little kingdom will be shaped by iconic, time-tested beauty and resilience-Lavender Orpington, Blue Orpingtons, and other storied breeds whose soft colors and gentle strength feels almost dreamlike. It is fitting that the next chapter be dressed in shades of mist, twilight, and sky – colors that echo both mourning and hope.
These new birds will not replace the four who came before them. They will carry them forward.
In the courage of the future rooster, there will be Link.
In the still wisdom of a quiet hen, there will be Smog.
In the curious spark of a wandering chick, Enigma will stir.
And in the elegant stance of a proud Orpington rooster, Lestat will live again.
Their spirit will live in the way the flock moves as one, in the way they settle at dust, in the sacred normalcy of care: clean water, fresh feed, warm bedding, and gentle hands.
The Kuntry Klucker will become more than a coop. It will become a legacy sanctuary-shaped by memory, inspired by beauty, and guided by love.
And one day, when the yard is filled again with soft coos, gentle clicks, and the whisper of feathers brushing the earth, I will know:
They were never truly gone. They simply become the future.
Farewell, boys, thank you for your service, and fly high.
In loving memory of Link, Smog, Enigma, and Lestat.
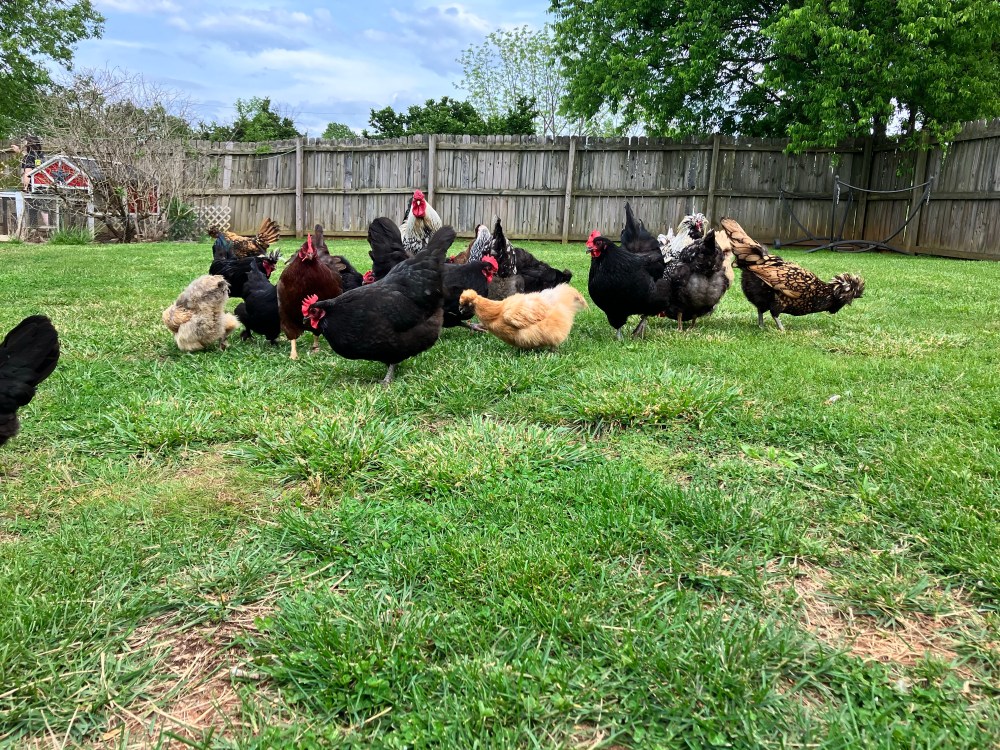
The flock scratching in the hay for delectable treats.
Trees display a variety of colors, store shelves brim with the excitement of trick-or-treating, and the weather cools as the days grow shorter. This signifies that a change from Mother Nature is on the horizon.
Halloween isn’t just for humans; the flock can also partake in fall and Halloween festivities. In this article, I will explore various autumn activities that both families and their feathered friends can enjoy together.
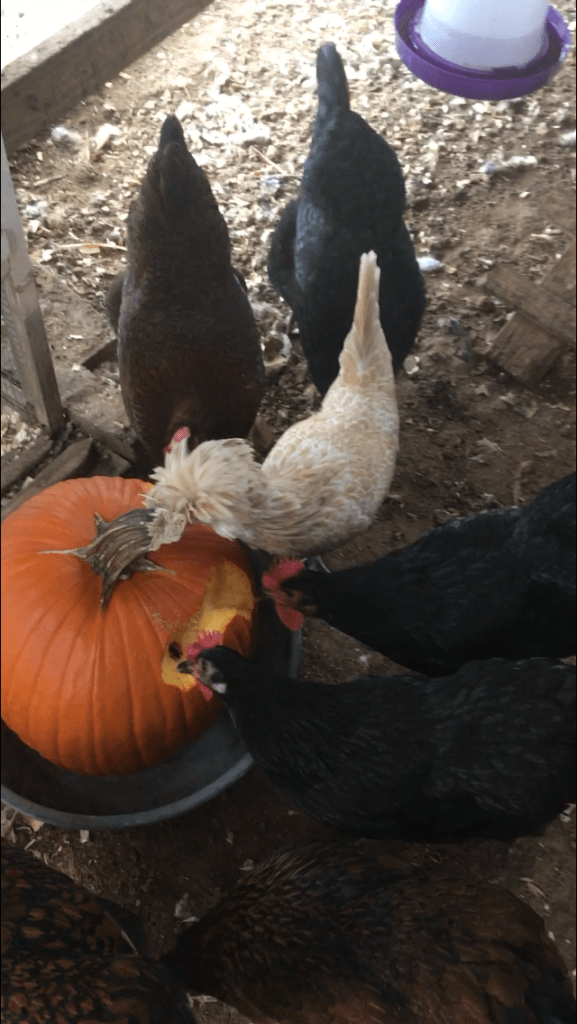
Pumpkin Carving Contest:
My chickens love pumpkins! Every fall, when pumpkins are discounted after Halloween, I buy several for my flock to enjoy. As they peck at the pumpkins to reach the delicious seeds inside, they carve the pumpkin. I provide each of my coops with a pumpkin, turning it into a fun pumpkin carving contest.
Every flock has its unique approach to pumpkin carving. Pumpkins carved by chickens make for a charming autumnal adornment in the backyard.
Note: To assist the flock in beginning to craft their pumpkin, create small holes to stimulate pecking, which will allow them to access the seeds inside.Contrary to popular belief, pumpkin seeds are not natural dewormers. If you suspect a worm infestation in your flock, proper management is required. For information and instructions on treating worms, please refer to my post for the correct worming dosage and techniqueor consult a veterinarian.
Mealworm Hay Hunt:
Lestat leads the flock in hunting for mealworms in the hay.
During the fall, when wet, muddy, or snow-covered ground is common, I create a barrier for my flock by scattering several bales of hay around the coops. To encourage activity on the dull days of late fall, I scatter mealworms on the hay.
The flock will spend hours engaged in the stimulating activity of finding mealworms in the hay. Mealworms are excellent for chickens because they provide a good source of protein, which helps with feather regrowth during the fall molt and boosts body energy for warmth on cool nights.
Note: If the hay becomes moldy, it should be promptly removed and replaced with fresh hay. Since moldy hay can cause illness in chickens, it’s important to monitor the quality of the hay, especially during damp conditions.I spread the moldy hay over my garden to decompose, which will serve as fertilizer for next season’s growth.
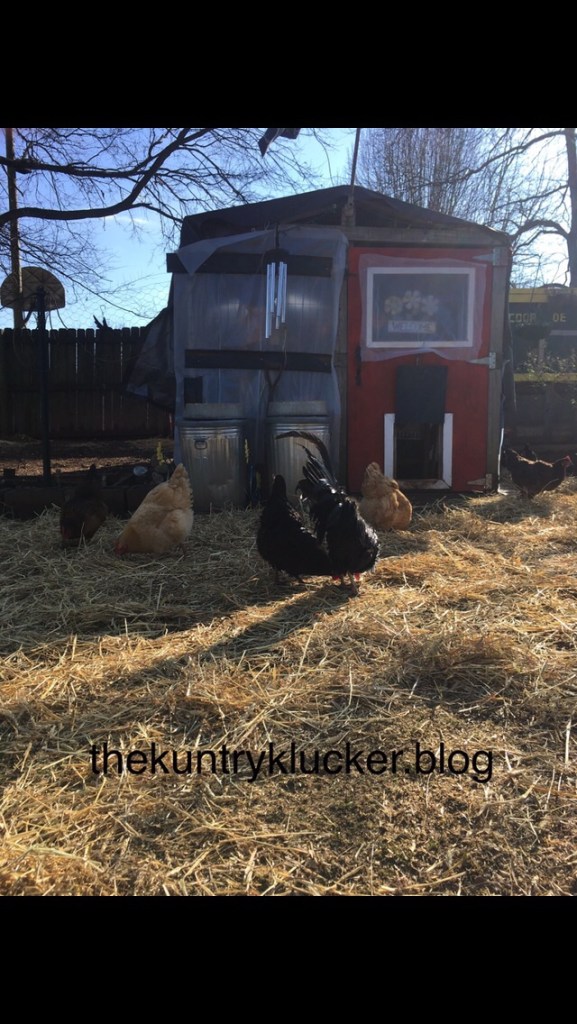
Haunted Coop:
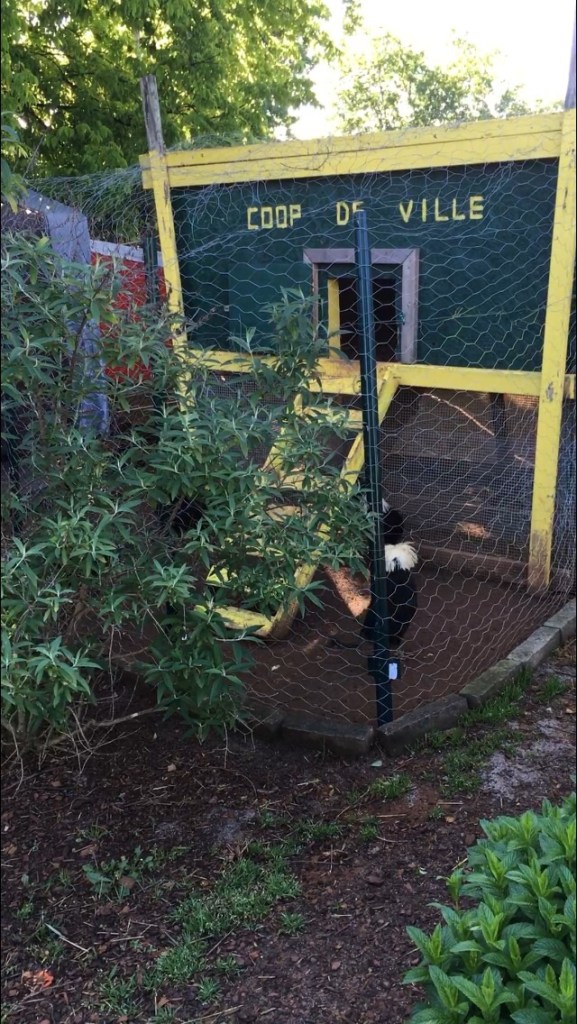
Silhouettes of the Coop De Ville crew are illuminated by the red LED light inside the coop.
As daylight begins to recede, I place a light in the pen to give the flock extra time to get something to eat and drink before roosting. Additionally, the added light helps assists in egg production and evening chores as the coop is illuminated during long dark night of late fall and winter.
Red lights are ideal for this purpose because the red spectrum is not bright enough to disrupt sleep, yet it provides sufficient light to tend to the flock after dark. Additionally, red lights can give off an ominous glow reminiscent of a haunted house.
Note: LED lights are best because they remain cool to the touch unlike incandescent bulbs, are cost-effective, and have a long lifespan.Also, ensure that all cords are out of reach for the flock.
Sandbox Scratch Hunt:
The Kuntry Klucker Crew busily scratching in the sandbox, searching for the seeds I had sprinkled onto the sand.
During the cold days of winter when the ground is frozen or covered with snow, a sandbox placed in the pen provides the flock with a medium to engage in dust bathing and scratching keeping feathers and nails in top condition.
To promote this instinctive behavior, I sprinkle scratch grains over the sand, prompting the flock to eagerly forage through the sand for the grains.
Throughout the years, this ritual has grown to be a favorite among the flock. I spread scratch before roosting, providing a stimulating snack to fuel their internal furnace during the chilly nights of fall and winter.
Note: The ideal medium for a sandbox is play sand. To encourage dust bathing, you may add peat moss and natural wood ash. Avoid using materials that are harmful to chickens, such as cedar shavings, ash from barbecues, or mulchwhich can contain weed killer, dyes, and other harmful chemicals.
Flock Block Halloween Treat:
The flock enjoying a flock block on a cold winter day.
During cold, snowy days, I prepare a flock block for the girls who are confined due to inclement winter weather.
Flock blocks serve as both a distraction and a productive activity, offering additional nutrition through a stimulating activity that is essential for the flock to endure the harshest winter conditions.
A flock that is actively engaged during winter storms experiences less boredom, which can lead to destructive interactions and potential injuries. Introducing treats like raisins, mealworms, and sunflower seeds can pique their interest, as they will enthusiastically peck at the block to reach these tasty morsels.
Note: Store any leftover flock block in rodent-proof containers overnight to avoid attracting rodents to the coop. After two days, replace the flock block with a fresh one to prevent the flock from consuming mold.
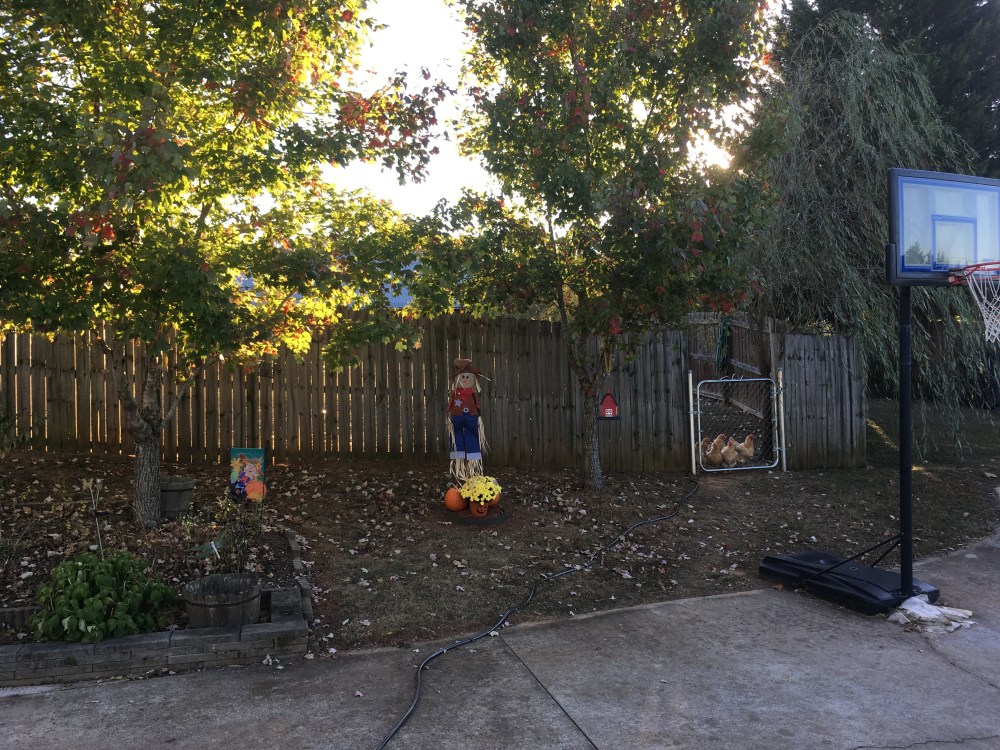
Halloween and autumn festivities aren’t just for humans—include your backyard flock in this year’s fall plans by decorating your coop and pen with inspiration from your hens.
A flock oversees an autumn arrangement adorned with pumpkins, chrysanthemums, and a scarecrow.
I am a multi-disciplinary writer, published author, and web content creator. If you like this post, visit some of my other sites or Online Writing Portfolio.
The Kuntry Klucker Crew hunting for delectables on a freshly cut summer lawn
The first signs of changing seasons are clear as the buzz of cicadas fills the auto backdrop, a sign that late summer descends upon the northern hemisphere. Many backyard chicken keepers notice their flocks look disheveled as molt begins the slow transition of shedding feathers in preparation for the coming fall and winter seasons.
In late summer, many novice backyard chicken keepers are horrified to see feathers covering the coop and pen floor. While the scene resembles an attack from a nocturnal predator, feather loss is natural and affects all birds, including chickens. Molt is the biological process of feather replacement and occurs yearly in backyard flocks.
In this article, I will discuss what molt is, why it’s important, and what backyard chicken keepers can do to support their flocks during the molting process.
What Is Molt?
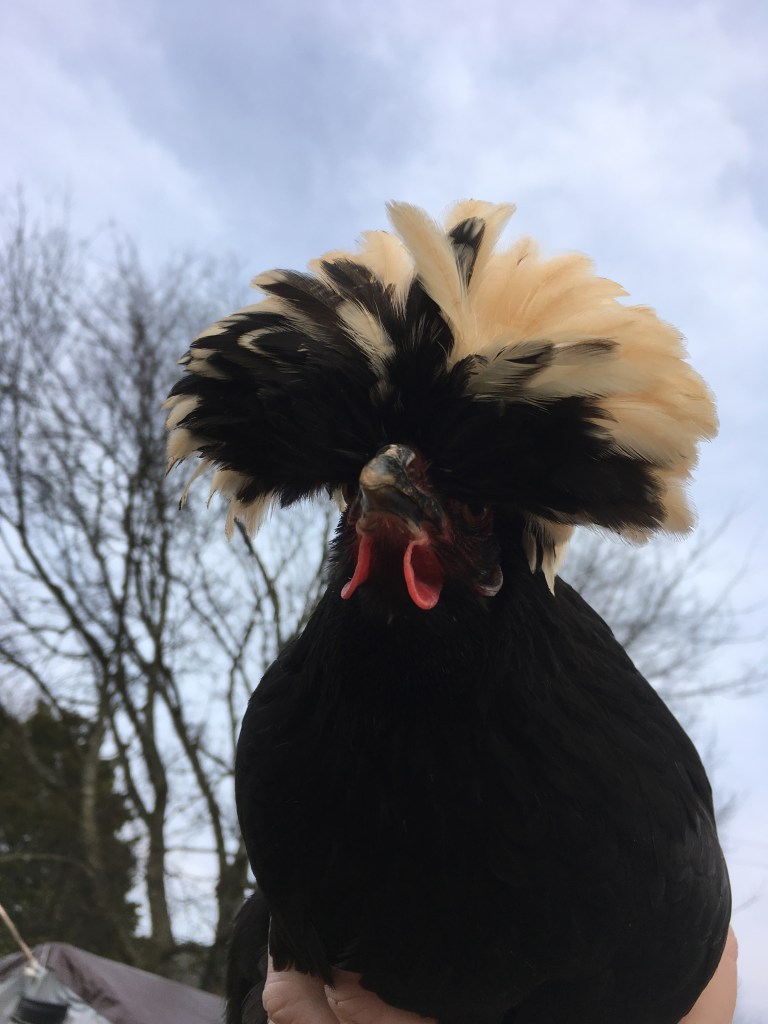
Fi (Silver Lace Polish Hen) sporting her stunning crest feathers after molt.
Molt is the process by which birds shed their old feather and replace them with new ones. Molt can vary by species, year, and by individuals. Molt is considered complete when the bird replaces all if its feathers. Molting typically progresses from the head to the tail over the course of several months. Some birds can lose more feathers at once appearing naked while others lose few to no feathers.
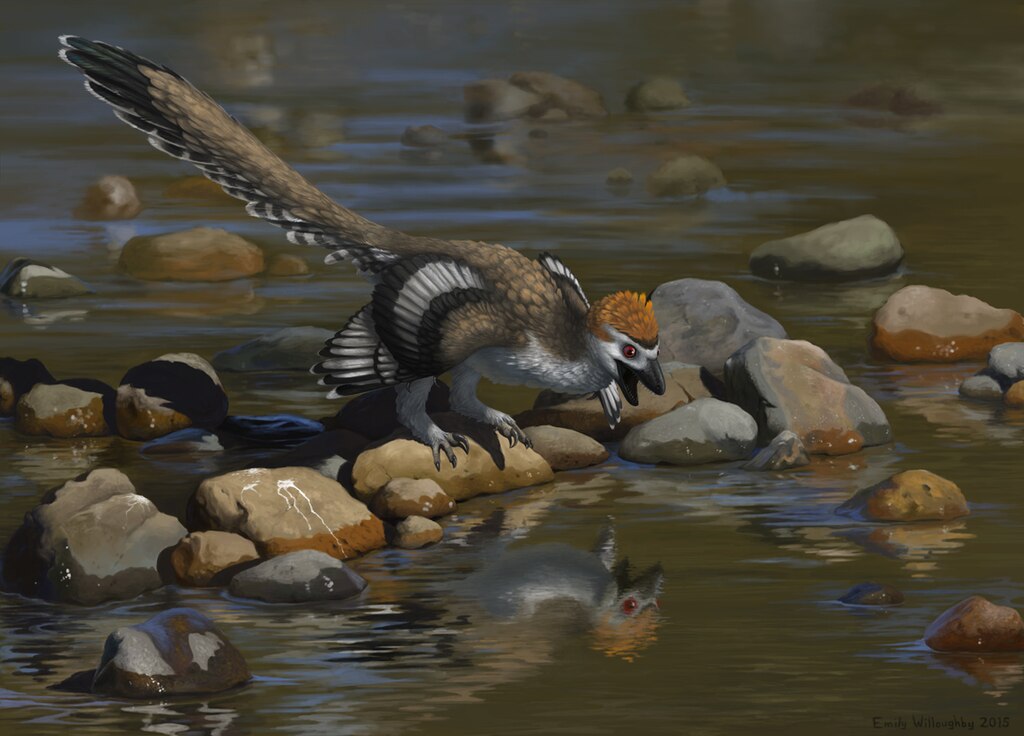
Molting is as old as the linage of birds which began in the Mesozoic when dinosaurs roamed the earth. Birds are dinosaurs, specifically, birds are an advanced group called paravians, a clade of dinosaurs that is directly related to the mighty Tyrannosaurus Rex and the ferocious Velociraptor(Brusatte, 2018).
The signature feature of birds – feathers – evolved in their ground-dwelling theropod ancestors first noticed in Sinosauropteryx, the first dinosaur taxon outside parades to be found with evidence of proto-feathers.
The earliest feathers looked much different than the quill feathers of today. Initially, feathers evolved as multipurpose tools for display, insulation, protection for brooding, and sexual dimorphism. These early feathers were more like a fluff – appearing more like fur than feathers – consisting of thousands of hair-like filaments. Silkie chickens possess feathers that lack barbs that form the classic shape we associate with feathers. The first proto-feathers in dinosaurs were much like the texture of feathers on the Silkie. The breed name “Silkie” is derived from this unique feather texture.
Silkie flock grazing on a lush spring lawn. Silkies lack the barbs in their feathers that resemble protofeathers of their Mesozoic ancestors.
As the body plan for feathered dinosaurs continued to fine-tune the use of feathers, flight happened by accident. More advanced paravians had achieved the magical combination to achieve flight – large wings and smaller bodies (Brusatte, 2018). As the body plan of birds continued to refine, they lost their long tails and teeth, reduced to one ovary, and hollowed out their bones more to lighten their weight. By the end of the Cretaceous, birds flew over the heads of Tyrannosaurus Rex and other land-dwelling dinosaurs.
Sixty-six million years ago, the birds and T-rex witnessed the Chicxulub impact that brought the Mesozoic to a close. While therapods with large and expensive body plans died out, birds sailed through to the Cenozoic. The surviving non-avian dinosaurs carried with them the body plan seen in birds today, including the yearly process of molting.
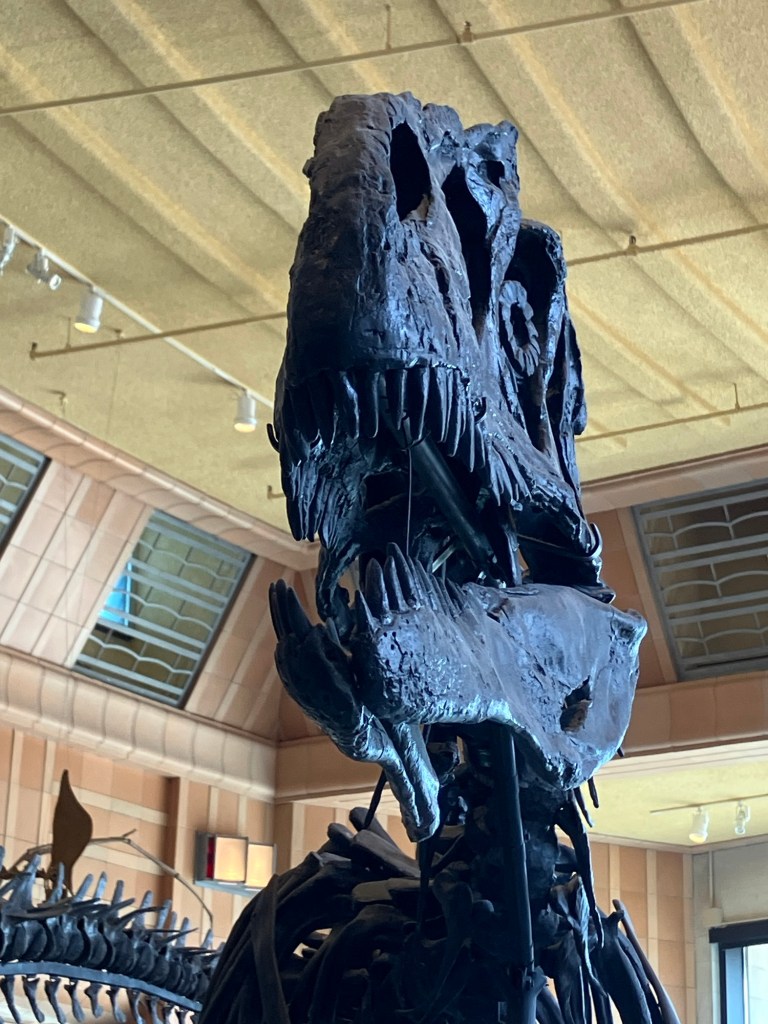
Image Credit:Noelle K. Moser.Me peering through the fenestrae of Tyrannosaurus Rex specimen MOR555
Why is Molting Important?
The Kuntry Klucker Crew sifting through freshly spread hay for mealworms, a treat during the yearly molt.
Feathers, like skin or hair in humans, are replaced by the body regularly. Unlike humans who constantly shed skin cells, birds shed feathers annually.
Molting prepares a bird’s body for winter by replacing old feathers with new ones. During molt, backyard chickens will grow in the winter down needed for warmth. It is important for chicken keepers not to interfere with the molting process by placing chicken sweaters or other unnecessary items on the bird. While molting chickens can look naked and cold their bodies are built for this process.
How Can Backyard Chicken Keepers Help the Molting Flock?
Image Credit:Noelle K. Moser. Smog and Link (Silver Lace Wyandotte and Silver Lace Polish respectively) sporting stunning lacing feathers after molt.
During molt, birds will need increased protein in their diet to support feather regrowth. Providing mealworms is a great way to add affordable, healthy protein.
As pin feathers emerge, keepers must prevent irritating these new feathers. Pin feathers contain a fresh blood supply and are very sensitive to the touch. If new pin feathers are touched too roughly, they can bleed, causing pain and distress to the bird.
While molting, I do not hold my birds unless necessary and avoid touching the pin feathers if possible. Once the feathers fully develop it is safe to hold and interact with the flock again.
During the molting process, hens will decrease or cease laying altogether. During this time, the hen’s body uses all available energy to support feather regrowth. Once molting is complete, egg production will increase, and the flock will resume activity. After molting, the flock with new feathers will look stunning with fresh plumage and renewed vigor.
While lengthy at times, molting is a natural process for all birds and necessary for survival and life outdoors.
I am a multi-disciplinary writer, blogger, and web content creator. If you like this post, please visit some of my other blogs or online writing portfolio.
Image Credit:Noelle K. Moser.Me with the gargantuan relative of birds MOR555 Tyrannosaurus Rex, “Walter”. National Museum of Natural History. Washington, D.C.
If you have any questions, please reach out. You can catch me at kuntryklucker@gmail.com or visit my YouTube Channel.
As always, thanks for reading. Till next time, keep on crowing!
Resources:
Brusatte, Steve. The Rise and Fall of the Dinosaurs: A New History of Their Lost World. William Morrow An Imprint of Harper Collins Publishers. New York, NY. 2018. (pgs. 282)
Miss Sweet Pea (Buff Orpington Hen) surrounded by a halo of light from the morning sun.
While cold weather issues often take precedence in the minds of backyard chicken keepers, heat-related illnesses are usually more deadly to backyard flocks. Unlike cold weather bringing snow and ice, hot weather is more dangerous than cold and wet weather combined. Dehydration and heat stroke can decimate a flock in minutes if proper precautions are not taken to avoid these issues.
In this post, I will discuss how soaring summer temperatures affect chicken physiology and how to avoid, treat, and prevent heat-related illnesses.
Image Credit: Noelle K. Moser. Me observing the North American Solar Eclipse.Image Credit: Noelle K. Moser. Diamond Ring Eclipse taken with my Celestron Refracting Telescope. April 8, 2024. Cincinnati, Ohio.
Chicken Physiology, Body Plan, and Dehydration:
Image Credit: Noelle K. Moser. Aphrodite and Lady Me (White Crested Polish hen and Black Silkie hen, respectively) caught sampling freshly potted petunias.
Related to the mighty Tyrannosaurus Rex, chickens are theropods and can trace their lineage back to the common ancestor of dinosaurs. (Brusatte, 2018).
All birds – chickens included – are dinosaurs. Specifically, birds are a type of theropod rooted in the dinosaur family tree that contains the same ferocious meat-eaters as T-Rex and Velociraptor (Brusatte, 2018).
Birds perch within an advanced group of dinosaurs called paravians – a subgroup of a theropod that traded in the brute body plan of their gargantuan ancestors for larger brains, sharpened acute senses, and smaller, lighter bodies that permitted progressive lifestyles above their land-dwelling relatives. Anatomically, chickens have many common characteristics that define the body plan of these magnificent creatures.
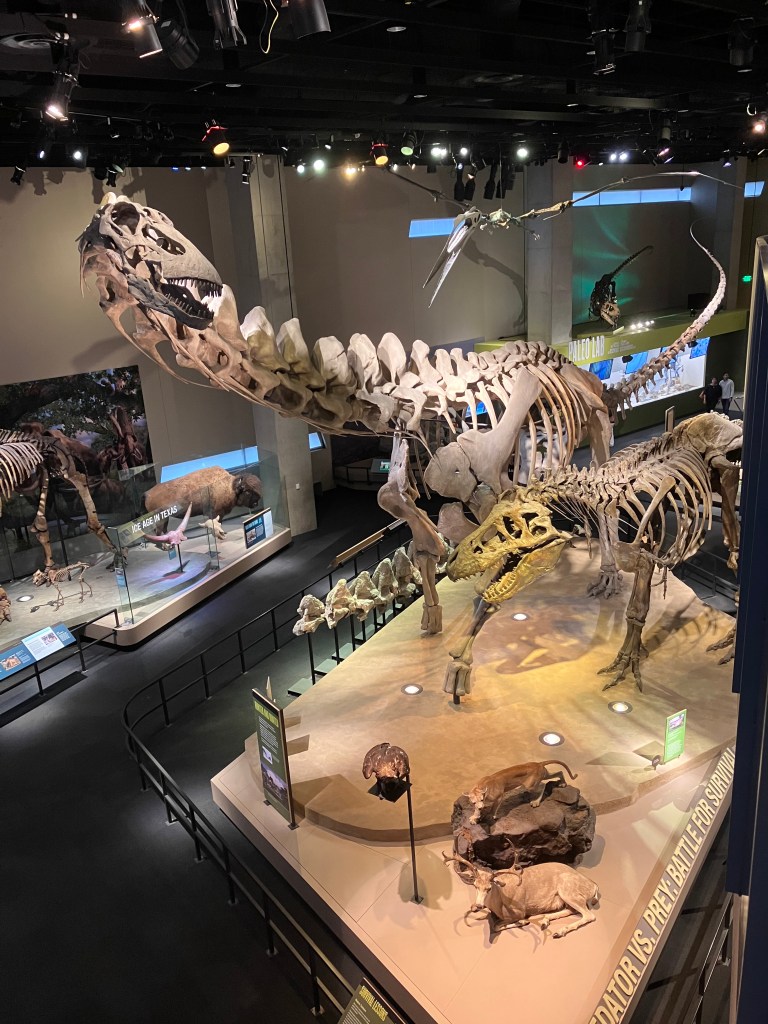
Image Credit: Noelle K. Moser. Tyrannosaurus Rex. Perot Natural History Museum. Dallas, Texas.
Chickens and all birds have a unique body plan visible in the skeleton. Comparing the skeleton of Tyrannosaurus Rex with modern chickens yields similar anatomical attributes. T-Rex has a skull attached to a spine, ribs, and two legs with splayed toes, providing swift bipedal locomotion. Focusing on the appendicular skeleton, we see that T-Rex and modern chickens have an S-shaped skeleton. The reason is that body plans do not have unlimited parts from which evolution can choose but rather build upon earlier ancestral shapes (Horner, 2009).
Image Credit: Noelle K. Moser. Profile of skeletal body plan of Tyrannosaurus Rex which survives in birds and chickens today. National Natural History Museum. Washington, D.C.
While it’s easy to say that these features are of birds, they are not attributes of birds at all but of dinosaurs.
Image Credit: Noelle K. Moser. Saurischian dinosaurs – Alamosaurus and Tyrannosaurus Rex – locked in the battle of predator and prey. Perot Natural History Museum. Dallas, Texas.
Like the nightly T-Rex, chickens are related to saurischians – the line of the dinosaur family tree that contains both the giant sauropods and theropods – possessed skeletal pneumaticity – spaces for air in their bones.
Skeletal pneumaticity produces hollow bones that lighten the skeleton, allowing for a wide range of motion. Without pneumaticity, sauropods would be unable to lift their long necks, and giant theropods would lack the agility and ability to run because their skeletons would be far too heavy.
In birds, air sacks are an ultra-efficient lung oxygen system. This flow-through inhalation and exhalation provide the high-energy birds need during flight. Evolving one hundred million years before birds took flight, this is the true secret to their ability to take to the skies.
While pneumaticity is an incredible anatomical adaption inherited from their ferocious ancestors, it also makes birds vulnerable to dehydration. In warm weather, this ultra-efficient lung oxygen system requires access to water for optimal performance. In backyard chickens, readily available water is crucial to prevent dehydration. In extreme heat, chickens can dehydrate fast, causing compromised health and death.
Image Credit: Noelle K. Moser. Me looking through the fenestrae (Pneumaticity in T-Rex anatomy to make the skull lighter) of MOR 555 – Tyrannosaurus Rex. Natural History Museum. Cincinnati, Ohio.
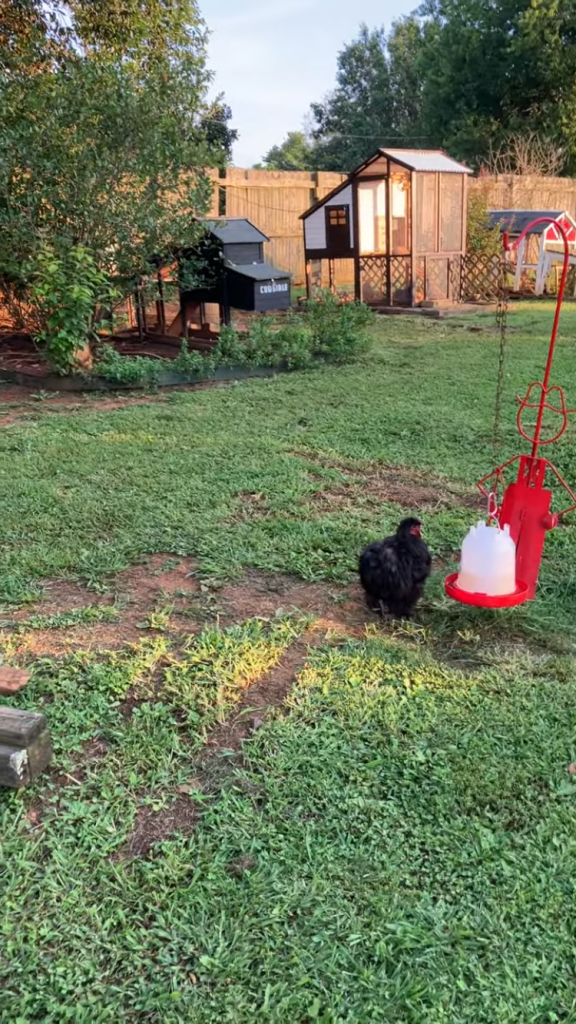
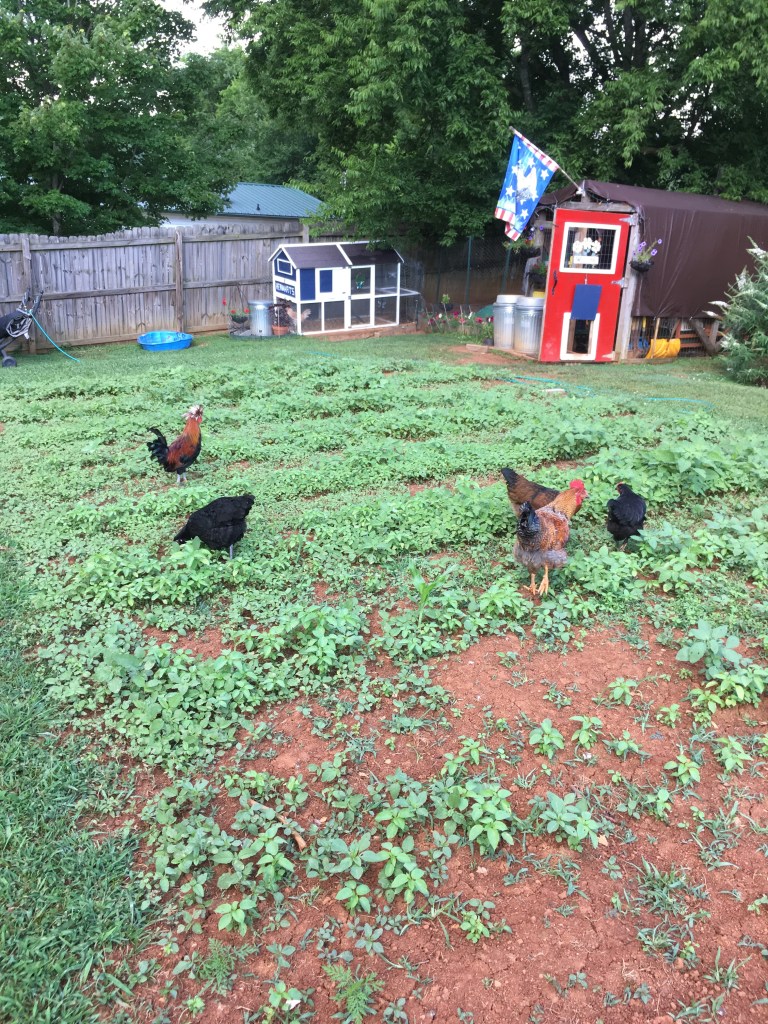
Preventing dehydration in backyard chickens is crucial in hot weather. Water needs to be accessible at all times and if free-ranging in multiple locations. In my backyard, I have multiple waterers suspended from red Shepard hooks.
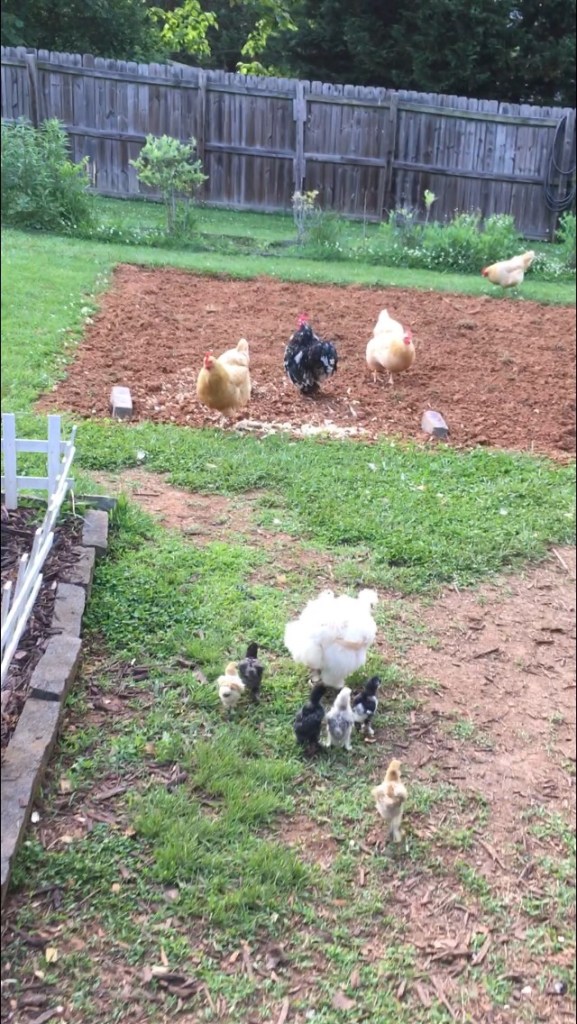
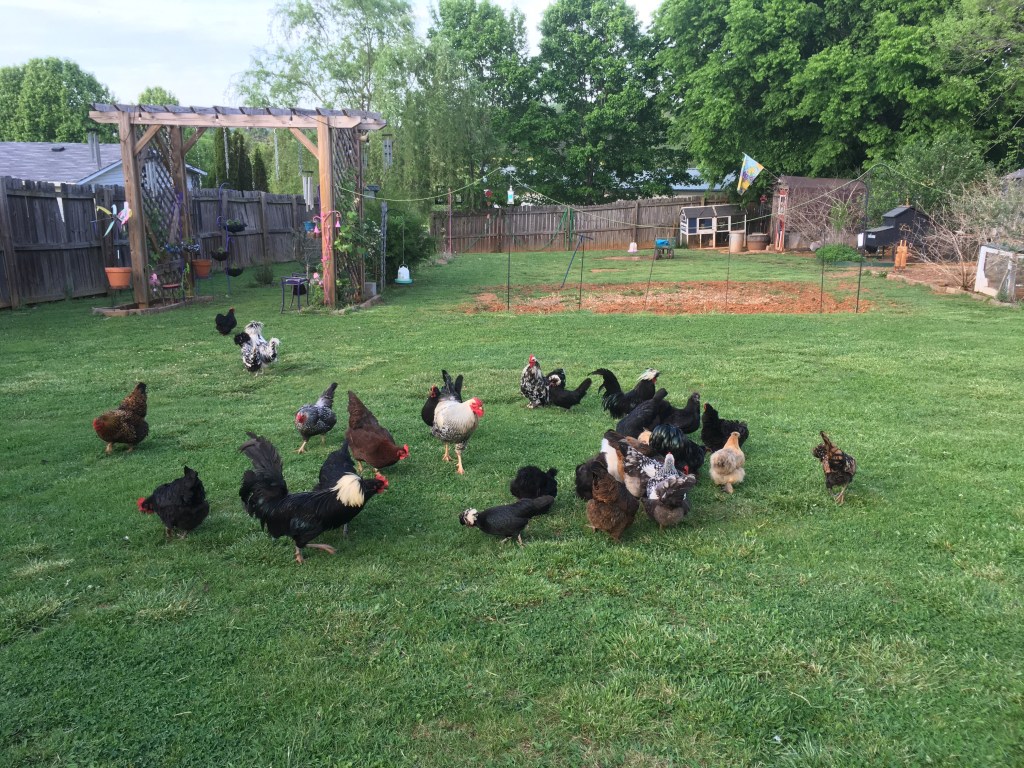
Image Credit:Noelle K. Moser. My flock free ranging in the backyard with multiplewatering locations visible for easy access.
When free ranging a backyard flock, it is necessary to keep water in easy reach from several locations. If the only water source is at a distance chickens can dehydrate before they can access water.
Image Credit:Noelle K. Moser. Mickey Smith (Black Silkie Rooster) drinking from one of the many watering stations placed throughout the backyard.
Electrolytes:
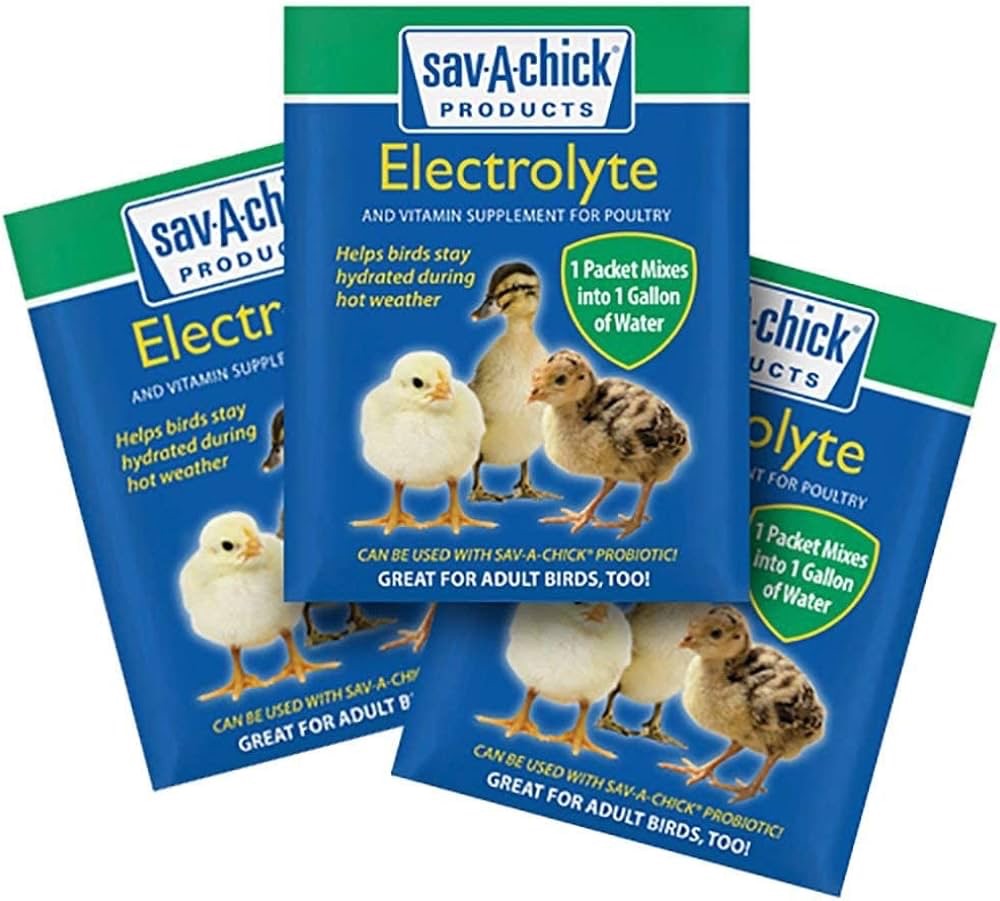
Rooster Booster Vitamins and Electrolytes available at farm and feed stores.Save-A-Chick electrolytes available at farm and feed stores.
Like Gatorade for humans, electrolytes are necessary for optimal flock health in hot weather. When temperatures soar, I add electrolytes to my flock’s water daily. Following package instructions for administration, electrolytes for poultry will aid in supporting the chicken’s body providing proper hydration.
Shade:
The Kuntry Klucker Pen shaded from the harsh sun by a tarp that protects the roof of the pen.A trio of Polish hens perching on a macrame hammock swing under the shade of the grape arbor.
Whether in the coop/pen or free-ranging, shade is key for optimal flock health in hot weather. In allowing the flock to free range in a backyard, plant pushes or trees that provide shade from the hot afternoon sun. If the free ranging area is too small, simple canopy tents are a great alternative.
Image Credit: Noelle K. Moser.The Kuntry Klucker crew seeking shade under a large tree in the corner of the free ranging yard.
In my backyard, I have multiple areas providing shade for the flock. I also post watering stations near these locations to help the flock stay hydrated while they rest in the shade.
Provide Chicken A/C:
Another trick of the trade is to provide your flock chicken A/C. During the hottest part of the day, use a hose to saturate a favorite shaded spot for the flock. The water will cool the ground and the chickens will rest on the cool ground acting as A/C that will help the flock stay cool. If your property allows, placing a misting host on the ground will also provide this cooling effect. The chickens will come and go out of the mist as needed depending on individual comfort levels.
Image Credit:Noelle K. Moser.The Coop De Ville crew taking advantage the freshly moistened ground in a shaded spot on a hot summer day.
Treating Heat Illness in Backyard Flocks:
The signs of heat illness in chickens are much the same in humans. Lifelessness, exhaustion, lack of appetite, pale comb, dry mouth, passing out, and death.
If you notice any of the above symptoms in a flock member, immediate action is required. The first measure is to take the heat-affected individual to water. Many times, the heat-stressed bird needs quick access to water. If the individual is strong enough to drink, this will quickly rectify the situation. Keep the ill individual near the watering source in a pen or shaded location to recover.
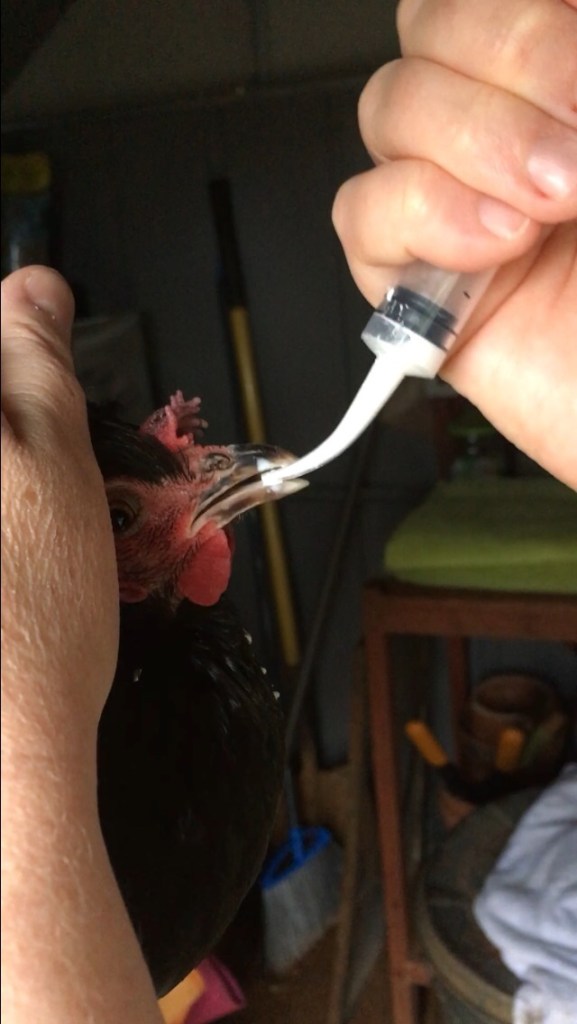
Image Credit: Noelle K. Moser. Me using a syringe to orally administer wormer to a black Cochin bantam hen.
If the heat illness is more severe, direct administration may be necessary. Using a syringe with the needle removed, provide water mixed with electrolytes directly to the affected flock member. When given orally, the patient will drink the water, providing relief.
Note of caution: do NOT force the water down their throat; chickens have a passage in the back of their mouth that leads directly to the lungs. Instead, slowly administer the water and allow the bird to drink the water.
I have a video on my YouTube Channel demonstrating the correct oral administration using Wormer. While this video focuses on worming a backyard flock, the oral methodology is the same. The skills here can be extrapolated and transferred to heat-related illnesses in backyard chickens.
If possible, isolate the heat-stressed member to a cool shaded place such as a laundry room, mud room, or shaded location in the pen, and over several hours, administer water in small doses to help the member recover from the heat-related illness.
Most chickens treated for heat stress in this manner make a full recovery and no ill health is observed.
I hope this post has helped treat a heat-stressed backyard flock. Like cold weather challenges, hot weather has associated risks that need to be addressed to have a happy and healthy backyard flock. If you have any questions feel free to reach out, by leaving a comment or dropping me an email at kuntryklucker@gmail.com
Image Credit: Noelle K. Moser. Daspletosaurus Torous (Jurassic ancestor of Tyrannosaurus Rex), cast of Tyrannosaurus Rex (MOR 555 skull) and I. Cincinnati Natural History Museum. Cincinnati, Ohio.
I am a multi-disciplinary writer, blogger, and online content creator. If you like this post, please visit my online writing portfolio or other sites.
As always, thanks for reading. Till next time, keep on crowing!
~ The Kuntry Klucker Crew ~
Resources:
Brusatte, Steve. The Rise and Fall of the Dinosaurs: A History of Their Lost World. William Marrow of Harper Collins Publishers. New York, NY. 2018. Pts. 270.
Horner, Jack. How to Build a Dinosaur. Plume, Published by Penguin Group. London, England. 2009. Pts. 8,9.
Buff, Silver-lace, and Golden lace Polishes gathered for routine health inspections.
Performing routine health inspections on chickens is essential and a prerequisite for a healthy flock. Like a check-up at a physician’s office, health inspections for chickens are much the same. Catching problematic pathologies before they occur requires routine health inspections.
I will discuss the process and procedure for conducting successful health inspections in a backyard flock. Beginning at the head down to the body and tail, I will include all the vital indications to prevent illness in the backyard flock.
Head, Eyes, Comb, and Waddles:
Apollo (White Crested Polish Hen) posing as I inspect her eyes for indications of ill health.
Starting at the crown of the head, inspect for mites and lice on the individual. If mites and lice are present treatment will be required. The eyes should be clear and free of debris. If crusting is present around the eye, gently wipe it away with a paper towel moistened with clean, warm water.
Dracula (Silver Lace Easter Egger) shaking his waddles for the camera.
The comb and waddles should be red and warm to the touch. Dried blood or pecking marks indicate flock disharmony and bullying. Monitor the flock and take appropriate actions to rectify the problem by isolating the bully or establishing a bachelor pen if roosters are sparring.
Legions or sores indicate fowl pocks (a common virus) or parasites such as fleas or ticks. Treatment with Eprinex will clear up external parasite infections. I have a video on my YouTube Channel showing my methodology to treat external parasites in my flock.
Neck:
Buff and Golden Lace Polish hens hunting and pecking as they search for delicious morsels.
Moving down the body, examine the neck of the bird. Feathers should be clean, and the base of the shaft should be visible. If clumps or residue surrounding the base of the quill is noticed, this indicates the presence of lice. Treatment with eprinex is warranted to address these external parasites.
Wings:
Lestat (White Crested Polish Rooster) proudly displaying his feathers to attract his favorite hens.
The wings of birds are among one of the favorite places for external parasites to congregate. Due to the warmth and protection from disruption, mites and lice can live rent-free. Parting the feathers and exposing the skin, tiny moving dark spots indicate red fowl mites. These small parasites feed on the host’s blood and must be addressed. Again, Eprinex works very well to address and abruptly stop a mite and lice infestation on the bird.
Tail and Vent:
Clean and health fluffy bottoms of a Buff Silkie, Black Australorp, and Silver Lace Wyandotte Rooster.
Like the wings, the vent is a favorite place for mites and lice to congregate. Due to the inability of the bird to preen this location, mites and lice will multiply unencumbered. Treatment for external parasites will rectify the infestation.
If the vent area is dirty or caked with dried or wet excrement, this indicates worms. Left untreated, intestinal worms will weaken and eventually cause death in affected individuals. Natural wormers such as Diamateous earth, pumpkin seeds, or apple cider vinegar will not address a high worm load in chickens. Worm infections should be treated with products developed to kill worms and the eggs in the intestinal tract. Another indication of worms is finding roundworms on the poop boards or worms visible in the eggs. See the video on my YouTube Channel using my flock to demonstrate proper dosage and administration.
Shanks, Feet, and Toes:
Bumblefoot in a Buff Orpingtons Hen
The shanks (legs) of the chicken should be neat; the scales should lie uniformly. Uplifted scales are a sign of leg mites and can be addressed by soaking the legs in warm Epsom salt, followed by applying Vaseline to the legs to smother the mites. Treatment with Eprinex is also helpful in advanced infestations.
The pad of the foot should be clean and without puncture wounds or signs of trauma. If a round scab is present on the foot, this is bumblefoot and can be addressed with simple steps to remove the corn (infection) and wrapped in gauze and vet wrap for healing. Bumblefoot is common in backyard flocks and not necessarily a reflection of poor flock management. For instructions on how to treat bumblefoot, please see my blog post on treatment in my flock.
Take care to use proper protection when treating bumblefoot
Use caution when treating bumblefoot as these infections are usually staph infections and zoonotic (passing from one species to another) and can affect humans. Medical gloves and masks for treatment are recommended. Sanitize all instruments with bleach to kill any bacteria before storage.
Routine health inspections are key for proper flock husbandry as problematic illnesses can be caught early and prevented through preventative efforts. For more information on caring for backyard chickens, please visit my YouTube Channel.
Stan (BHI 3303) Tyrannosaurus Rex and I. Perot Natural History Museum. Dallas, Texas.
I am a multi-disciplinary writer, blogger, and web content creator. To see more of my work visit my online writing portfolio and other sites.
Always greet the day with anticipation. Many great delicacies await.
2. Simplicity and a thankful heart are some of life’s greatest virtues.
3. Bring up your young well. They are the next generation, and the key to your legacy.
4. When getting into mischief always make sure you have a buddy. Partners in crime always have more fun.
5. Make sure that you leave a little something for those who care about you. Giving is always better than recieving.
6. Try to appreciate the season of winter. Although bleak, it prepares the ground for spring flowers and other delectables.
7. Tend your gardens well. A well groomed garden makes the heart sing.
8. Choose your flock wisely, they will be your groupies for life.
9. Make time for friends. Friends make the heart happy.
10. Above all, be like butterflies, they hold the key to true freedom.
Hens can teach you so much about the simple pleasures of life. They are simple creatures that require little. They are happiest when they are allowed to do what nature intended them to do.
I hope you enjoyed this lesson on the simple pleasures of hens. They can teach us many things if we just take the time to watch and learn.
I am a published author, multi-disciplinary writer, and web content creator. If you like this post, please visit my writing portfolio or other blogs.
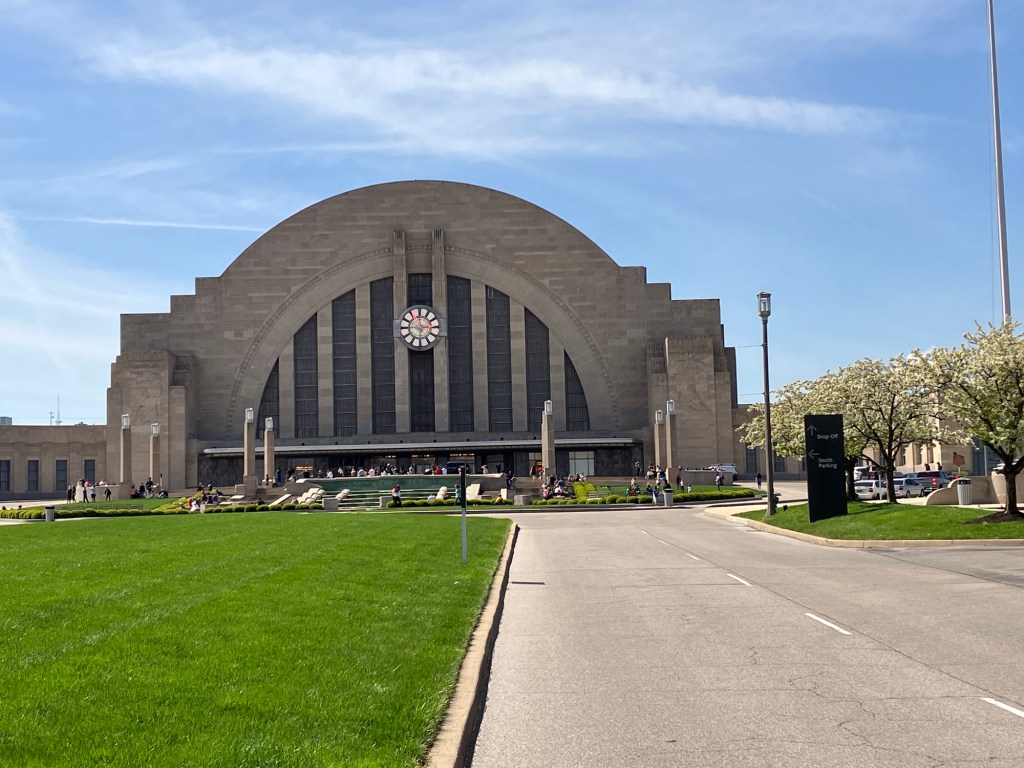
Me observing the eclipse at the Cincinnati Natural History Museum.
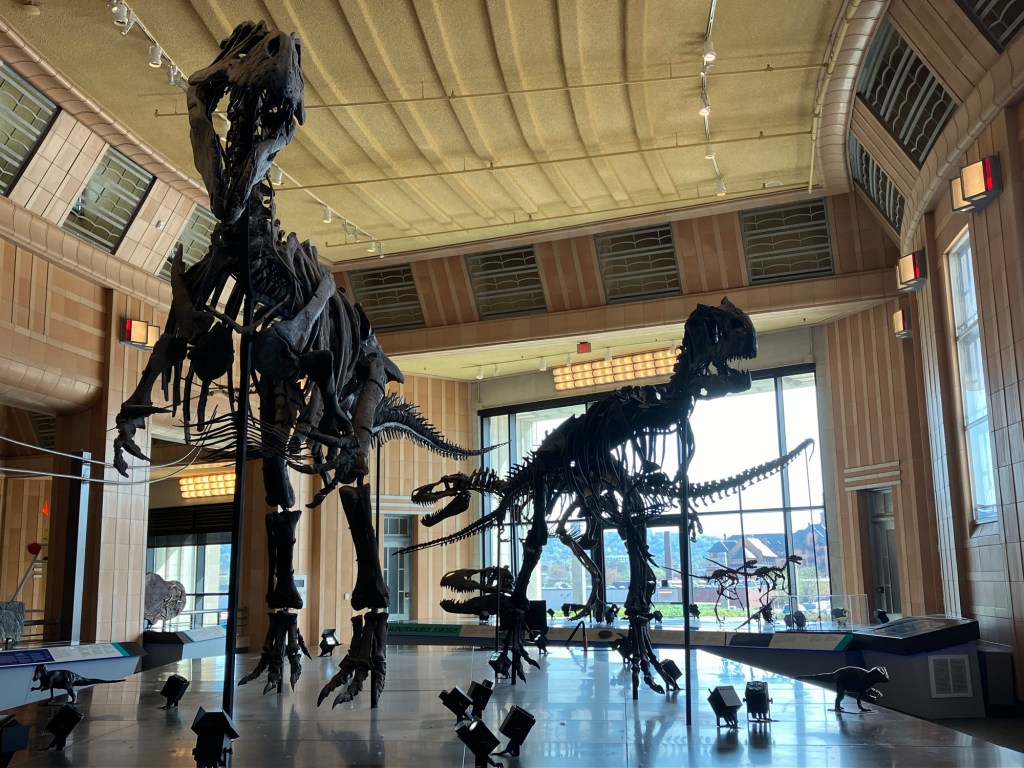
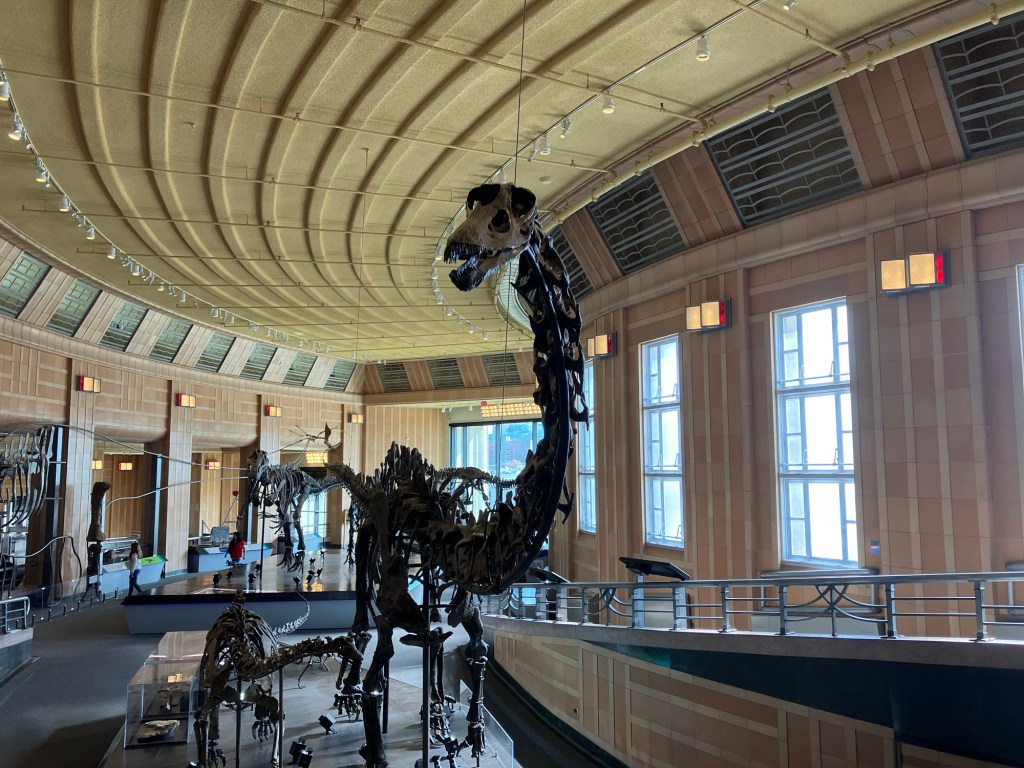
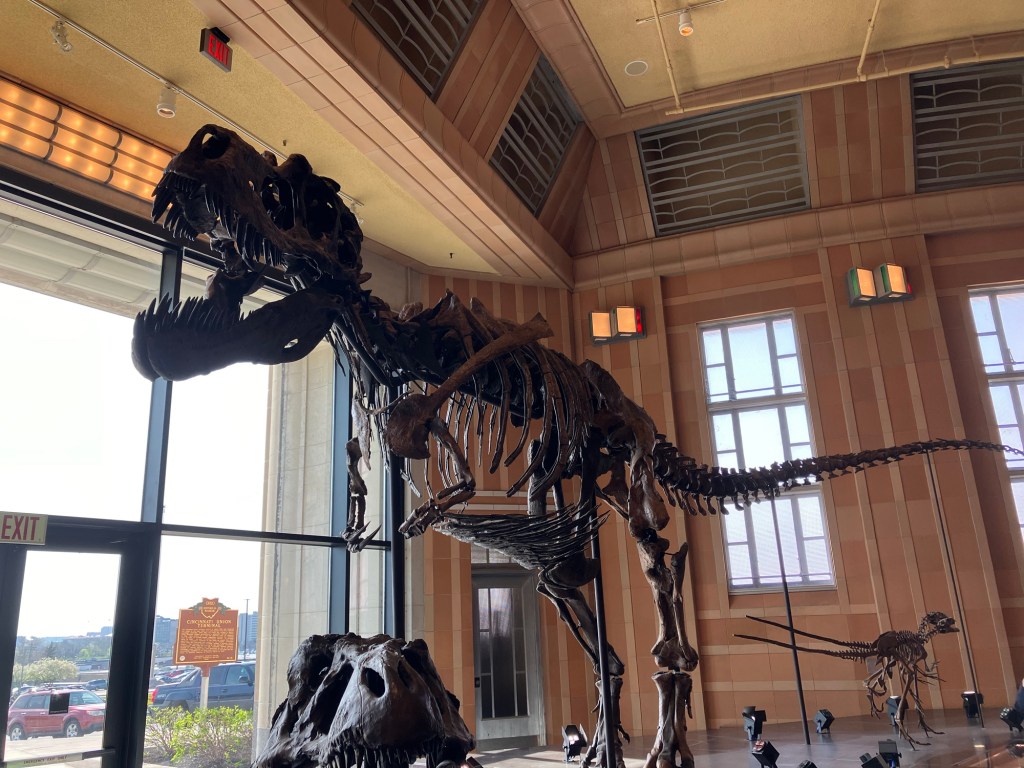
On April 8, 2024, the United States was in the path of totality of a Solar Eclipse. I recorded the flock’s reaction with a time-lapse camera and the eclipse with a Celestron telescope and Canon camera. Due to my location, I am just outside the path of totality; for better observation conditions, I traveled to Cincinnati, Ohio, and recorded the eclipse at the Cincinnati Natural History Museum. While there, I took in the museum’s dinosaur wing and captured some images of the Mesozoic ancestors of my backyard theropods.
Daspletosaurus and Tyrannosaurs Rex display at Cincinnati Museum Center. Daspletosaurus-Jurassic ancestor of Cretaceous apex predator T-rex-the blood of these dinosaurs’ pumps through the veins of my backyardflock.
While this blog is about raising and caring for backyard chickens, given the notoriety of the celestial event, observing the flock’s reaction to the solar eclipse is fascinating.
Image Credit: Noelle K. Moser.Cincinnati Natural History MuseumCenter prior to the onset of the solar eclipse.
Before leaving, I set up a time-lapse camera in the backyard to capture the flock’s behavior as the sun, blocked by the moon, darkened the land below. Like all birds, the behavior of the Klucker Crew is predictable but fascinating to witness, nonetheless.
As I was in two places at once, I will pair my observation and progression of the eclipse with the reactions of the flock for this post. As chickens are diurnal creatures and associate the waning of sunlight with nature’s ques to begin roosting, the flock demonstrated these behaviors only to be caught off guard during midday.
Image at inception of the eclipse taken with Celestron refracting telescope with solar filter. Image of eclipse captured with Canon T7i 19-250mm Lense with solar filter.Smaug (Silver Lace Wyandotte Rooster) and Brian (Buff Lace Polish hen) eating at the feeder at the onset of the eclipse.
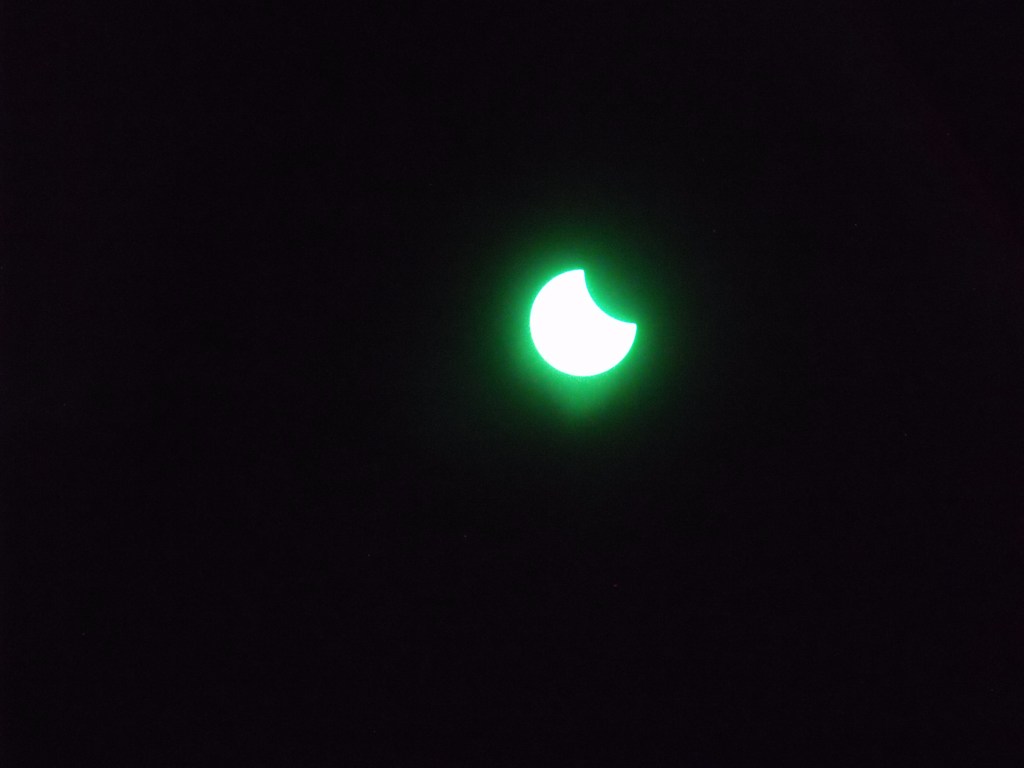
As the first signs of the moon moving in front of the sun began, activity in the backyard was routine. Occupying their time with hunting and pecking, the flock is blissfully unaware that something spectacular is about to unfold above their heads.
Image taken with Celestron Refracting Telescope with solar filter.Image of eclipse captured with Canon T7i 19-250mm Lense with solar filter.
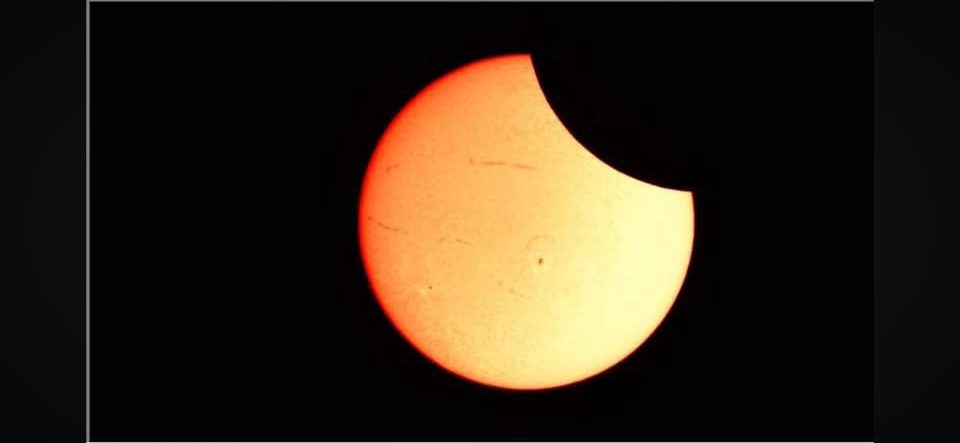
As the moon traversed more of the sun’s disk, the land below became transformed by the hint of waning sunlight. At this point in the eclipse process, the anticipative effects became apparent.
Back on the farm, as the sky slowly darkened, the flock noticed the early evening waning sunlight. Continuing to graze without sense of urgency, the flock slowly approached the pen.
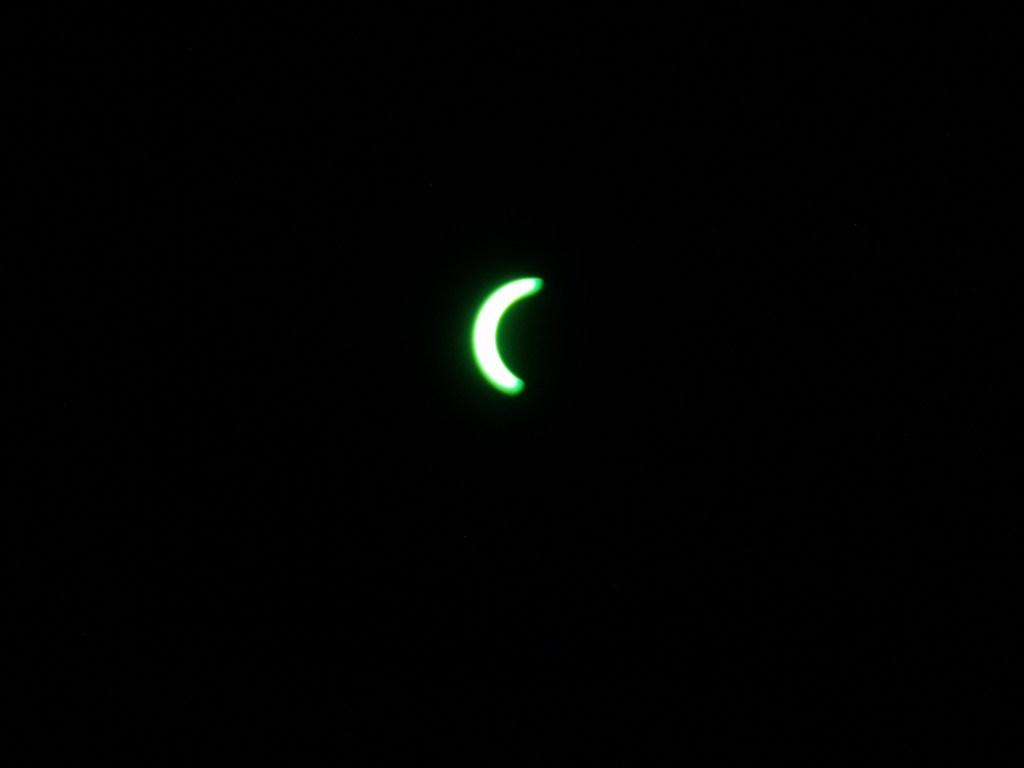
Image taken with Celestron Refracting Telescope with solar filter.Image of eclipse captured with Canon T7i 19-250mm Lense with solar filter.Image of eclipse captured with Canon T7i 19-250mm Lense with solar filter.
As the eclipse approached totality, the landscape was transformed into a mural of twilight. On the ground crescent shaped shadows filtered through the leaves of a tree near my observation location at the Cincinnati Museum Center.
Crescent shaped shadows from the eclipse sun filtering through the leaves of a tree surrounding a Moon pie box, my snack of choice during eclipse observing.
As the sky above the Kuntry Klucker darkened, the solar lights on my grape arbor turned on, and the flock members stranded in the yard found themselves in the panorama of momentary darkness and confused before the sunlight returned as fast as it had receded.
Below are stills from a time-lapse camera in the pen recording the flock’s reaction to the eclipse. The camera shows that it got dark for a few moments, but not long enough for the flock to make their way up the ladder to the coop. Instead, they froze in place as sudden momentary darkness fell, only to be subsumed into increasing daylight.
The flock’s response was dumbfounded confusion as evening came on suddenly, not giving them much time to react. I hoped they would go to roost to have the sunlight return, rendering their efforts mute. Although I did not get the pics I anticipated, I captured some stunning images of the celestial event. Below is a chronological order of the eclipse as the moon traversed the sun.
At the Cincinnati Museum Center, the darkened sun yielded incredible photos of the landscape during the fleeting period of totality, allowing me several seconds of naked-eye observing.
Cincinnati Museum Center at the inception of the eclipse.Cincinnati Museum Center illuminated by indoor lighting at the peak of totality.Diamond ring eclipse taken with Celestron Refracting Telescope.
This solar eclipse was an incredible celestial event that I am glad I had a chance to observe. While the flock’s reaction was subdued – due to the diminished totality and location at home – the images I captured in Cincinnati are incredible.
Below is a slideshow of the dinosaurs on display. Noteworthy, and one of the reasons I chose this location is the only mounted Torvosaurus in the world is at the Cincinnati Museum Center.
I am a published author, multi-disciplinary writer, and web content creator. If you like this post, please visit my online writing portfolio and my other blogs.
Dirty vents are not only unattractive but a sign that something is wrong. In this post, I will discuss the reasons for dirty vents in chickens and how to treat conditions that cause this problem.
A healthy Buff Silkie fluffy bottom.
A chicken is not supposed to have a dirty vent; underlying conditions and environmental factors cause excrement to be runny, sticking to feathers surrounding the vent and causing a messy and unsightly situation. Some conditions are as simple as placing supplements in the water; others require a closer examination and treatment.
Worms:
Treating worms in a bantam cochin hen with SafeGuard.
One of the most common reasons for dirty vents in chickens is worms. Intestinal worms wreak havoc on the digestive tract, causing malnutrition and dirty vents. Worm infections are evident in dropping.
A chicken’s body can withstand a baseline worm parasitic load without ill effects. Once the parasite load exceeds the point at which the body can manage the load, health problems will result. Worms visible in the droppings or on the dropping board when cleaning the coop are a reliable indication that the parasitic load has reached a critical point. At this point, it is advisable to treat the flock for worms. Once the flock has completed treatment, dirty vents associated with worms will resolve.
I have a post and YouTube videodetailing the correct dosage and procedure for worming a flock.
Mites and Lice:
Treating mites and lice in a Silver Lace Wyandotte Hen with Eprinex.
Like worms, mites and lice will deplete a chicken of energy, leaving them anemic and lethargic. Dirty vents are one of the first indications that an individual may be dealing with a mite and lice infestation. To determine if mites and lice are present, pick up the chicken and examine the vent area for small dark brown to red bugs crawling on the skin; these are red fowl mites and are detrimental to the individual. They multiply fast and will suck the lifeblood out of a chicken in a short about of time.
Lice live in the feathers of a bird and will cause dirty vents and extreme discomfort to the individual. Like mites, lice will congregate around the vent area, appearing as light brown or tan bugs crawling on the feathers. In a progressive lice infestation, bundles of eggs will be visible on the quill near the skin.
Treatment for mites and lice is simple and requires one topical product to address both parasites. I have a blog post and YouTube Video demonstrating the correct dosage and procedure for treating mites and lice using my flock as examples.
Egg laying Issues:
Silkie eggs on a nesting pad.
Egg-laying issues such as soft-shelled eggs can result in dirty vents in hens. During the formation of the egg, reproductive medullary bone deposits form the shell around the yolk cell. When the calcium supply in the hen’s body is low, soft-shelled eggs cause the egg to break during the laying phase.
Adding supplemental calcium to the flock’s diet will address soft-shelled eggs. Most poultry feed contains calcium for hard shells that the hen’s body uses quickly. Oyster shells available at farm/feed stores add valuable long-absorption calcium that the hen’s body will process over 24 hours, providing the resources for hard shells that do not break during laying.
Oyster shells for stronger eggshells.
Offer oyster shells in a separate container in the pen or where the flock eats. The hens can determine the amount of supplemental calcium their body requires and will consume from the available oyster shells. Keep oyster shells available for laying hens during active laying periods. The hen’s body will use the long-absorption calcium to produce hard eggshells, reducing dirty vents.
Heat-Related Issues:
Apollo and Aphrodite (White Crested Polish hens) enjoying a summer evening sampling from a pot of marigolds.
A hen will drink more water during excessive heat and high humidity. The unbalance in the gut biome results in loose excrement and dirty vents. Adding electrolytes and probiotics to the flock water will address this issue. Not all electrolytes are alike; purchase a probiotic marketed for use in poultry. While watermelon and cucumbers are a nice treat for a hot summer day, they lack the essential electrolyte balance that a hen’s body needs during extreme heat.
A product I readily provide for my flock is Rooster Booster Vitamins and Electrolytes, found at Tractor Supply. Containing Lactobacillus, this product promotes a balanced gut biome during extreme heat. Since I have started using this, dirty vents due to summer temperatures have notably decreased.
Vent Gleet:
Unlike parasitic or environmental causes, vent gleet is an inflammation of the cloaca (the vent), causing an unsightly condition called cloacitis. The most obvious symptom of cloacitis is a yellowish discharge from the vent that sticks to the feathers around the vent area and presents with a foul odor. In addition to the aforementioned, a hen will have a bloated abdomen, and the vent area can appear red and inflamed.
Treatment for vent gleet involves a two-pronged approach with probiotics – Rooster Booster administered in water mentioned above – and anti-fungal cream. Begin treatment by isolating the affected hen from the flock. Wash the vent area with warm water and mild soap to remove the debris and dried excrement from the feathers. Carefully cut away feathers from the vent if necessary.
Monistat 7-day cream – treatment for yeast infections in women – works well for vent gleet in hens. For hens, apply a pea-sized amount of the cream externally around her vent daily. Repeat for 5-7 days or until the redness has subsided around the vent. Continue to keep the hen in isolation for treatment till her condition improves. In my experience, vent gleet treated with probiotics and anti-fungal cream will resolve in two weeks.
Buff Orpington hen’s healthy fluffy butt.
I am a multi-disciplinary writer, published author, and web content creator. If you like this post, consider visiting some of my other blogs.
If you have any questions or comments, please leave a comment or reach out to kuntryklucker@gmail.com. I check my email daily and will get back to you as soon as I can.
Thanks for reading! Till next time, keep on crowing!
Image Credit: Noelle K. Moser. Tyrannosaurus Rex. Perot Natural History Museum. Dallas,TX
I recently wrote an article examining medullary bone found in a tyrannosaurus rex fossil and how chickens were used to help determine the gender of the fossil. While I focus on backyard chicken-related topics on this blog, I thought my fellow backyard chicken enthusiasts would find this subject matter meaningful and help further understand hens and their biological processes during laying. While this article is scientific, I hope it will bring an appreciation to the marvelous workings and the incredible design of mother nature and our backyard hens.
Image Credit:Noelle K. Moser. Tyrannosaurus Rex. Perot Natural History Museum. Dallas, TX.
Since the discovery of the holotype Tyrannosaurus Rex in 1902 by Barnum Brown in the Hell Creek Formation of Montana, no other dinosaur has captured the human imagination. Upon its discovery, Barnum Brown wrote this to Henry Fairfield Osborn, friend, and curator of the American Museum of Natural History in New York. “It is as if a child’s conception of a monster had become real and was laid down in stone” (Randall, 2022).
Image Credit: Noelle K. Moser.“Walter” Tyrannosaurus Rex. The National Museum of Natural History. Washington, D.C.
Though most of the skull and tail were missing, everything about this monster would overwhelm the human imagination. The specimen that Brown found stood 13 feet tall at the hips, its jaws measured over 4 ft in length, and would have weighed 6-8 tons. This was the only known specimen to science and was given the appropriate name Tyrannosaurus Rex by Henry Osborne in the fall of 1902. Tyrannosaurus which means “tyrant lizard” in Greek and “rex” which means “king” in Latin; Tyrannosaurus Rex, the king of the lizards, no other name would capture in two words the sheer power contained within this beast.
We crave to learn all we can about the largest therapod dinosaurs that ever existed. Over the past one hundred years, we have gleaned a wealth of information from the fifty Tyrannosaurus Rex specimens currently housed in museums around the world.
Image Credit: Noelle K. Moser.Tyrannosaurus Rex and an Alamosaurus (a titanosaurian sauropod). Perot Natural History Museum. Dallas, TX.
Tyrannosaurus rex gender is a tribute to the founder of the specimen. Sue (FMNH PR2081), discovered in 1990 by Sue Hendrickson, the largest and most complete Tyrannosaurus-rex, is aptly considered female. Stan (BHI 3033), discovered in 1987 by Stan Sacrison, containing the most complete skull, is considered male.
Stan and I. Perot Natural History Museum. Dallas, TX.
While these attempts to assign a pronoun to tyrannosaurus specimens offer a sense of personhood, a link to the actual gender of tyrannosaurus rex specimens rests in the most unlikely of places – chickens.
Smaug: (Silver Lace Wyandotte Rooster). Chickens have much in common with their ancestor, Tyrannosaurus Rex. By understanding chickens, we can much better understand T-rex.
Birds are dinosaurs. Specifically, birds are a type of therapod rooted in the dinosaur family tree that contains the same ferocious meat-eaters as T-rex and Velociraptor (Brusattee, 2018). Birds lie within an advanced group of therapods called parades – a subgroup of therapods that traded in the brute body plan of their gargantuan ancestors for larger brains, sharpened acute senses, and smaller, lighter bodies that permitted progressive lifestyles above their land-dwelling relatives. Anatomically, chickens and tyrant theropods have many common characteristics that define the body plan of these magnificent creatures.
Air Sacs:
Birds achieve flight by two fundamental anatomical adaptions – feathers and hollow bones. While feathers provide the ability to soar above our heads, the real secret lies in their bones. Saurischians – the line of the dinosaur family tree containing both the giant sauropods and therapods – possessed skeletal pneumaticity – spaces for air in their bones. Skeletal pneumaticity produces hollow bones that lighten the skeleton, allowing for a wide range of motion. For example, without pneumaticity, sauropods would not be able to lift their long necks, and giant therapods would lack agility and ability to run because their skeletons would be far too heavy. In birds, air sacs are an ultra-efficient lung oxygen system. This flow-through inhalation and exhalation provides the high-energy birds need during flight. Evolving one-hundred million years before birds took flight, this is the true secret to their ability to take to the skies.
The signature feature of birds – feathers – evolved in their ground-dwelling theropod ancestors first noticed in Sinosauropteryx, the first dinosaur taxon outside parades to be found with evidence of proto-feathers.
Image Credit: Sinosauropterys fossil with evidence of proto-feathers.
The earliest feathers looked much different than the quill feathers of today. Initially, feathers evolved as multipurpose tools for display, insulation, protection for brooding, and sexual dimorphism. These early feathers were more like a fluff – appearing more like fur than feathers – consisting of thousands of hair-like filaments. Silkie chickens possess feathers that lack barbs that form the classic shape we associate with feathers. The first proto-feathers in dinosaurs were much like the texture of feathers on the Silkie. The breed name “Silkie” is derived from this unique feather texture.
Black Silkie hen. Silkie chickens possess hairlike filament feather texturefrom which their name is derived.
Wings:
While large theropods like Tyrannosaurus Rex noticed diminishing forearms throughout the Mesozoic, other dinosaurs like Zhenyuanlong and Microraptor traded in forearms for wings.
Image Credit:Life restoration of Zhenyuanlong, a small theropod that possessed feathered wings but could not fly.Image Credit:Microraptor, feathered dinosaurs that possessed wings on both forelimbs and hindlimbs and could glide from treetop to treetop.
Despite possessing wings, these feather-winged dinosaurs could not fly. Their bodies were far too heavy to achieve flight observed in birds today. Aboral dinosaurs glided from tree to tree or used their wings to fly flop on the ground. These first fully feathered dinosaurs also used their plumage as display features to attract mates or frighten enemies, as stabilizers for climbing trees, and protection and warmth for brooding offspring.
As the body plan for feathered dinosaurs continued to fine-tune the use of feathers, flight happened by accident. More advanced paravians had achieved the magical combination to achieve flight – large wings and smaller bodies (Brusatte, 2018). As the body plan of birds continued to refine, they lost their long tails and teeth, reduced to one ovary, and hollowed out their bones more to lighten their weight. By the end of the Cretaceous, birds flew over the heads of Tyrannosaurus Rex and other land-dwelling dinosaurs. Sixty-six million years ago, the birds and T-rex witnessed the Chicxulub impact that brought the Mesozoic to a close. While therapods with large and expensive body plans died out, birds sailed through to the Cenozoic. For this reason, we say that all non-avian dinosaurs are extinct, but dinosaurs are still very much with us – we call them birds.
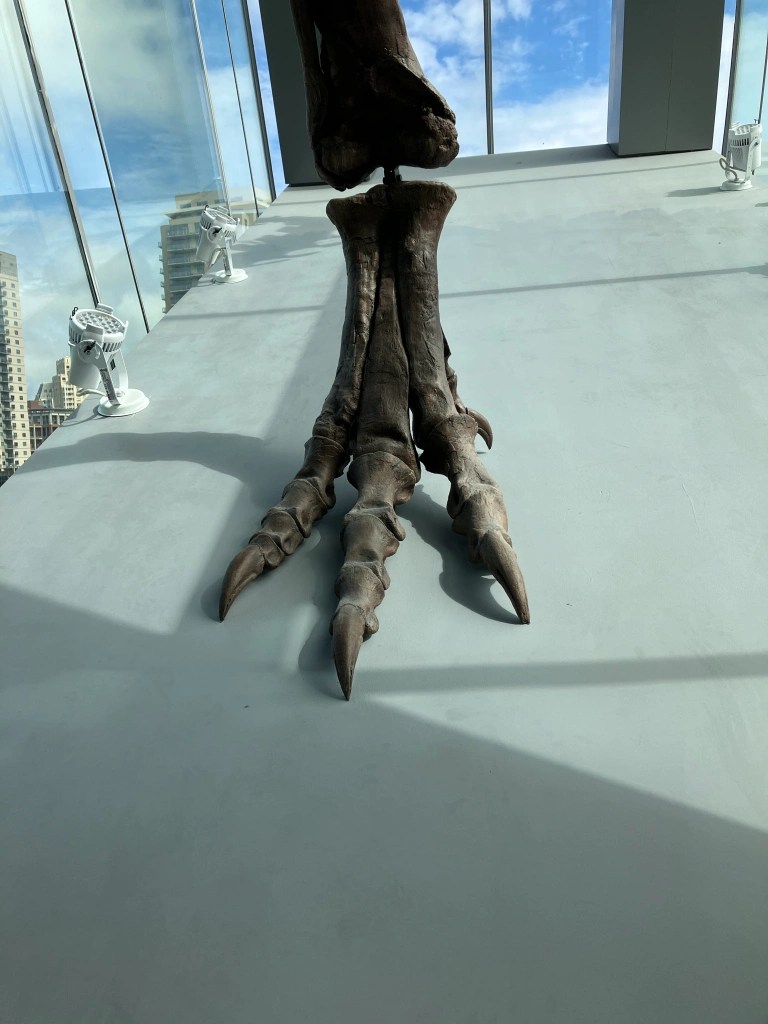
Dignitary Locomotion in feet:
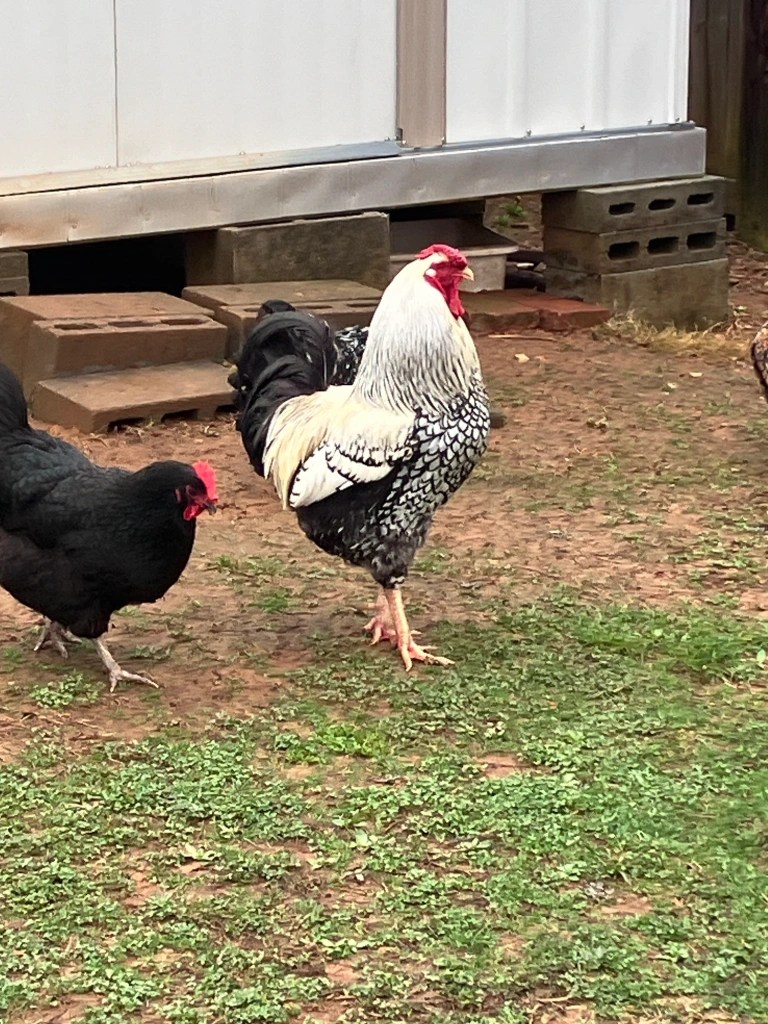
Foot of Stan (Tyrannosaurus Rex specimen 3033). Stan walked with digitigrade locomotion.Smaug; Silver Lace Wyandotte Rooster. Like Stan, Smaug walks with digitigrade locomotion.
Theropod means “beast foot”, and for good reason. Adaptions in the metatarsals (foot bones) of theropods allowed them to walk with a digitigrade stance. Unlike humans that walk plantigrade (flat-footed), tyrannosaurus rex walked on their toes. Digitigrade motion has many benefits, as it allows the animal to run fast, increased agility and splayed toes offer better balance on muddy or slippery surfaces. Birds are coelurosaurs and inherited these anatomical characteristics from their theropodian ancestors. Chickens like tyrannosaurus rex walk with digitigrade locomotion, making them swift runners on land and providing excellent balance and stabilizing ability when resting on roosts.
Wish Bone:
Image Credit: Noelle K. Moser. Walter (tyrannosaurus rex) possessed a furcula or “wish bone”. The Furcula can be seen in the image that attached to the forelimbs.National Museum of Natural History. Washington, D.C.
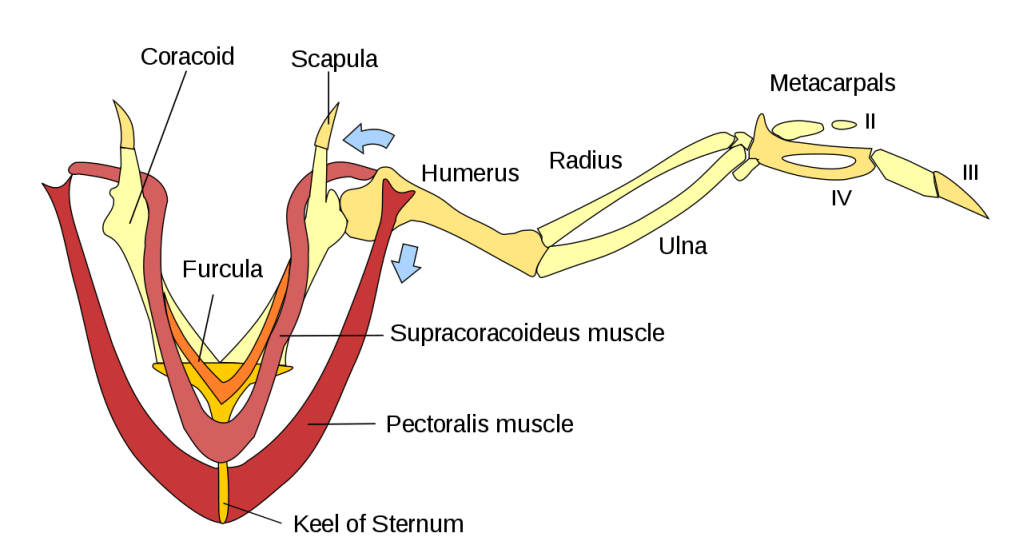
The Thanksgiving tradition of “the lucky break” of the turkey wishbone is possible thanks to theropods who passed this anatomical trait to birds. In Tyrannosaurus rex, the furcula provided strength and power to the diminished but muscular forearms. In birds, the furcula fused from the two clavicle bones and function to strengthen the skeleton in the rigors of flight.
Image Credit: Coracoid and supracoracoideus muscles in a bird’s wing.The furcula provides support to these muscle systems in flight.
In conjunction with the coracoid and the scapula, it forms a unique structure called the triosseal canal, which houses a strong tendon that connects the supracoracoideus muscles to the humerus. This system is responsible for lifting the wings during the recovery stroke in flight.
S-shaped Skeleton:
Image Credit: Noelle K. Moser.Coelophysis, basal coelurosaur with an S-shaped skeleton possessed by both T-rex and modern birds. Perot Natural History Museaum. Dallas TX.
Chickens and all birds have a unique body plan visible in the skeleton. Comparing the skeleton of Tyrannosaurus rex with modern birds will yield similar anatomical attributes. T-rex has a skull attached to a spine, ribs, and two legs with splayed toes providing swift bipedal locomotion. Focusing on the appendicular skeleton, we see that T-rex and modern birds have an S-shaped skeleton. The reason is that body plans do not have unlimited parts from which evolution can choose but rather build upon earlier ancestral shapes (Horner, 2009).
While birds lack teeth and long tails, the genes to manipulate these features still exist in the gene sequence of birds. In 2006, researchers at the University of Wisconsin published a report on manipulating the genes responsible for teeth in chicken egg embryos, resulting in buds that would later develop into crocodile-like teeth. The embryos were not allowed to hatch, but this research shows that the genes related to “dinosaur-like” features still exist within the genes of chickens; mother nature has just switched them off.
While it’s easy to say these features are of birds, they are not attributes of birds at all but are of dinosaurs.
Image Credit:Noelle K. Moser. Close up of teeth on tyrannosaurus Rex. Inside the genome of birds lie the genes for teeth and long tails. Mother Nature just has them switched off. Perot Natural History Museum. Dallas, TX.
By studying the anatomy of chickens and comparing these findings with the tyrannosaurus Rex skeleton, we see many of the same features. As we look closer, it becomes increasingly clear that T-rex is an overgrown chicken. Since the backyard chicken and the mighty T-rex have these characteristics in common, it stands to reason that these similarities are transferable to the study of tyrannosaur fossils, sexual dimorphism, and gender.
Medullary Bone in Egg Laying Hens:
Polish trio roosting on macramé swing suspended under my grape arbor.
In 2006, while studying bones of a newly discovered tyrannosaurus Rex, B-rex (Bob Rex, a tribute to the finder of this tyrannosaurus skeleton, Bob Harmon), a spongy-like mesh of tiny transparent flexible tubing was visible under a microscope. In attempts to determine the nature of this bone material, researchers turned to the closest living relative of the mighty T-rex – birds, specifically hens.
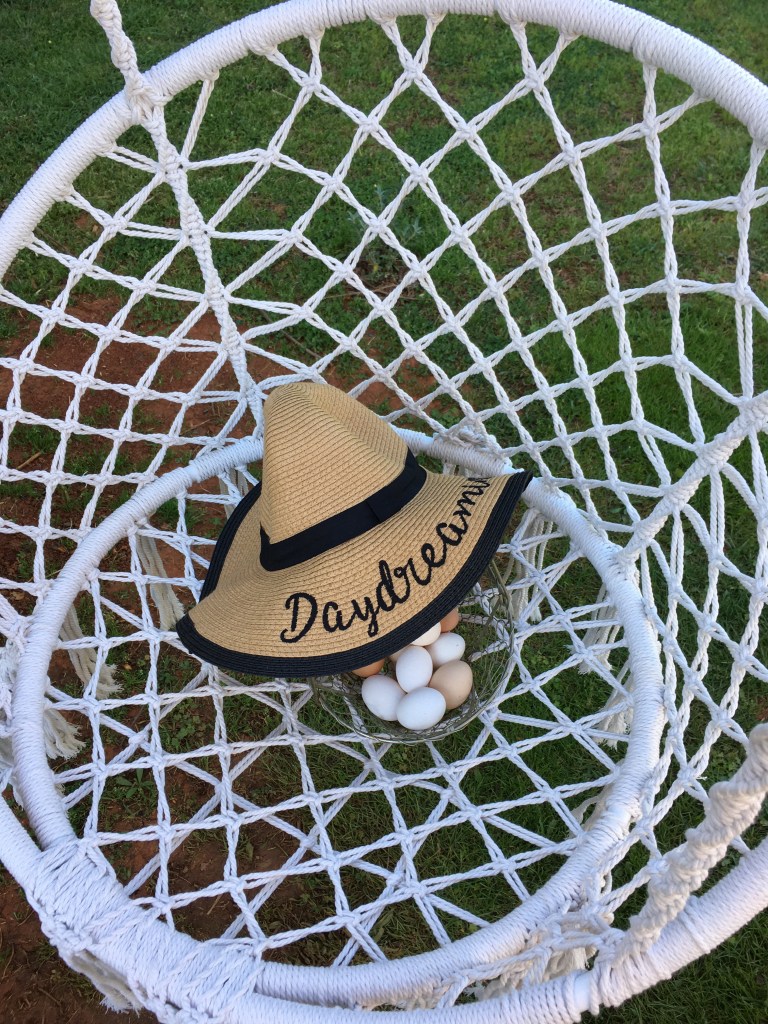
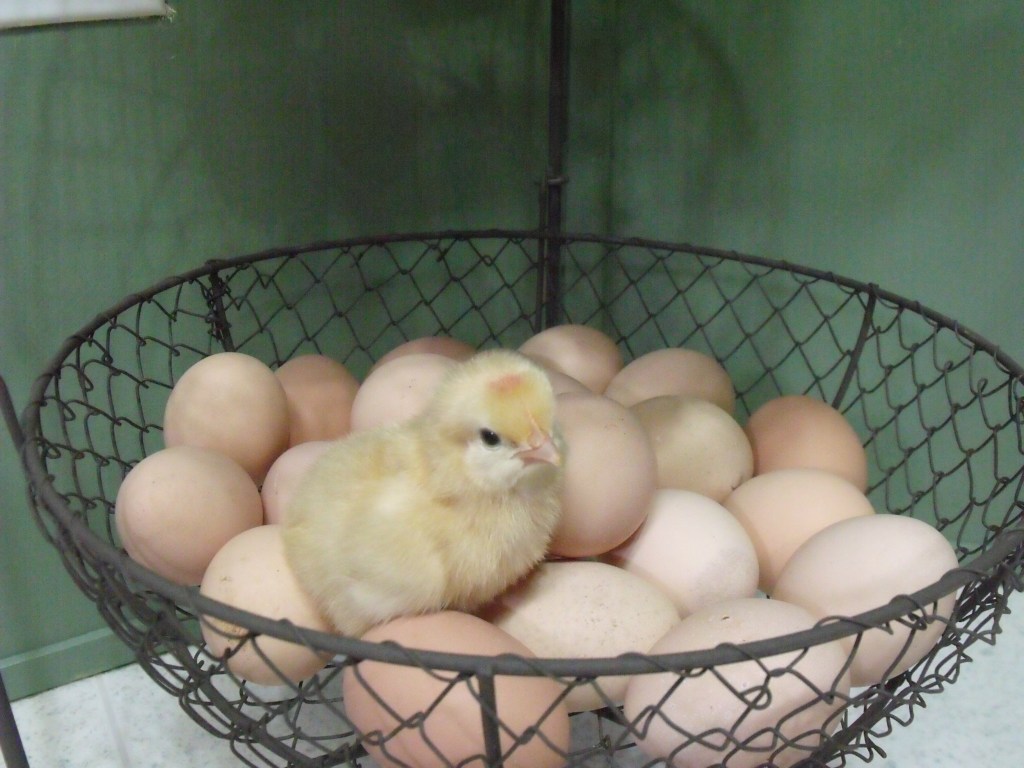
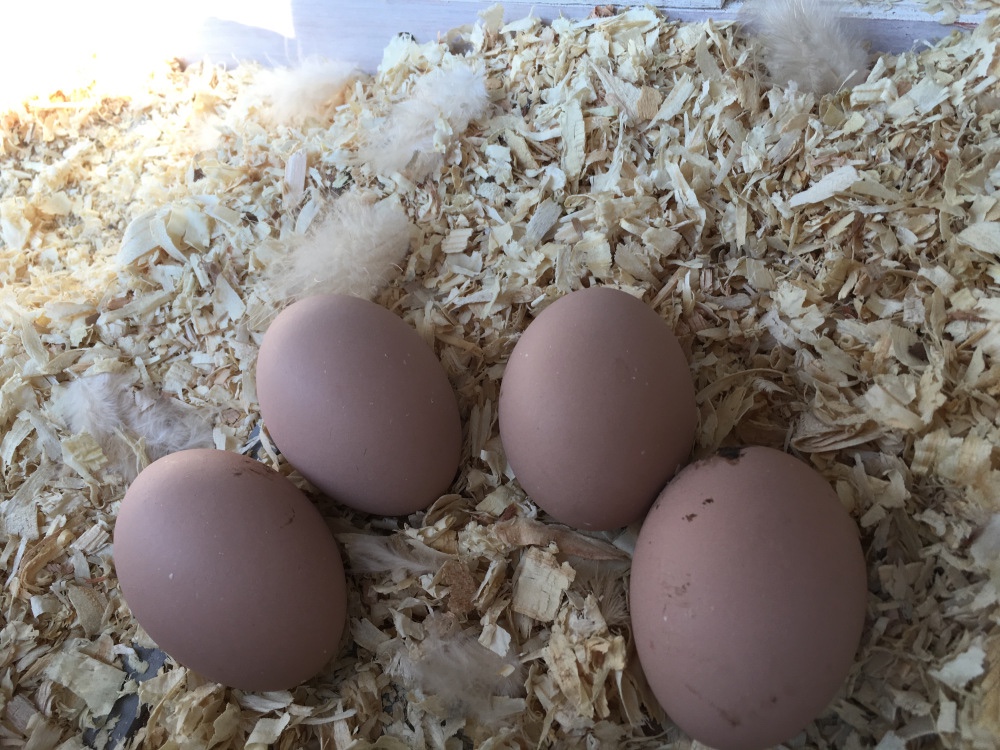
Buff Orpington chick resting amongst farm fresh eggs from my backyard flock.
This bone medullary bone is a reproductive tissue found only in living female actively reproducing hens. As a hen advances to maturity, marked by egg laying, her body will produce medullary bone and continue to produce this bone throughout her laying duration. In some birds, this is seasonal in hens such as chickens; medullary bone is produced from her first egg at about 20 weeks of age throughout her subsequent laying lifetime. This reproductive bone tissue serves as mobilized calcium storage for the production of eggshells (Larson and Carpenter, 2008).
Buff Orpington eggs from my backyard chicken flock.
The hens in my backyard flock possess the same medullary bone discovered in B-rex. When my hens lay eggs, the shells that protect the egg are medullary bones stored in their bones. As she continues the lay year after year, this reproductive tissue replenishes. Since hens lay several eggs a week vs only seasonal, chicken feed is fortified with additional calcium to extend the egg potential of laying hens. While man’s attempts to lend support by increased calcium allow hens to produce stronger eggshells, the fundamentals are the same. My hens produce medullary bone because it is an attribute that they inherited from their ancestor, tyrannosaurus rex.
Buff Orpington Hens, White Crested Polish hen, and Mottled Cochin Rooster. My hens-related to tyrannosaurus rex-possess the same reproductive medullary bone as that of B-rex.
Unlike other bone types, medullary bone has no other function. It exists solely as a calcium storage for the production of eggshells. The formation of this reproductive tissue osteoclasts in the femur and tibiotarsus bones begins to deposit about 1 or 2 weeks before lay.
It’s a Girl!!!
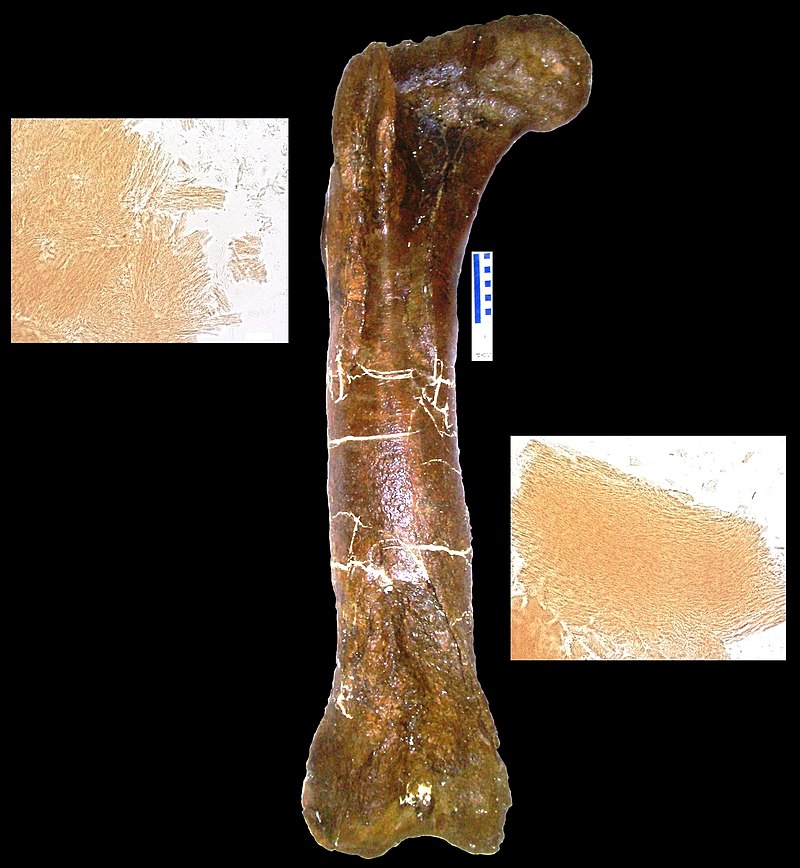
Image Credit:Femur of MOR 1125 where osteoclasts of medullary bone were found.
The discovery of medullary bone found in the femur of MOR 1125, triggered by the increase of estrogen in her body, signified that this tyrannosaurus rex was not only a female but pregnant.
Living near the end of the 140-million-year reign of the dinosaurs, B-rex moved through the lush forests of a delta that fed several winding rivers in the Hell Creek Formation. She hatched 16 years prior, wandering about this tropical landscape, growing to maturity and preparing to mate.
Image Credit: Noelle K. Moser. Mesozoic plants at the National Botanical Gardens in Washington. D.C. Bob-rex would have seen many of these same plants as she wondered the tropical regions of the Hell Creek Formation sixty-eight million years ago.
Whether or not this was her first mating season, we do not know. Perhaps she died without ever producing offspring, or she was preparing to be a mother for the first time. We know that sixty-eight million years ago, she died young of unknown causes, and her burial was quick because her skeleton was well preserved.
The discovery of B-rex is the holy grail for paleontology and dinosaur studies. We can now assign gender and learn more about the intimate lives of tyrannosaurus rex specimens and other medullary bone-bearing dinosaurs through the lessons of B-rex, the pregnant T-rex.
I hope this post was resourceful and brought more understanding to egg laying in backyard hens and where the eggshell is derived. By understanding the ancestors of our backyard flocks, we can better understand their biological processes.
If you have any question, feel free to post in the comment or you can e-mail me: kuntryklucker@gmail.com
Thanks for reading. Till next time, keep on crowing.
Tyrannosaurus Rex and I. Perot Natural History Museum. Dallas, TX.
~ Noelle K. Moser ~
Resources:
Brusatte, Steve. The Rise and Fall of the Dinosaurs: A History of Their Lost World. William Marrow of Harper Collins Publishers. New York, NY. 2018. Pgs. 282, 298, 299.
Harris P Matthrew, Hasso M Sean, Ferguson W.J. Mark, and Fallon F John. The Development of Archosaurian First-Generation Teeth in a Chicken Mutant. Current Biology Vol. 16, 371-377, February 21, 2006. URL
Horner, Jack. How to Build a Dinosaur. Plume, Published by Penguin Group. London, England. 2009. Pgs. 8,9,57, 58, 60.
Larson, Peter and Carpenter, Kenneth. Tyrannosaurus Rex: The Tyrant King. Indiana University Press. Bloomington, Indiana. 2008. Pgs. 40, 93, 95, 98.
Randall K., David. The Monster’s Bones: The Discovery of T. Rex and How it Shook Our World. W. W. Norton & Company, Inc. New York, N.Y. 2022. Pgs. 153.
As a dangerous winter storm will soon impact the Northern Hemisphere, people are preparing for impacts of snow, ice, and severe cold temperatures. Store shelves are picked clean, and pet and livestock owners are stocking essentials for their animals till the storm relinquishes its grip.
During this time, many backyard chicken keepers will need to confine the flock to the pen and coop. While the flock is cooped up, providing stimulating activities will assist the flock in weathering the worst of Old Man Winter.
The Kuntry Klucker and Henwarts covered in a blanket of freshly fallen snow.
When winter storms impact our region, I like to prepare my flock a homemade flockblock for my hens and gents. All ingredients are available in most home pantries or easy to obtain in stores. Over the past decade, I have had much success with this recipe, and the girls greatly enjoy the break from the winter blues with this boredom buster.
Ingredients:
2 cups of scratch grains (cracked corn is also good)
1 cup layer feed (pellets or crumbles)
1 Cup old fashioned oats
1/2 cup flax seed (ground or whole)
1/4 cup flour (whole wheat is best)
1 teaspoon ground cinnamon
1/2 teaspoon cayenne pepper
3 eggs (shells included)
1/2 cup blackstrap molasses
1/2 coconut oil
1 cup raisins (dried cranberries, blueberries, or bananas will also work)
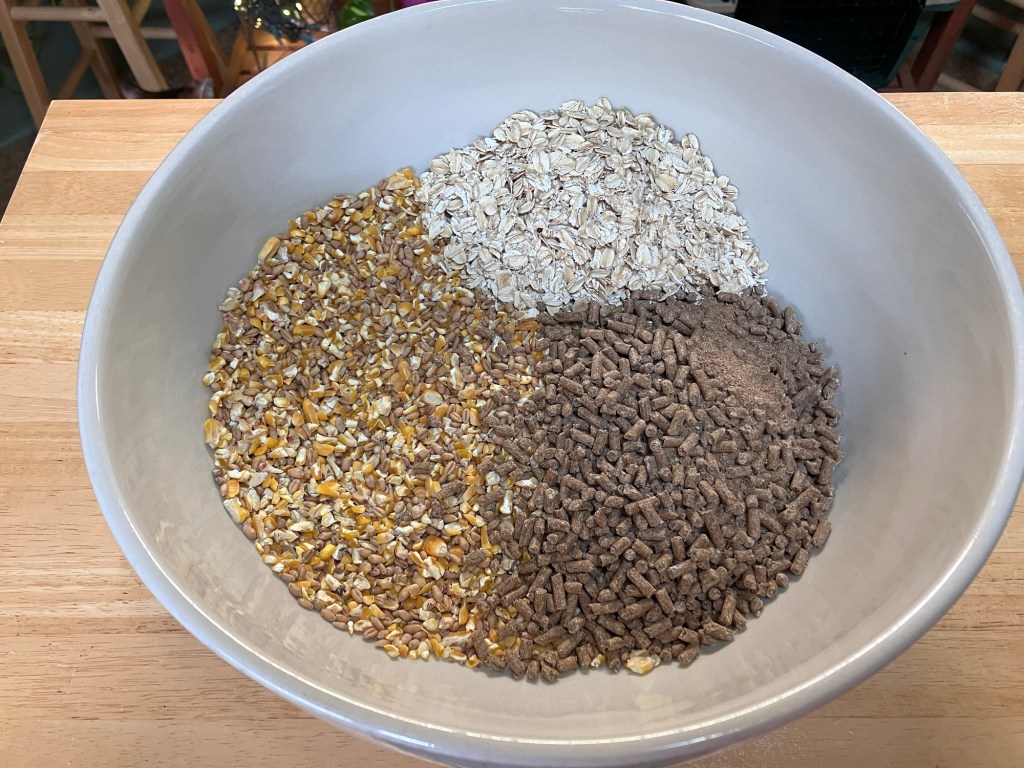
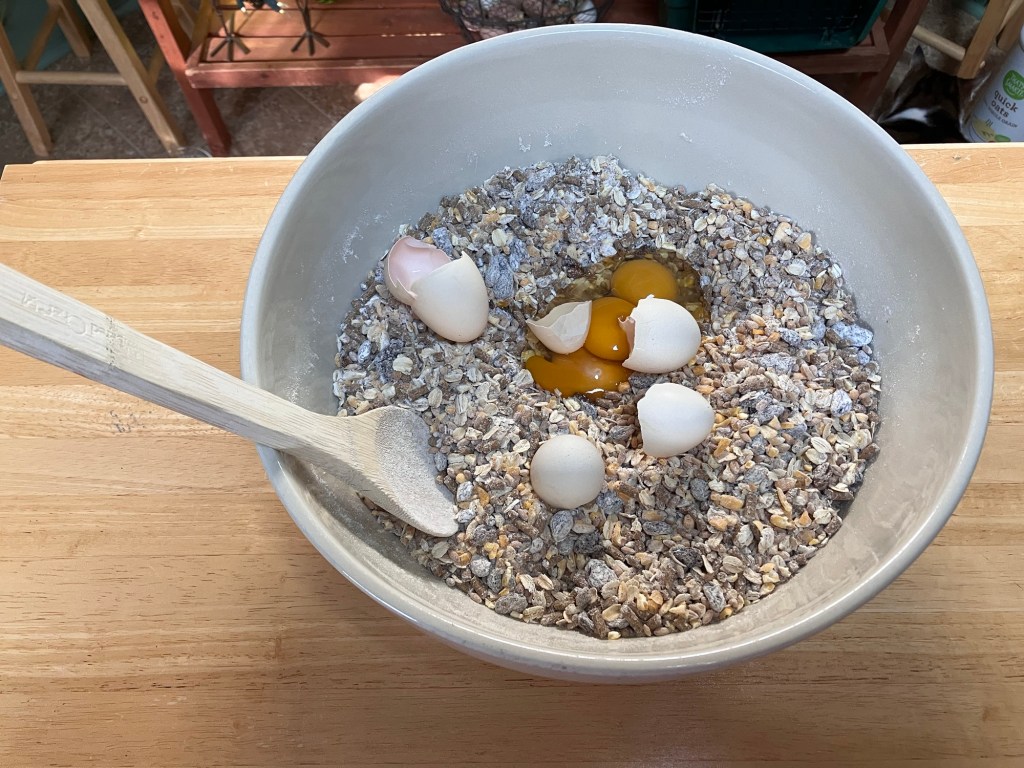
Begin by placing the scratch and layer feed in a large bowl.
Add the oats.
Next, add the spices. The cinnamon aids in respiratory health in the cold weather and the cayenne pepper helps circulation.
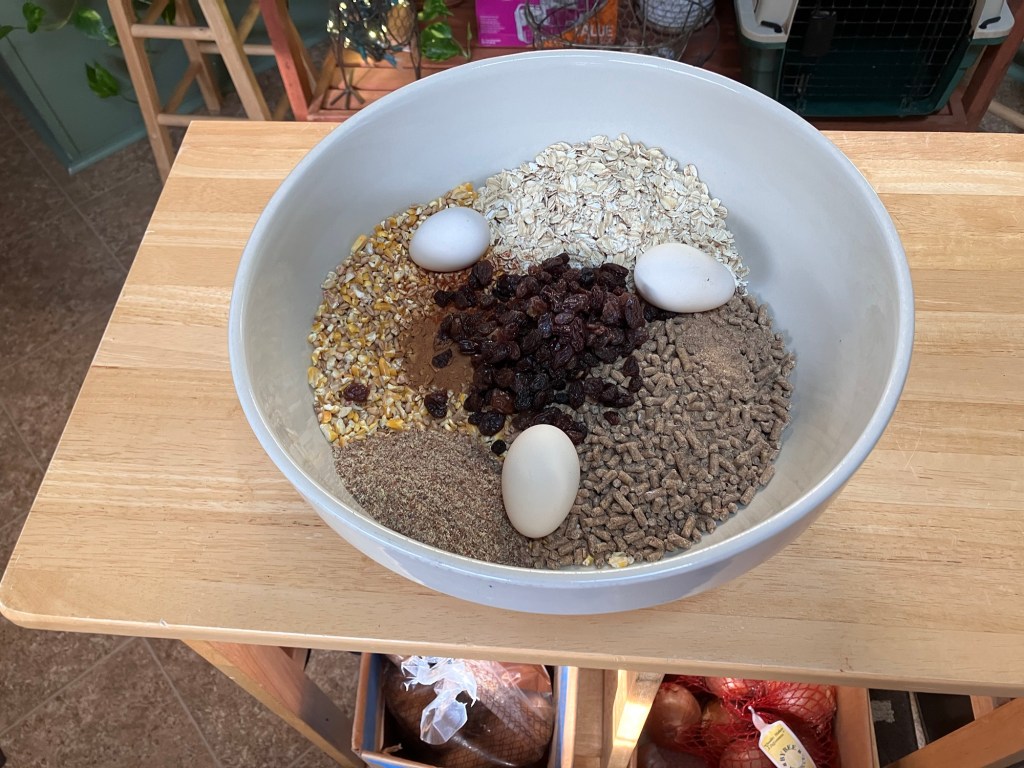
Next, add the raisins. The raisins will promote pecking as they look like tasty bugs, plump after baking.
Mix all the dry ingredients together well. After mixing, add the flour and the eggs. Crush up the eggshells into smaller pieces when mixing. The eggshells will dehydrate while baking adding calcium to the final product.
After mixing the eggs in well, add the blackstrap molasses and coconut oil.
Continue to mix. As the molasses and coconut oil combines, the mixture should be sticky and hold a ball shape when compressed in the hand.
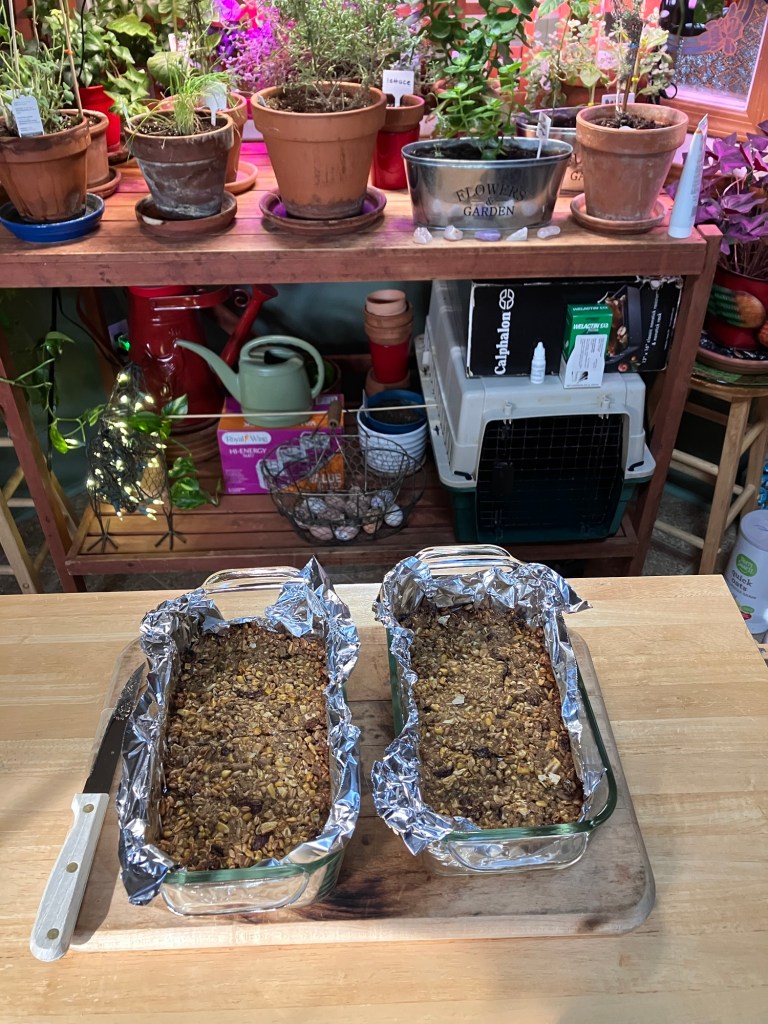
Select an oven baking pan and line with foil. Spray the foil with a cooking spray for easy release after baking.
For a large flock block, select a square baking dish. If you prefer to hang the flock block in the pen, bread pans work best because it is roughly the size of a standard suit feeder. For free-hang, a round pie dish works best. Poke a hole in the area where rope or twine be will inserted. You can also double the recipe to create a large flock block to fill a 9 x 13 baking dish.
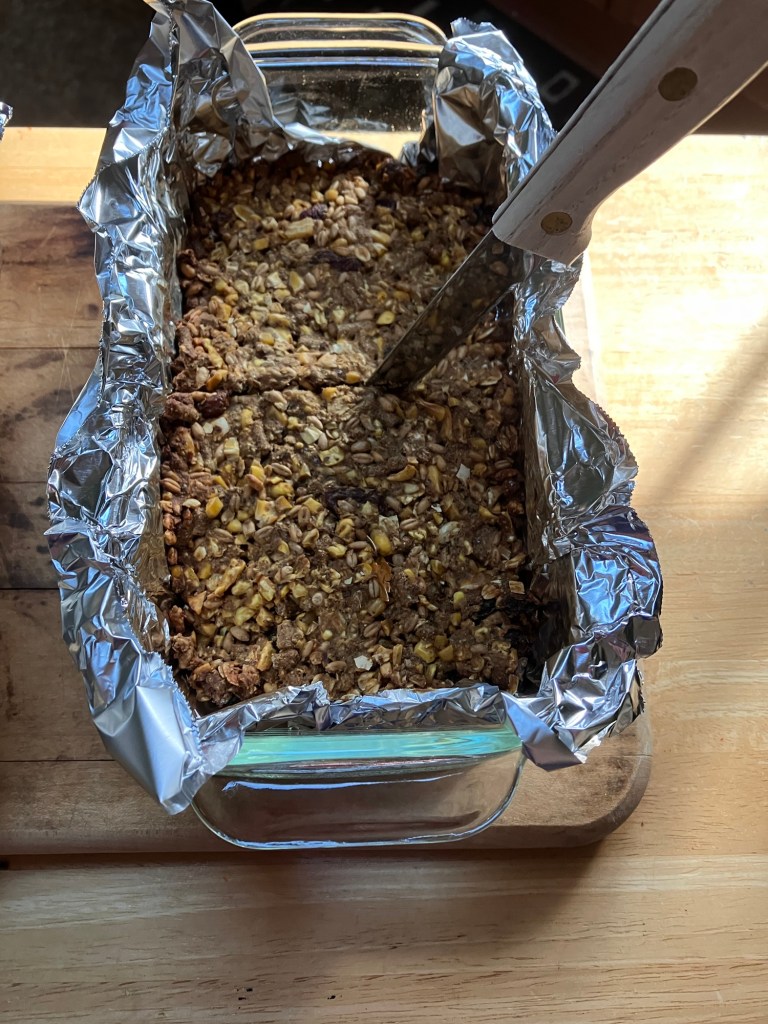
Press the mixture into the chosen baking dish. Press hard to compact the mixture as much as possible. This will result in a dense flock block that will not fall apart when removing from the pan.
Preheat the oven to 325 degrees. Place the baking dish or dishes into the oven and bake for 35 minutes.
After baking, cut the flock block into the desired size. If you plan to hang the flock block in a suit feeder, a bread pan flock block can be cut in half, into two equal sizes that will fit nicely. If you prefer a larger flock block to free-hang in the pen, cut a hole for the rope of twine.
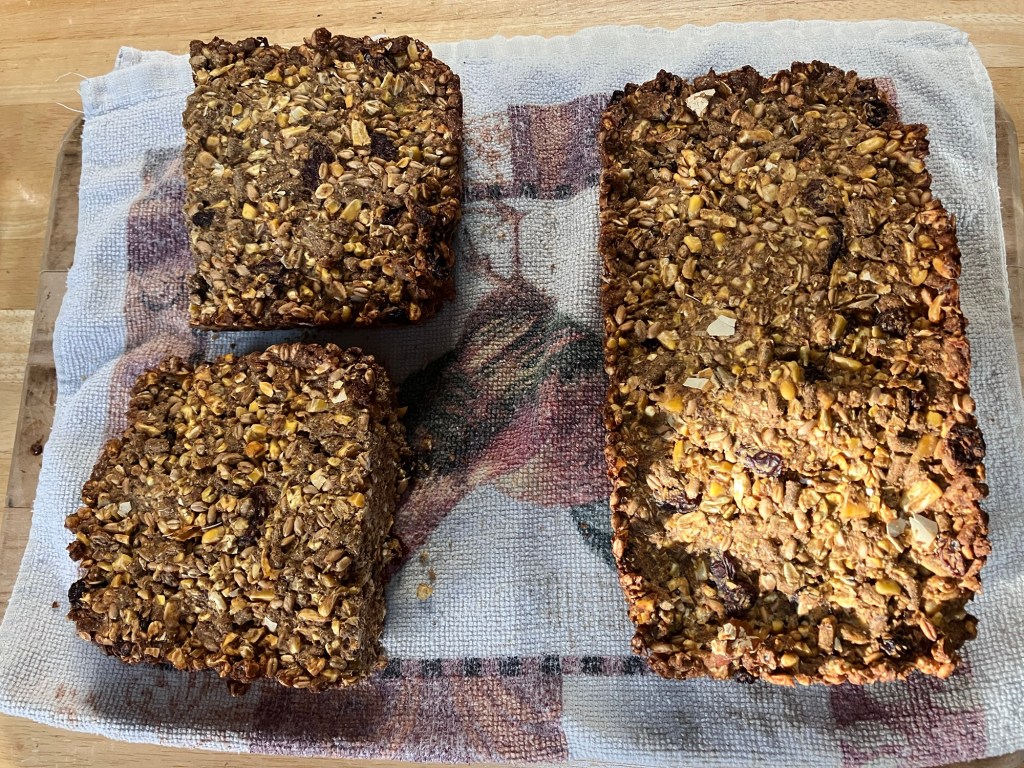
Flock block cut to fit a suit feeder.
Do not try to remove the flock block from the baking pan till cool. Removing the flock block while warm will increase the chance that it will fall apart. As it cools, the flock block will harden making removal simple.
Once the flock block has cooled, remove by lifting the foil out of the pan and turn over. This recipe will freeze for several months when wrapped in plastic wrap and foil.
Wishing everyone the best. Stay safe during this historic winter storm and cold weather and remember to give your flock boredom busters to help them bide the time while cooped up.
If you enjoyed this post, please peck the subscribe button.
If you like this blog, please consider visiting some of my other sites and online writing portfolio.


 3. Bring up your young well. They are the next generation, and the key to your legacy.


