As a dangerous winter storm will soon impact the Northern Hemisphere, people are preparing for impacts of snow, ice, and severe cold temperatures. Store shelves are picked clean, and pet and livestock owners are stocking essentials for their animals till the storm relinquishes its grip.
During this time, many backyard chicken keepers will need to confine the flock to the pen and coop. While the flock is cooped up, providing stimulating activities will assist the flock in weathering the worst of Old Man Winter.
The Kuntry Klucker and Henwarts covered in a blanket of freshly fallen snow.
When winter storms impact our region, I like to prepare my flock a homemade flockblock for my hens and gents. All ingredients are available in most home pantries or easy to obtain in stores. Over the past decade, I have had much success with this recipe, and the girls greatly enjoy the break from the winter blues with this boredom buster.
Ingredients:
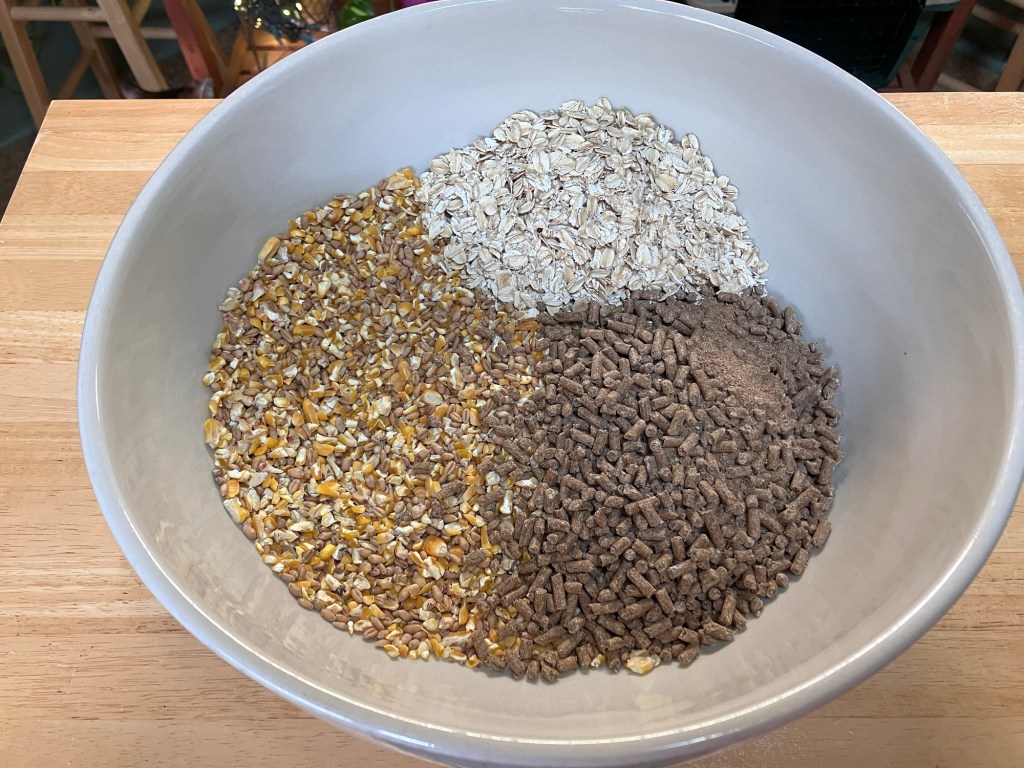
2 cups of scratch grains (cracked corn is also good)
1 cup layer feed (pellets or crumbles)
1 Cup old fashioned oats
1/2 cup flax seed (ground or whole)
1/4 cup flour (whole wheat is best)
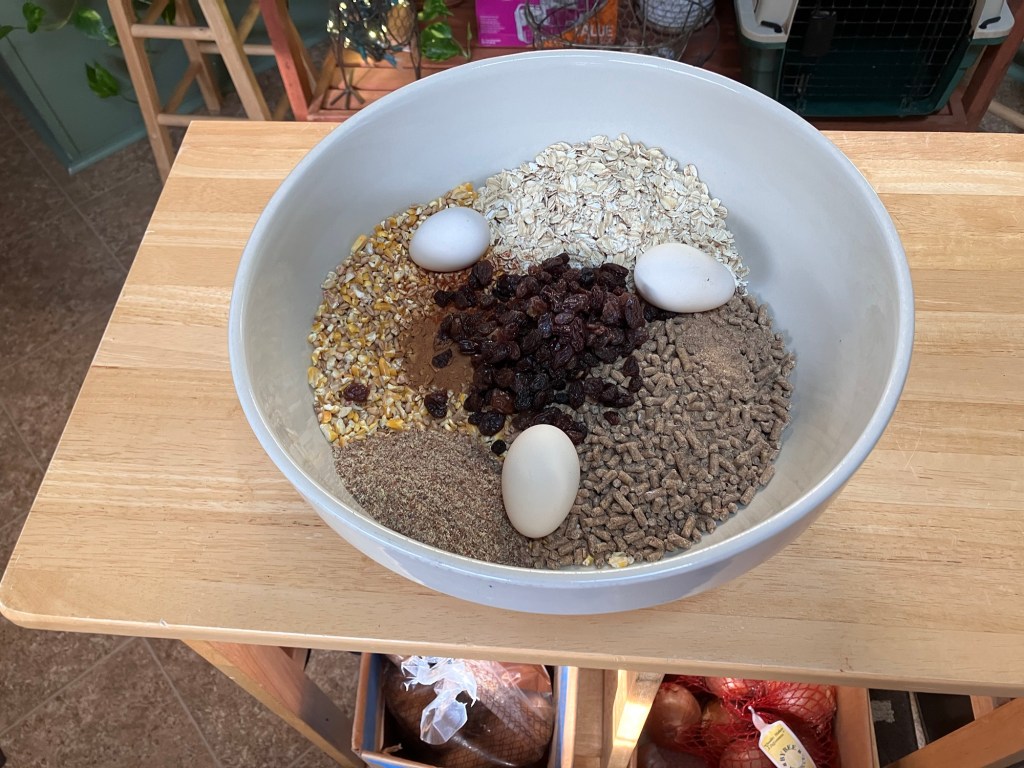
1 teaspoon ground cinnamon
1/2 teaspoon cayenne pepper
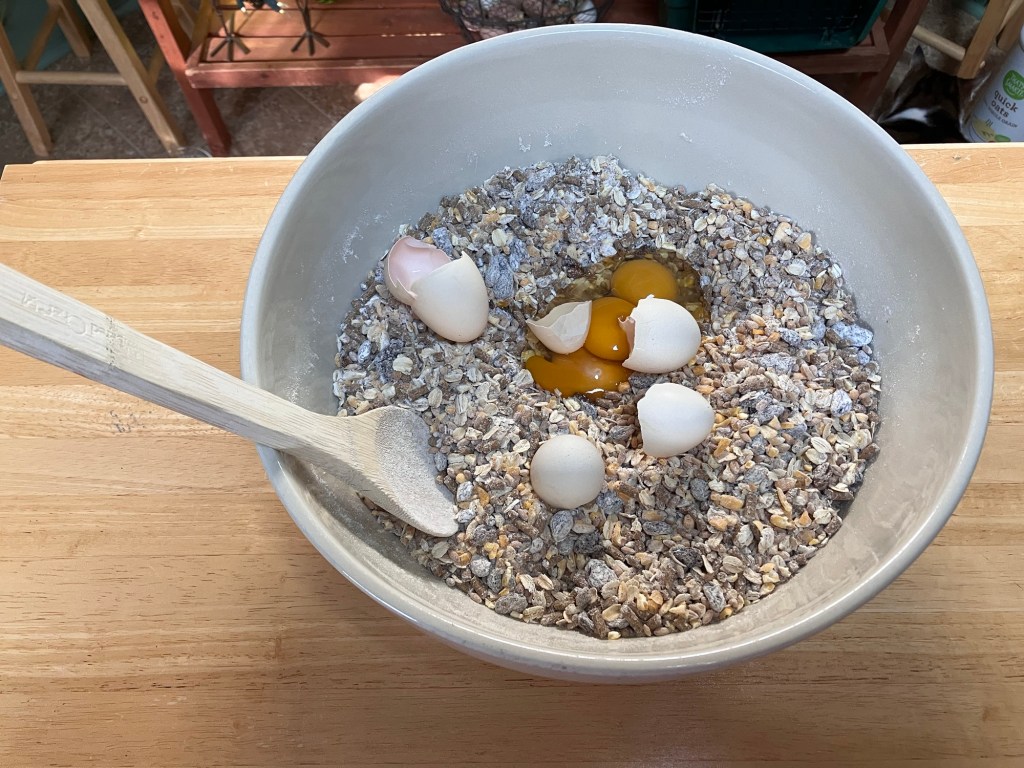
3 eggs (shells included)
1/2 cup blackstrap molasses
1/2 coconut oil
1 cup raisins (dried cranberries, blueberries, or bananas will also work)
Begin by placing the scratch and layer feed in a large bowl.
Add the oats.
Next, add the spices. The cinnamon aids in respiratory health in the cold weather and the cayenne pepper helps circulation.
Next, add the raisins. The raisins will promote pecking as they look like tasty bugs, plump after baking.
Mix all the dry ingredients together well. After mixing, add the flour and the eggs. Crush up the eggshells into smaller pieces when mixing. The eggshells will dehydrate while baking adding calcium to the final product.
After mixing the eggs in well, add the blackstrap molasses and coconut oil.
Continue to mix. As the molasses and coconut oil combines, the mixture should be sticky and hold a ball shape when compressed in the hand.
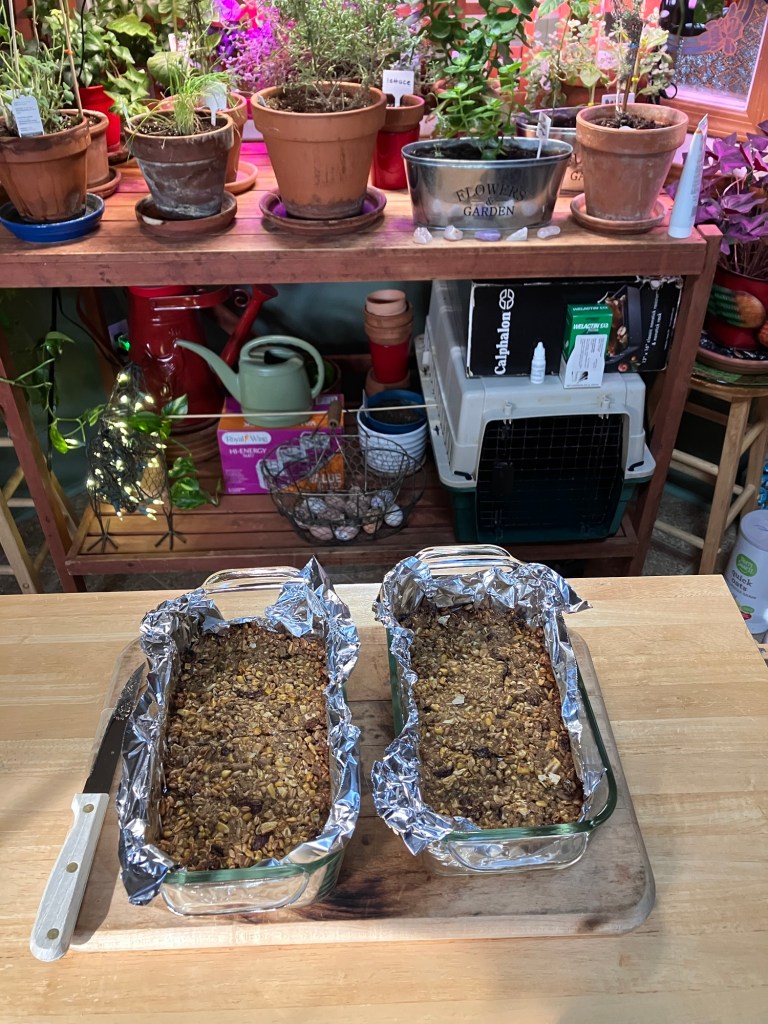
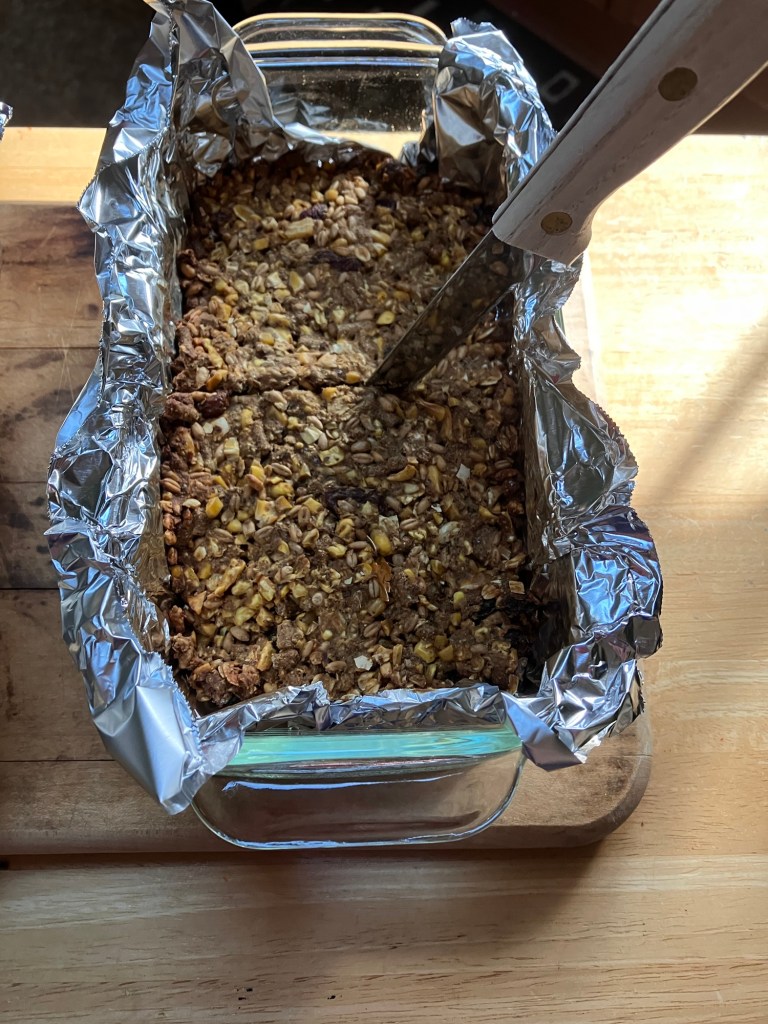
Select an oven baking pan and line with foil. Spray the foil with a cooking spray for easy release after baking.
For a large flock block, select a square baking dish. If you prefer to hang the flock block in the pen, bread pans work best because it is roughly the size of a standard suit feeder. For free-hang, a round pie dish works best. Poke a hole in the area where rope or twine be will inserted. You can also double the recipe to create a large flock block to fill a 9 x 13 baking dish.
Press the mixture into the chosen baking dish. Press hard to compact the mixture as much as possible. This will result in a dense flock block that will not fall apart when removing from the pan.
Preheat the oven to 325 degrees. Place the baking dish or dishes into the oven and bake for 35 minutes.
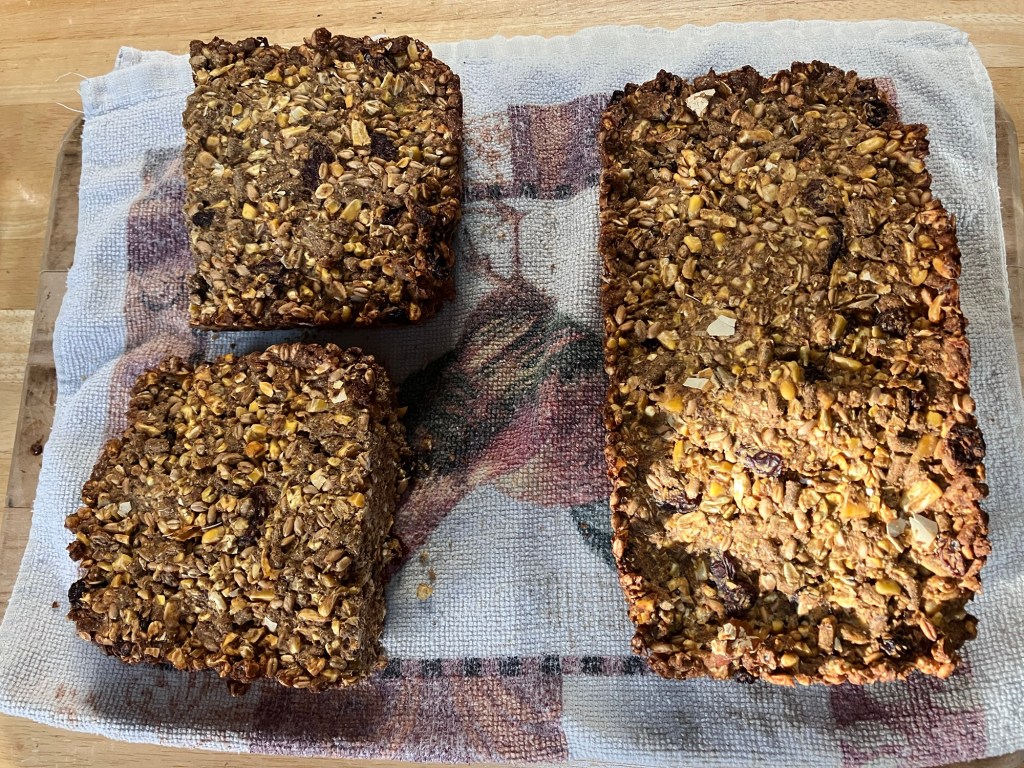
After baking, cut the flock block into the desired size. If you plan to hang the flock block in a suit feeder, a bread pan flock block can be cut in half, into two equal sizes that will fit nicely. If you prefer a larger flock block to free-hang in the pen, cut a hole for the rope of twine.
Flock block cut to fit a suit feeder.
Do not try to remove the flock block from the baking pan till cool. Removing the flock block while warm will increase the chance that it will fall apart. As it cools, the flock block will harden making removal simple.
Once the flock block has cooled, remove by lifting the foil out of the pan and turn over. This recipe will freeze for several months when wrapped in plastic wrap and foil.
Wishing everyone the best. Stay safe during this historic winter storm and cold weather and remember to give your flock boredom busters to help them bide the time while cooped up.
If you enjoyed this post, please peck the subscribe button.
If you like this blog, please consider visiting some of my other sites and online writing portfolio.
This post is dedicated to the care and wellbeing of backyard laying hens. In the post, I will answer the following questions. What are oysters shells? What does it do for your hens? and why are they important?
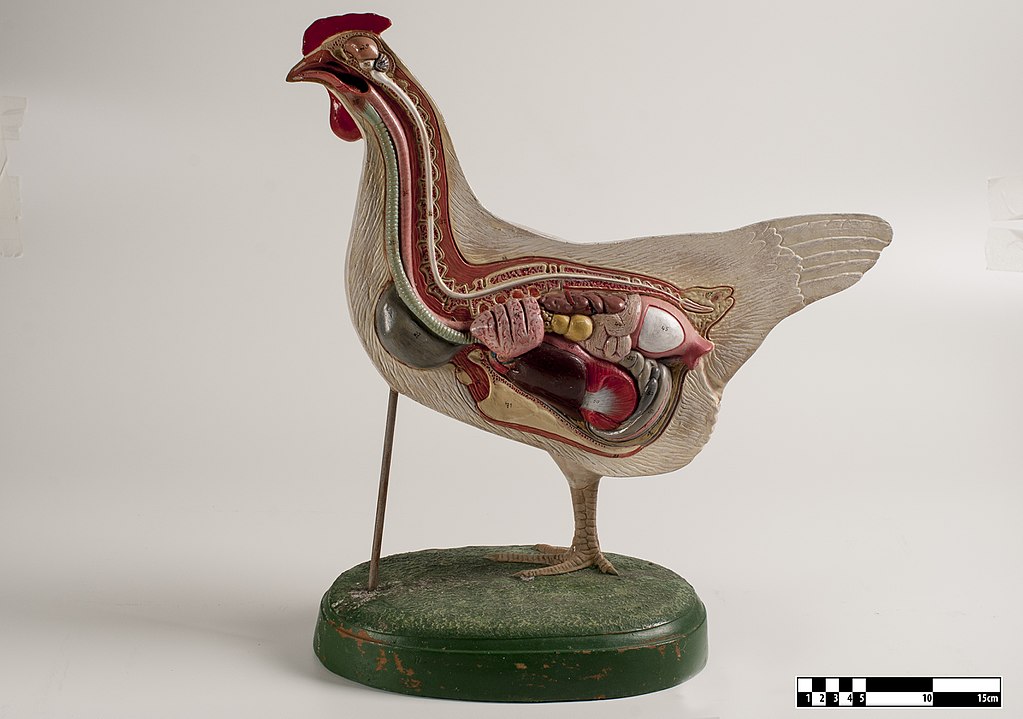
But before we get into the specifics of oyster shells, I first need to discuss some of the basics of what your hens body goes though when she lays an egg.
One of the most common questions I get is, “do I need to have a rooster for hens to lay eggs?” The answer to that is No. Your hens will lay eggs in the absence of a rooster. If you want to populate your flock and hatch chicks on your farm, for that you will need a rooster. But that’s a post for another time. For now, we are just going to talk about how you hen lays eggs.
Each egg that your hen lays take about 24-26 hours to complete. There are 4 stages in the egg laying process that I will cover.
Stage 1: The Yolk Releases
A hen is born with all the egg yolk cells that she will lay throughout her life. Each yolk is contained within its own follicle. When the yolk is released from the follicle, it travels from the ovary to the oviduct, commonly known as the reproductive track. This entire journey this far only takes about 15 minutes.
Stage 2: The White forms
The formation of the egg white takes your hen 4+ hours to complete. As the yolk leaves the ovary and travels through the oviduct, it can be fertilized by a rooster. An unfertilized egg is known as a blastodisc,a fertilized egg is known as a blastoderm. If you do not have any roosters, the blastodisc will continue its progress in his absence. The yolk (now known as a blastodisc or blastoderm) travels through the magnum and the isthmus sections of the oviduct. This is where most of the albumen (egg white) forms around the yolk, the thin outer shell membrane holding everything loosely together. When you break open an egg you will notice white spiral strands connected to the yolk. These spindles are called chalaza and attach the yolk to the shell. At this point the blastodisc resembles an egg missing the outer shell.
Stage 3: The Eggshell
The blastodisc (egg) receives the shell in the uterus via a shell gland. The shell takes about 20 hours to form and another hour or more for the pigment or color to be applied to the outer shell. It is this phase of egg development that requires calcium from your hen’s body. If she does not have access to calcium through her feed or supplemented in oyster shells, her body takes this critical nutrition from her bones. Over time, the depletion of calcium from the hen’s body weakens her bones leading to injury. This is why making oyster shells available to you hens is very important. Most feeds come “enriched” with oyster shells, but this does not meet all the calcium requirements needed by your laying hens.
State 4: The Nest Box
Your hens lay eggs through their cloaca (the vent). Eggs exit through the same vent used for everything a chicken excretes. Tissues of the uterus expands with the egg until the entire egg passes through the vent. During the act of laying the egg, a bloom layer is applied to the shell to protect the egg and keep it clean. This bloom keeps bacteria from entering the egg which can spoil the yolk and contents inside the egg. It is for this reason; we refrigerate eggs after washing them. Once the bloom is washed off the egg, the egg will begin spoiling. The outer layer of protection is removed, no long protecting the egg from bacteria.
Unwashed eggs can remain at room temperature for several weeks before they begin to break down. This is why eggs bought at the grocery store are sold in the refrigerated sections and kept cold. Farm fresh eggs only need to be washed prior to use. Otherwise, your farm fresh eggs can be stored at room temperature, only needing refrigeration if you will not use them for an extended period of time.
Now that you have a better understanding about you hens’ body and the process of laying eggs, let’s discuss and answer some common questions about oyster shells.
What are Oyster Shells?
Oyster shells are pretty much what they sound like, ground up oyster shells. They are an excellent source of calcium, a much-needed supplement for your hens. Most chicken feed contains some oyster shell in the feed. However, it is quickly absorbed by your hens, not longing enough for them to gain the full benefit. Don’t get me wrong, its better than nothing, but your hens are not getting what they need for their daily calcium requirements. Your hens require a long release calcium source which is not in all chicken feed brands.
The only feed brand that contains a long release oyster shell in the feed is Purina Poultry Feed. Purina can be found at Tractor Supply and many other farm and feed stores. If you cannot find Purina, don’t panic. You can still use the feed that you currently purchase, just make oyster shells available to your girls in addition to the feed.
I have found that a small dish attached to the side of their pen filled with oyster shell does the trick. You don’t need to worry about them going through it like scratch or even feed. A hen will only consume what she needs. Her body will tell her when she needs extra calcium and how much she needs to lay her eggs. Each hen’s body is different, some may consume more than others. Don’t worry is if one hen consumes a lot while another hen consumes very little, their bodies know what their supplement needs are.
What do Oyster Shells do for your hens?
Oyster Shells supply your girls with the calcium that they need to form strong eggshells. Most chicken feed brands have some oyster shell in the feed but not enough. Since hens do the majority of the hard work of making eggs shells during the night, they need a supplement that will provide calcium during this time. The Oyster Shell that is contained in the feed is only accessible to the hen while she is eating. Oyster Shells that are supplied in addition to the feed are larger pieces. Sitting in her crop during the night, they slowly grind down, supplying the hen with calcium as she sleeps. It is in this way that your hens are able to make strong eggshells, reducing the stress on her body and depleting her calcium resources.
Why are Oyster Shells important?
Oyster shells are important because they provide a calcium source that is required to make eggshells. If a hen does not have adequate calcium resources for her body to produce the eggshell, it will weaken her bone structure. An eggshell is made almost entirely of calcium, in the absence of a calcium source her body will take the needed resource from her bones. Over time this can lead to bone issues with hens who are not getting enough calcium, in particular the leg bones. Often time the weakened bones lead to painful injury, even breaking during normal activity. For the optimal health of your hens, providing Oyster Shells aids in their overall health and longevity.
After providing supplemental calcium to you girls, you will notice that the eggs she lays will be harder and have firmer shells. This is also beneficial to your hens; eggs are less likely to break during the process of laying. This is another risk to your hen. If an egg breaks inside a hen during the process of laying a soft-shelled egg, it can cause internal injury. Broken eggshells are sharp and can cut the delicate skin of her tract and vent. A broken shell during laying can often lead to infection, pain and discomfort. Recovery is not always possible depending on where and how the egg broke inside of her. To prevent this and other unwanted issues with egg laying, simply supply oyster shells to your laying hens.
I hope that you have found this post helpful. Keeping backyard chickens is a fun and rewarding endeavor. Like us, hens need a little help in supplementing their diet. They can’t get everything they need from their feed, but that’s an easy fix. Taking proper dietary care of your girls will lend to a long and happy life for your special ladies.
If you have any questions, please feel free to post them in the comments. You can also drop me a line at kuntryklucker@gmail.com.
I am a published author, multi-disciplinary writer and blog contributor. If you like this blog, please visit some of my other sites.