Always greet the day with anticipation. Many great delicacies await.
2. Simplicity and a thankful heart are some of life’s greatest virtues.
3. Bring up your young well. They are the next generation, and the key to your legacy.
4. When getting into mischief always make sure you have a buddy. Partners in crime always have more fun.
5. Make sure that you leave a little something for those who care about you. Giving is always better than recieving.
6. Try to appreciate the season of winter. Although bleak, it prepares the ground for spring flowers and other delectables.
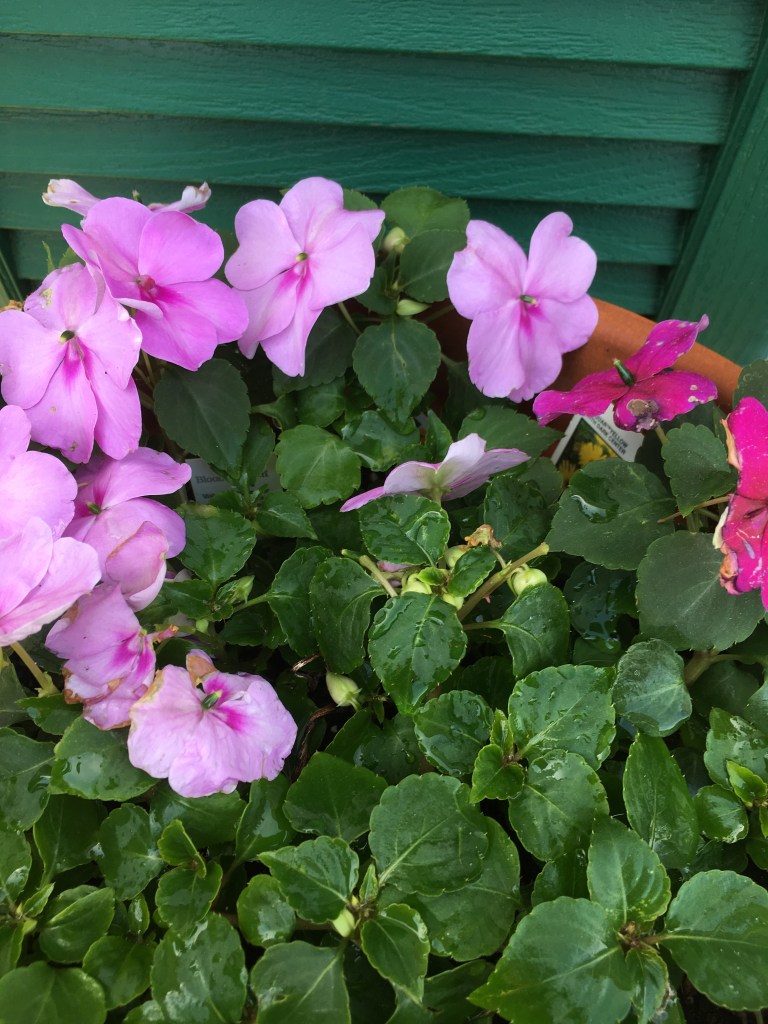
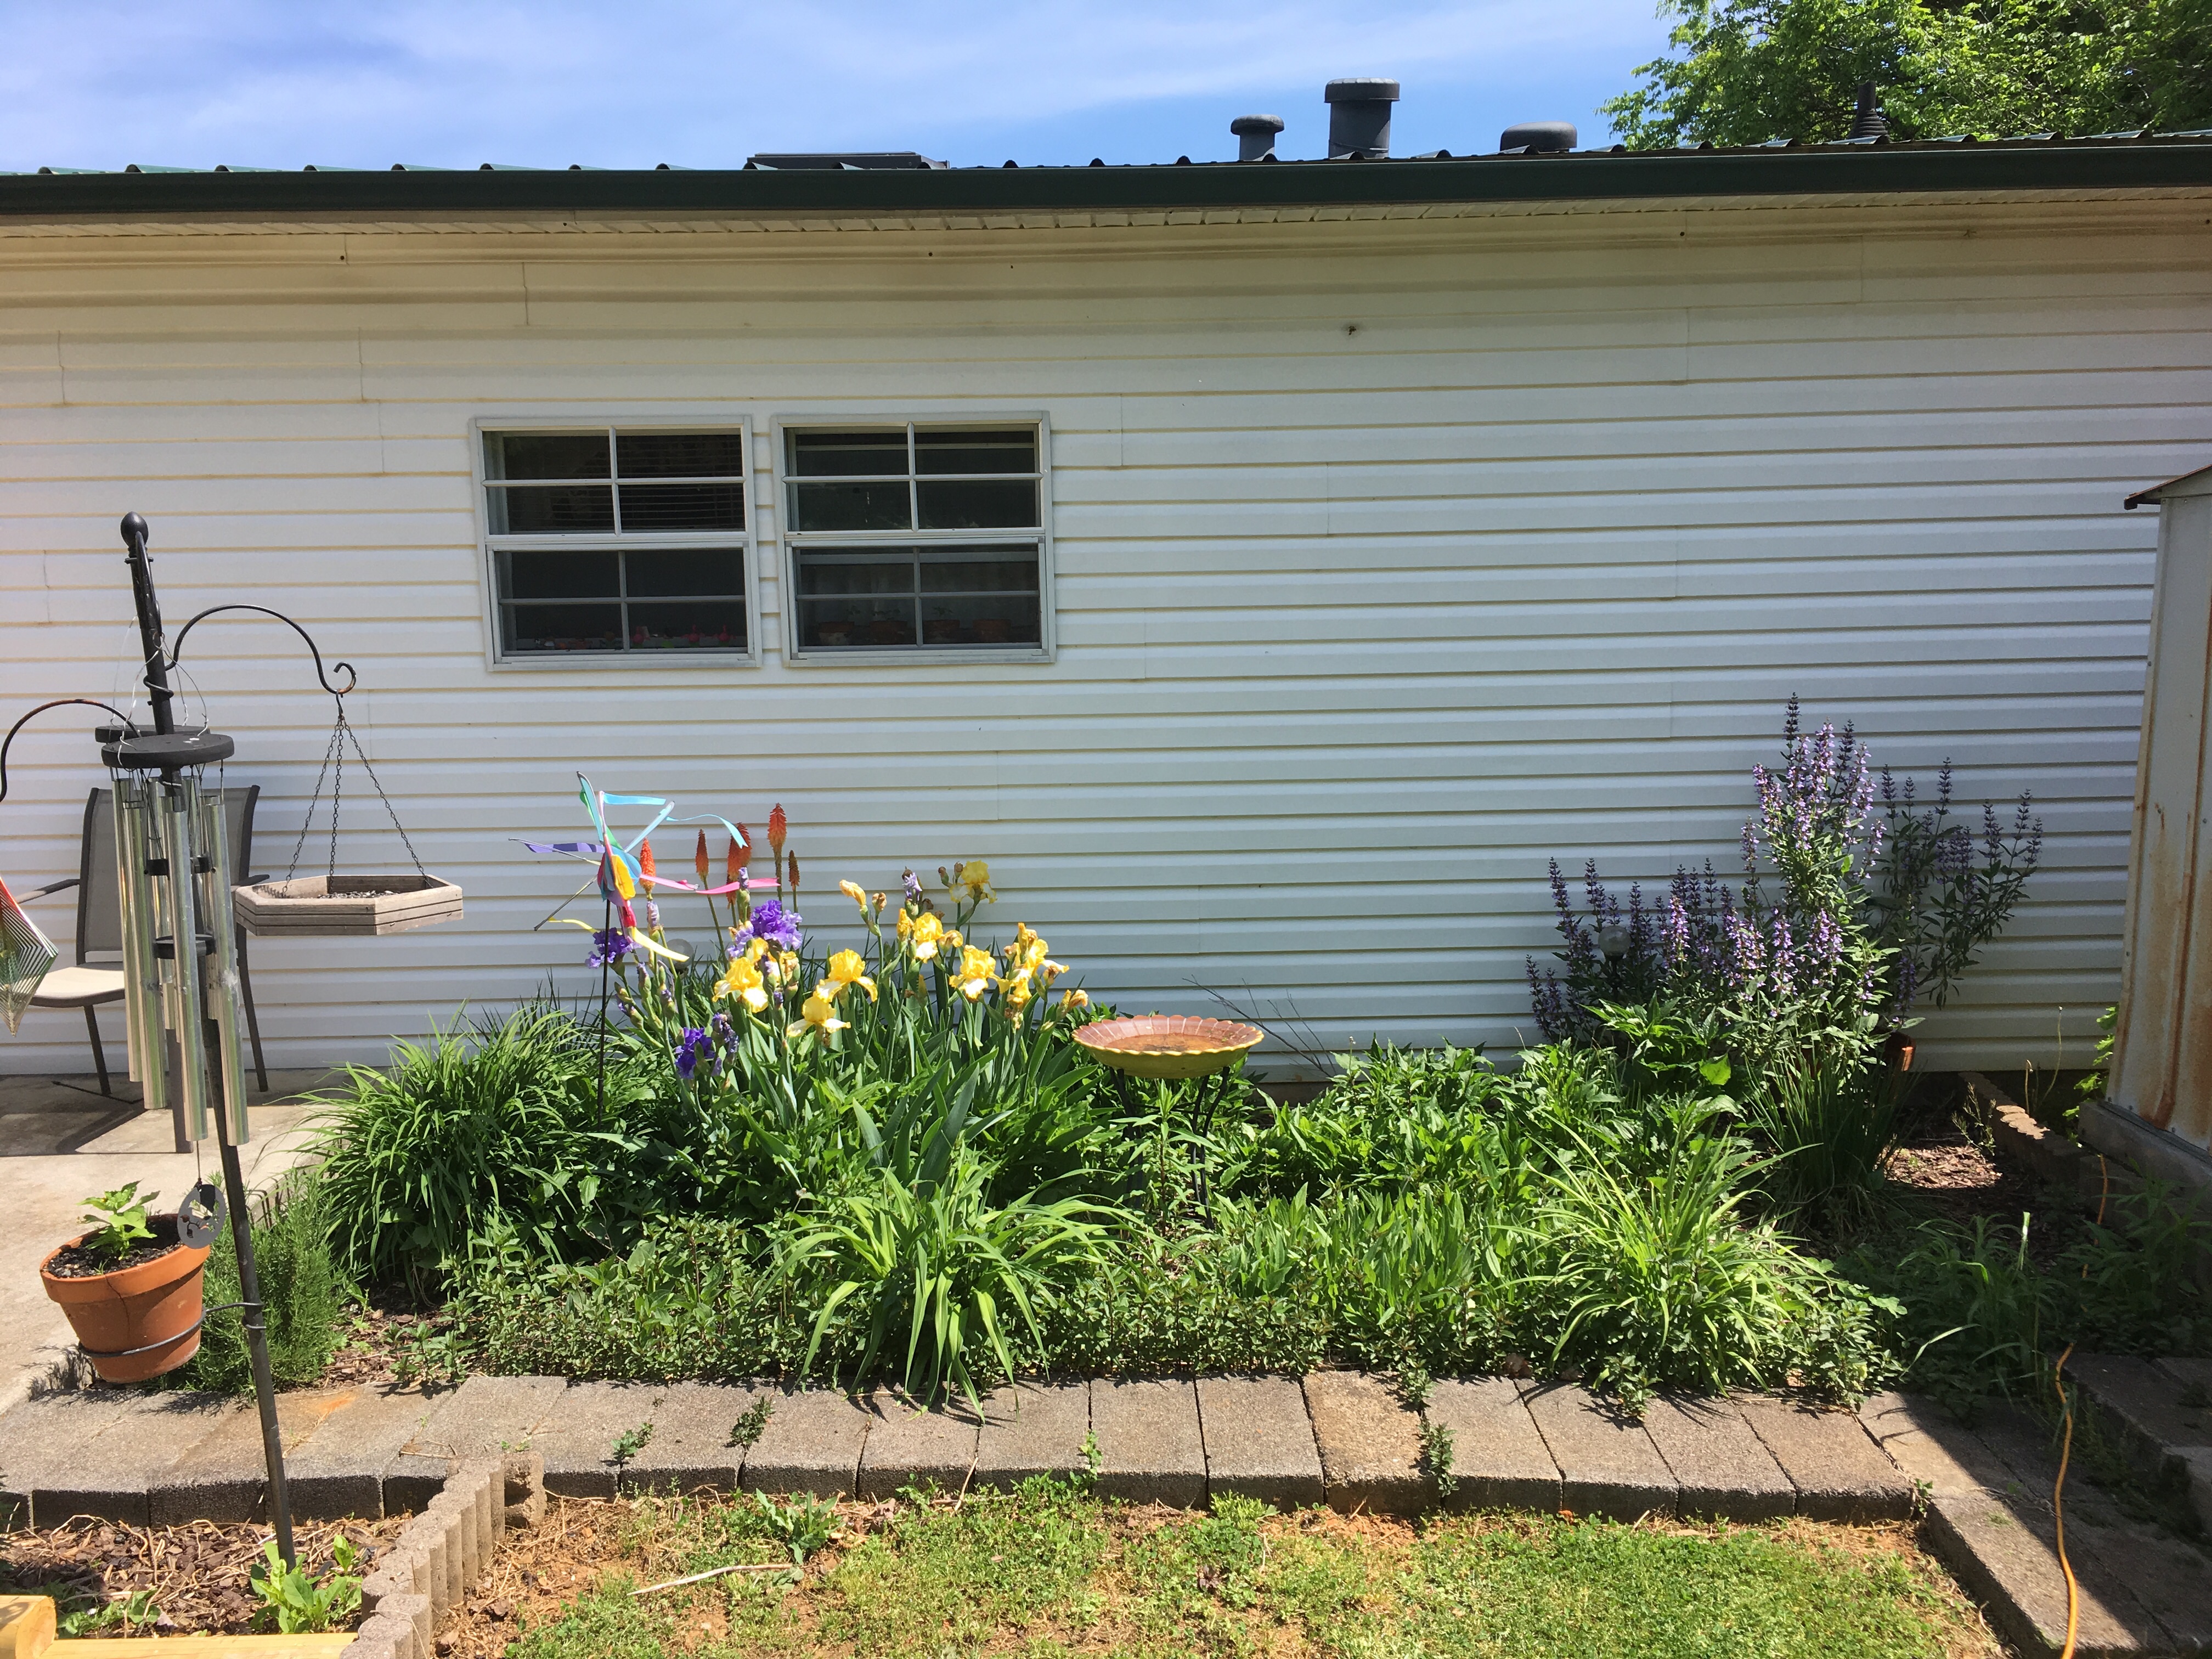
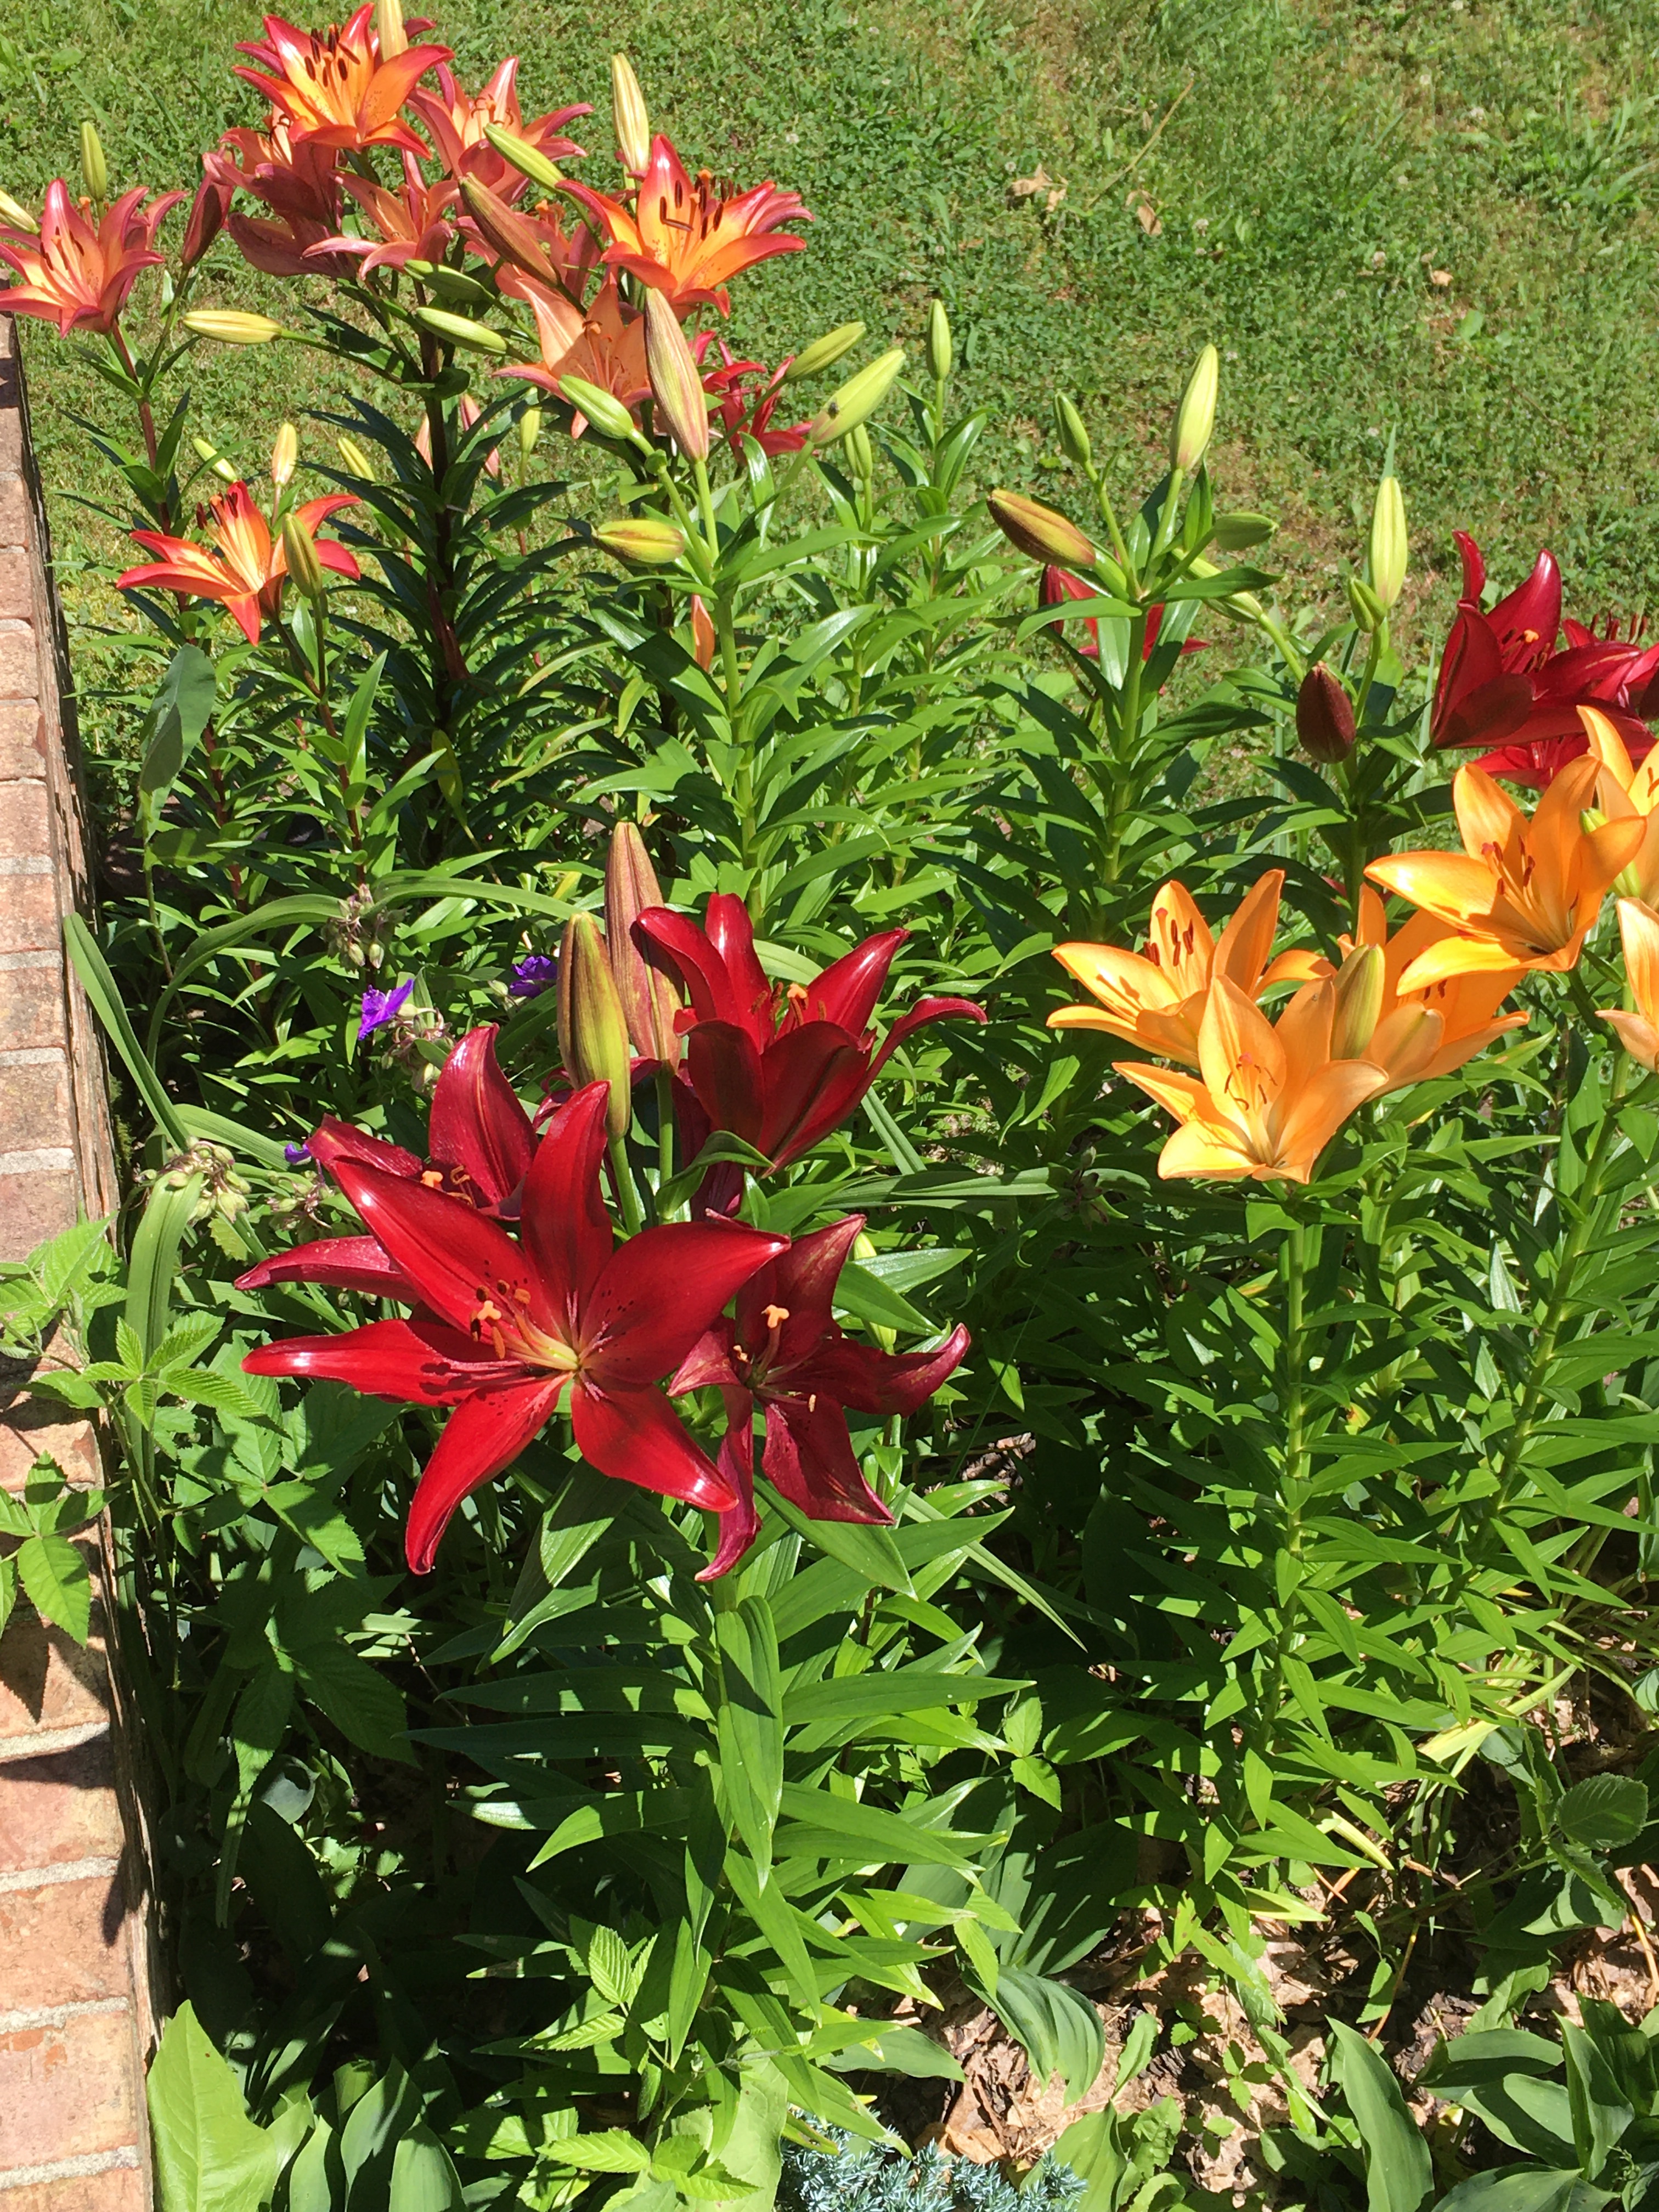
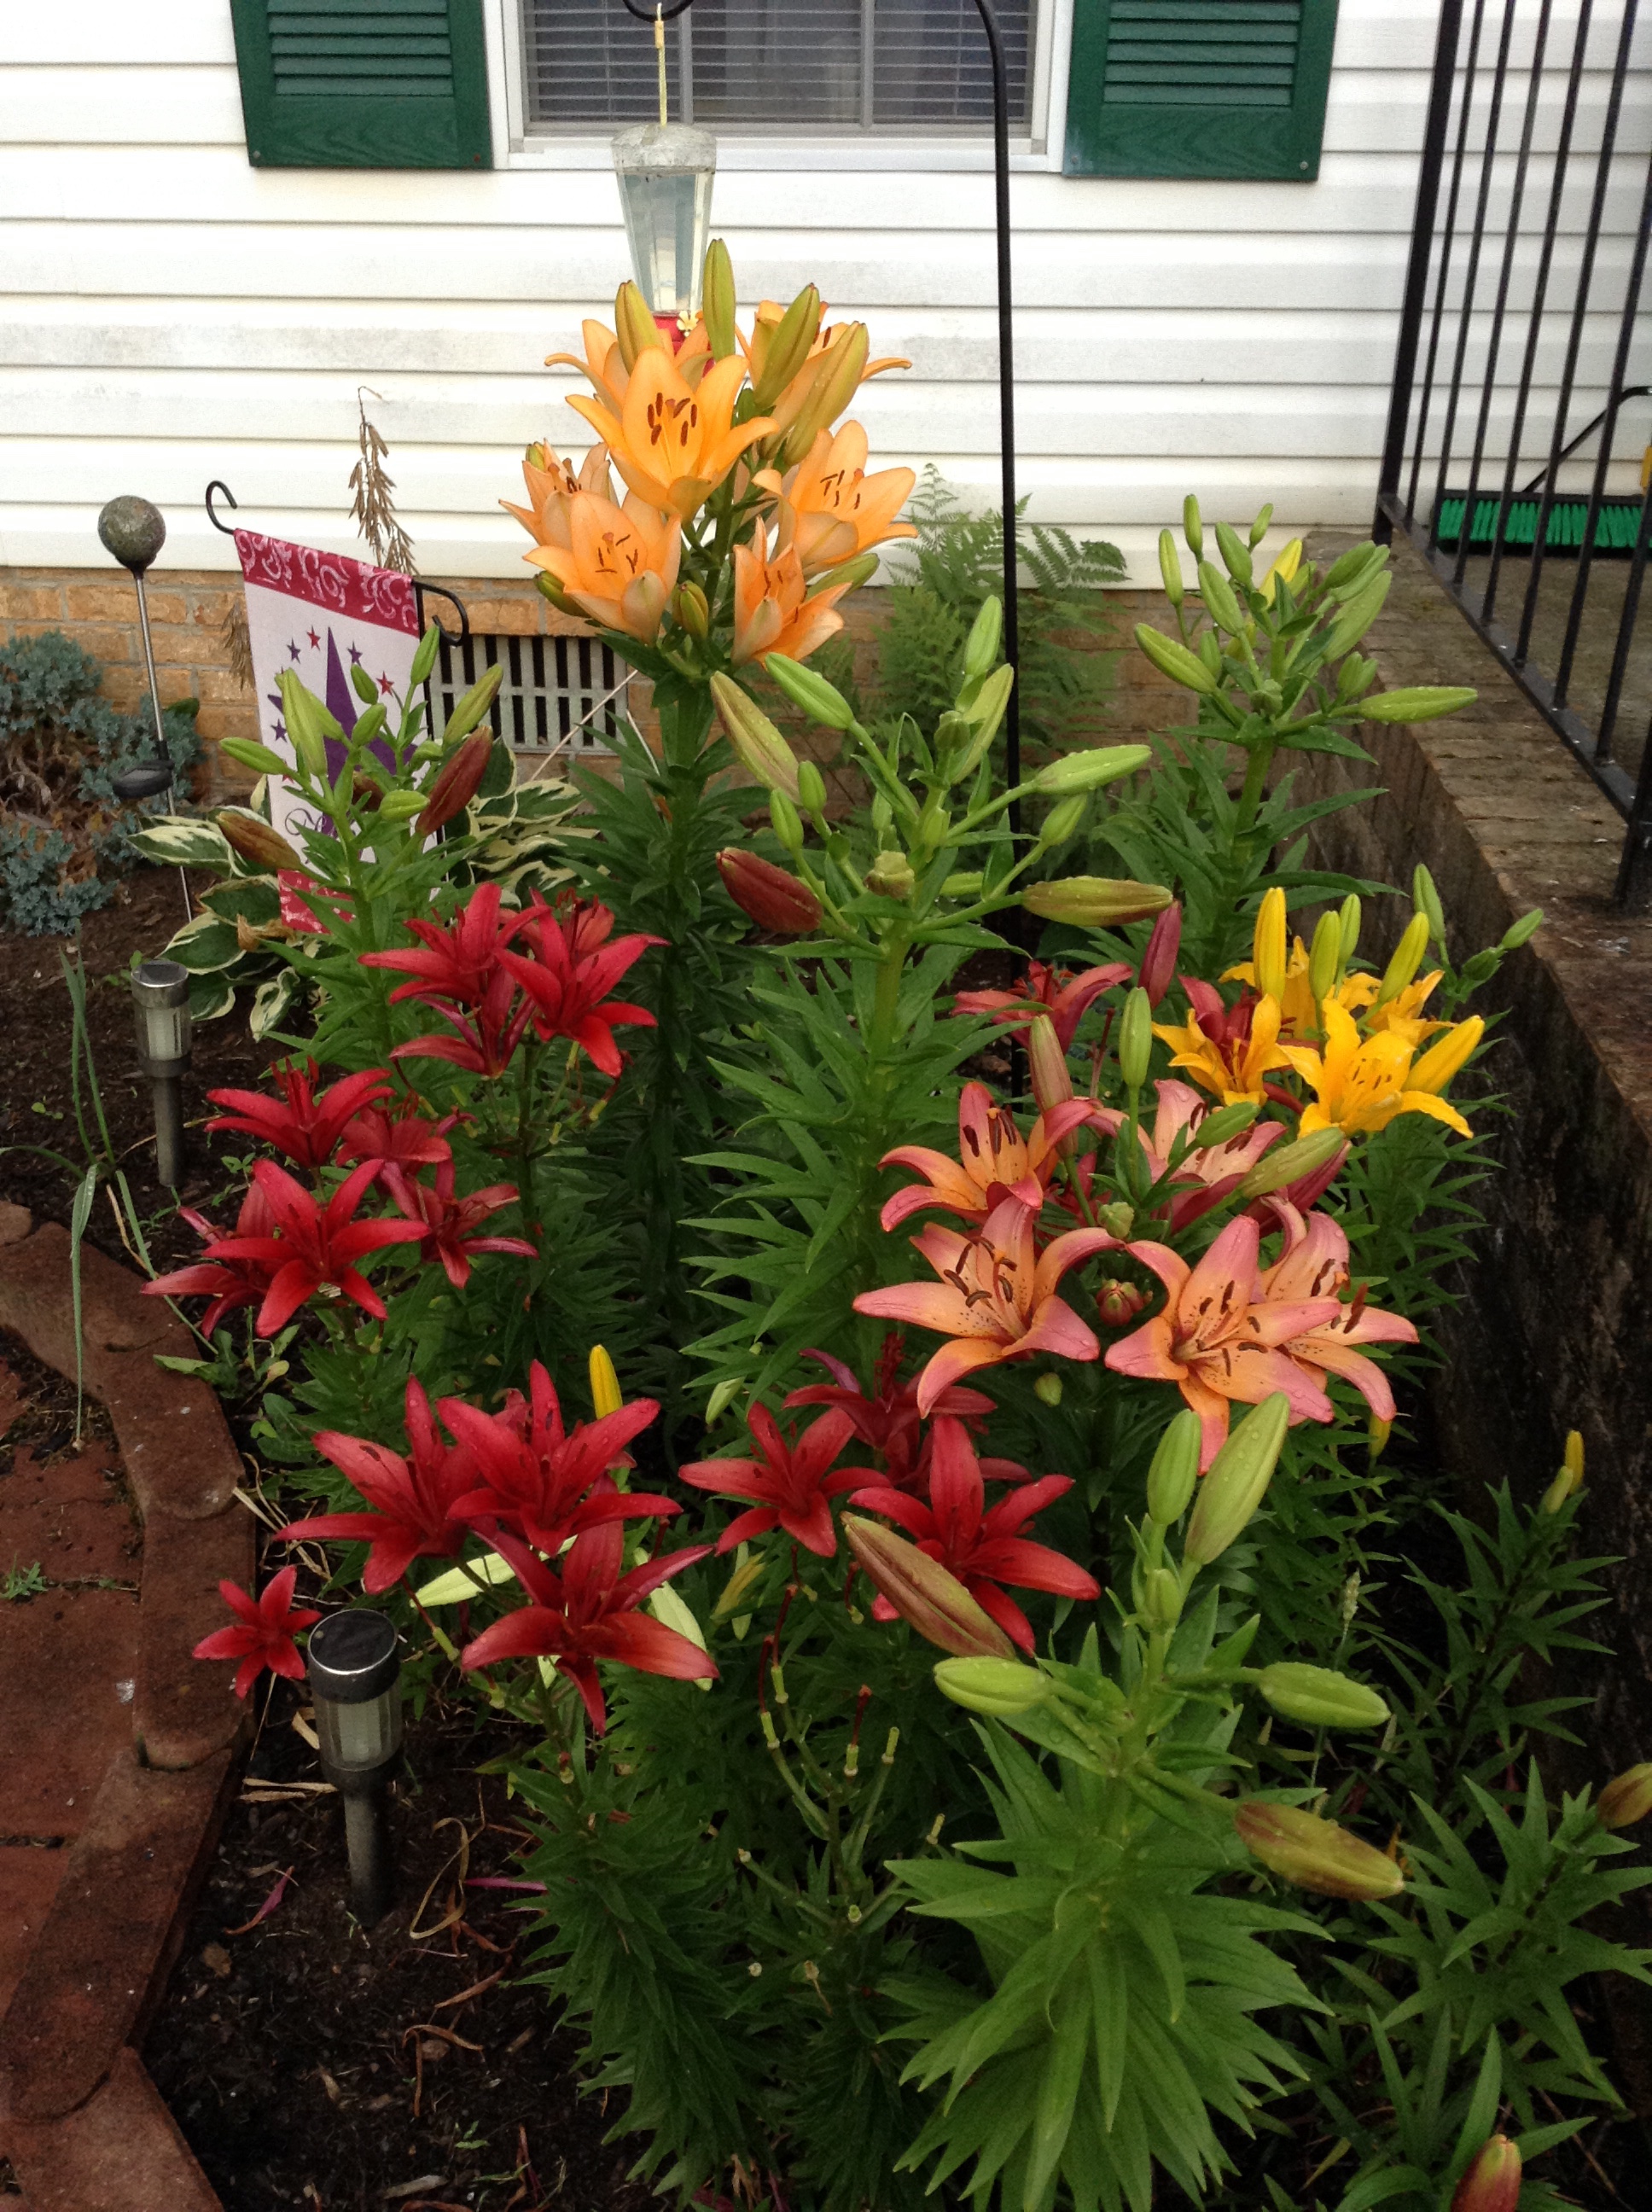
7. Tend your gardens well. A well groomed garden makes the heart sing.
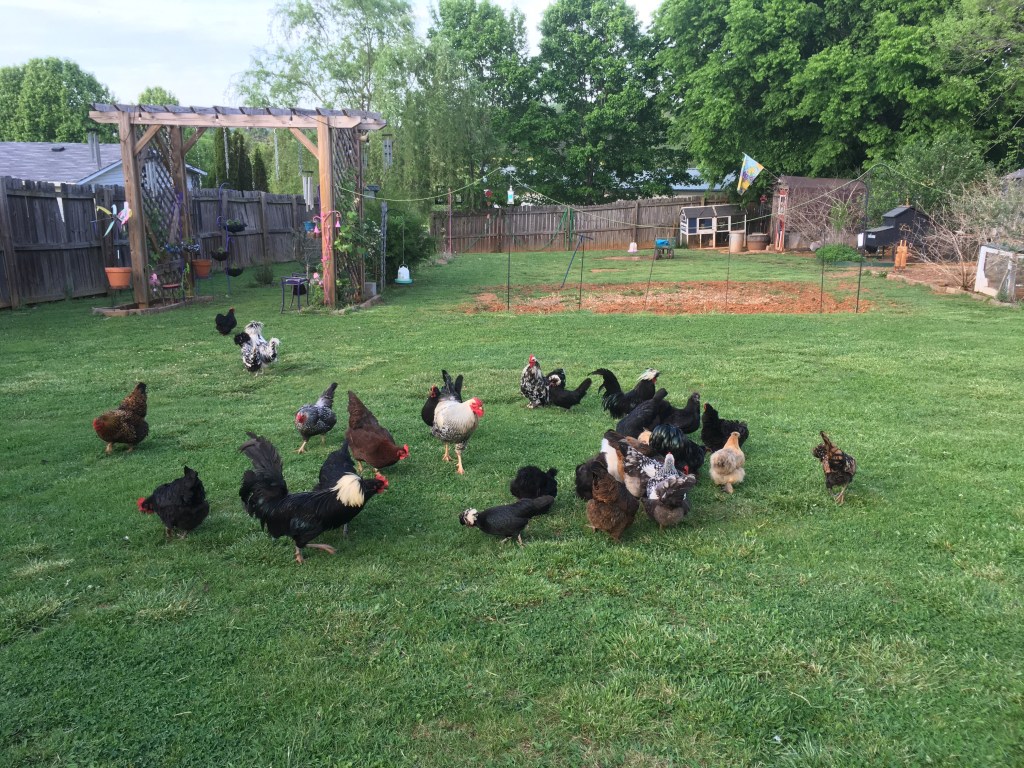
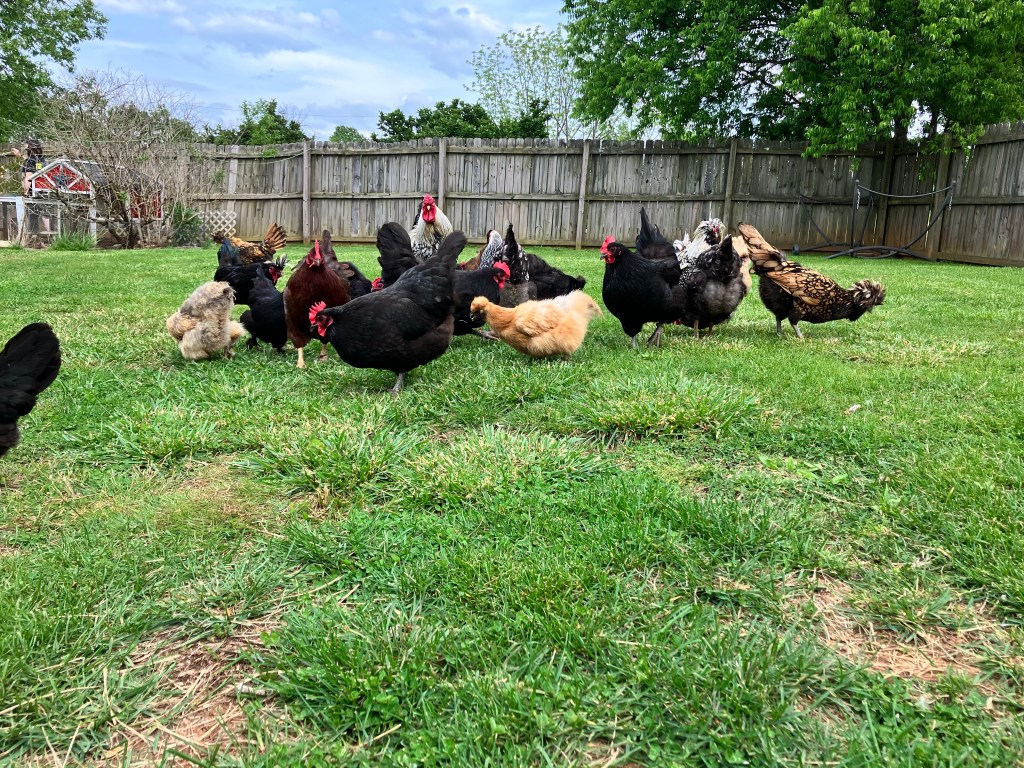
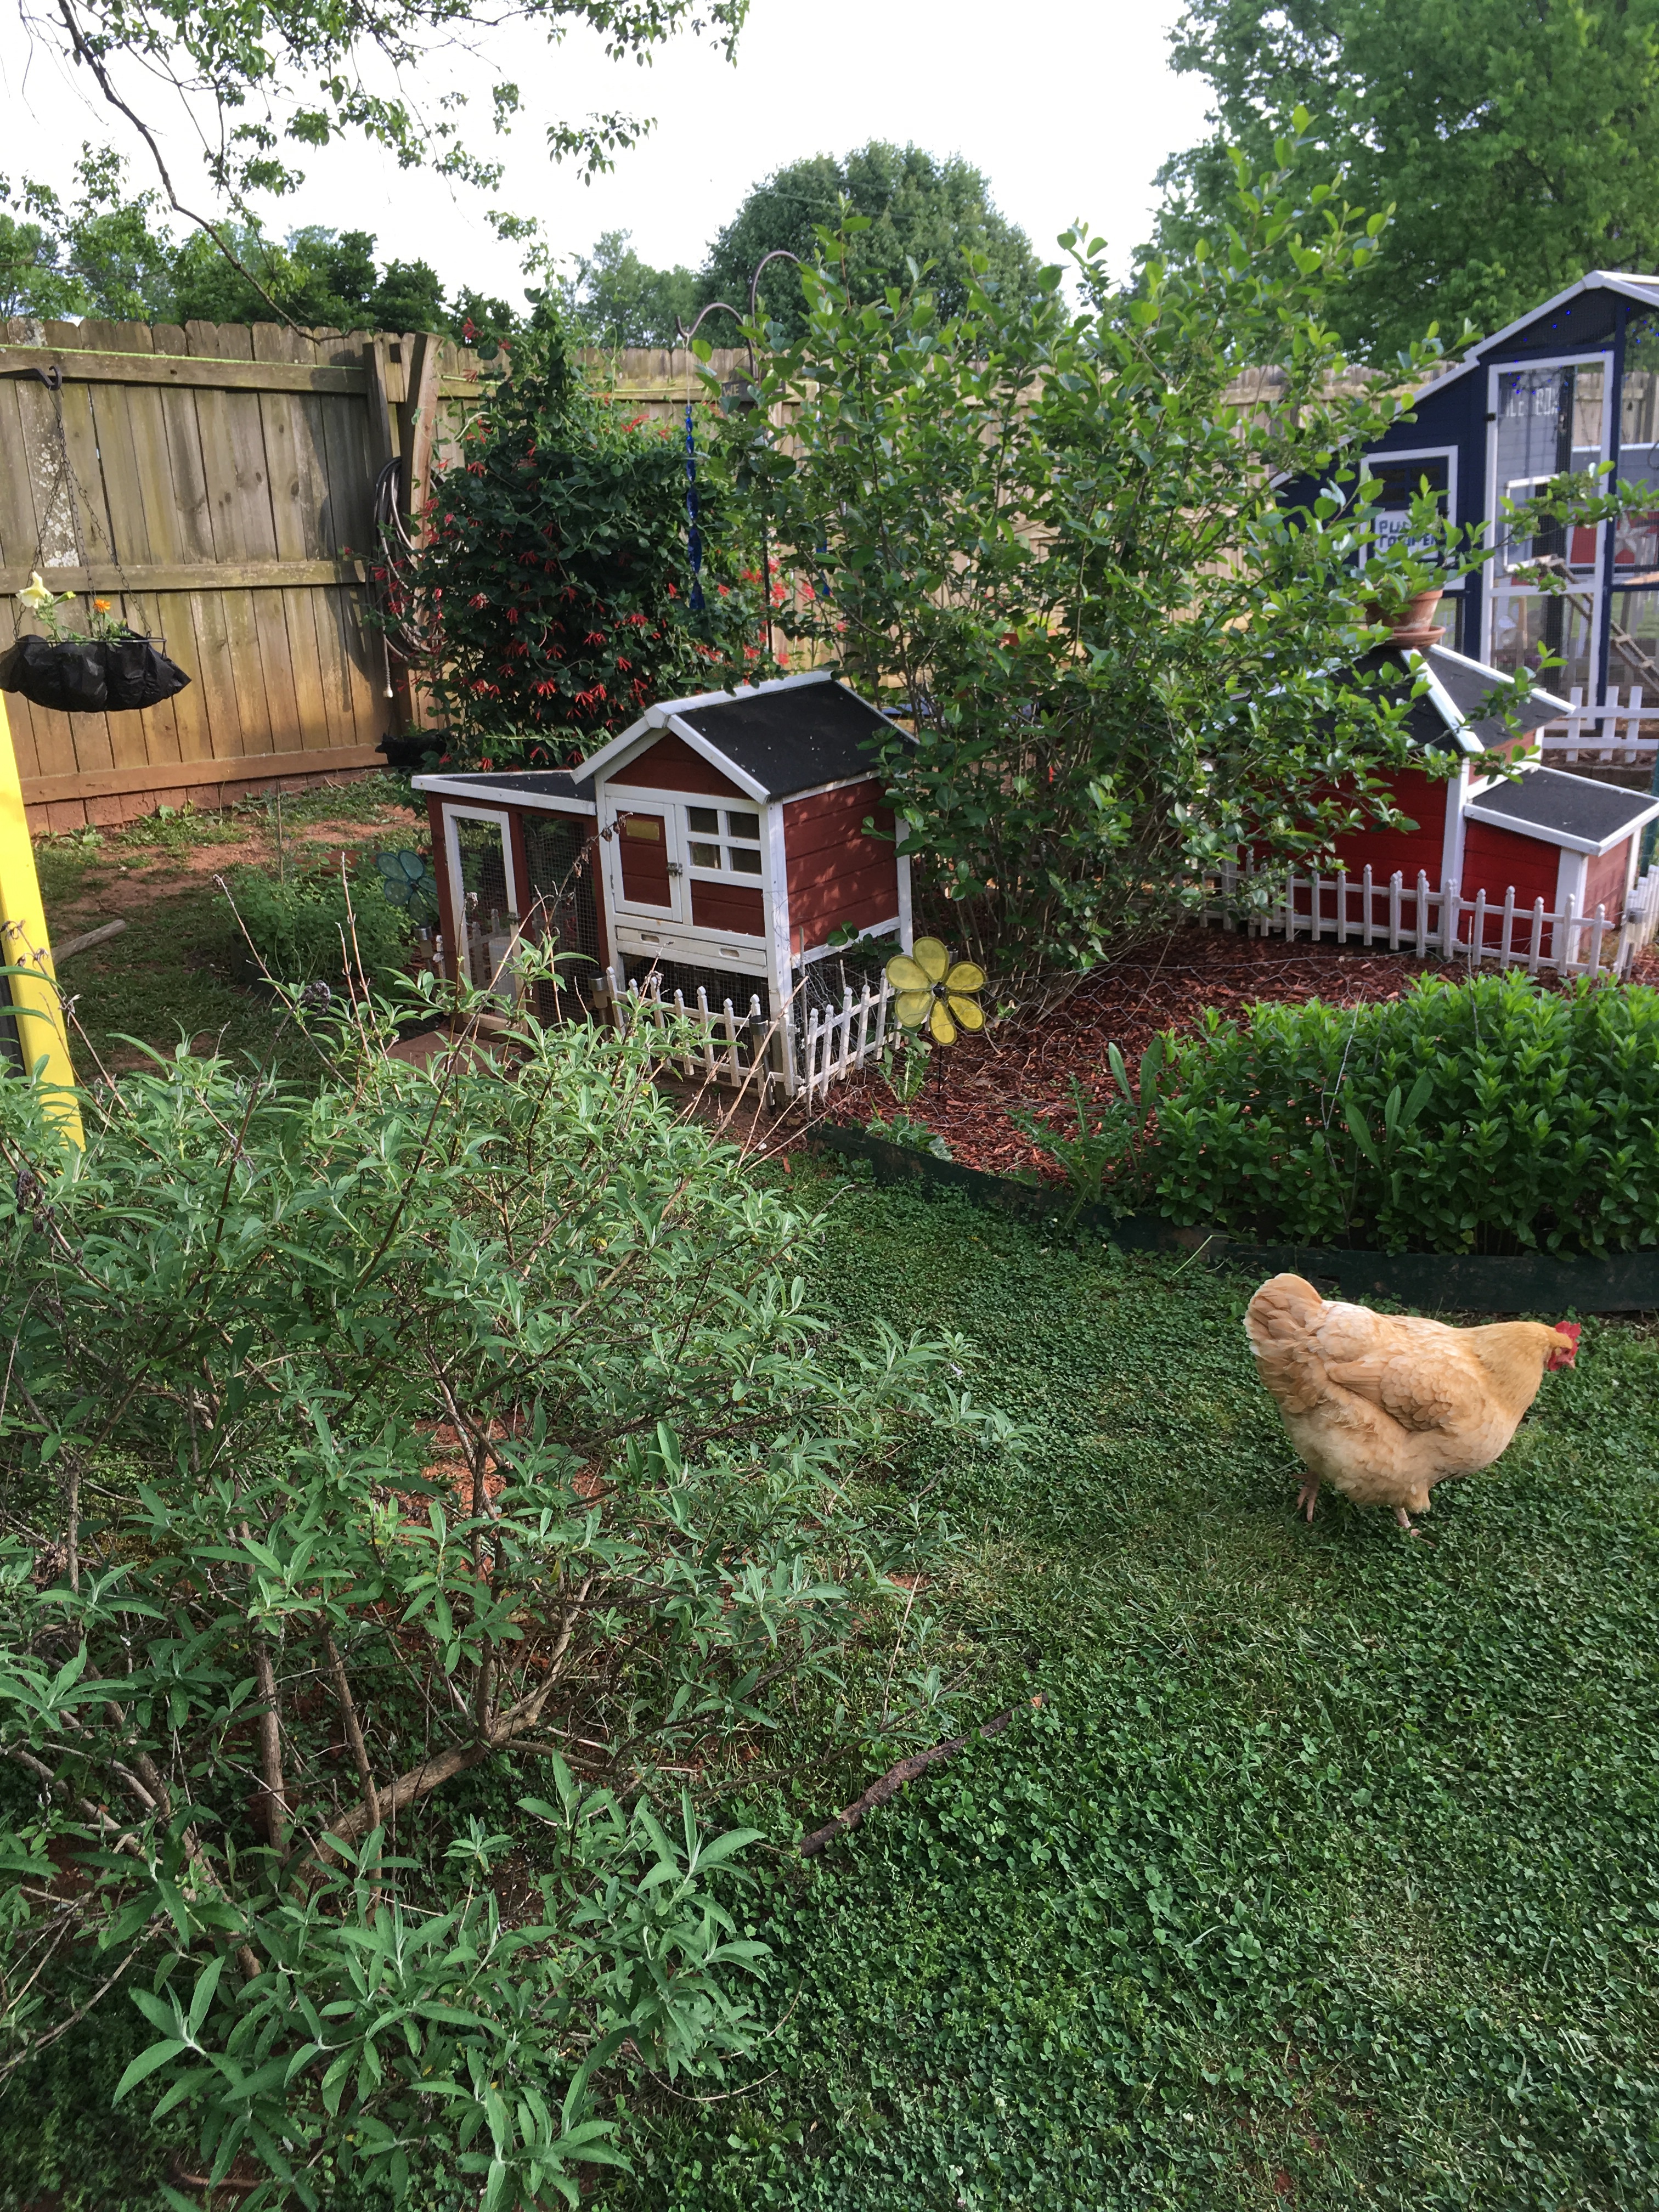
8. Choose your flock wisely, they will be your groupies for life.
9. Make time for friends. Friends make the heart happy.
10. Above all, be like butterflies, they hold the key to true freedom.
Hens can teach you so much about the simple pleasures of life. They are simple creatures that require little. They are happiest when they are allowed to do what nature intended them to do.
I hope you enjoyed this lesson on the simple pleasures of hens. They can teach us many things if we just take the time to watch and learn.
I am a published author, multi-disciplinary writer, and web content creator. If you like this post, please visit my writing portfolio or other blogs.
Featured on Rent Blog “How to Start A Thriving Patio Vegetable Garden”.
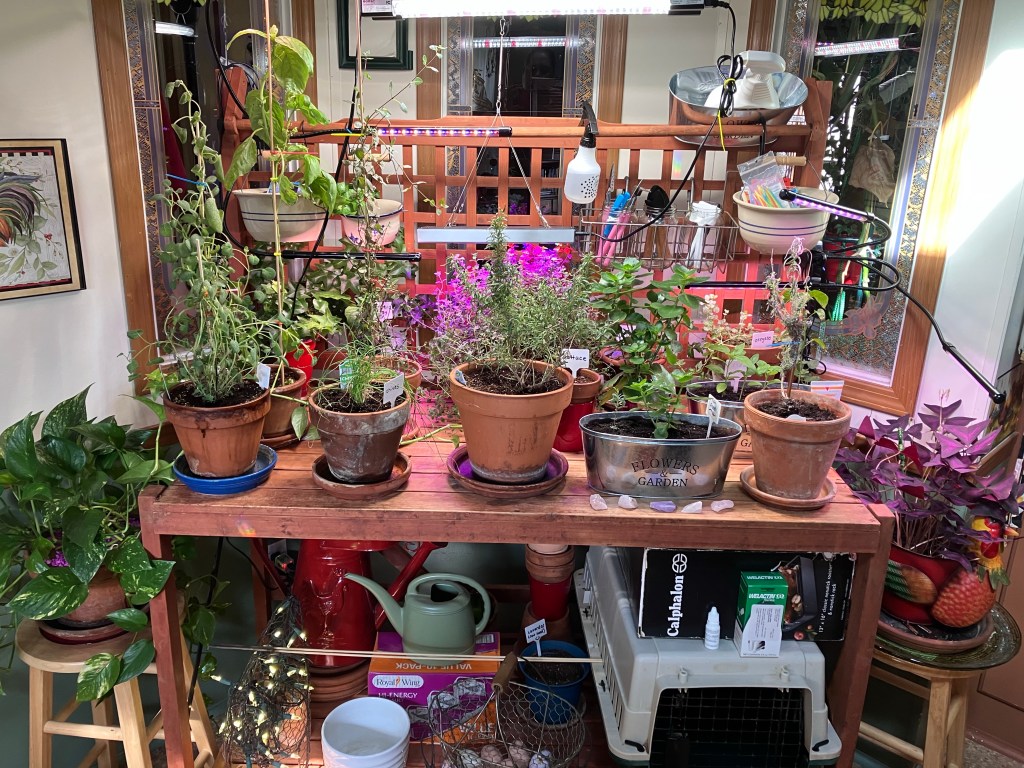
You don’t need a large property to enjoy gardening. Indoor and container gardening is becoming increasingly popular due to the accessibility and easy maintenance of the hobby. If you don’t like weeding or having to worry about time-consuming chores, container gardening just might be for you. In this post, I will share how I implemented container and indoor gardening into my hobby.
One advantage of container gardening is the ability to garden year around. During the cold months, you don’t have to say goodbye to the flowers you have tended to all summer and grown attached to. Not only can you bring them indoors, but you can also even grow them exclusively inside.
The keys to container gardening are light, water, humidity, and soil. If you are familiar with houseplants, you are well aware of these parameters. If not, don’t worry, I will walk you through how I utilize container gardening in my home as well as outside.
Schlumbergera (Thanksgiving Cactus) in bloomThriving Monstera DeliciosaHouseplant Assortment on Hearth
Lighting:
Plants need light to photosynthesize. Outside, these conditions are provided by the sun, and indoor lighting needs to be replicated as naturally as possible. Plants need specific wavelengths of light to photosynthesize; not all light is created equal in the indoor environment. To mediate this, growing plants need light in the spectral range of 400-700 nm. Light near 400 nm humans see as the color violate, and light around 700 nm our eyes percieve as red. Many grow lights emit light with LED lights, making them both bright and cost-effective. I will link the grow lights here, here, and here that I like and produce good growth for my plants. Natural sunlight is always best. If you have large windows that allow natural light to fill the room, your plants will be very grateful. If not, grow lights are a good investment for a container gardening hobby.
Kitchen Herb GardenLiving Room Monstera D. leavesMonestra D. plant basking in the light from a LED growlight.
Water:
Sage Leaves after a gentle rain.
All plants need water. Without water, plants can not absorb nutrients from the soil or complete the photosynthesis process. Unlike outdoor plants that reap the benefits of rainwater, indoor plants rely on the gardener for all essential water. Additionally, due to the controlled indoor environment, the needs of plants are much different. To tell if your plant needs water place your finger about 2 inches into the soil. If the soil is dry, your plant needs water. If the soil is damp, wait a few more days and check again. The most common mistake indoor gardeners make is overestimating how much water their plants need. In the indoor environment, plants need water less often but more deeply. When watering your plants, soak the pot until water pours out from the bottom. Wait a few weeks and check the soil before watering again.
Humidity:
Humidity is often the most overlooked element of growing plants indoors. In their natural environment outdoors, plants can regulate how much water they release through their leaves by judging the humidity levels allowing them to maintain a healthy balance. Indoors, especially in the dry climate-controlled air, plants will release more moisture into the air at a greater rate leading to dry leaves. Adding a humidifier or placing plants in naturally humid rooms such as a bathroom will help to meditate humidity issues with your plants.
Soil:
Soil is necessary for all plants, but indoor gardens need special attention concerning growing medium. Luckily, most garden centers will have multiple formulas, and knowing your plant specifications will help in soil selection. For houseplants, a general all-purpose soil formulated for indoor plants is ideal, as the growing medium will contain all essential fertilizers and food needed for the proper growth of houseplants. For cactus or succulents medium that drains well is ideal for the health and vitality of these plants. Citrus, cactus, or palm soil has the desired balance for growing these water-sensitive plants. Indoor herbs and other vegetable plants thrive in indoor soil made for houseplants mixed with a little seed starter. This mixture allows for the proper fertilizer balance and growth but resists holding too much water leading to root rot. Mixing equal amounts of houseplants soil and cactus soil or seed starter in the pot is an easy way to provide the ideal growing medium for your plants. A word of caution, do not use outdoor flower gardens or vegetable garden soil for indoor plants. Indoor potting soil has been sterilized and is free of annoyances and bugs in outdoor soil mixtures.
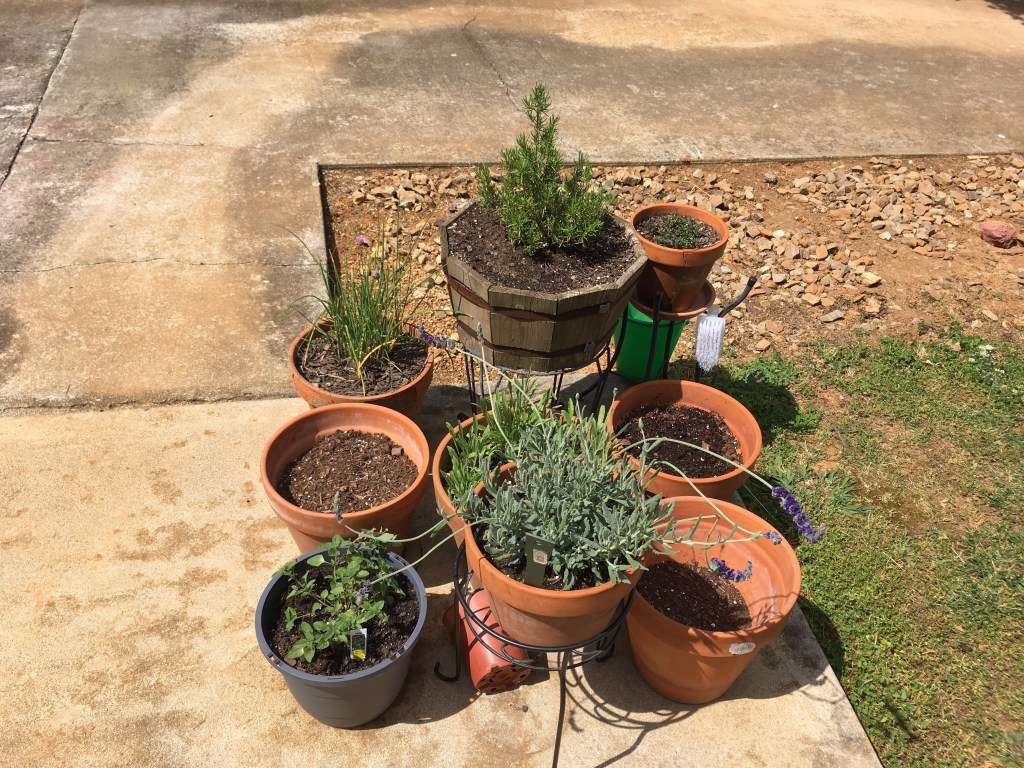
Container Gardening:
My patio container garden.
Light:
Outdoor container gardening is much like growing plants indoors with a few exceptions. The light requirement for your container garden will largely depend on how much sun exposure the plants need. A more sensitive plant is best placed in the shade while a plant that loves light is best suited in a sunny location.
Water:
Unlike plants placed in the ground, potted plants cannot source water. It falls to the gardener to gauge the needs of the plants and water appropriately. During the summer, it is common for outdoor container gardens to need water daily. As with indoor plants, check the soil before watering to avoid over-watering.
Soil:
Flower pot atop the Bantam Botique Pen.
As with indoor gardening, soil is a critical element in the success of the plants. For outdoor container gardens, an all-purpose outdoor potter container soil is ideal. Select a soil that is formulated for containers as the in-ground garden soil will have a higher fertilizer concentration that could burn the sensitive roots of plants in pots.
Container:
Besides watching your container garden grow, choosing the right pot is an enjoyable process. When selecting a pot size is key. Choose a pot that is not too large but allows the plant some room to grow, as the plant matures you can repot into a larger pot if needed. A pot that is too large can stress the plant as the soil remain moist for too long leading to root rot and fungal issues.
There are so many types of pots available it can be over-overwhelming. To help narrow the selection look for pots that have ample drainage holes. Many planters look attractive but are not functional for plant health. Terra-cotta pots are great for outdoor container gardens. As they are porous, air can exchange, allowing the roots to breathe. Wooden planters or large whiskey barrels are other attractive options that allow air to reach the roots and drain well. Choosing a container is the beginning of a wonderful adventure in the world of container gardening.
Above all, have fun and enjoy your gardening advanture. Happy growing!
I am a multi-disciplinary writer, blogger, and content creator. If you like this post, please visit my writing portfolio.
Flowering bushes and gardens are most definitely atheistically pleasing. I have flower gardens plenty but edible landscaping is a joy that is unique in and of itself.
Just about everything in my backyard is edible. Going to my backyard is like going to a farmers’ market on my property. There are lots of options when it comes to landscaping.
In this post, I will reveal how I use plants to landscape my backyard into an edible mini paradise.
Blueberry Bushes:
Blueberry bushes loaded with berries.
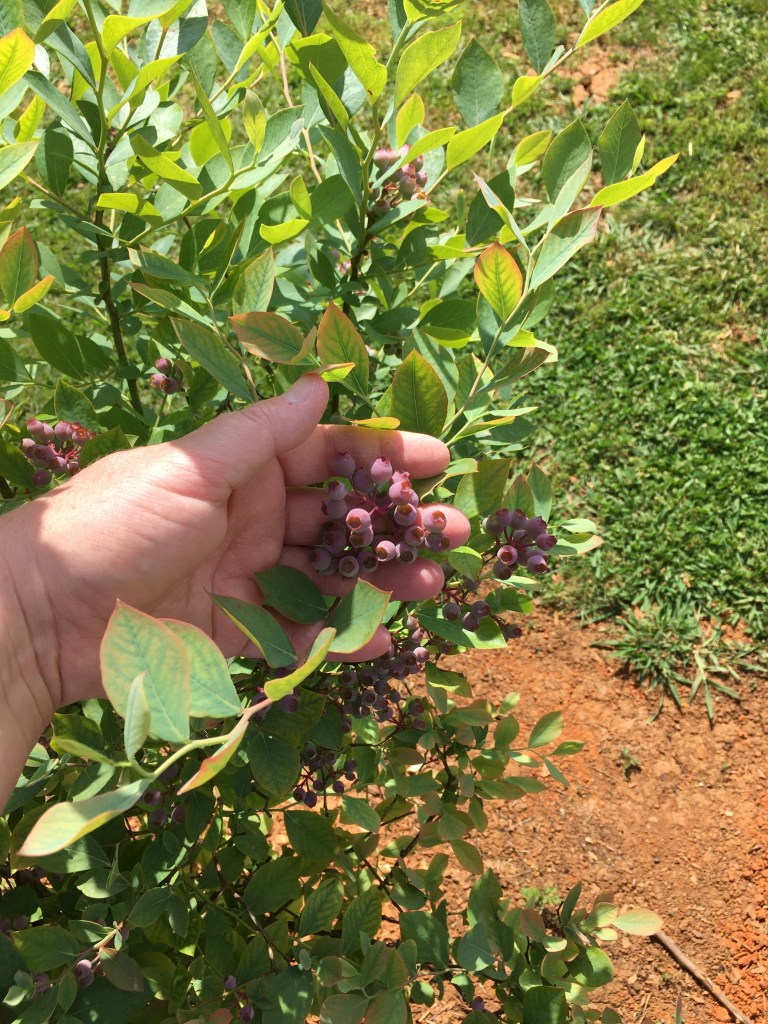
There are lots of ways to add edible landscaping to your property. Blueberry bushes are not only producers of wonderful deep blue berries but have beautiful spring green leaves. When planted in a row, they create a hedge of greenery and goodness. In the fall, their leaves turn to a beautiful red that is stunning in the fall landscape.
Blueberries ripening on one of the blueberry bushes
As the blueberries ripen throughout the season, they add a lot of beauty to the yard. They turn from green to deep blue or purple depending on the variety.
When planting blueberry bushes, plant at least 6 of 2 or 3 different varieties. Doing this will ensure adequate cross-pollination and a large yield. Blueberries need a few different varieties nearby to cross-pollinate well. If too few are planted, the harvest will be reduced as they will not be as prolific.
Arona Berry Bushes:
Arona Berry Bush. Related to the Acai Berry, Arona Berries are a superfood high in antioxidants and are great additions to smoothies. –Arona Bush loaded with berries Arona Berry bush. 8ft tall.TARDIS in the background behind Arona Berry bush.
Arona Berry bushes are another great way to add edible landscaping to your property. Topping out at about 8-10 ft tall and a spread of 5 to 6 ft wide, these bushes are showstoppers.
In the Spring they are filled with white delicate blooms that turn into dark purple berries around mid-summer. They have a sweet/tart taste, somewhere between a cranberry and a cherry. They are dense little berries that are great to add to smoothies or other berry dishes. My chickens love the Arona Berries. They will readily pick all the berries they can near the bottom, luckily these bushes are tall so there is plenty to go around.
Arona berry blooms
Unlike blueberries, Arona Berry bushes do not need another bush to cross-pollinate. Given their size, 1 or 2 will be enough. I have two of these bushes in my backyard, both are beautiful and produce a lot of berries come mid-summer.
Black Berry Bushes:
Another beautiful trailing berry bush to add to an edible landscape are Blackberries. Unlike Blueberries or the Arona Berries, Blackberries do best on a trellis. While they can grow independently of a trellis, they do better if they have support to keep the branches off the ground. If too low to the ground the berries tend to rot before they can be picked.
Fresh Black Berries and Raspberries picked from my backyard. After dinner, for dessert I serve my family and guests fresh berries.
If you have tasted Blackberry jam or Blackberry pie, then you know exactly what to do with these prolific little berry producers. Blackberries are great in many things from smoothies to jams to pies. If the bushes produce an abundance, then frozen berries are a treat in the winter months when all the bushes are dormant.
The possibilities are limitless with what one can do with a bushel of Blackberries. I have my Blackberry bushes near the Grape Arbor. They climb the trellis along with the grapes as they grow taller. Instead of keeping them pruned to a smaller size, I allow them to grow long and attach them to the Arbor as they need more support.
Grapes:
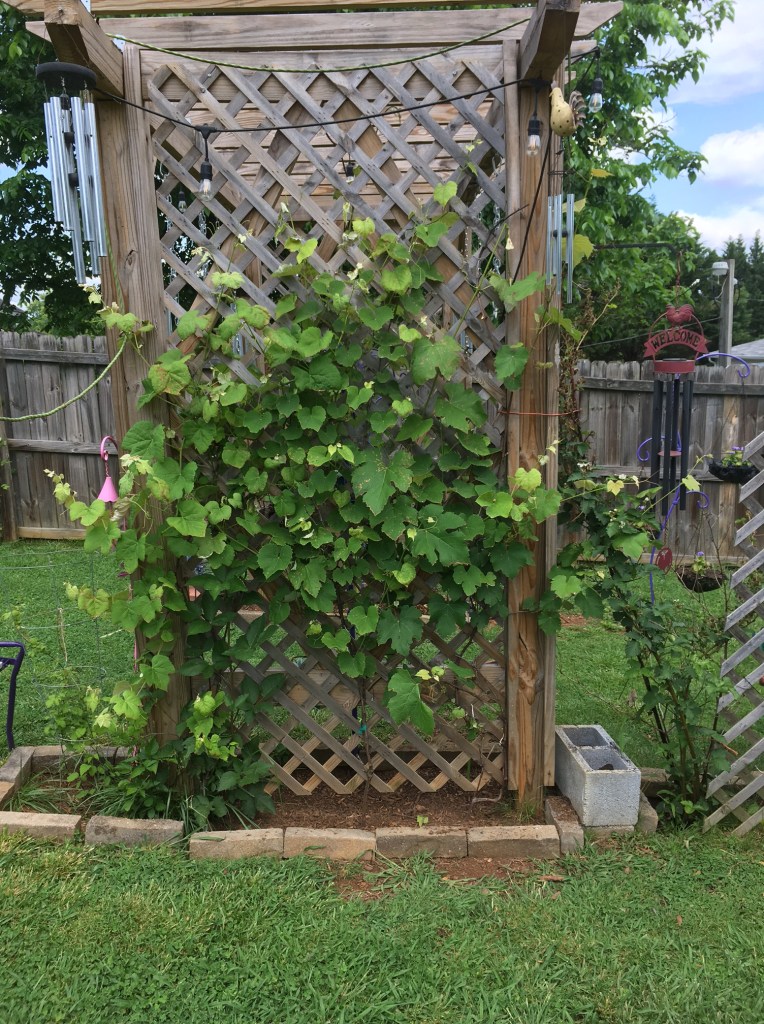
Grape vines attached to arbor.
If you are granted the room, grapes are another great plant to add to your edible landscape. Grapes are very versatile, they can grow on fence posts, poles, trellis, or even chain link fences. As long as whatever they are growing on can support the weight of the vines, grapes are a possibility. Uncultivated, grapes vines will grow up trees and other vertical shrubs that can support the weight of the vines.
A Grape Arbor is not necessary to grow grapes just the method that I chose. But if you are interested in building a Grape Arbor, a Pergola Arbor is a great asset as it can double as a place to hang a Hammock swing, porch swing, or even a hammock. If you are interested in how we built our Grape Arbor I will link that post here.
Grape clusters on the grape vines.
Unlike Blueberries and other berries, grapes need something to trellis on. To have a successful grape harvest, the vines must be kept off the ground. Grapes also need lots of pruning. I prune my grapes every January, cutting off the dead vines and securing the previous season’s growth to the trellis. Come March/April when the grape vines come out of dormancy, they will grow from the dormant vine and continue their journey up the trellis.
Horticultural/mineral oil spray that I use on my grape vines and other vines that need a hand in dealing with insect loads. Found at Tractor Supply and other feed/farm stores.
You will need to spray your grape vines to keep insects at bay. I use an organic gardening spray that works well at keeping the bugs off and will not harm the chickens or other wildlife in my backyard (just the bugs). It can be found at Tractor Supply or other farm/feed stores.
Neem oil is also a good option but will need to be sprayed more often. I spray my grape vines 3-4 times a year. Once as the grape vines start to bud, then again after they leaf out, again in the mid-season (June-July), and a month or so before harvest. This spray schedule keeps the bugs from eating the leaves and stripping my vines throughout the growing season. Make sure to spray early in the morning or late evening to keep from burning the leaves.
Raspberry:
Raspberries planted at back of the Grape Arbor.
Another beautiful plant to add to an edible landscape is raspberry bushes. Newly planted this year, I have the raspberry bushes planted at the back of the arbor. As they grow (like the blackberries, raspberries need a trellis) I will attach them to the grape arbor and let them trellis up the arbor along with the grapes and the blackberries. I have one raspberry bush that survived our cold winter, the rest sadly perished. This year I bought a hardier variety that is cold hardy down to -20. Hopefully, with these new varieties, I will not suffer any more losses of my raspberry bushes.
Butterfly Bushes:
Butterfly bush row opposite the berry row heading to the Grape ArborYellow Swallow-tail butterfly grazing on a Black Night Butterfly bush bloom.
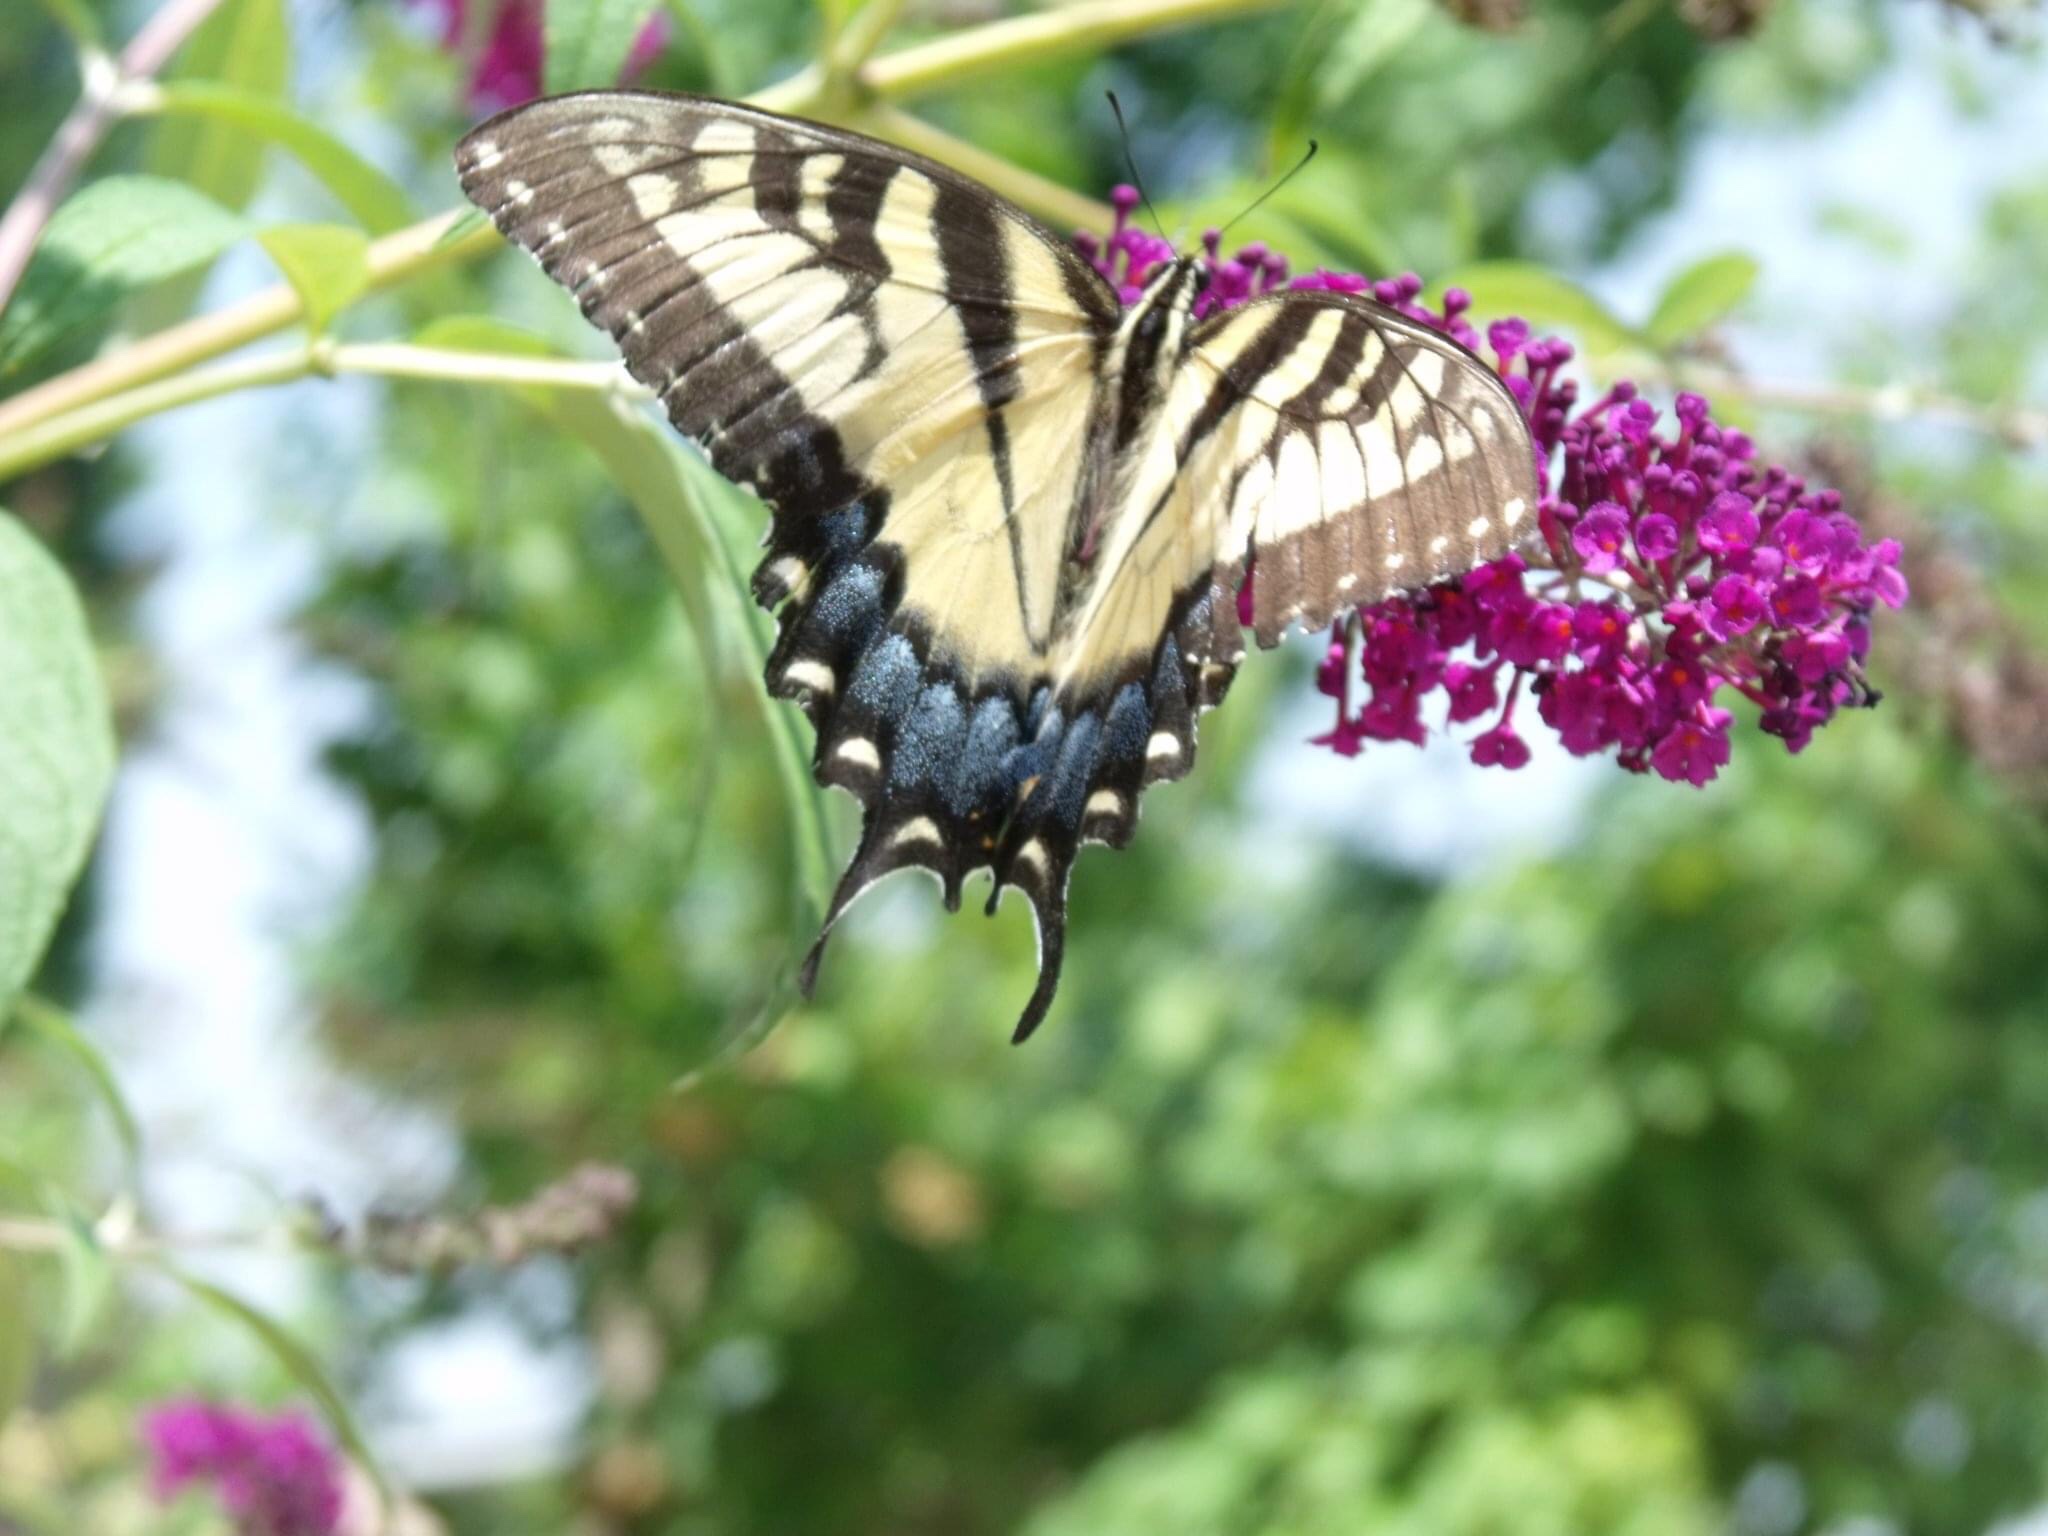
Although not edible (by humans anyway), butterfly bushes are a great plant to add to an edible landscape. Not only are they beautiful, but a stately butterfly bush will attract pollinators to your yard. Everything from butterflies, hummingbirds, bumble bees, honeybees, and hummingbird moths will flock to the butterfly bushes to feed off the nectar of the large blooms.
In mid-summer when the bushes are in full bloom, there is a frenzy of activity around the butterfly bushes. Near the berry row, many of these valuable pollinators visit the neighboring berry bushes and continue to pollinate creating a high yield.
Spices and Herbs:
MintKitchen Patio Herb container GardenChocolate mint, rosemary, and sage grow in my kitchen window gardenMintSageKitchen spice gardenSageDill and other spicesSpice and Herb gardens surround my home and property. I grow just about all the spices and herbs that I use in cooking and insincere making.
Another way to add edible plants to your property is that of herbs. Most herbs are flowering plants that have beautiful blooms that attract bees, butterflies, and other important pollinators.
I grow just about all the herbs and spices that I use in cooking and for incense making. I rarely have to buy herbs because I harvest and dry the herbs from my property. Everything from Basil to lavender I grow in my gardens.
In the fall, I harvest the spices and herbs and use them in cooking, teas, baking, and incense. At the end of this post, I will share one of my favorite dried herb incense recipes that I have to fragrance my home.
Vegetable Gardens:
Veggie garden patrolled by my the extermination crew.
Veggie gardens need no introduction, these gardens no matter the size is a great way to add edible landscaping to your property. I have several veggie gardens. One functions as a kitchen garden, and the other I grow corn, pumpkins, sunflowers, and other fall/winter goodies.
The girls patrol all my veggie gardens, eating bugs off the plants and tilling the soil in search of worms. My girls are a great asset in organic gardening, their natural talents reduce my need for any bug-eliminating regimen. I may lose a tomato or two to a curious chicken, but I plant enough for everyone to get a fair share.
Flower Gardens:
Flower Gardens
Although not edible (by humans) I do have an abundance of flower gardens that surround my home and property. These gardens provide food for necessary pollinators such as butterflies and bees which in turn assist me in increasing a high yield from my edible landscaping. It is through these beneficial insects that we can feed our families and put food on the table.
In an attempt to aid the bee populations, I do not spay any insecticide near my home. Many of my gardens contain herbs and spices which naturally deter many pest insects that would otherwise enter my home.
Chickens:
Given that this is a blog that is primarily focused on raising backyard chickens, how do my girls factor into edible landscaping?
The simple answer is composting. The girls create a very nutritious compost in their coops through their digestive processes. Due to the presence of a gizzard in their digestive system, chickens process everything they consume. When added to the gardens, litter from the coops is the best plant food that money can buy. Because my girls are fed an organic diet, their compost is also chemical free.
Every spring I spread the compost the girls have made in their coops throughout the winter. Chicken coop shaving and poo are high in nitrogen and other minerals, beneficial to plants. Due to the compost from the coops, my gardens are lush and produce high yields.
Many visitors to my farm ask me what I feed my gardens to produce such beautiful blooms and large vegetables. My answer is chicken poo. My homestead is powered by my girls. They are the secret to my success.
Recipe:
As promised, I leave my recipe for natural incense that I created using spices and herbs from my garden. This recipe is very versatile and can be tweaked given aromatic preferences.
The Kuntry Klucker’s Home Herb Insence
For this recipe, you will need an electric wax warmer or a wax warmer that is warmed by a tea light or other source of heat.
1/8 to 1/4 tsp olive oil
1-2 TBS dried rosemary
1-2 TBS dried sage
1-2 TBS Dried lavender
1 TBS Basil
Other things that can be added: Tree resins such as frankincense, dragons’ blood, myrrh, copal, or benzoin. Drops of essential oils can also be added.
In the wax warmer, place a small amount of olive oil, just enough to cover the bottom of the wax warmer. Mix all the dried spices in a small bowl and add to the wax warmer on top of the oil. Turn on the wax burner or light tea light under the warmer. After a few minutes of heating, a spicy yet calming aroma will be released by the herbs simmering in the oil. You can add other aromas as well, such as essential oils or resins to bring the aroma to your liking. This is an all-natural way to fragrance your home without releasing harmful substances in the air such as chemicals that are often added to candles and other wax or oil fragrances.
During the winter, and for culinary purposes I grow herbs indoors under grow lights so I can make my special insence and have fresh herbs at my fingertips.
Dried spices and herbs in a tea light heated cast iron wax warmer.
I am a published author, multi-disciplinary writer, and blog contributor. If you enjoy this blog, please visit some of my other sites.
If you enjoyed this post, please peck the subscribe button. As always, thanks for reading. Till next time, keep on crowing.
If you have any questions about raising chickens or edible landscaping, feel free to post them in the comments or drop me an email. Kuntryklucker@gmail.com.
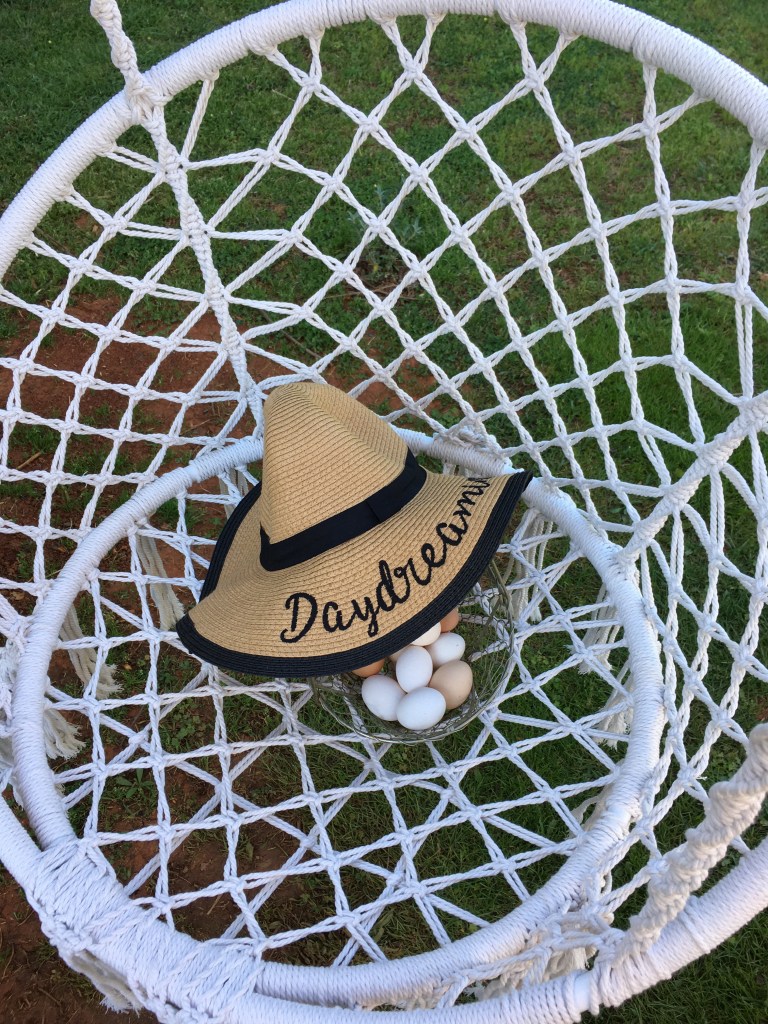
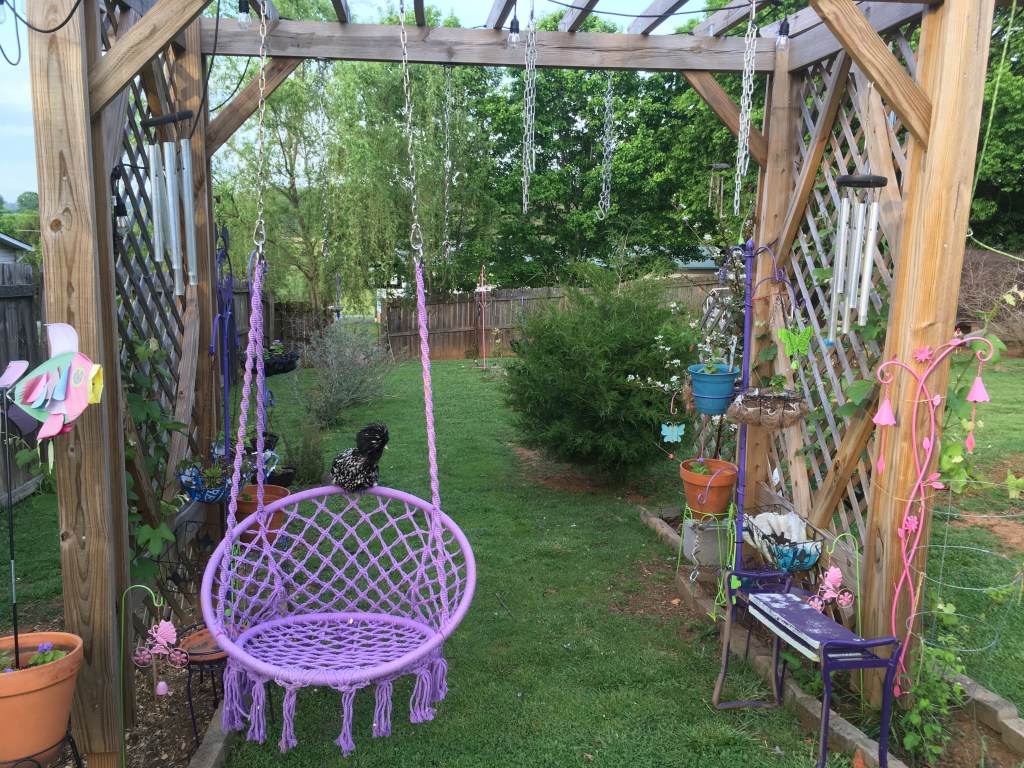
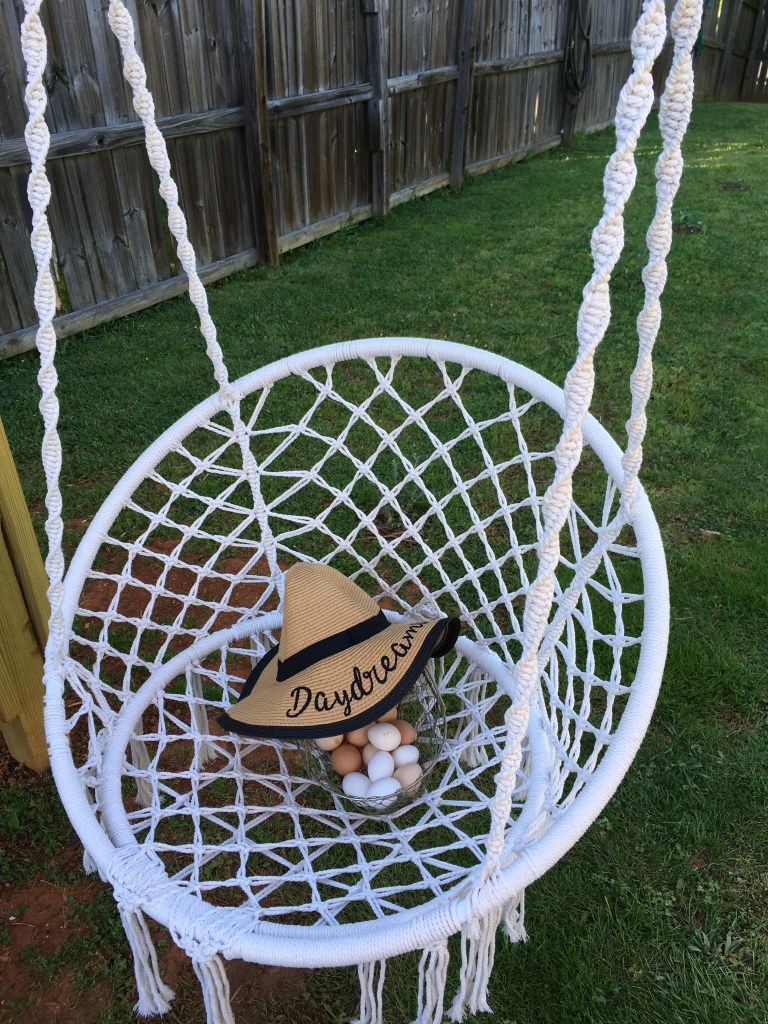
Basket full of the days eggs resting on a hammock chair hanging from the Grape Arbor.
Building a Grape Arbor is something that has been on my to do list for the past 10+ years. Grapes are a wonderful crop to grow on your own land as they grow very fast, are fairly pest resistant and easy to grow. They do require regular maintenance, pruning being the chief requirement.
As a child I remember visiting my grandparents farm during the summer and eating ripe grapes from their vine. It is a memory that I cherish and look forward to eating from my very own grape vines once more.
Building a Grape Arbor is a DIY project that you can tackle yourself. It takes some hard work, several partners, effort and time, but if you are diligent, you can build a Grape Arbor in a week.
Why I wanted to build a Grape Arbor?
Building a Grape Arbor has been a dream of mine for a very long time. Not only functional as a trellis for the grapes to grow on, Grape Arbors add a majestic presence to your backyard or garden. They command attention as you enter their sacred space. To make the most of your time and effort, you can attach a porch swing or hammock swings. Installing solar light to Arbor creates a romantic and relaxing seating area in your backyard.
Building a Grape Arbor.
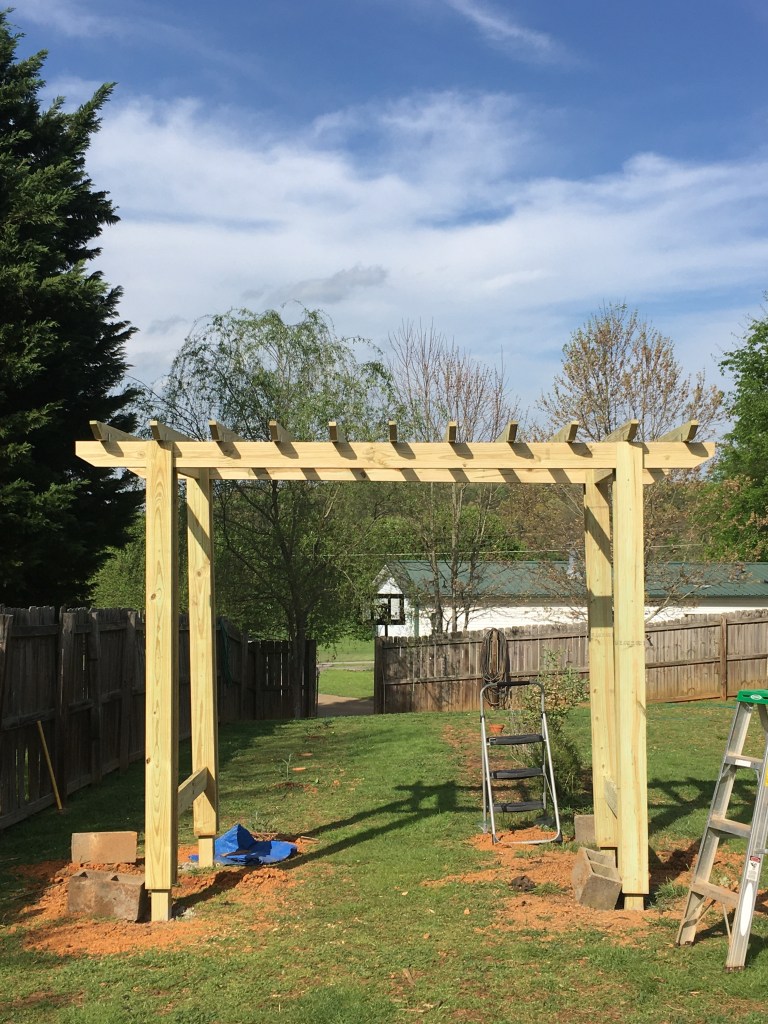
We chose a traditional style Pergola for our Backyard Grape Arbor. I wanted something that would not only serve as a trellis for grape vines, but a place that I could hang some backyard Hammock Swings. Above is the final completed project of the Arbor in our backyard. It is 8 feet tall is roughly 12 feet long.
Shopping list for a backyard Grape Arbor.
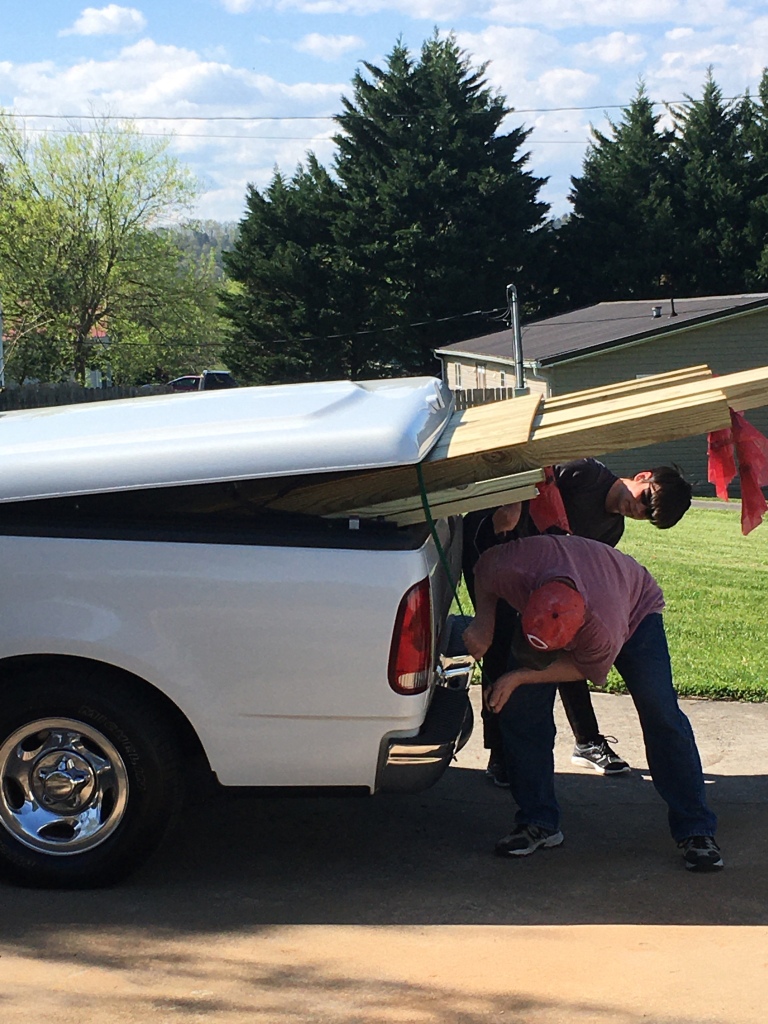
Pick up truck full of lumber for the Grape Arbor.
Posts: (4) 4×4 @ 7’6.5” and (8) 2×6 @ 8”.
Beams: (2) 4×6 @ 12’
Braces: 2×4’s
Runner on to of Arbor: (11) 2×4’s @ 5’8”. For a decorative look, cut the ends of the 2×4’s at a 45-degree angle or bevel. This is optional.
1 box of 2” deck screws and 1 box of 4” deck screws.
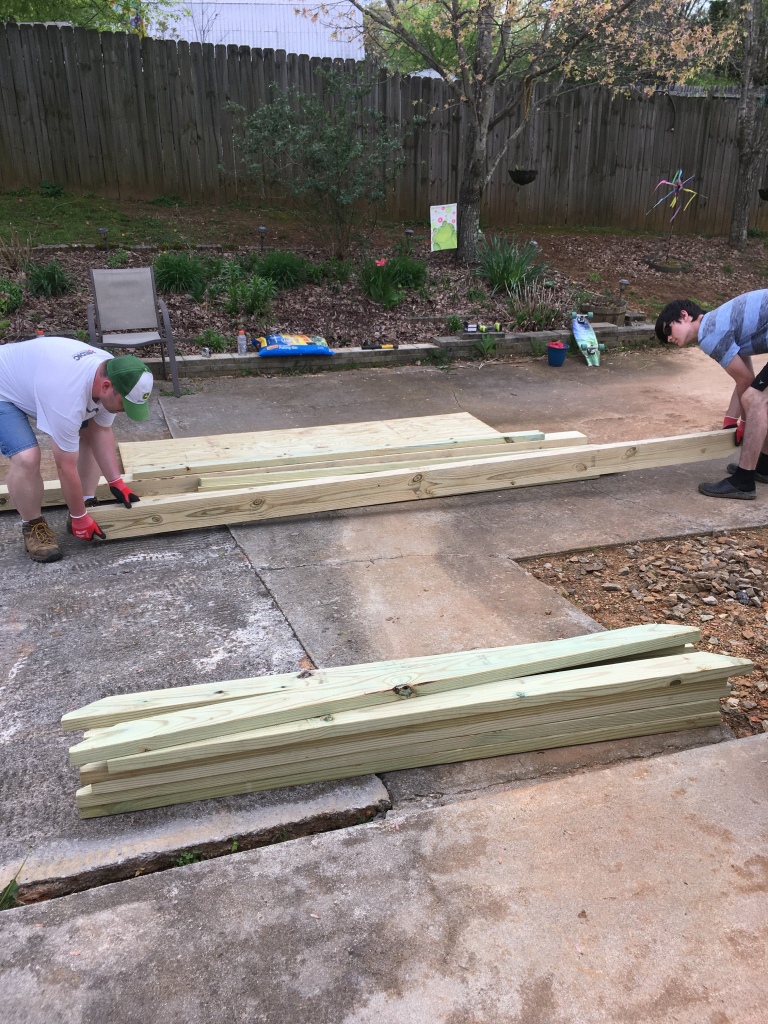
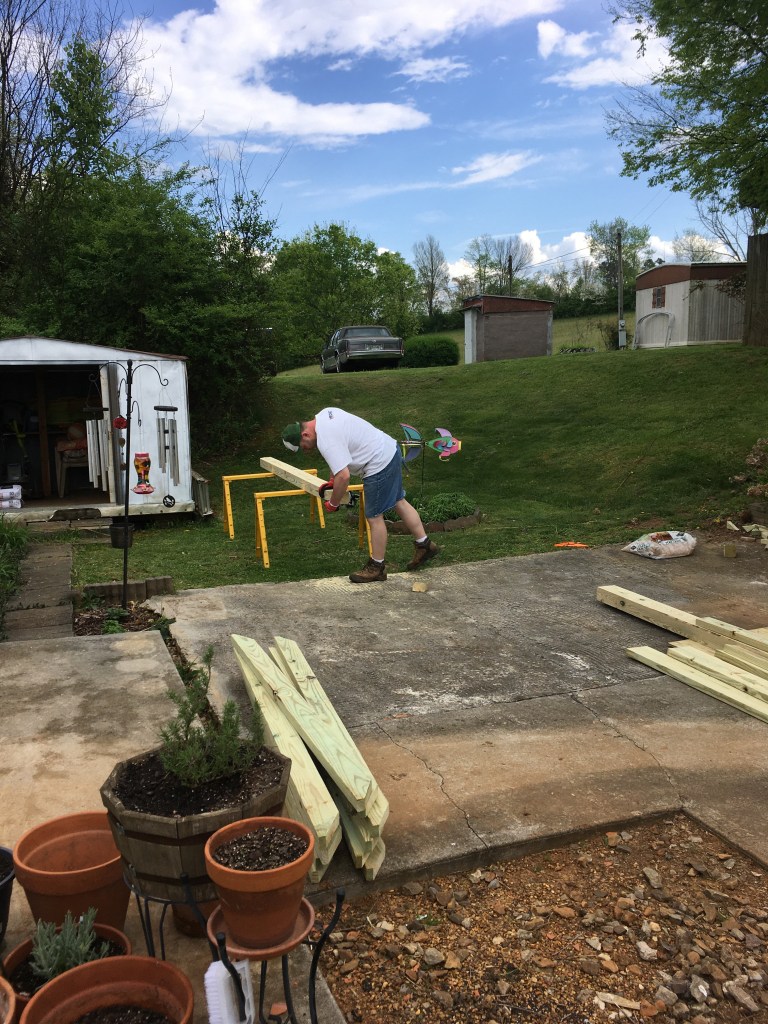
After we unloaded the wood, we cut the 2×4’s and 4×6 beams to size and beveled the ends at a 45 degree angle.
Preparing the wood by cutting 45 degree angles on the ends of the 2×4’s which will form the canopy of the Arbor.
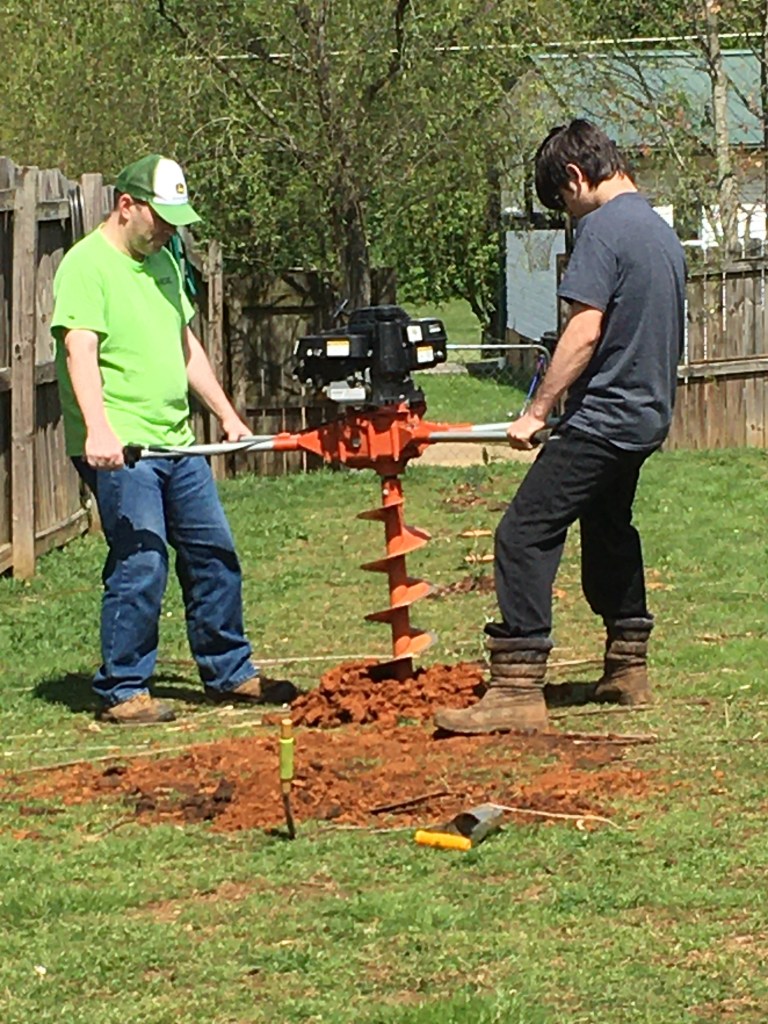
Before building the Arbor, we prepared the ground by digging the footings. We dug 4 holes at the dept of 4 feet. To accomplish this, we rented an Agar to dig the depth of the holes.
Digging the holes for the Arbor support beams.
After the footings were dug, we connected two 2×6’s to each of the 4×4’s then cemented them in place.
Cementing the 4×4 posts into place.
Next, we lifted the large 4×6 beams on center over the pair of 4×4 posts. These beams sit on top of the 4×4 posts. You can screw them into place if you wish, we decided to let gravity do the work for us.
4×6 beams sitting on top of the 4×4 posts.
Next, we attached the 4×4 pairs to each other using a 2×6 cut to length. We then toenailed them with 4” deck screws connecting them to the 4×4 posts.
4×4’s forming the canopy of the Arbor. Each held in place by braces connecting the 4×4’s to the 4×6 beams.
Next, we attached the (11) 2×4’s to the top of the Arbor to form the canopy. Each 2×4 is held into place and connected to the 4×6’s using braces.
Braces securing the 4×4’s to the canopy.
Nearing the end of our construction project, we cut the remaining 2×4’s to form diamond supports connecting the 4×4 beams to one another. These braces add beauty and strength to the Pergola. They are attached to the main support beams with pocket hole screws.
4×4’s forming diamonds as supports also adding esthetic beauty to the overall look of the Arbor.
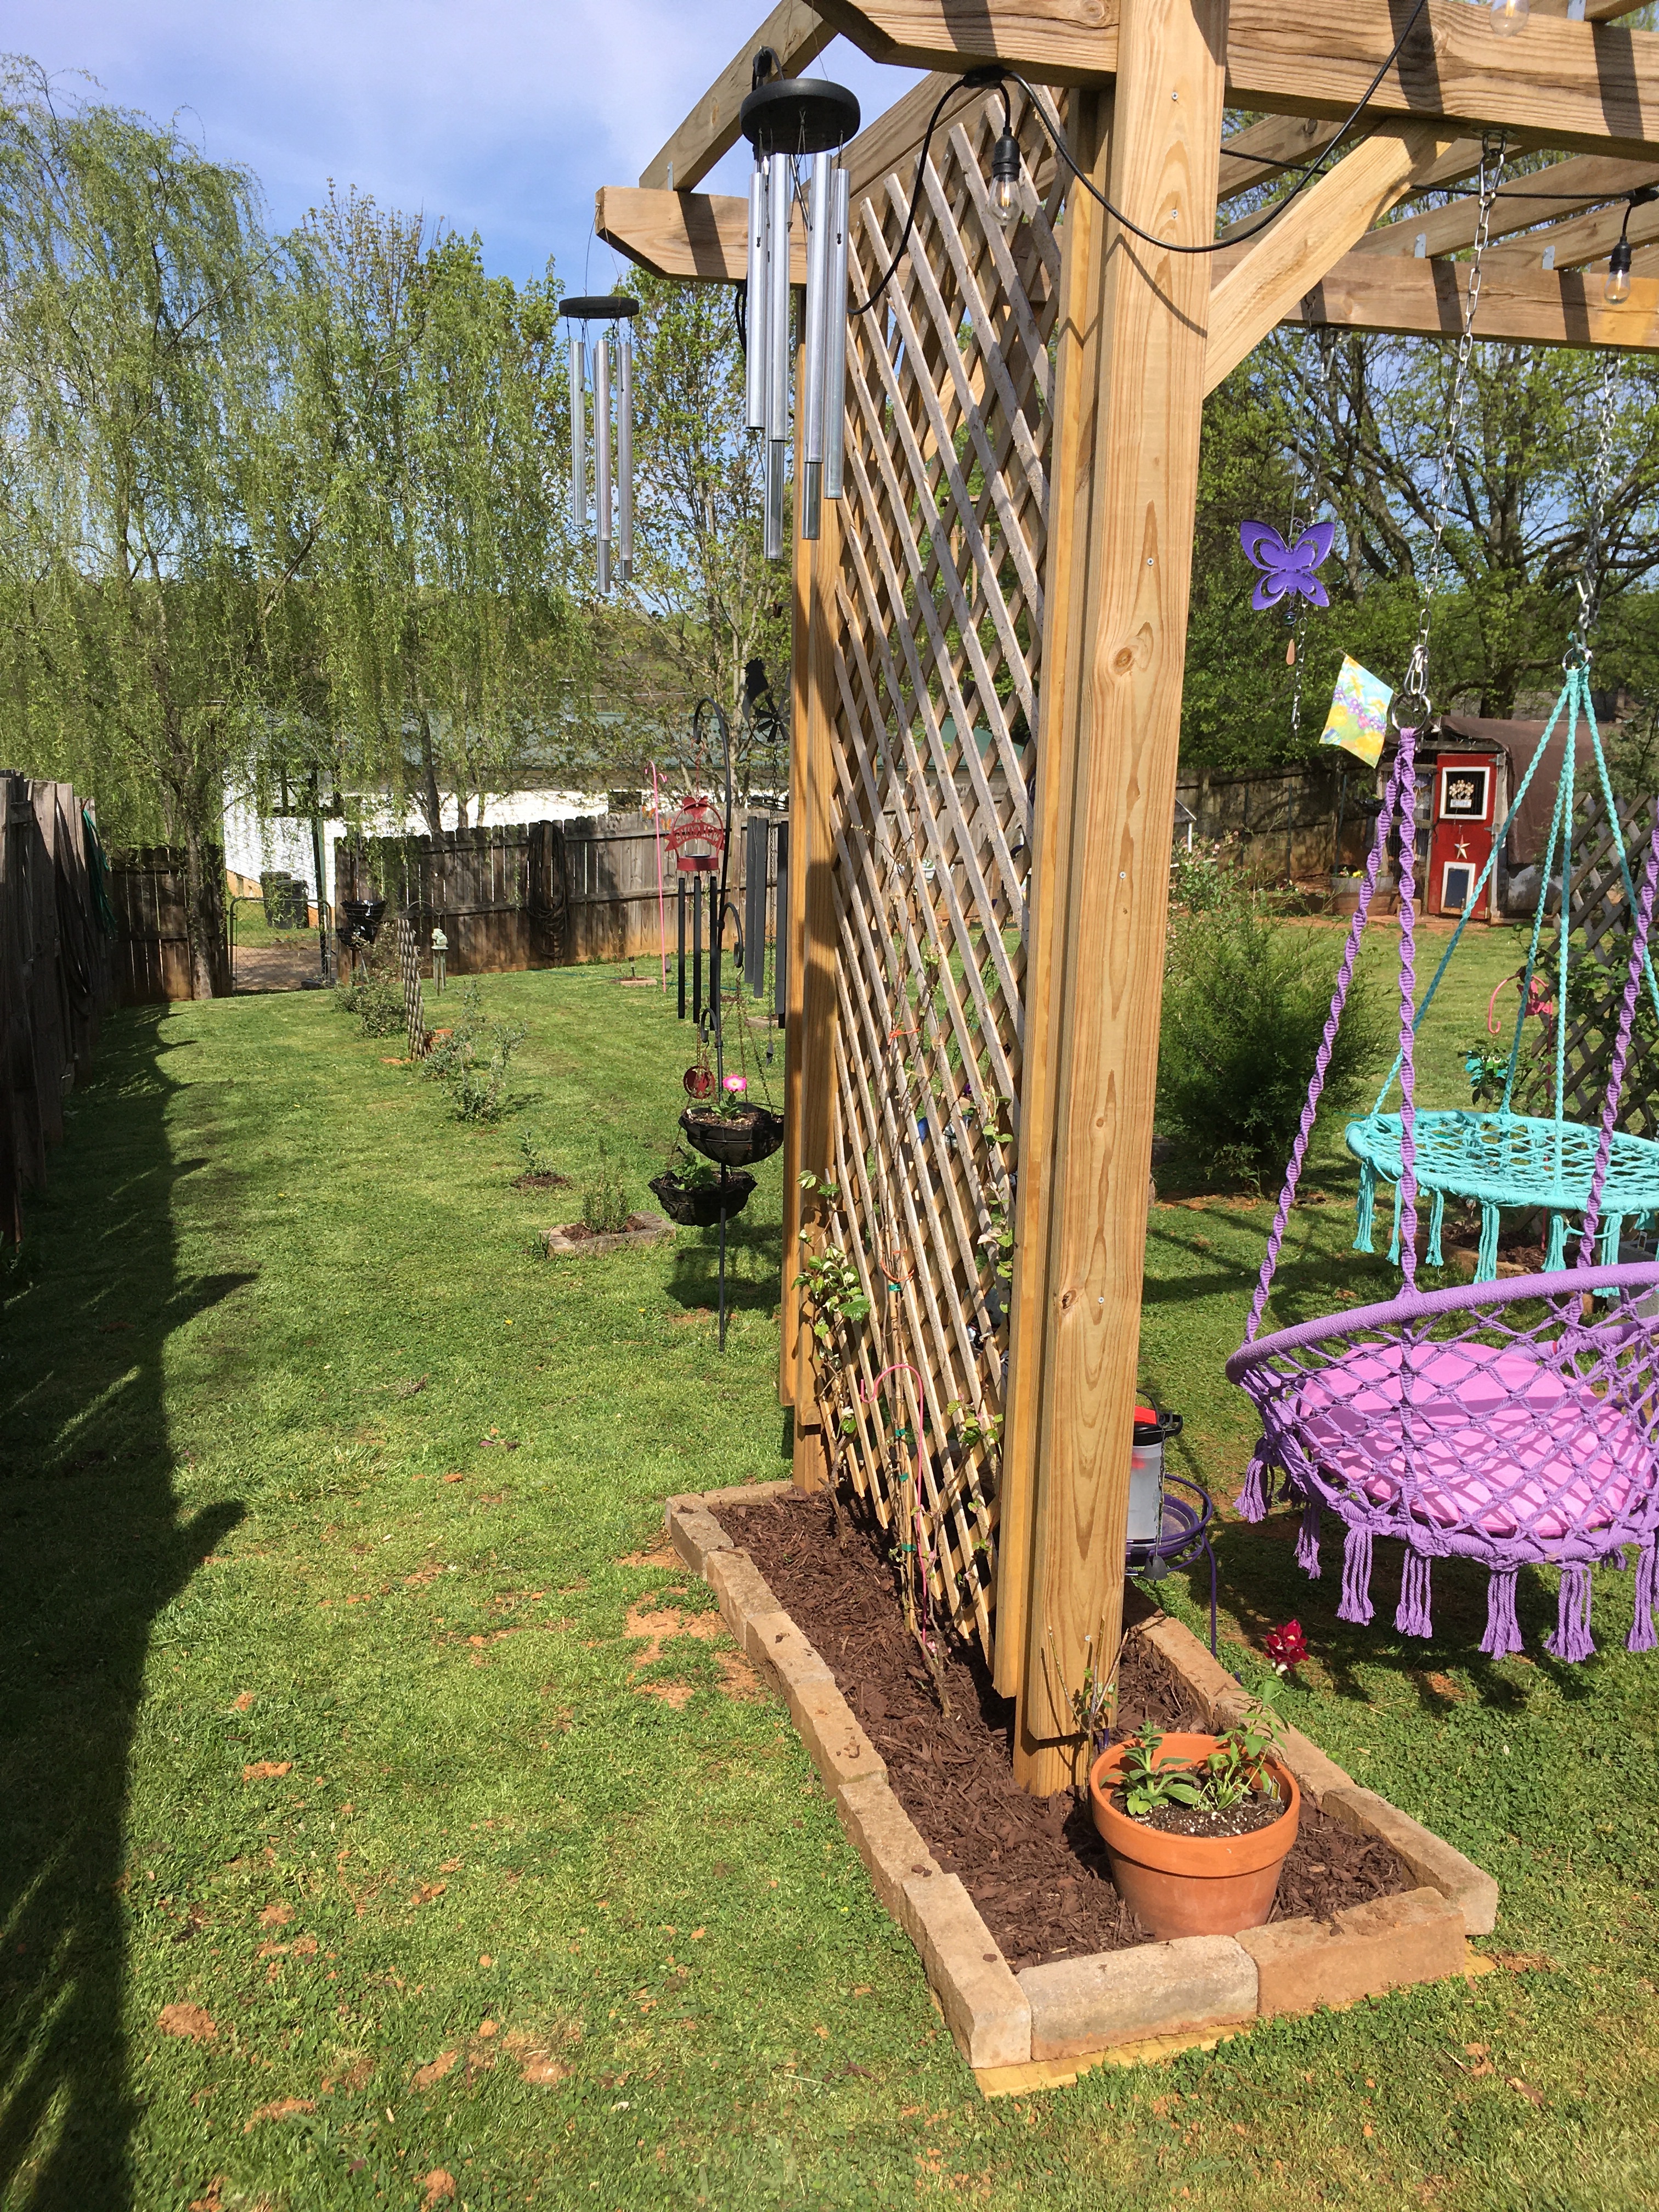
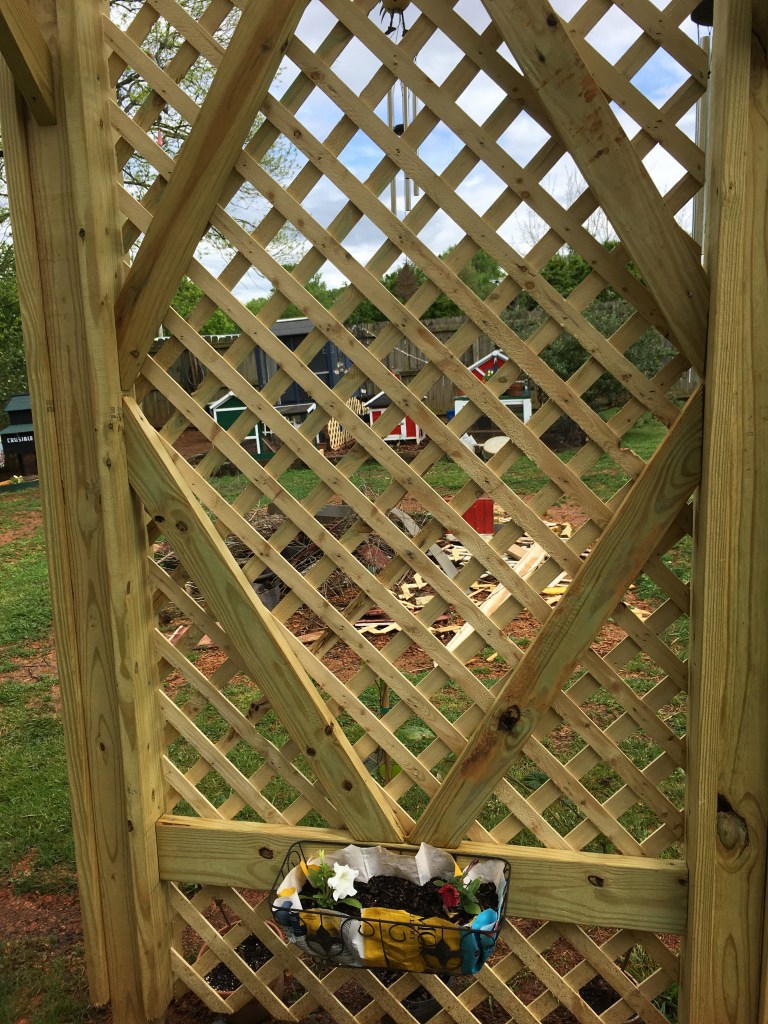
Finally, we added lattice boards to each side of the Arbor. This adds a touch of sophistication to the Arbor while giving the grape plants something to grasp onto as they climb to the canopy.
Lattice boards secured to each side of the Arbor. They add an aura of distinctive quality to the finished look of the Arbor. The lattice boards also give the young grape plants something to grab onto as they climb to the canopy.
From start to finish, it took us 1 week to build this Pergola Grape Arbor. The finished product is stunning!! It brings a sense of completion to our backyard, complimenting the “coop-hood” (a.k.a. chicken coops) with an aura of dignity.
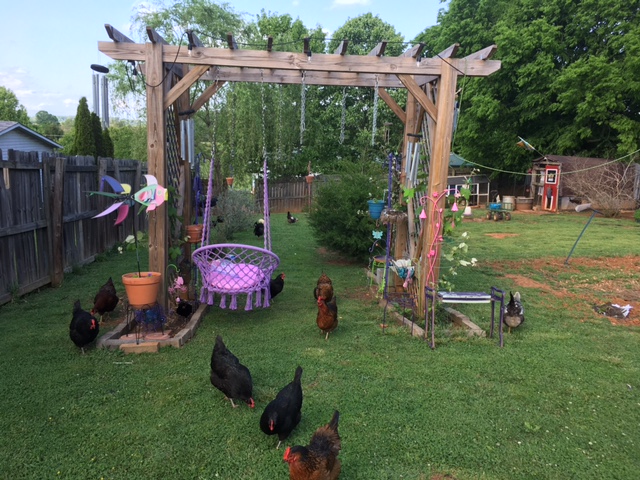
Fi (Silver Lace Polish Hen) perched on a hammock swing under the arbor.Finished Grape Arbor complete with hammock swings.The Grape Arbor in the backyard opposite the “coop-hood”.
My favorite activity is to lay on my hammock under the Grape Arbor, read, listen to the chatter of my girls and watch the grapes grow.
Enjoying a relaxing Sunday afternoon reading on my hammock lying under the Grape Arbor.
I cannot wait for the grapes to grow and reach the Arbor canopy. Until then I will sit under my Arbor, read, sip on some wine and look forward to the day that I can eat fresh grapes from my very own grape vines.
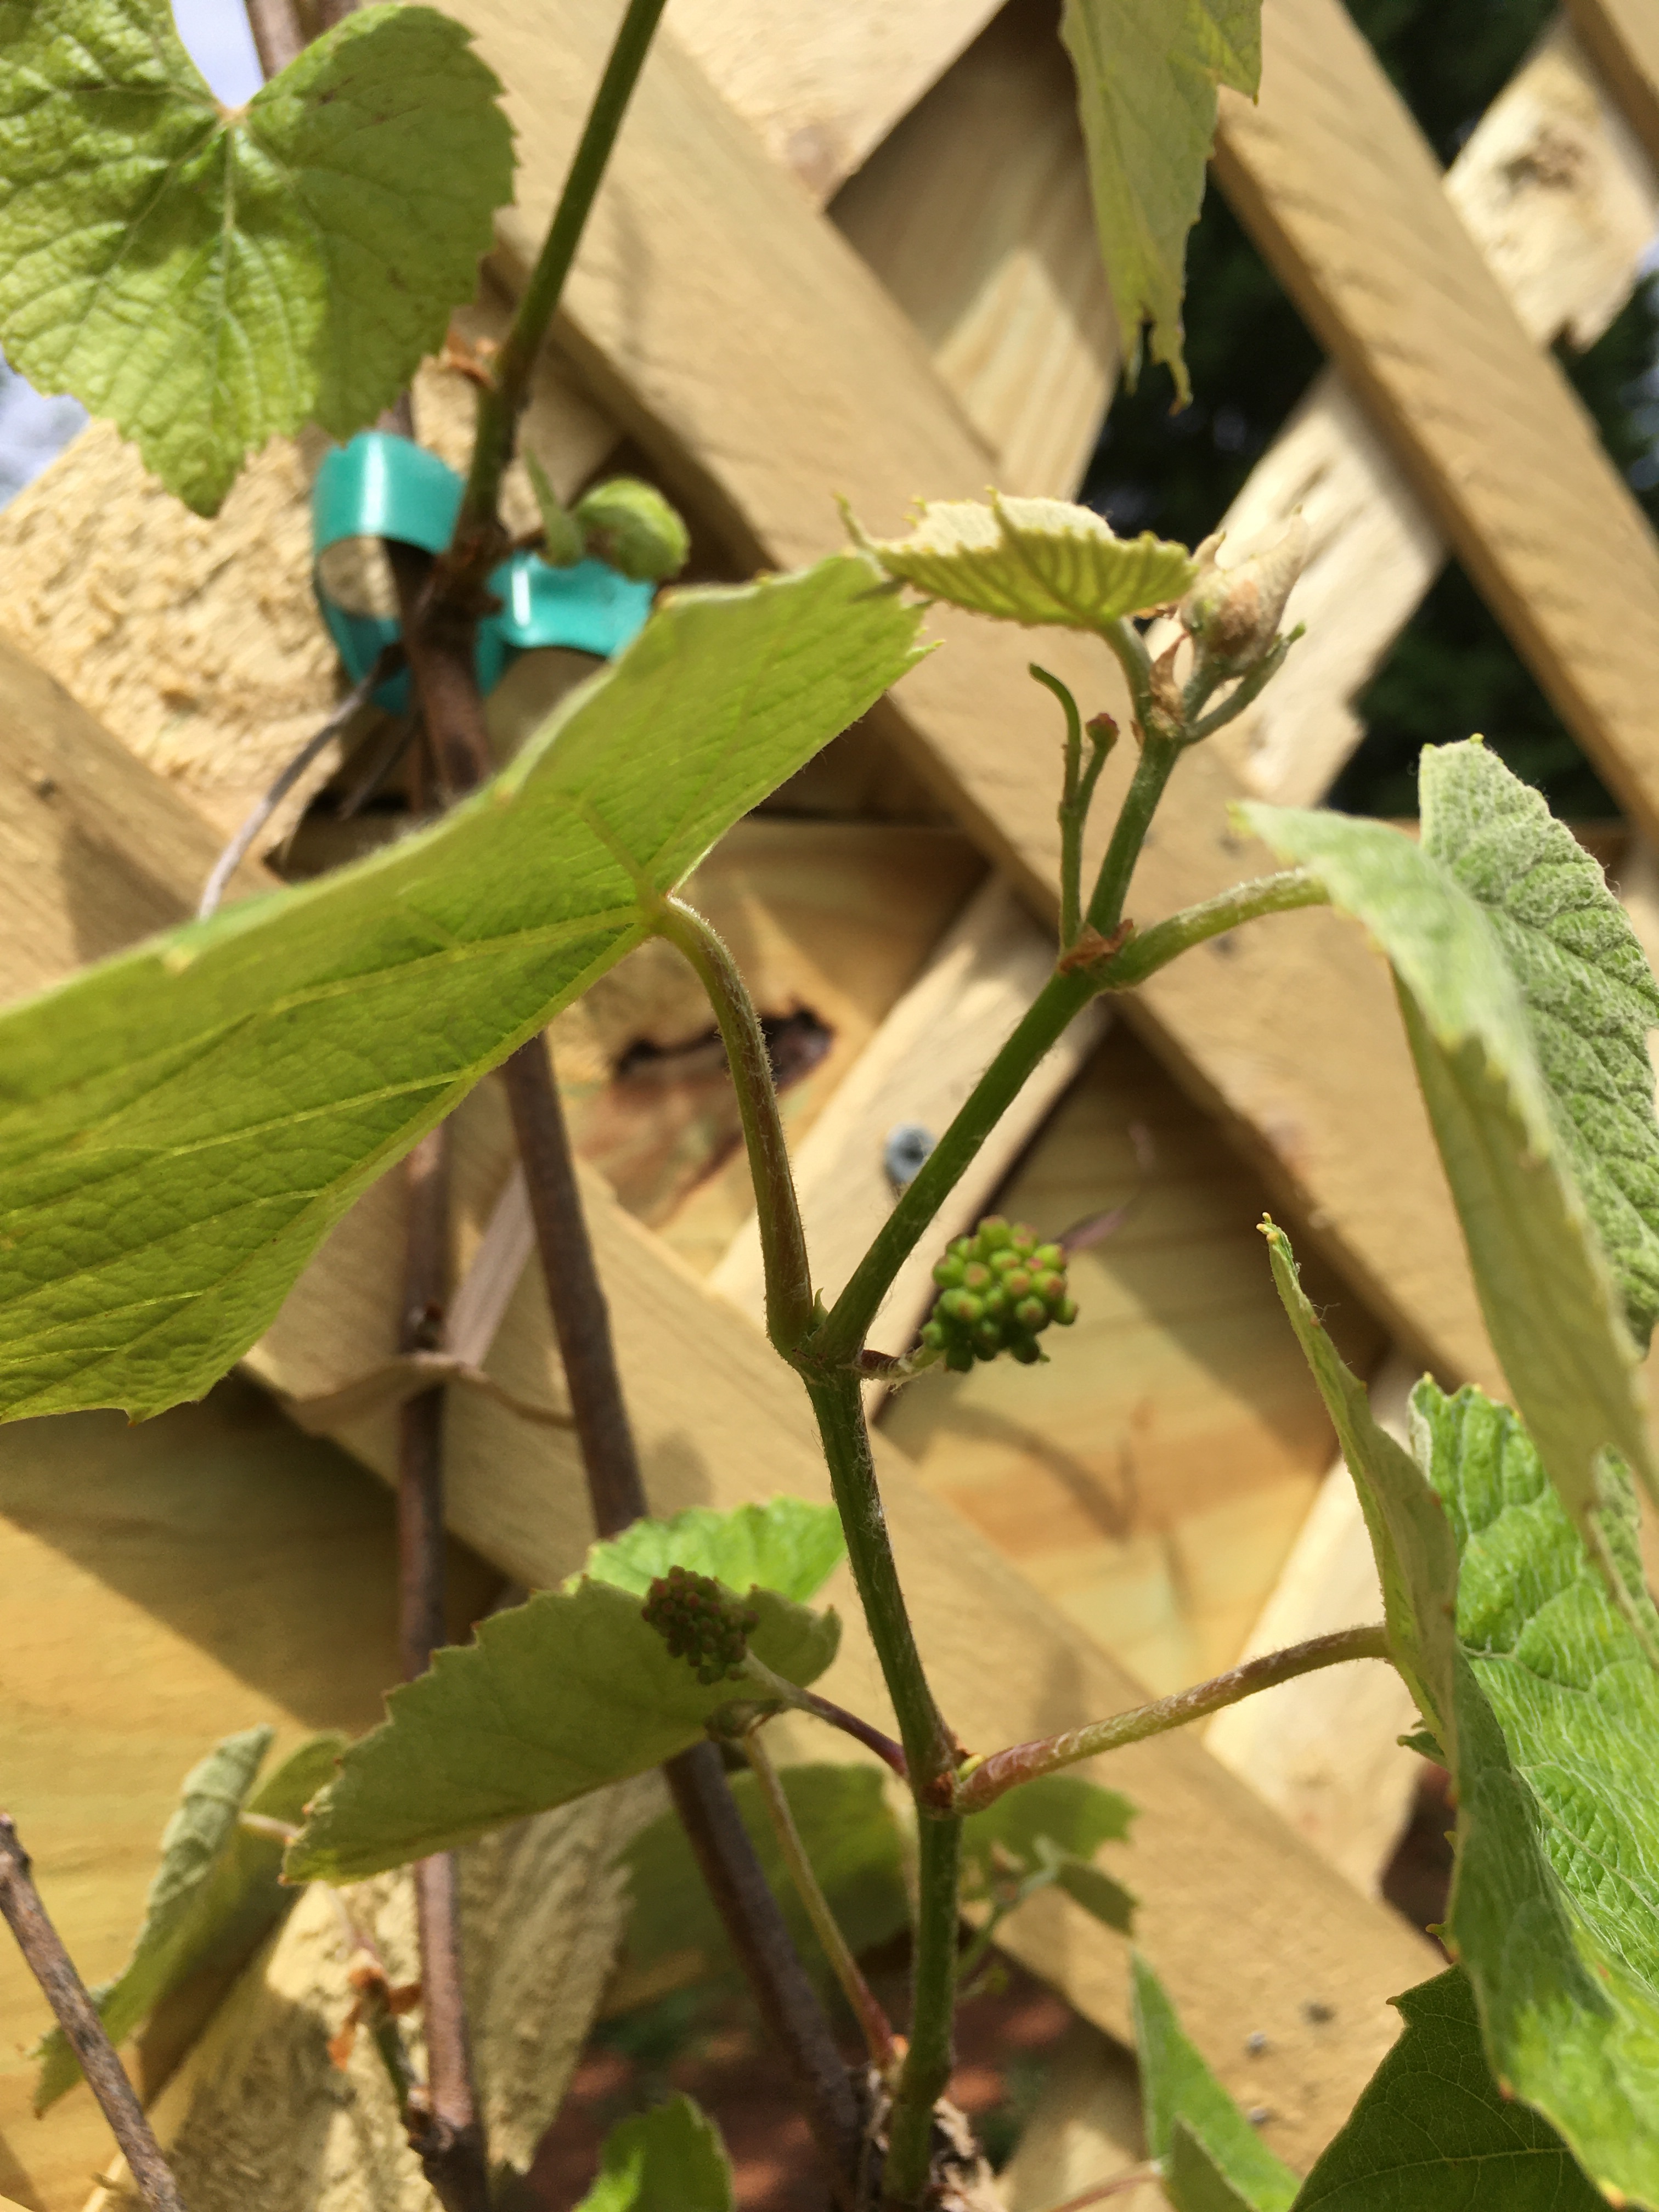
Grape clusters on a Muscadine Grape Vine.
I hope you enjoyed this post. Building this backyard Grape Arbor was a worthwhile endeavor, bringing a completion to our backyard homestead.
You too can build a Pergola Grape Arbor in your own backyard or garden and reap the benefits of growing your own grape vines.
Me, relaxing in a hammock swing below the Grape Arbor.The girls working hard to keep the grape vines free of bugs and weeds.My “hen-helping” crew, keeping the grape vines healthy, bug, and weed free.
Today May 2022
Three years after construction, the grape vines are prolific and rapidly climbing to the canopy. This year’s harvest (2022) will be the best yet! 🍇
Grape Vines loaded with tiny grapes.Grape Vines climbing to Arbor CanapyFi (Silver Lace Polish Hen) perching on a hammock swing in the shade of the Grape Arbor
I am a published author, multi-disciplinary writer and blog contributor. If you like this blog, please visit some of my other sites.
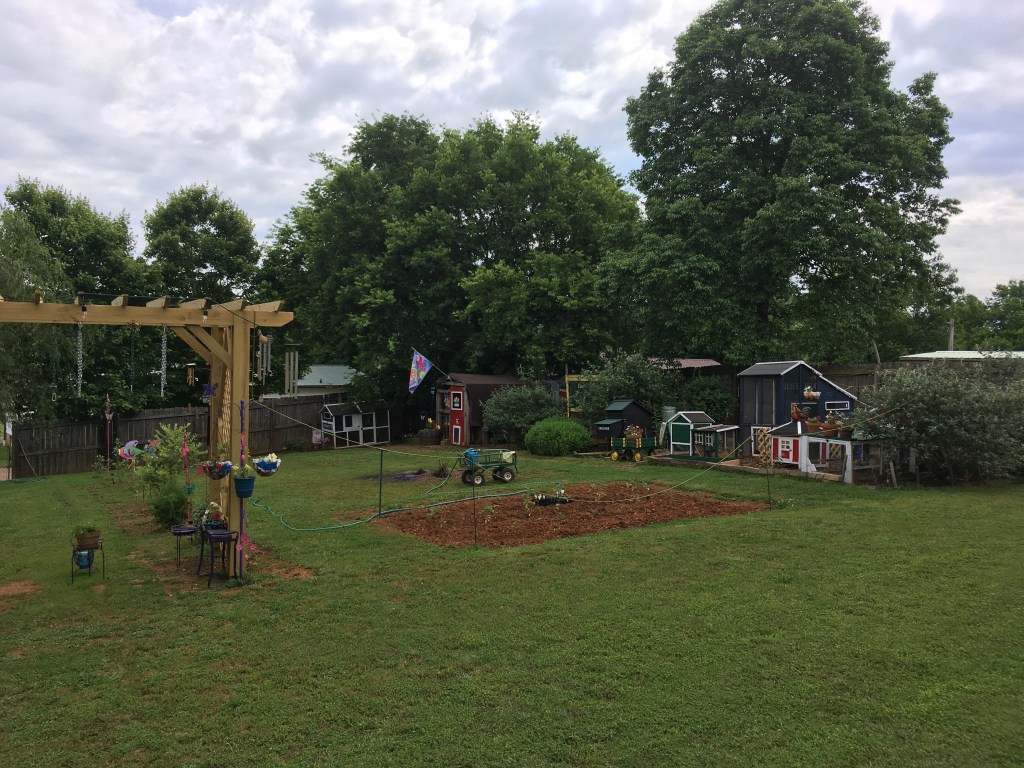
Spring has sprung at the Kuntry Klucker Farm, chicks are peeping and flowers blooming. In this post I will detail how I decorate my backyard for the coming growing season. It is no secret that I tend to go overboard when it comes to decorating the backyard for my girls, this will be a virtual tour, a flower walk if you will. We will start from the coop closest to the yard entrance and work out way out.
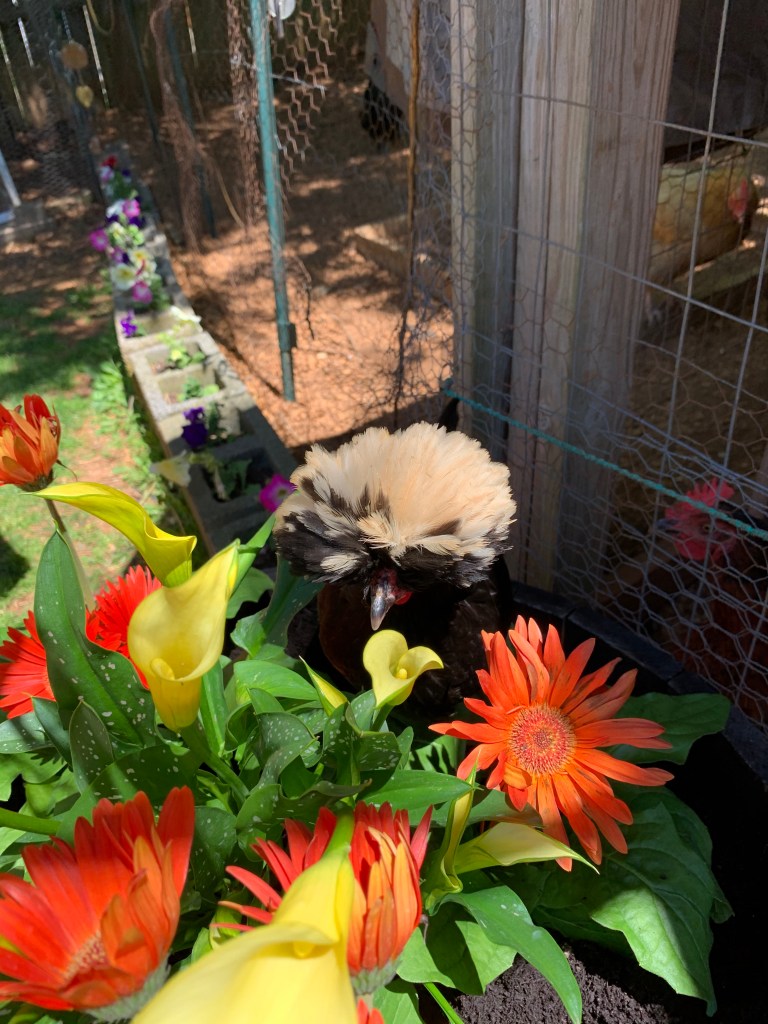
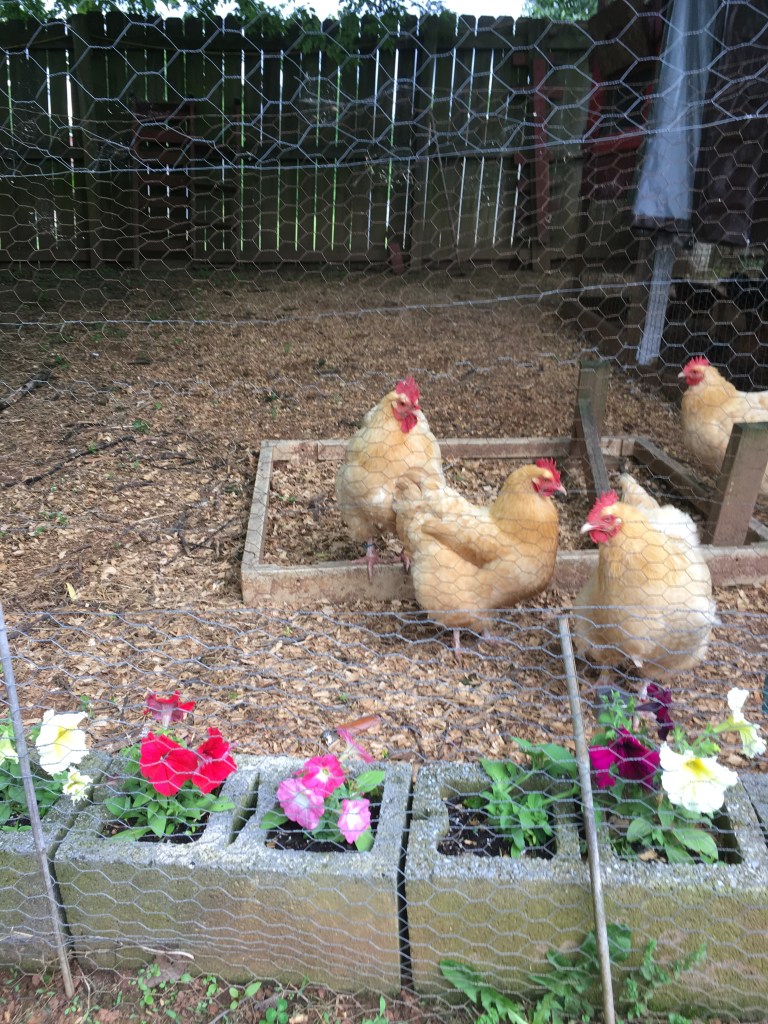
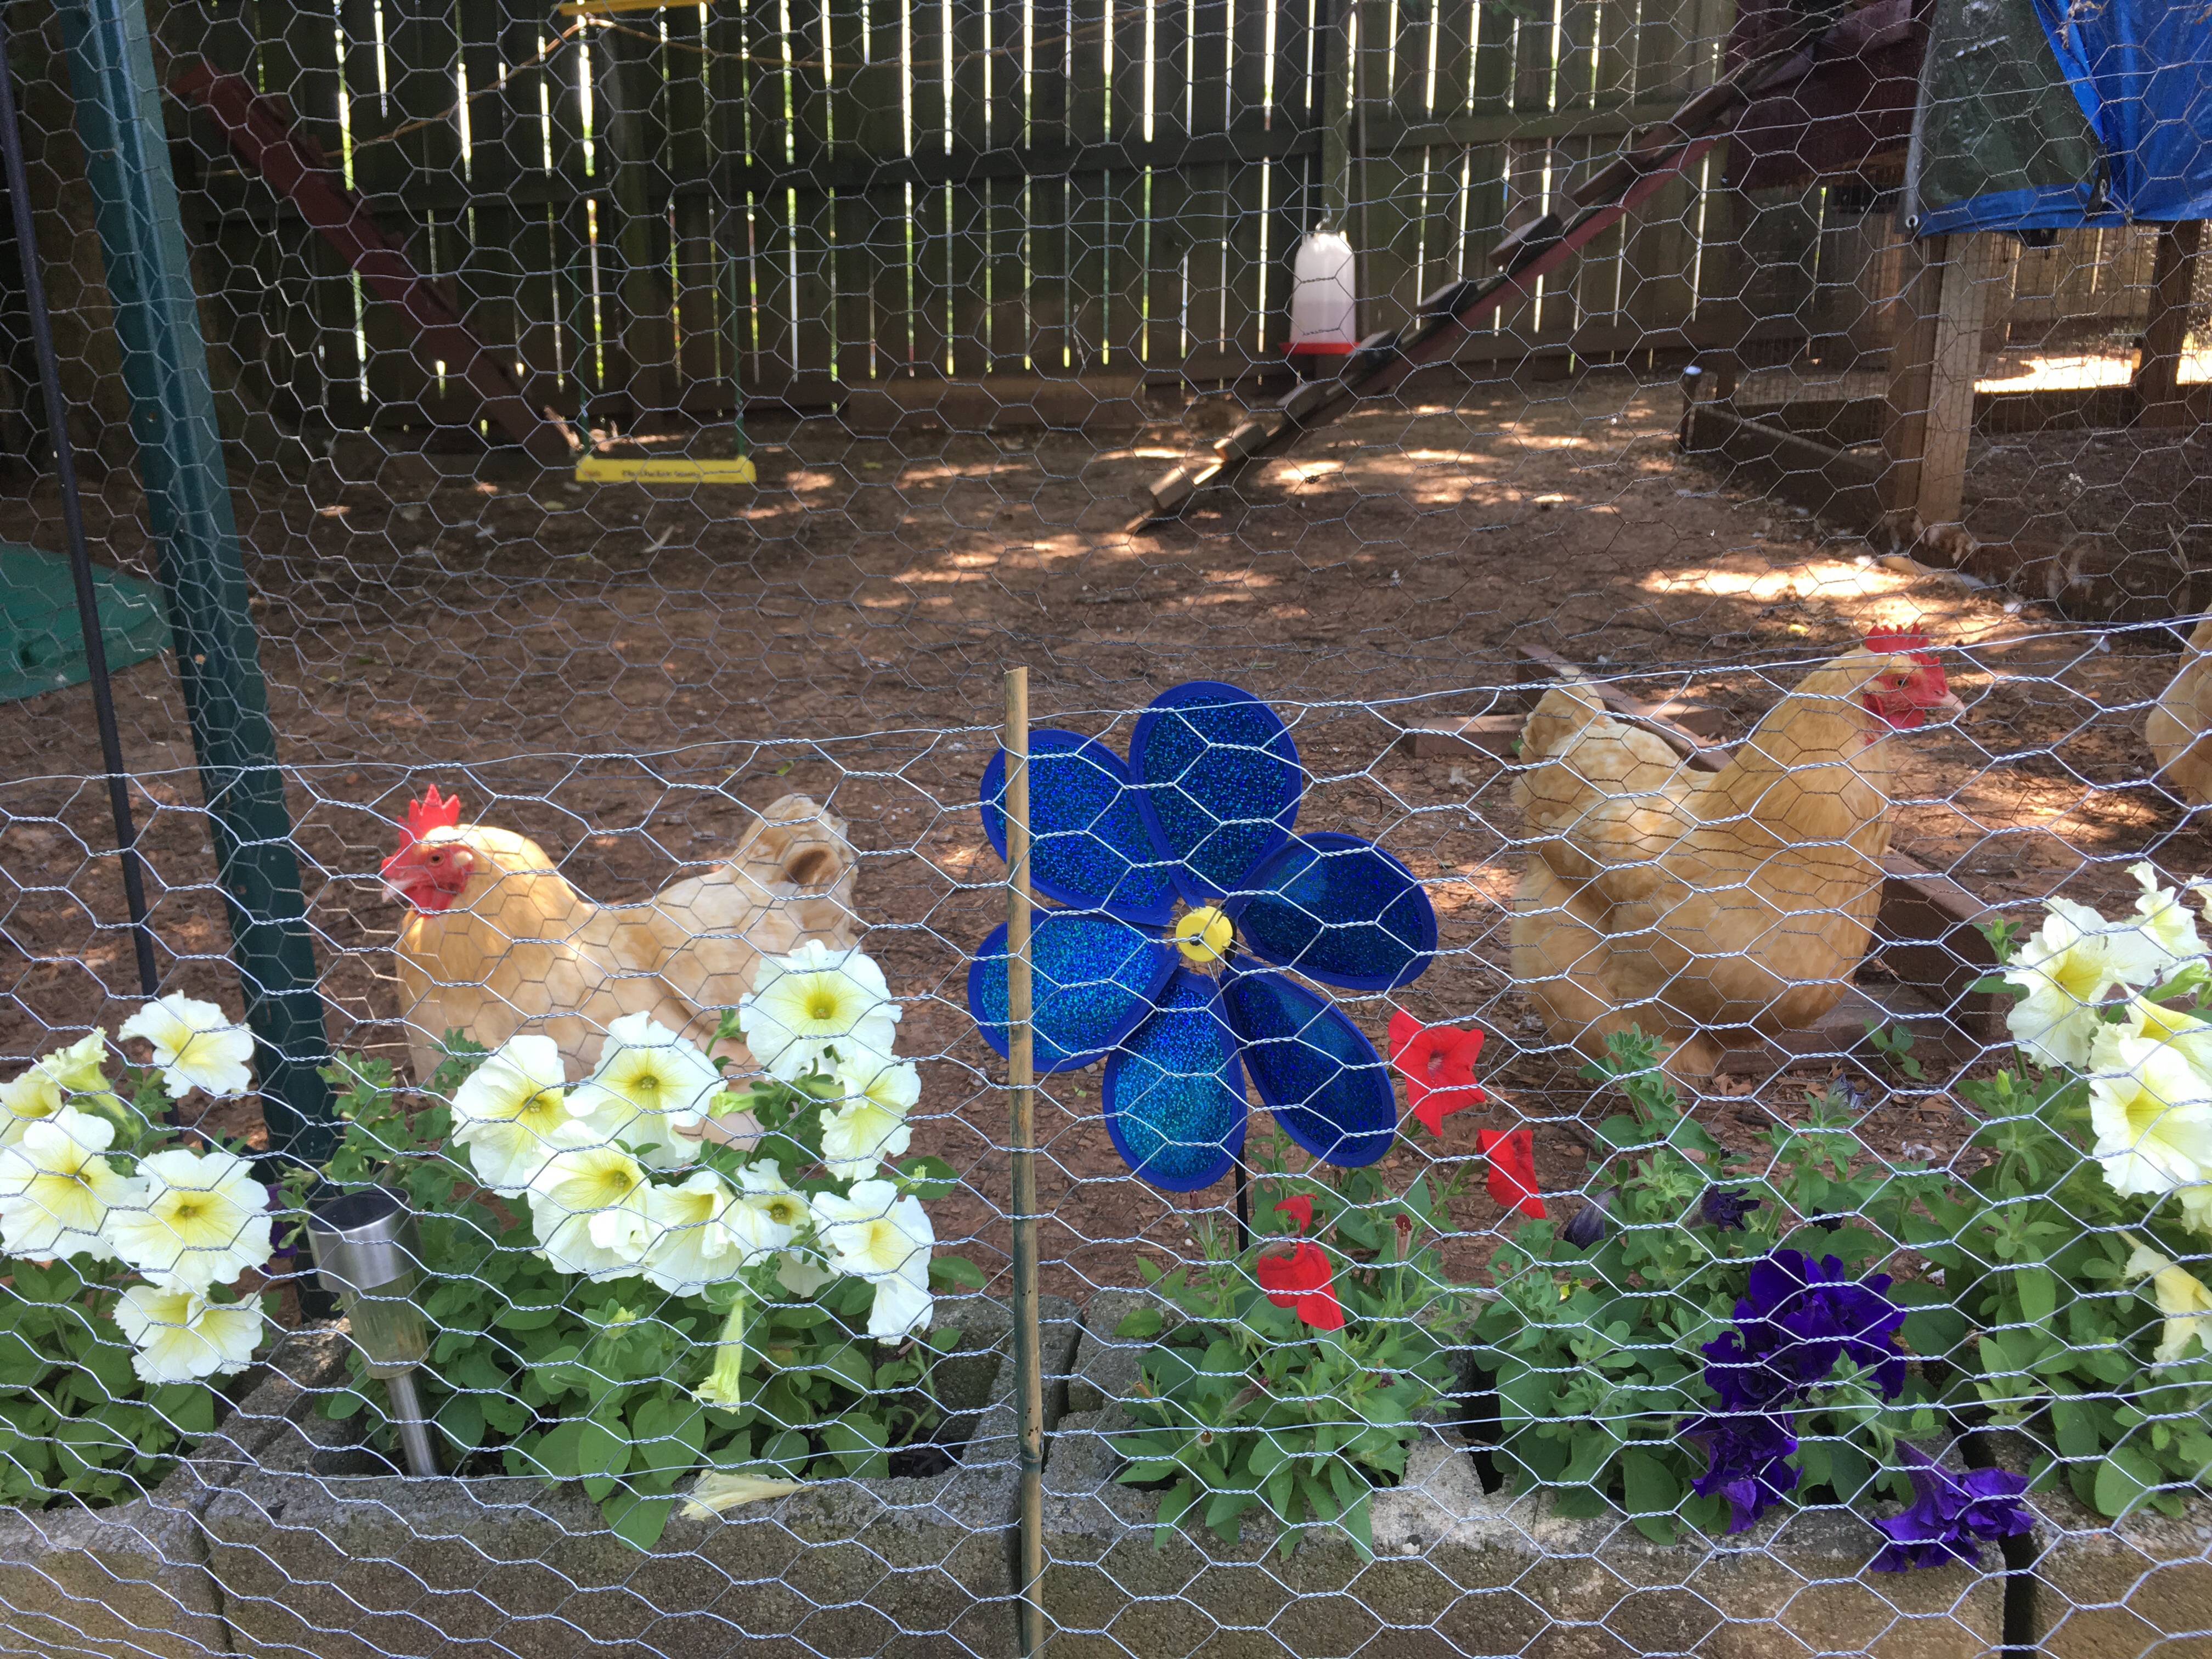
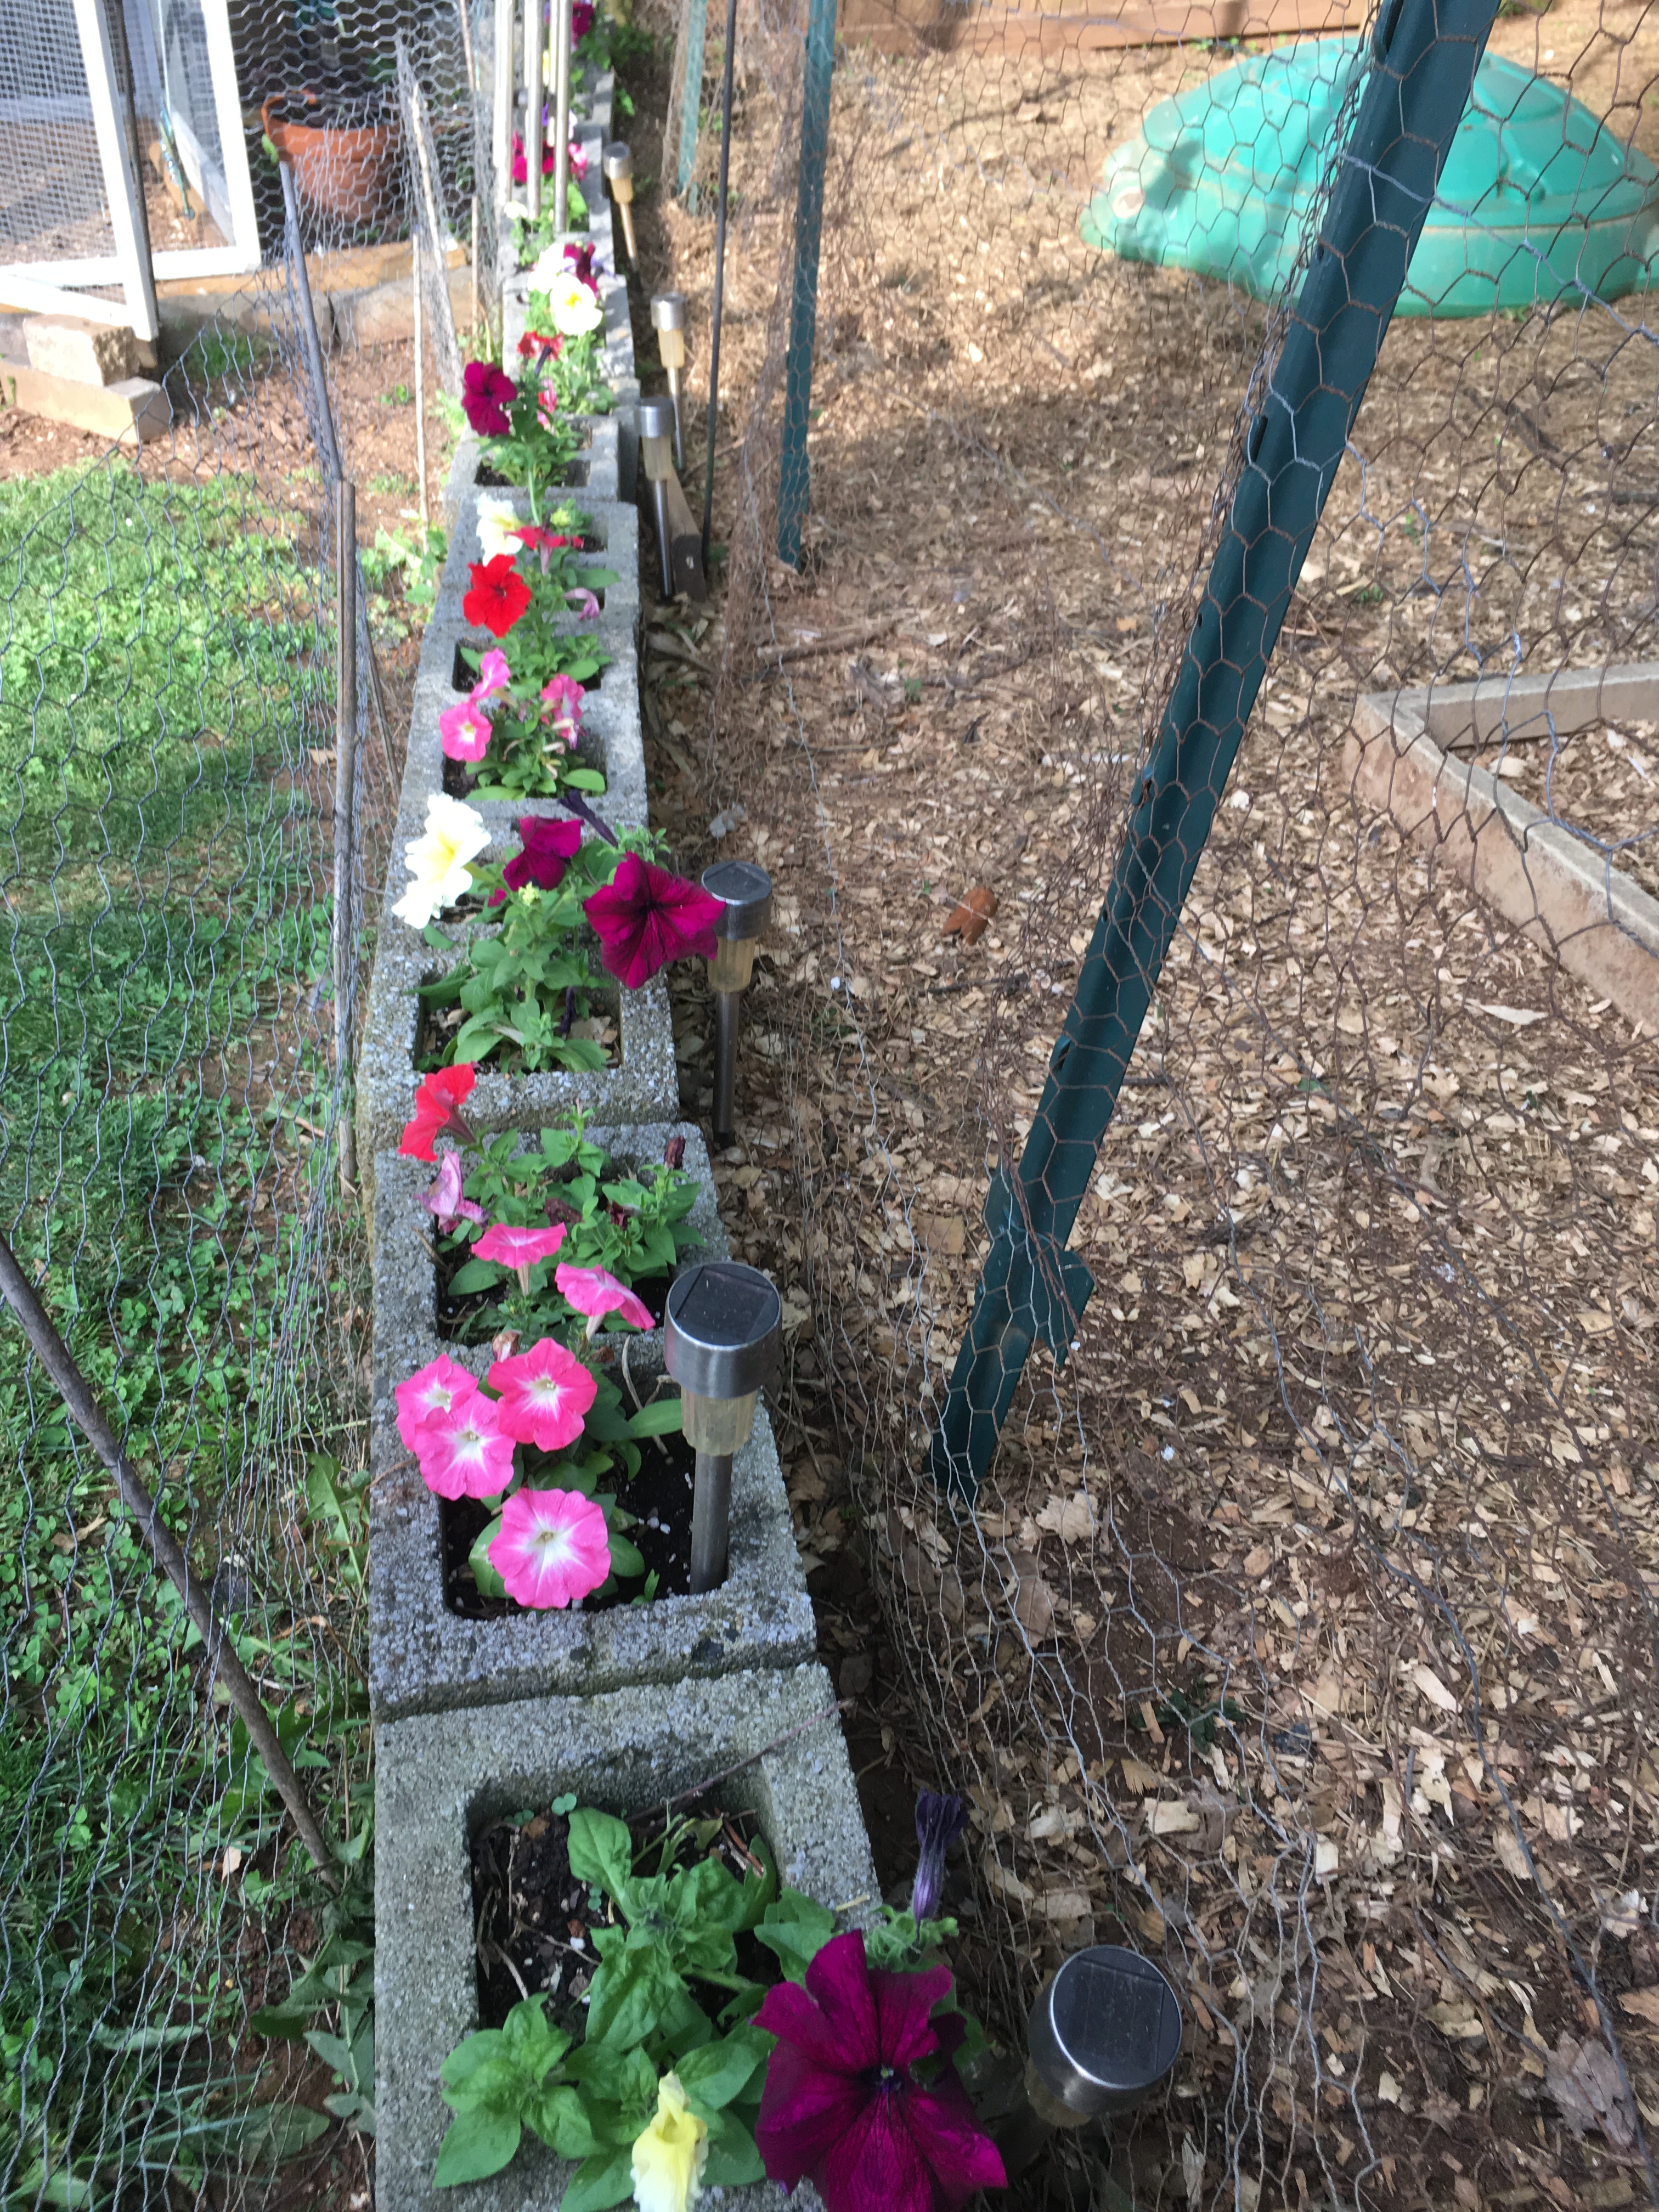
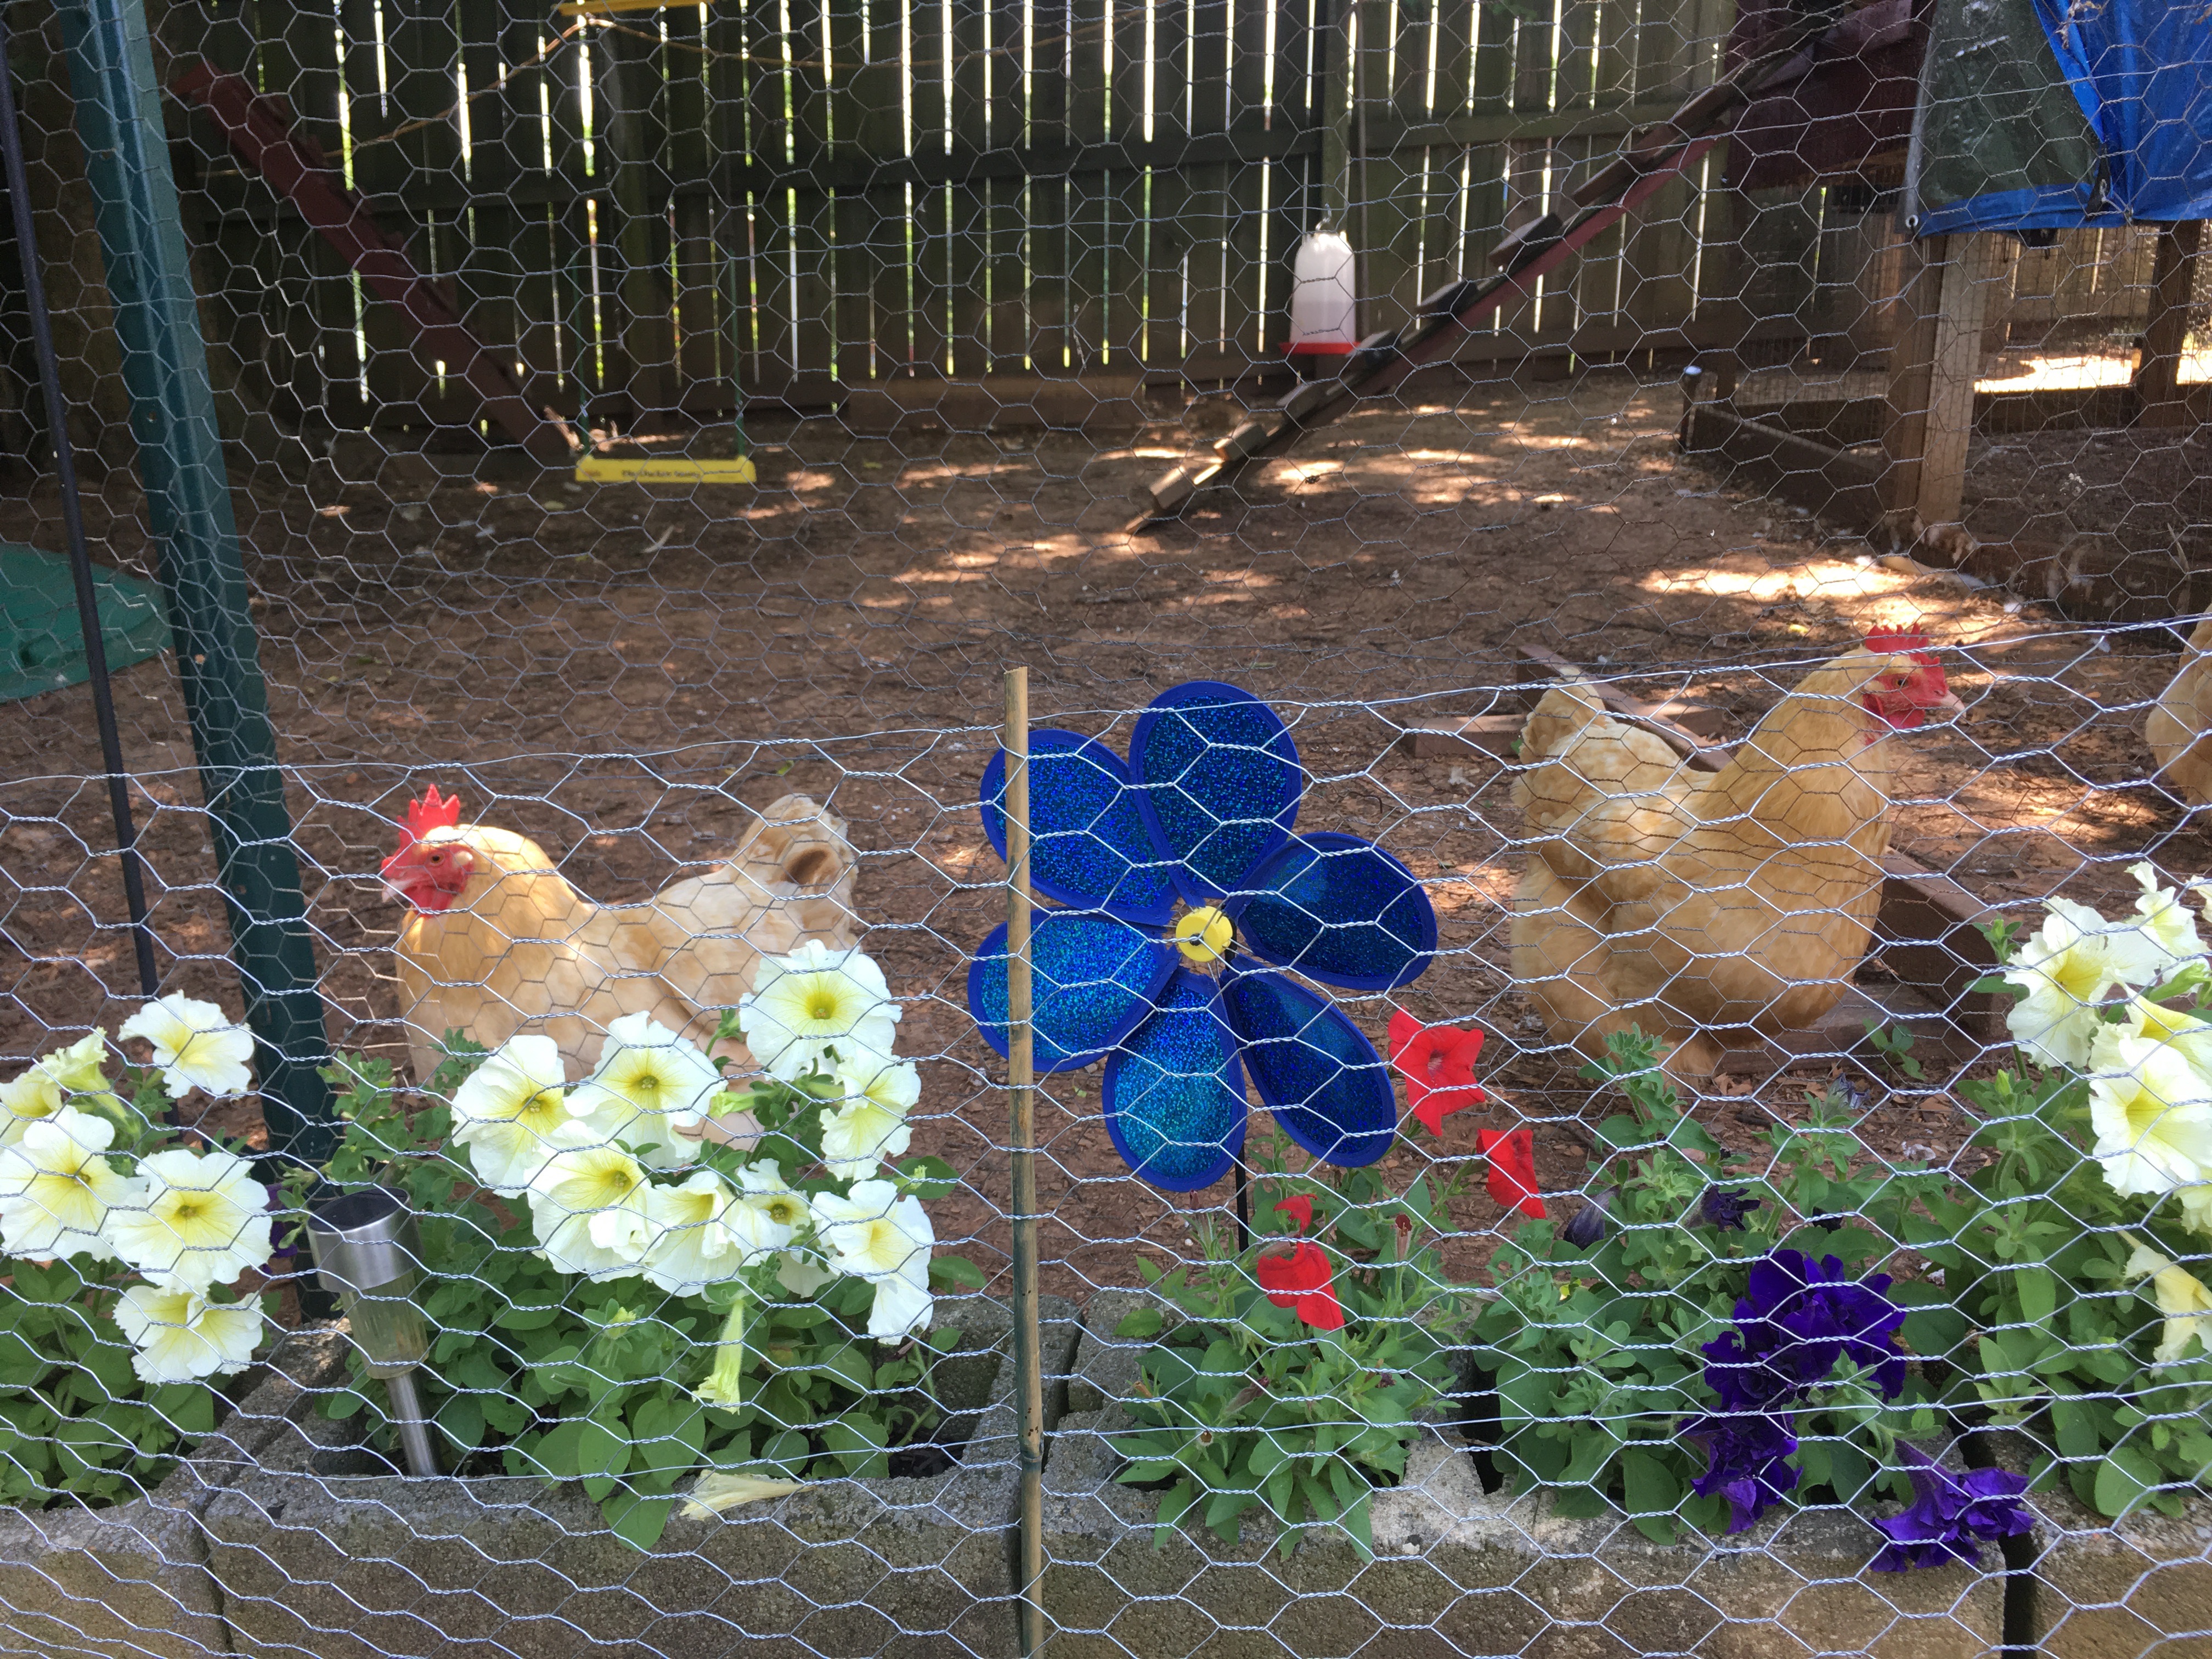
When entering the backyard, the first coop we come to is Henwarts. Henwarts is the newest addition to the “Coop-hood” and shares a large outdoor pen with The Kuntry Klucker. In front of The Kuntry Klucker I have a row of cinder blocks. These blocks have two purposes, keeps the girls and the dirt in the outdoor pen area and doubles as planters for flowers. Every year in this cinder block row I plant petunias. I love these little super bloomers for many reasons. A few of the most important are the fact that they display lot of color, tolerate the hot afternoon sun well, and most importantly hold up well around chickens. I have a few ladies that despite my efforts will help themselves to an afternoon snack of petunia blooms. The petunia’s being prolific bloomers look no worse for the wear, recovering very quickly.
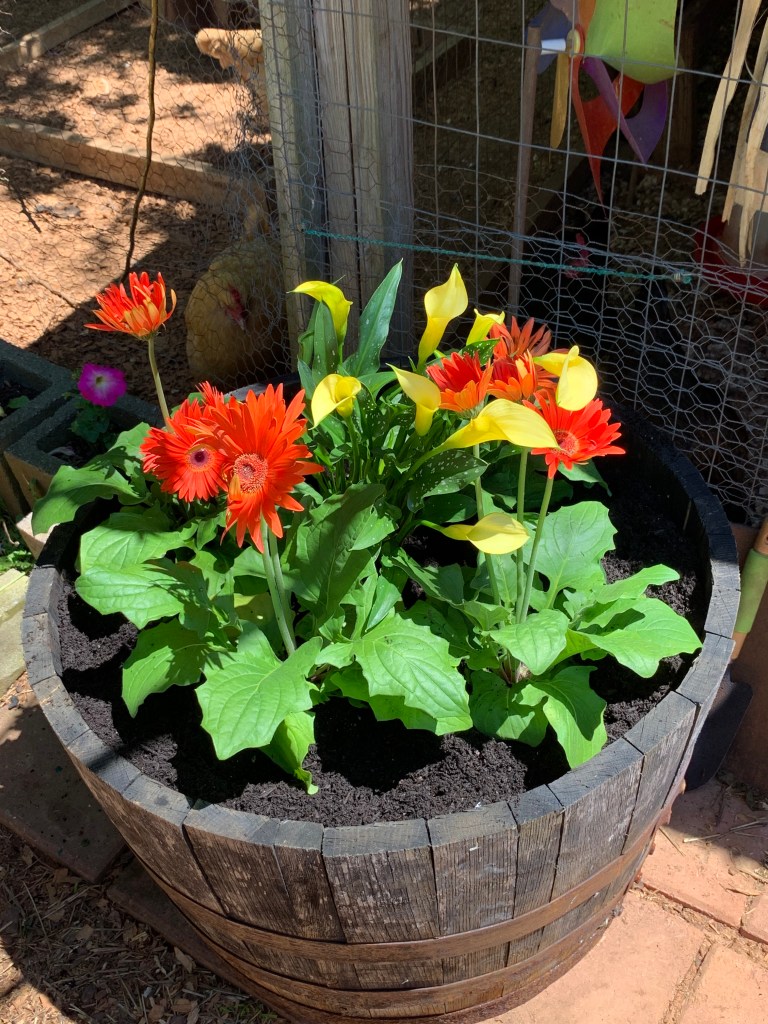
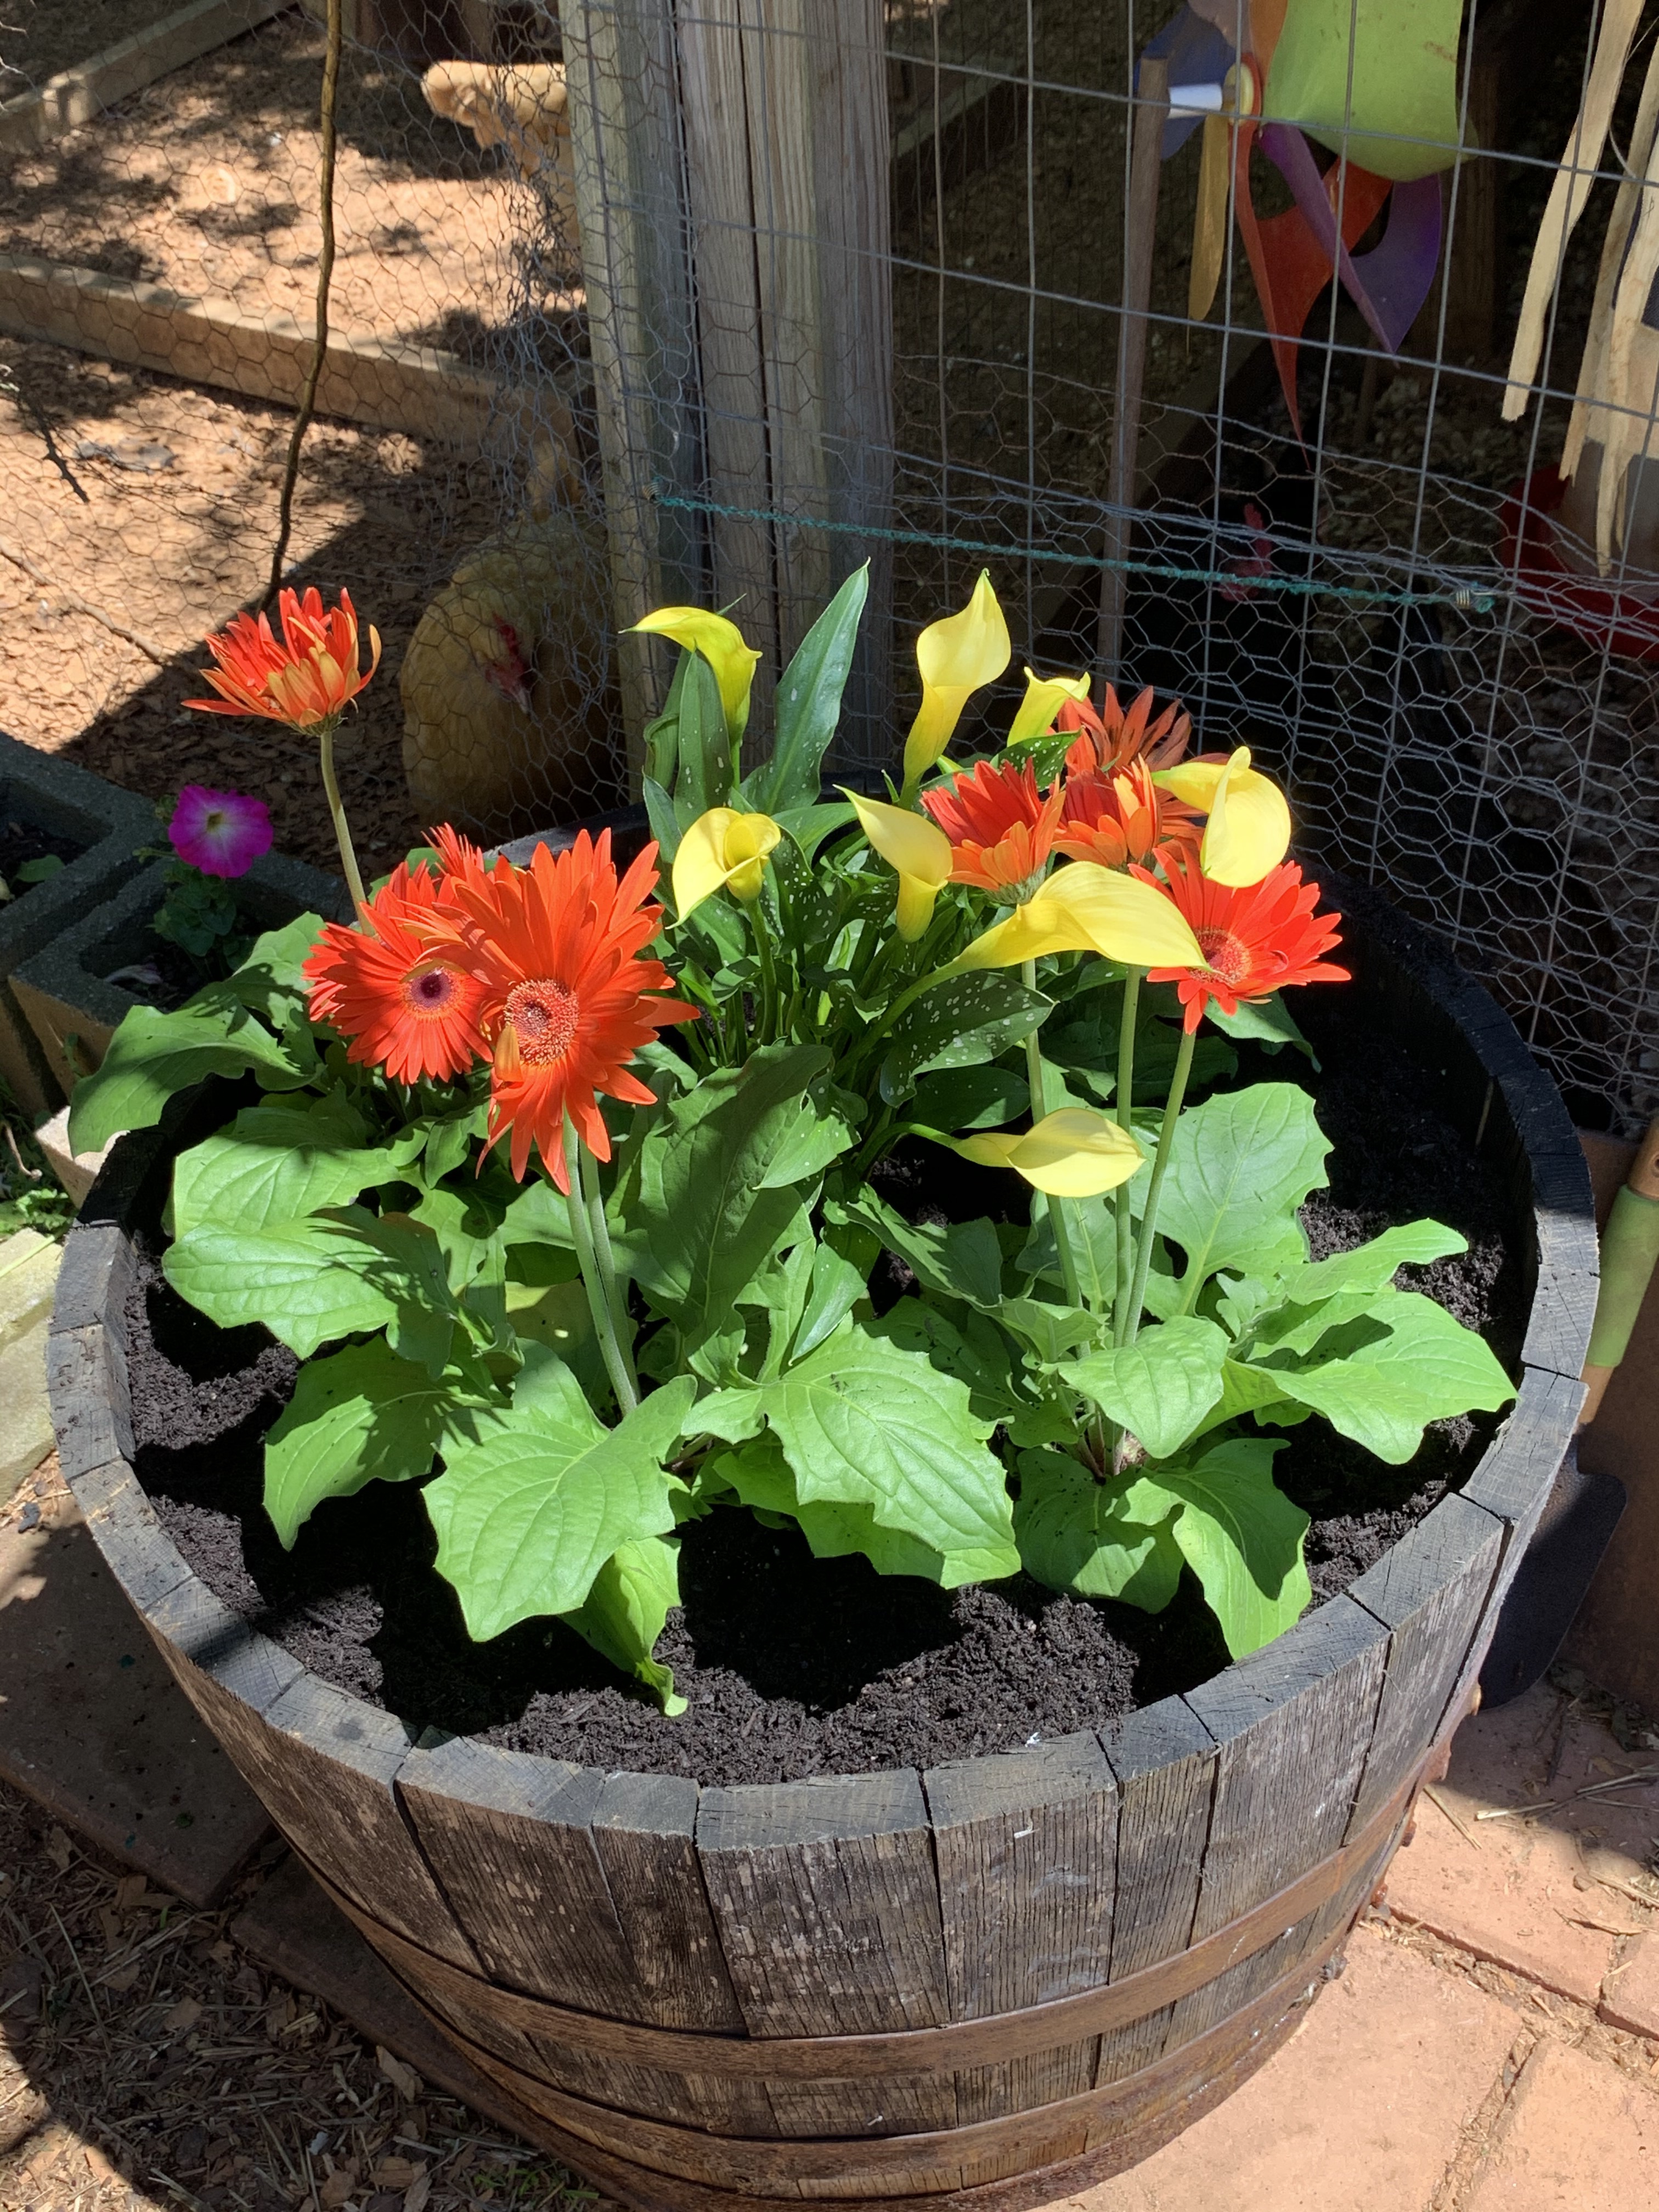
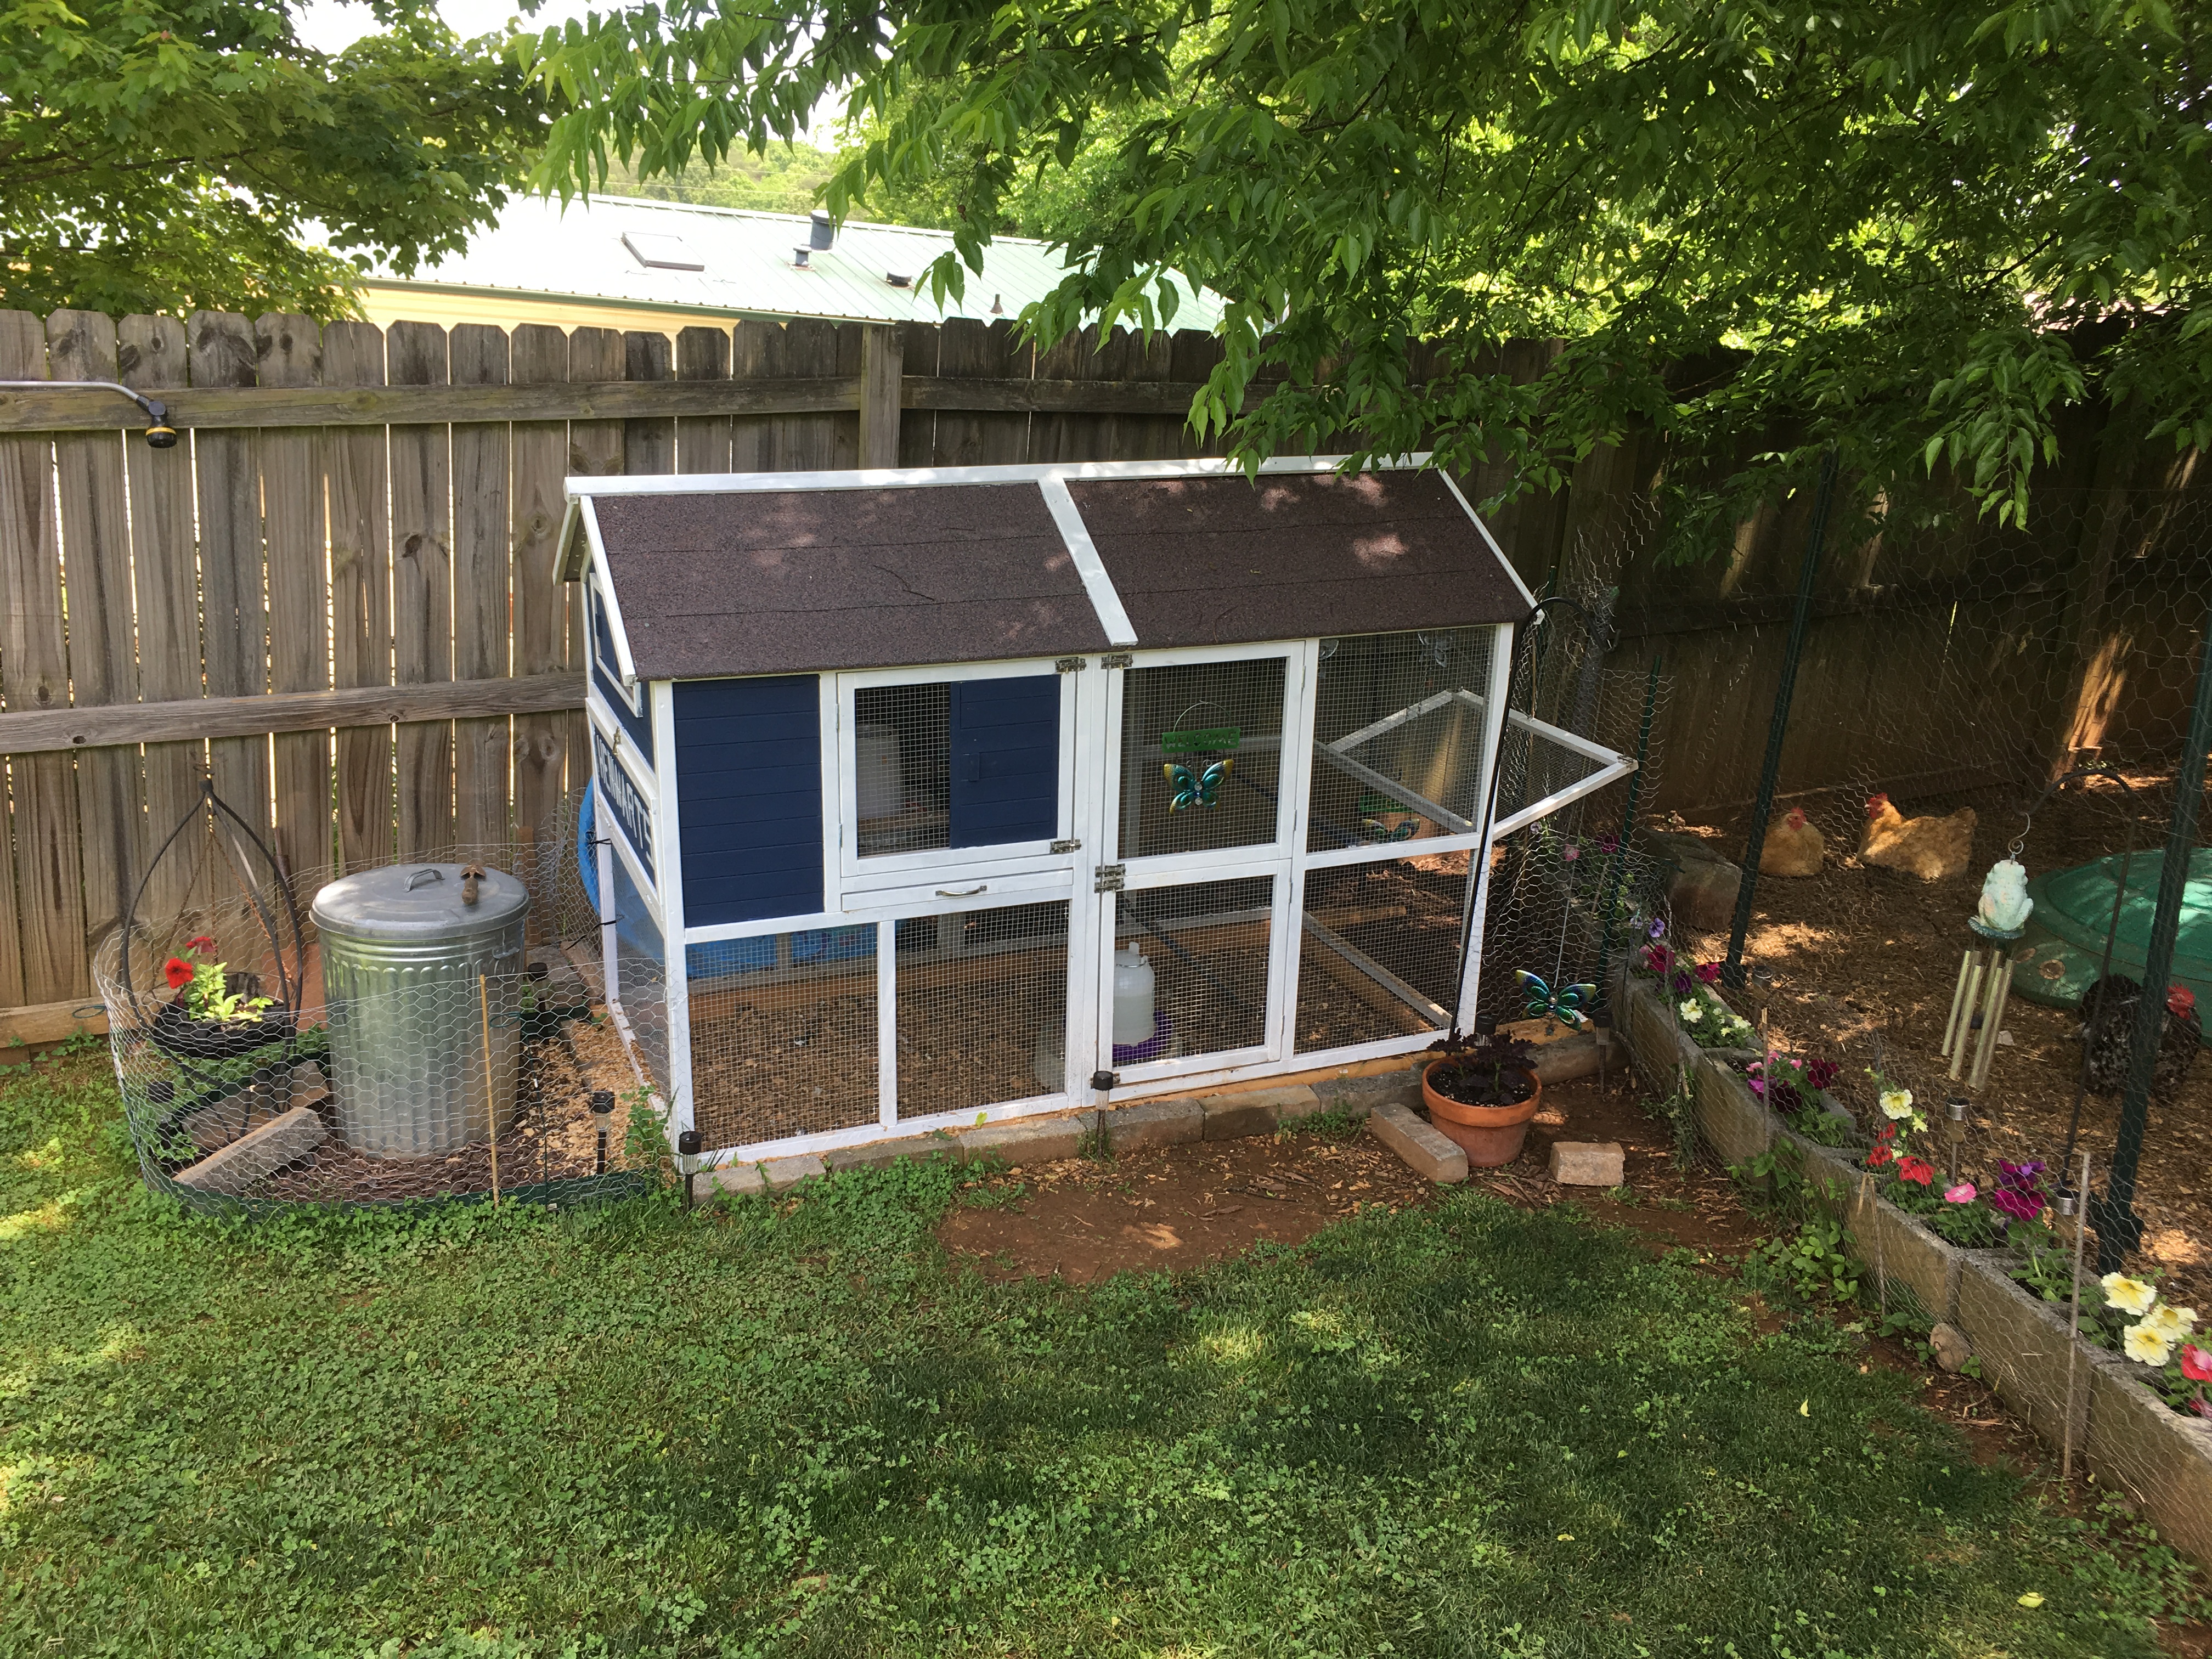
The next coop we visit on our backyard tour is my largest coop, The Kuntry Klucker. In front of the Klucker I have a large whiskey barrel full of Gerbera Daisies. Additionally, I have hanging flower baskets. With chickens, keeping flowers above their heads is a must. If at their level, they will undoubtedly make a snack out of the blooms. Found at the dollar store, these cute little baskets are just the perfect size for a few flowers. Instead of using cocoa liners that seem to lose their shape after the first two waterings, I opt to use thick weed barrier to hold the potting soil. Attached to the wood of the pen I have planted a variety of flowers in these baskets. Petunias once again taking center stage. I feel that they add a bit of fun to the girls’ homes.
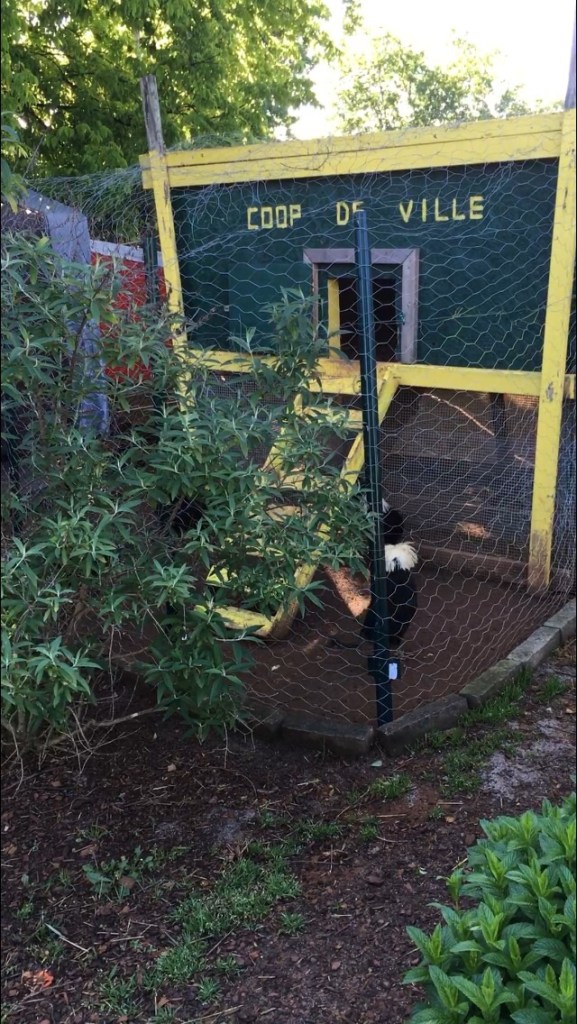
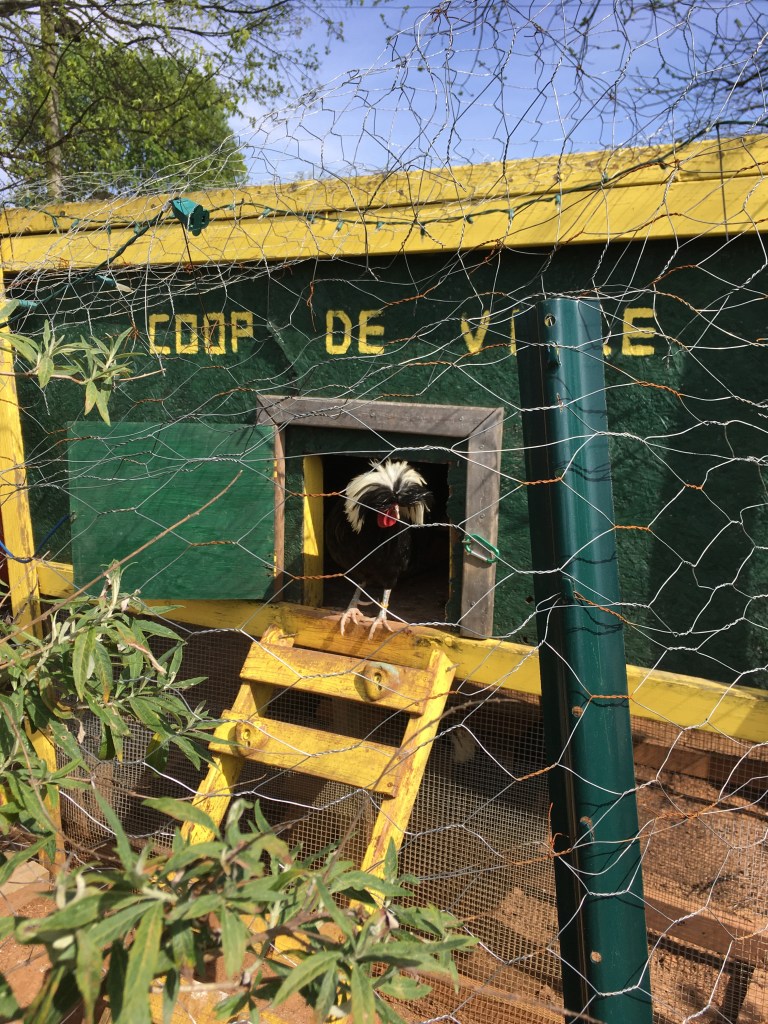
As we proceed on our coop tour, we come to The Coop De Ville. Serving as a Bachelor Pen, the Coop De Ville is home to 4 White Crested Polish Bantam breeding roosters. Situated between the Kuntry Klucker and the Spice Garden, the Coop De Vills shares space with many flowering plants. In front of the Coop De Ville I have planted a white butterfly bush. Butterfly bushes are prolific bloomers and due to their size, they hold up very well around chickens.
Next, we come to the spice garden. In this garden I have lot of things planted. The tall bush with the small red blooms is a red honeysuckle bush. Taller than me (I’m 5’8″), this bush is one of the largest in the garden. These highly fragrant little blooms blanket the whole backyard with a sweet fragrance and attract many butterflies and hummingbirds to the backyard, adding to the beauty of the girls’ surroundings.
I have many of my kitchen spices planted here among the two coops that call this plot home. Roy’s Roost and Betsy’s Bliss are situated here among all the plants and spices. This year I planted a red butterfly bush, in a few months it will be beautifully loaded down with blooms giving the butterflies another place to rest and spread their wings. The chickens are fenced out of this garden area so all the creatures that visit these plants are protected from the girls. This allows many caterpillars to spin cocoons among the thick foliage of many of the plants here.
Arona Berry bush loaded with berriesArona berry bushMint in spice gardenTARDIS seen between honeysuckle bush and Arona BerrySpice gardenDracula resting in the shade of the Arona Berry BushOreganoSageHoneysuckle Bloom
In the center of this garden, I have planted an Arona Berry bush (kin to the Acia Berry), this bush which too is taller than me has the most beautiful white blooms. I use many of the berries that this bush produces in my smoothies. The chickens also love these berries, another reason that I have to fence them out of this garden area. After the berries appear, I make sure that the girls get a good share of the spoil which they go absolutely nuts for. Amongst other plants in this garden, I have a Goji Berry Tree, Sage, Rosemary, Oregano, Thyme, and Mint.
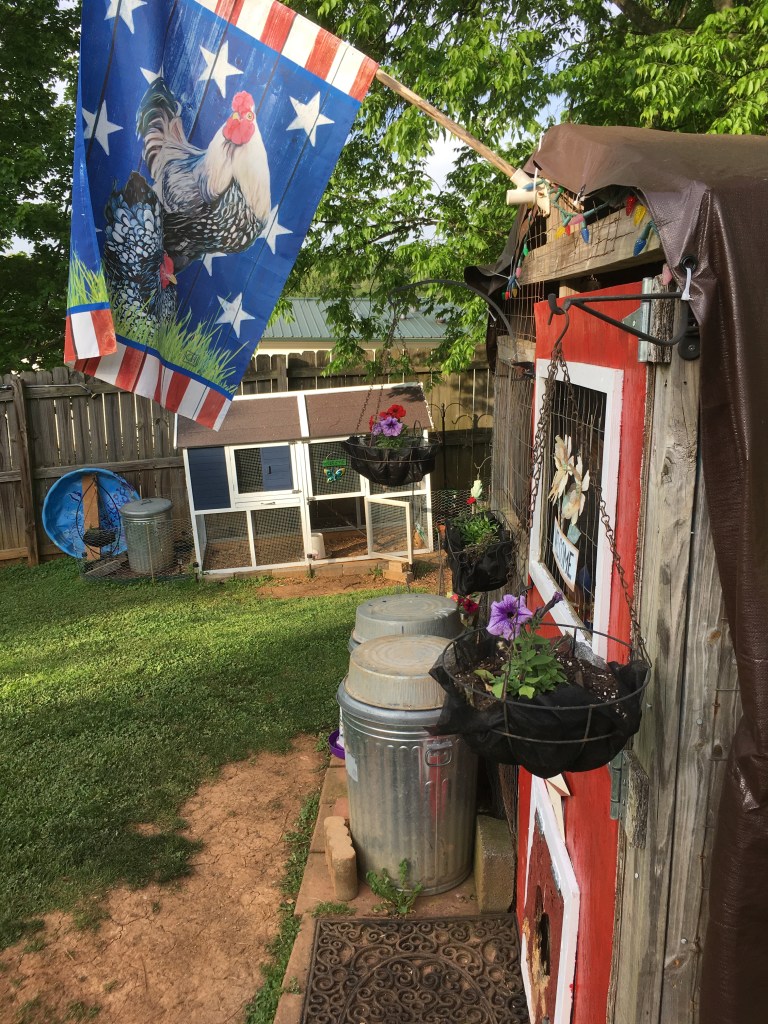
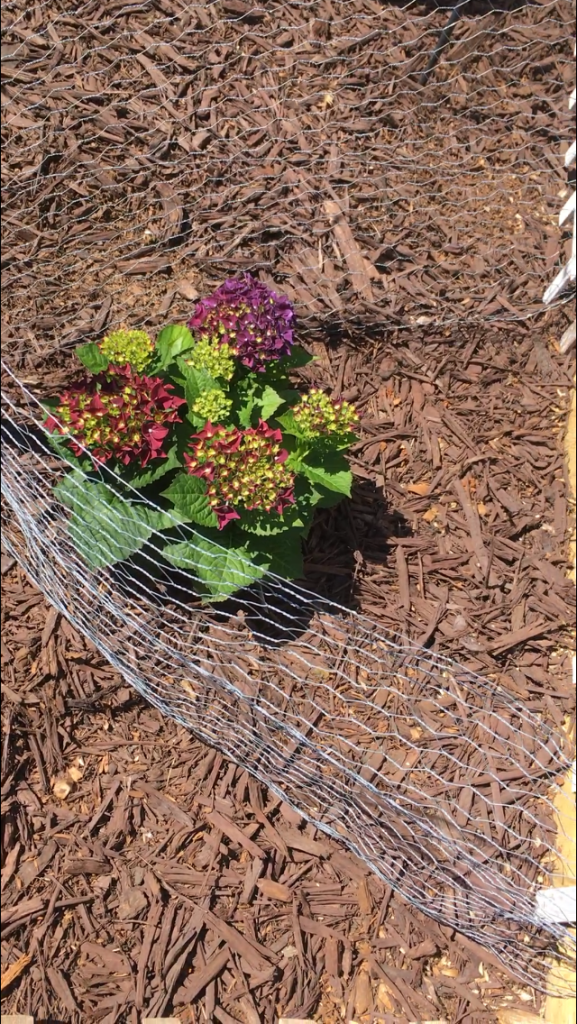
Next, we come to the TARDIS! This is one of the funniest coops in the “coop-hood”. Painted like the TARDIS from Dr. Who, this coop is home to Silkie’s. Sharing a large plot with the Bantam Boutique I planted a rare Red Hydrangea. The deep red of the hydrangea blooms will add a pop of red and contrasting well with the blue of the TARDIS.
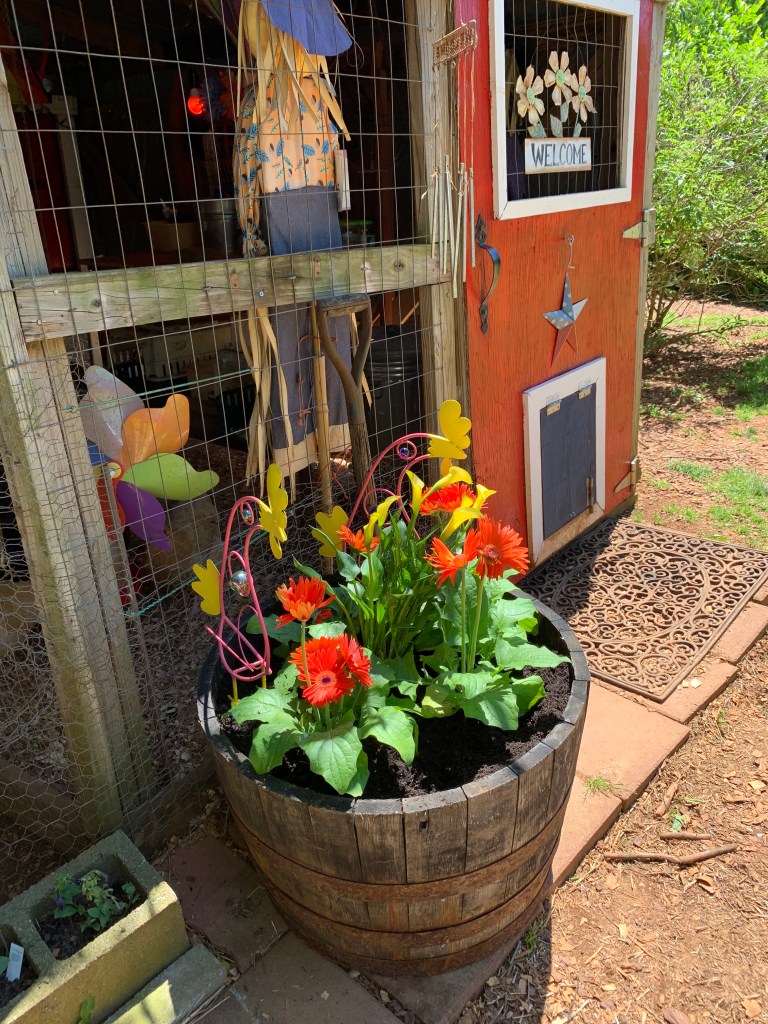
Finally, we come to the Bantam Boutique! At the end of the Bantam Boutique, I have a pot with several colorful annuals in it. The Polishes enjoy jumping on top of the pen to take a few samples from the flowers. On the far side of the Bantam Boutique, I have planted two yellow butterfly bushes. Not only are these bushes beautiful, but they also offer lots of afternoon shade for the Polishes that call this coop home.
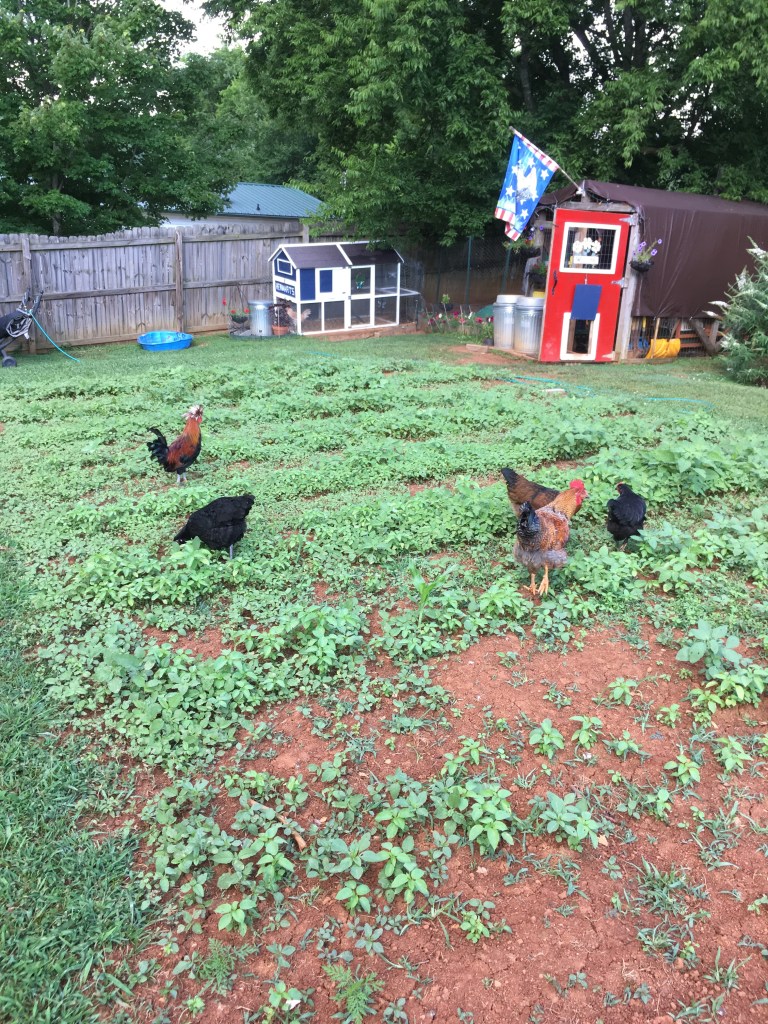
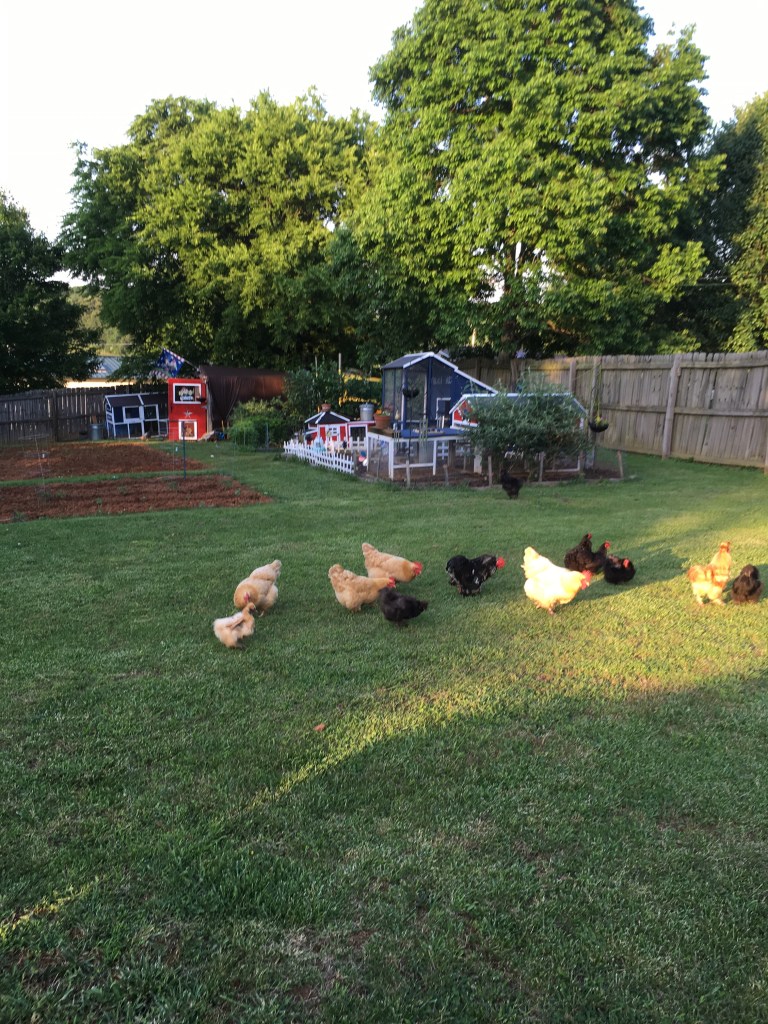
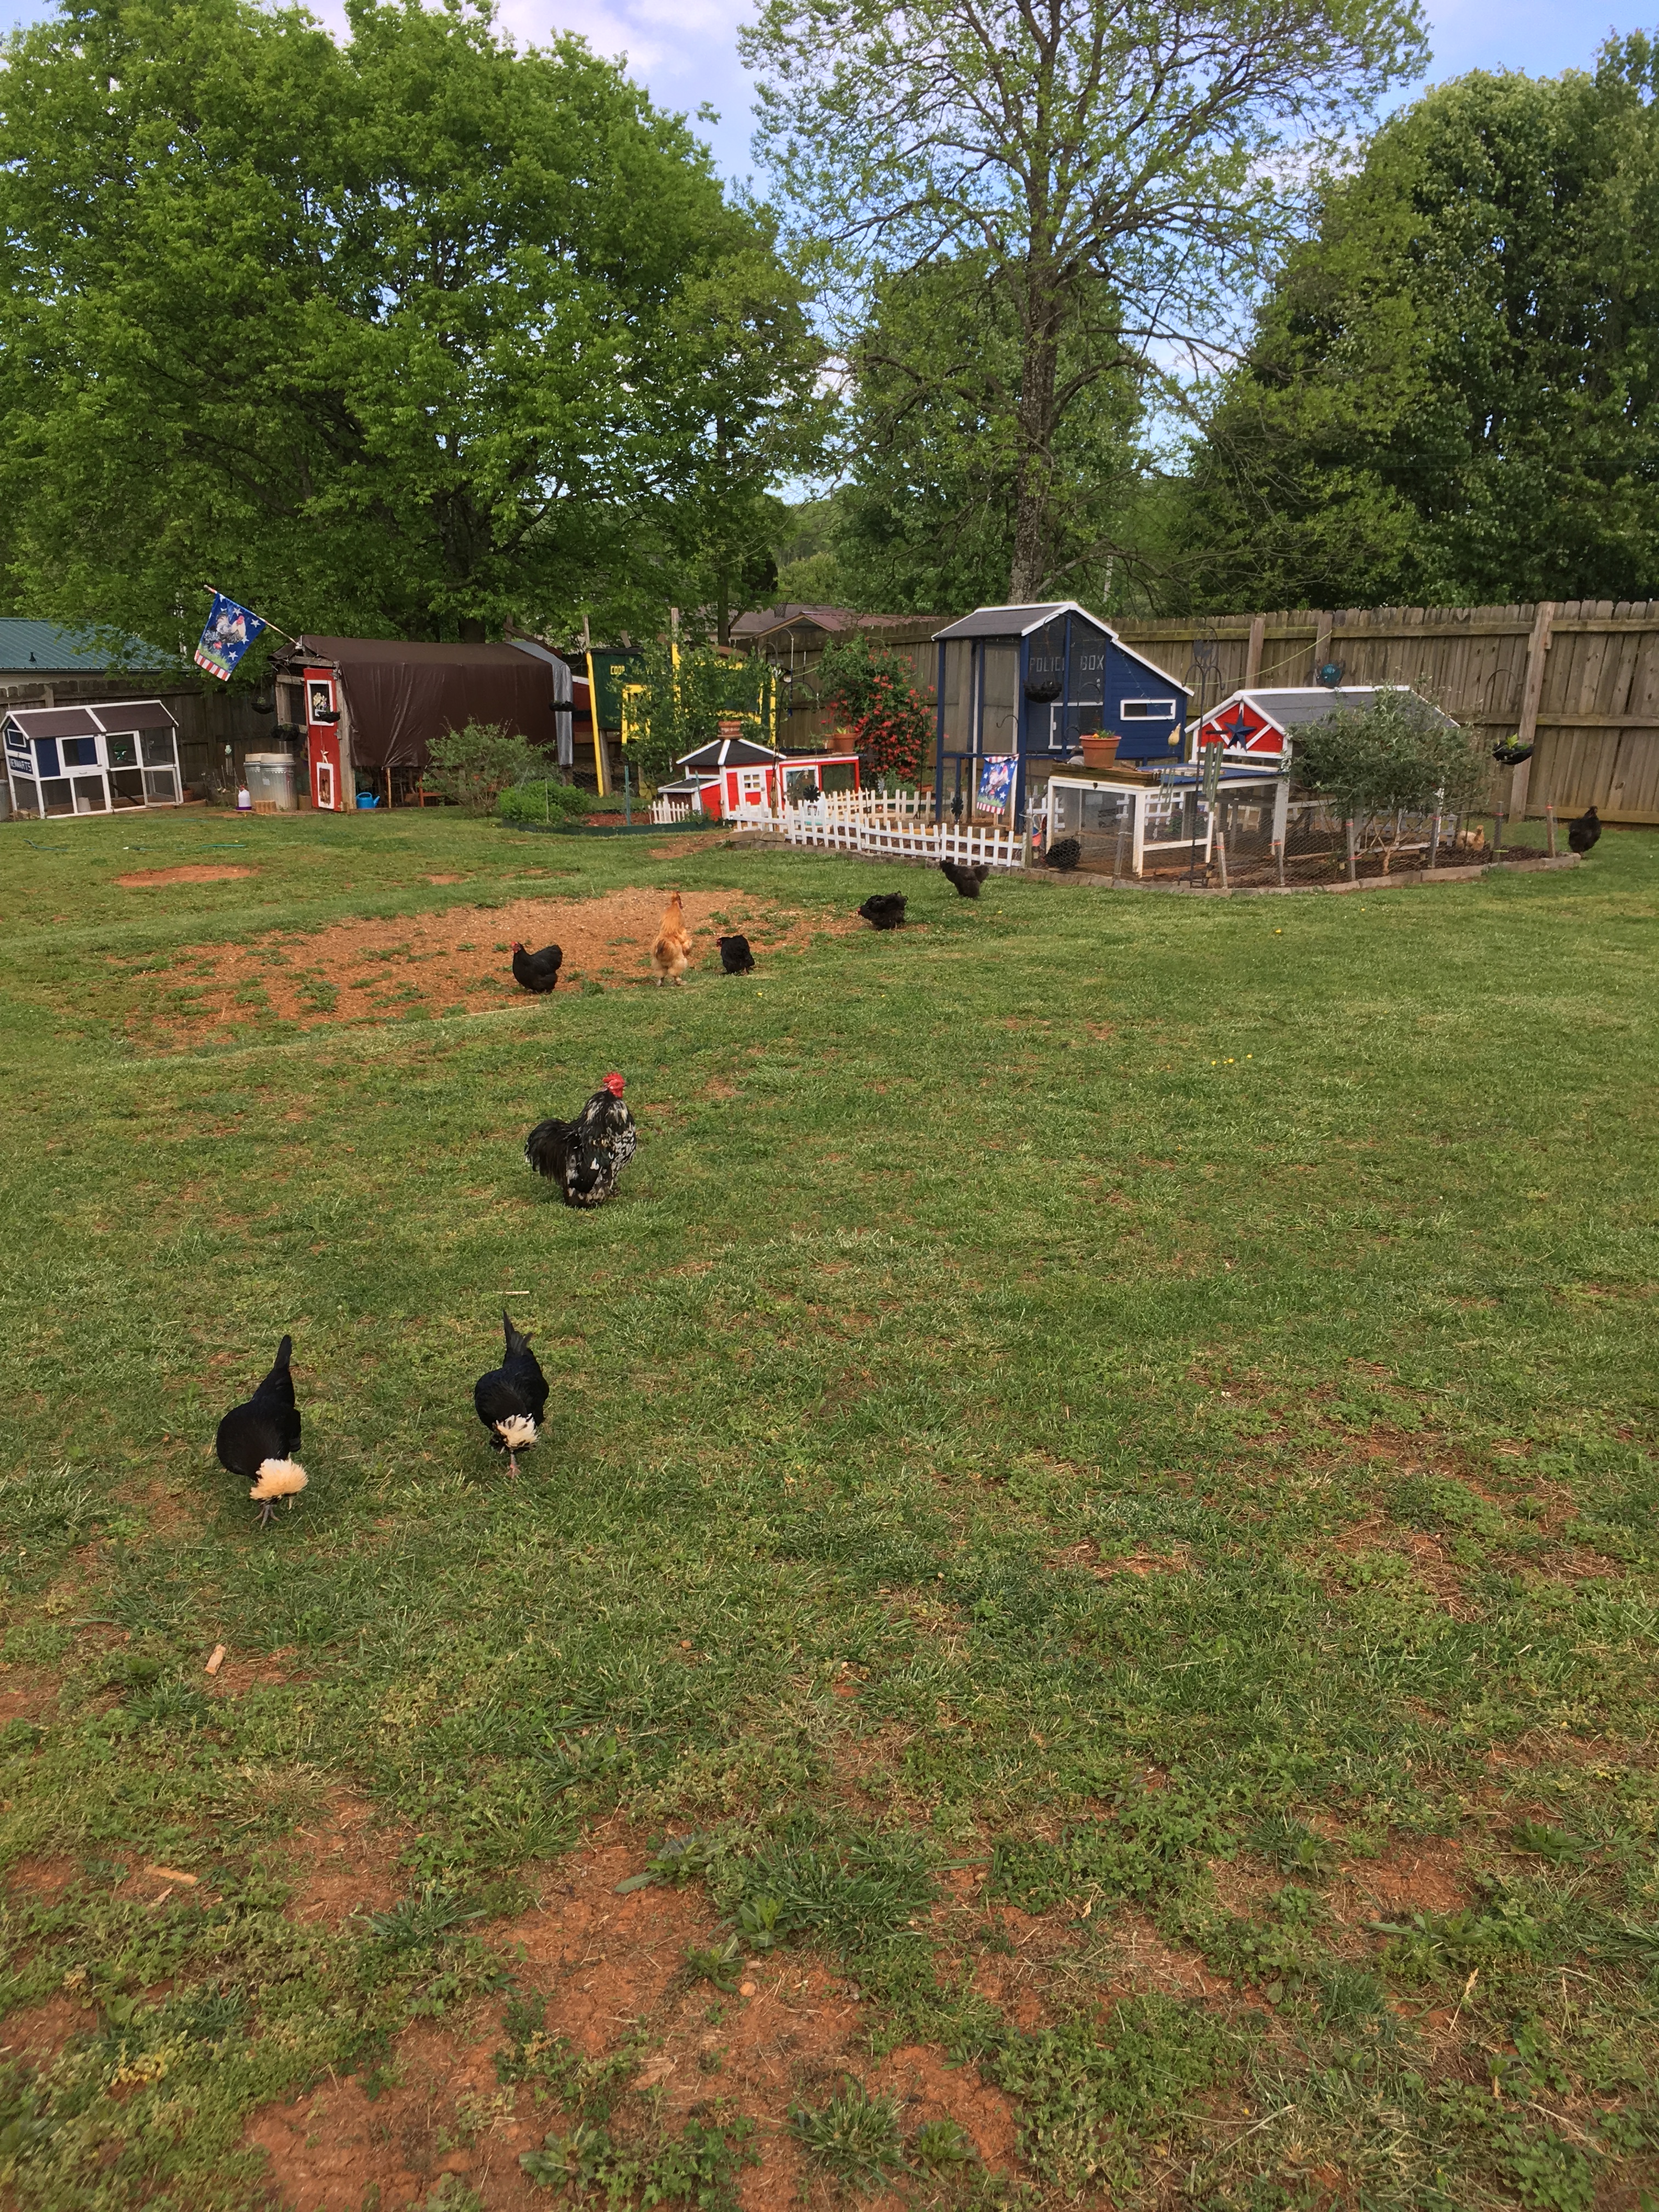
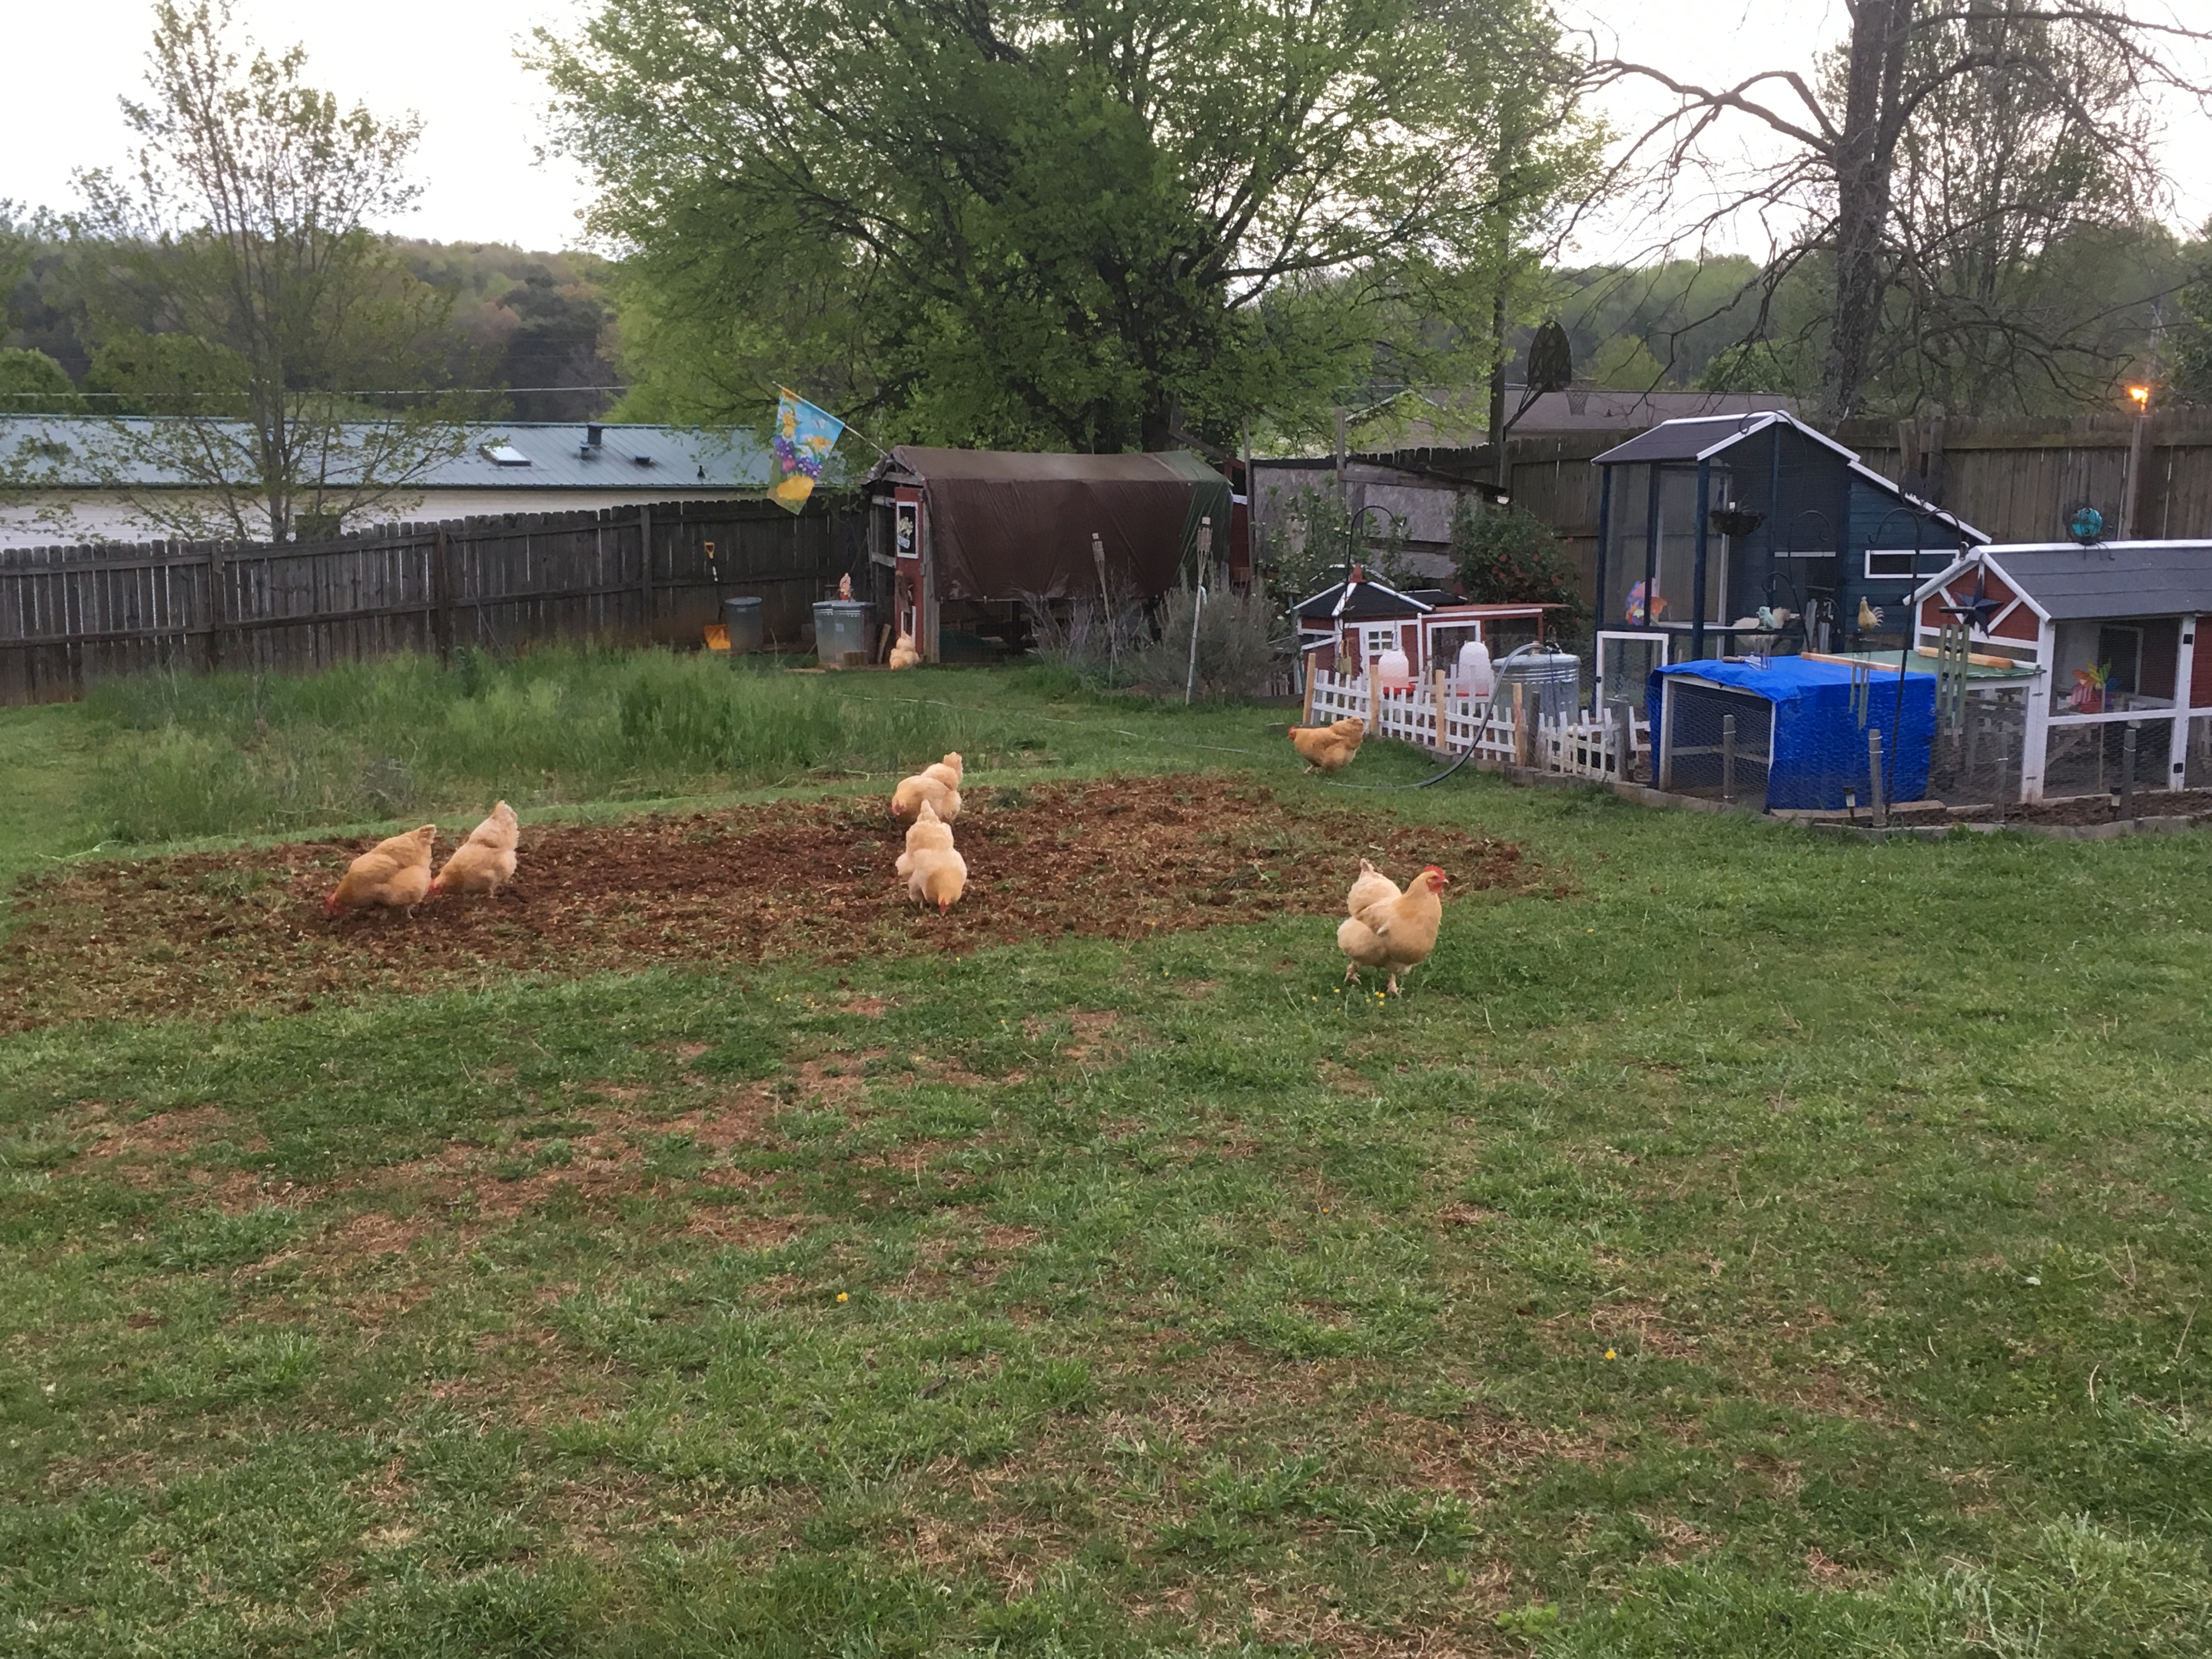
The Kuntry Klucker Farm
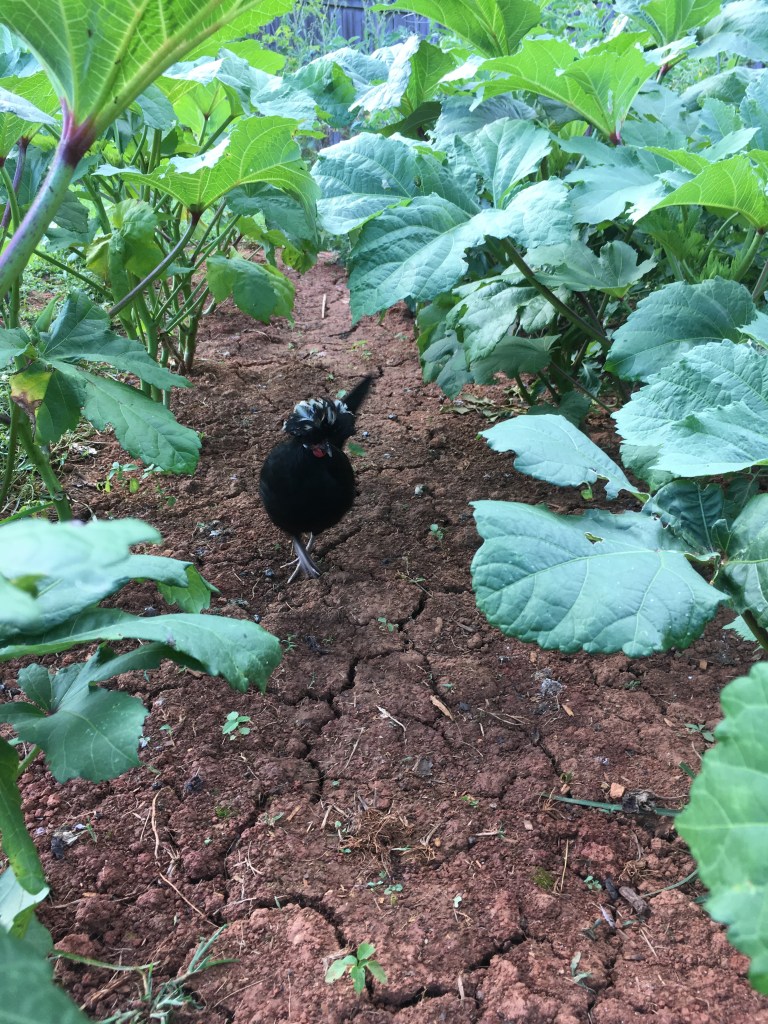
In the center of the backyard, resides our veggie garden. The chickens patrol the garden ridding the plants of any available bugs. As they till the soil in search of worms and grubs, they aerate the soil, further aiding the plants. With my theropod crew on duty, I eliminate the use of insecticides, allowing me to grow organic veggies for my family. I do lose a tomato or two to my carnosaur crew, I plant enough so there is plenty to go around. The girls get their share of the spoil in exchange for their hard work.
The Veggie Garden
We now come to the pride and joy of my hobby farm, the grape arbor. Several years ago, I built a grape arbor in my backyard. Grapes have been on my dream list for a long time. Not only are grapes a fast-growing easy-care crop, but the arbor can also be used as a structure to hang a swing or hammock chairs from. Attaching some patio lights to the arbor adds a nice romantic evening feel. Complete with shade from the grape vines and a place to hand swings, a grape arbor is a great addition for any backyard garden enthusiasts.
I hope that this post has given new ideas on how to decorate a backyard garden paradise. Armed with some annuals, a few hanging baskets and a few pots, you can turn any backyard space into a magical getaway.
As always, thanks for reading. If you have any questions, feel free to post in the comments. or drop me a line at kuntryklucker@gmail.com.
I am a published author, multi-disciplinary writer and blog contributor. If you like this blog, please visit some of my other sites.
It’s been a busy spring here at the Kuntry Klucker Farm. The coops have all been painted, seasonal annuals planted, and chicks flourishing in their new digs. Spring is always a busy time here, but this year has been especially busy. I did something that I have never done before, painted all the coops in the expanse of one week. If you’re asking if I am crazy the answer is, yes! It was a hard task, but with the weather not being very corporative I had to strike with the iron was hot. That meant painting all the coop in a week between strong cold fronts, ahh, the joys of spring. I usually like to pace it out a bit more, but usually I have weather patterns that are bit more subtle. But you have to work with what you can, so all the coops got a new coat of paint in the span of a week. The girls seem to enjoy their newly updated homes.
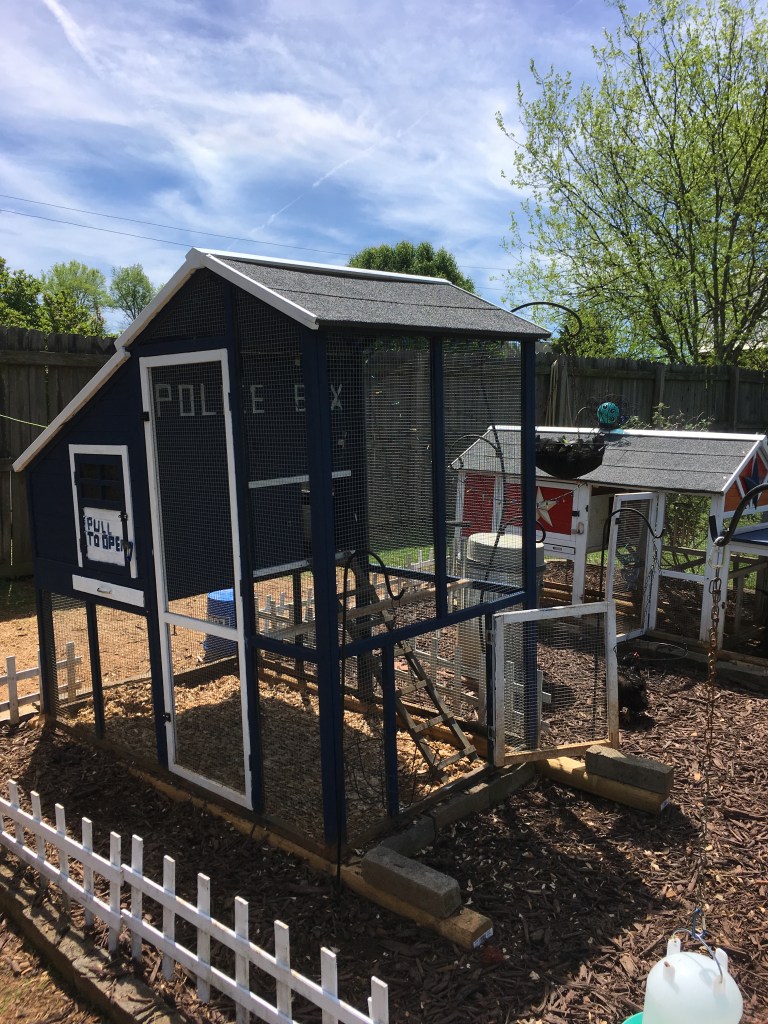
The TARDIS in particular got quite the facelift. This coop which is home to my “little Kuntry Klucker’s” Silkie’s is a huge Dr. Who fan. He named his coop the TARDIS from the beginning even painted it a TARDIS blue to match. This year during our coop painting projects the TARDIS finally got it official lettering. Might I add that he did all this work himself, he is quite the budding artist. Those that follow Dr. Who will relate quite easily to his artwork. Those that are not Dr. Who fans that is more than ok, I am a recent convert myself, so I understand. Without further ado, I unveil the chicken TARDIS here on the Kuntry Klucker Farm.
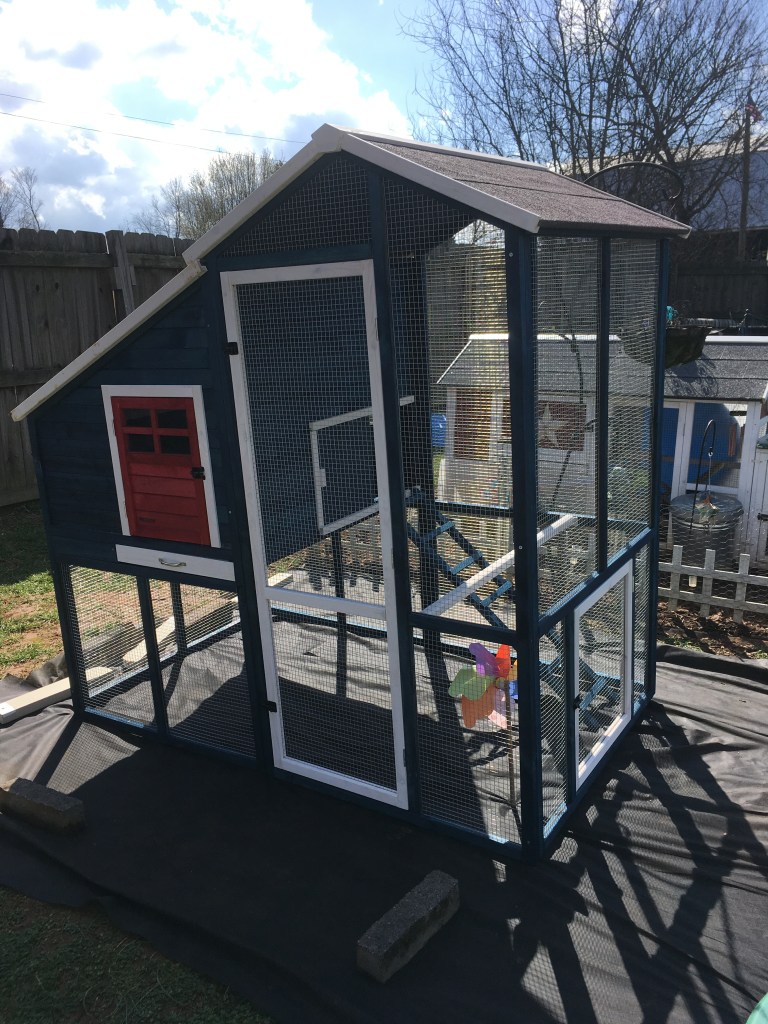
Two other coops additionally got their official lettering. Henwarts and the Coop De Ville. But first, Henwarts. Earlier this spring I added a 7th coop to the “coop-hood” here at the Kuntry Klucker Farm. This coop was named “Henwarts”. Named after the Hogwarts School of Magic only with a bent towards chickens. Henwarts has officially been added to my growing collection of chicken coops. Painted after the colors of Raven Claw, one of the four houses at Hogwart. I thought that this theme would fit well for a flock of Buff Laced, White Crested, and Tolbunt Polishes. The residents of this coop will officially move in in a few weeks. They are still being kept with the other chicks till they are old enough to move into their own coop.
Finally, the Coop De Ville. I have had this coop from the beginning. During the infancy as we were drawing up the plans for the Kuntry Klucker Farm it consisted of two large coops like the Kuntry Klucker. However, I found a need for a storage area for garden tools and so forth. So instead of attaching a pen this coop stayed as it was for a long time, an unfinished storage area. Well, this year I finally decided that it needed a name and a theme. So, I decided on the name “Coop De Ville” and the color theme of John Deere. It’s a bit of a mix match but I feel that it suites that chicken yard very well. So, showing her colors for the first time here on The Kuntry Klucker, the Coop De Ville. It’s still a storage area for garden tools, but I allow the girls to go up into the coop and lay eggs there by setting out a few nesting boxes. The girls really seem to enjoy the quietness of this laying area.
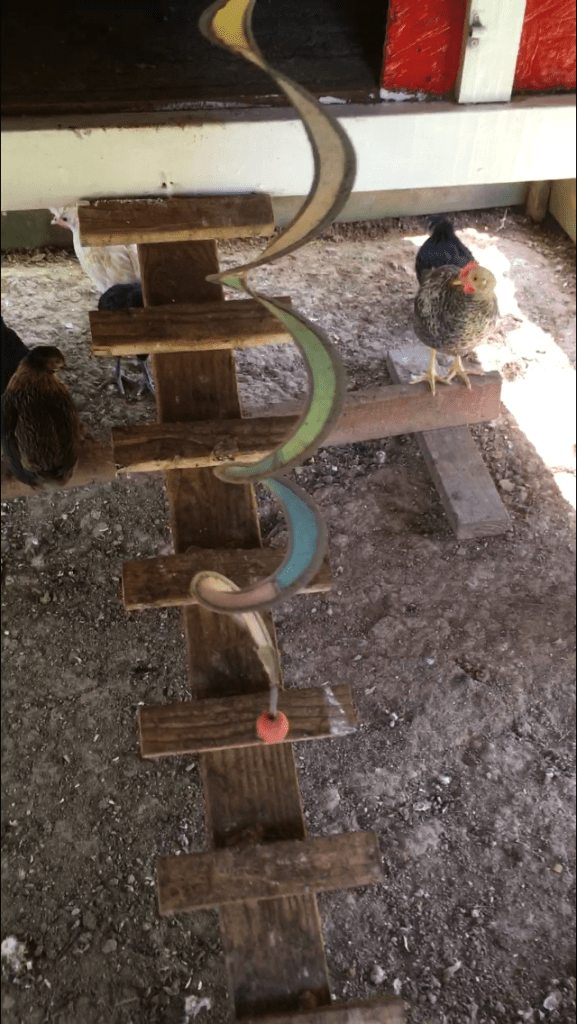
Now that the spring planting season on the horizon tilling the garden is my next task, in the meantime the girls have been helping me plant annuals. The girls know what fun awaits them when flats of flowers and bags to potting soil come into the backyard. I get lots of “hen-help” with planting the flowers in the various potting arrangement in the chicken yard area. They enjoy tasing all the different colors of the flowers and of course dust bathing in the potting soil bag. A hen’s life here is a good one.
And finally, the chicks! These were the little peeps that were in my indoor brooder just a few short weeks ago. Chicks grow so fast is almost insane. Anyway, they moved from the brooder to the TARDIS which was their outdoor brooder for a short time. Then as they outgrew the TARDIS they move to Henwarts for a short while, as they needed more space, they finally ended up at their final coop location The Kuntry Klucker. The Polishes will take up residence in Henwarts when they are a little older. They have taken to the move and adjusted well. They love the extra room for flying and of course all the meet and greets they get from the other girls as they walk by the Kuntry Klucker to see what all the peeping is about. The older girls are getting to know the new kids on the farm as the new kids are getting to know them. In just a few short months they will be out in the yard enjoying the plentiful bounty in the backyard.
Well, I think that pretty much does it for the news here at the Kuntry Klucker Farm. All feathered residents are doing well awaiting the next exciting event, tilling and planting the garden. I will start tilling up the garden in the next few days providing the weather cooperates.
If you have any questions, please post in the comments. You can also reach me at kuntryklucker@gmail.com.
I am a published author, multi-disciplinary writer and blog contributor. If you like this blog, please visti some of my other sites.
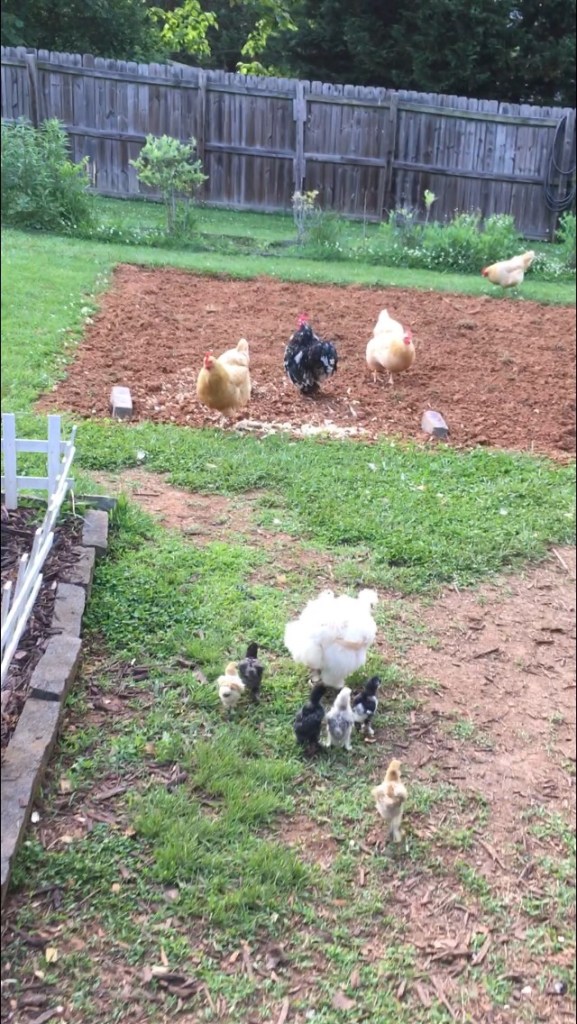
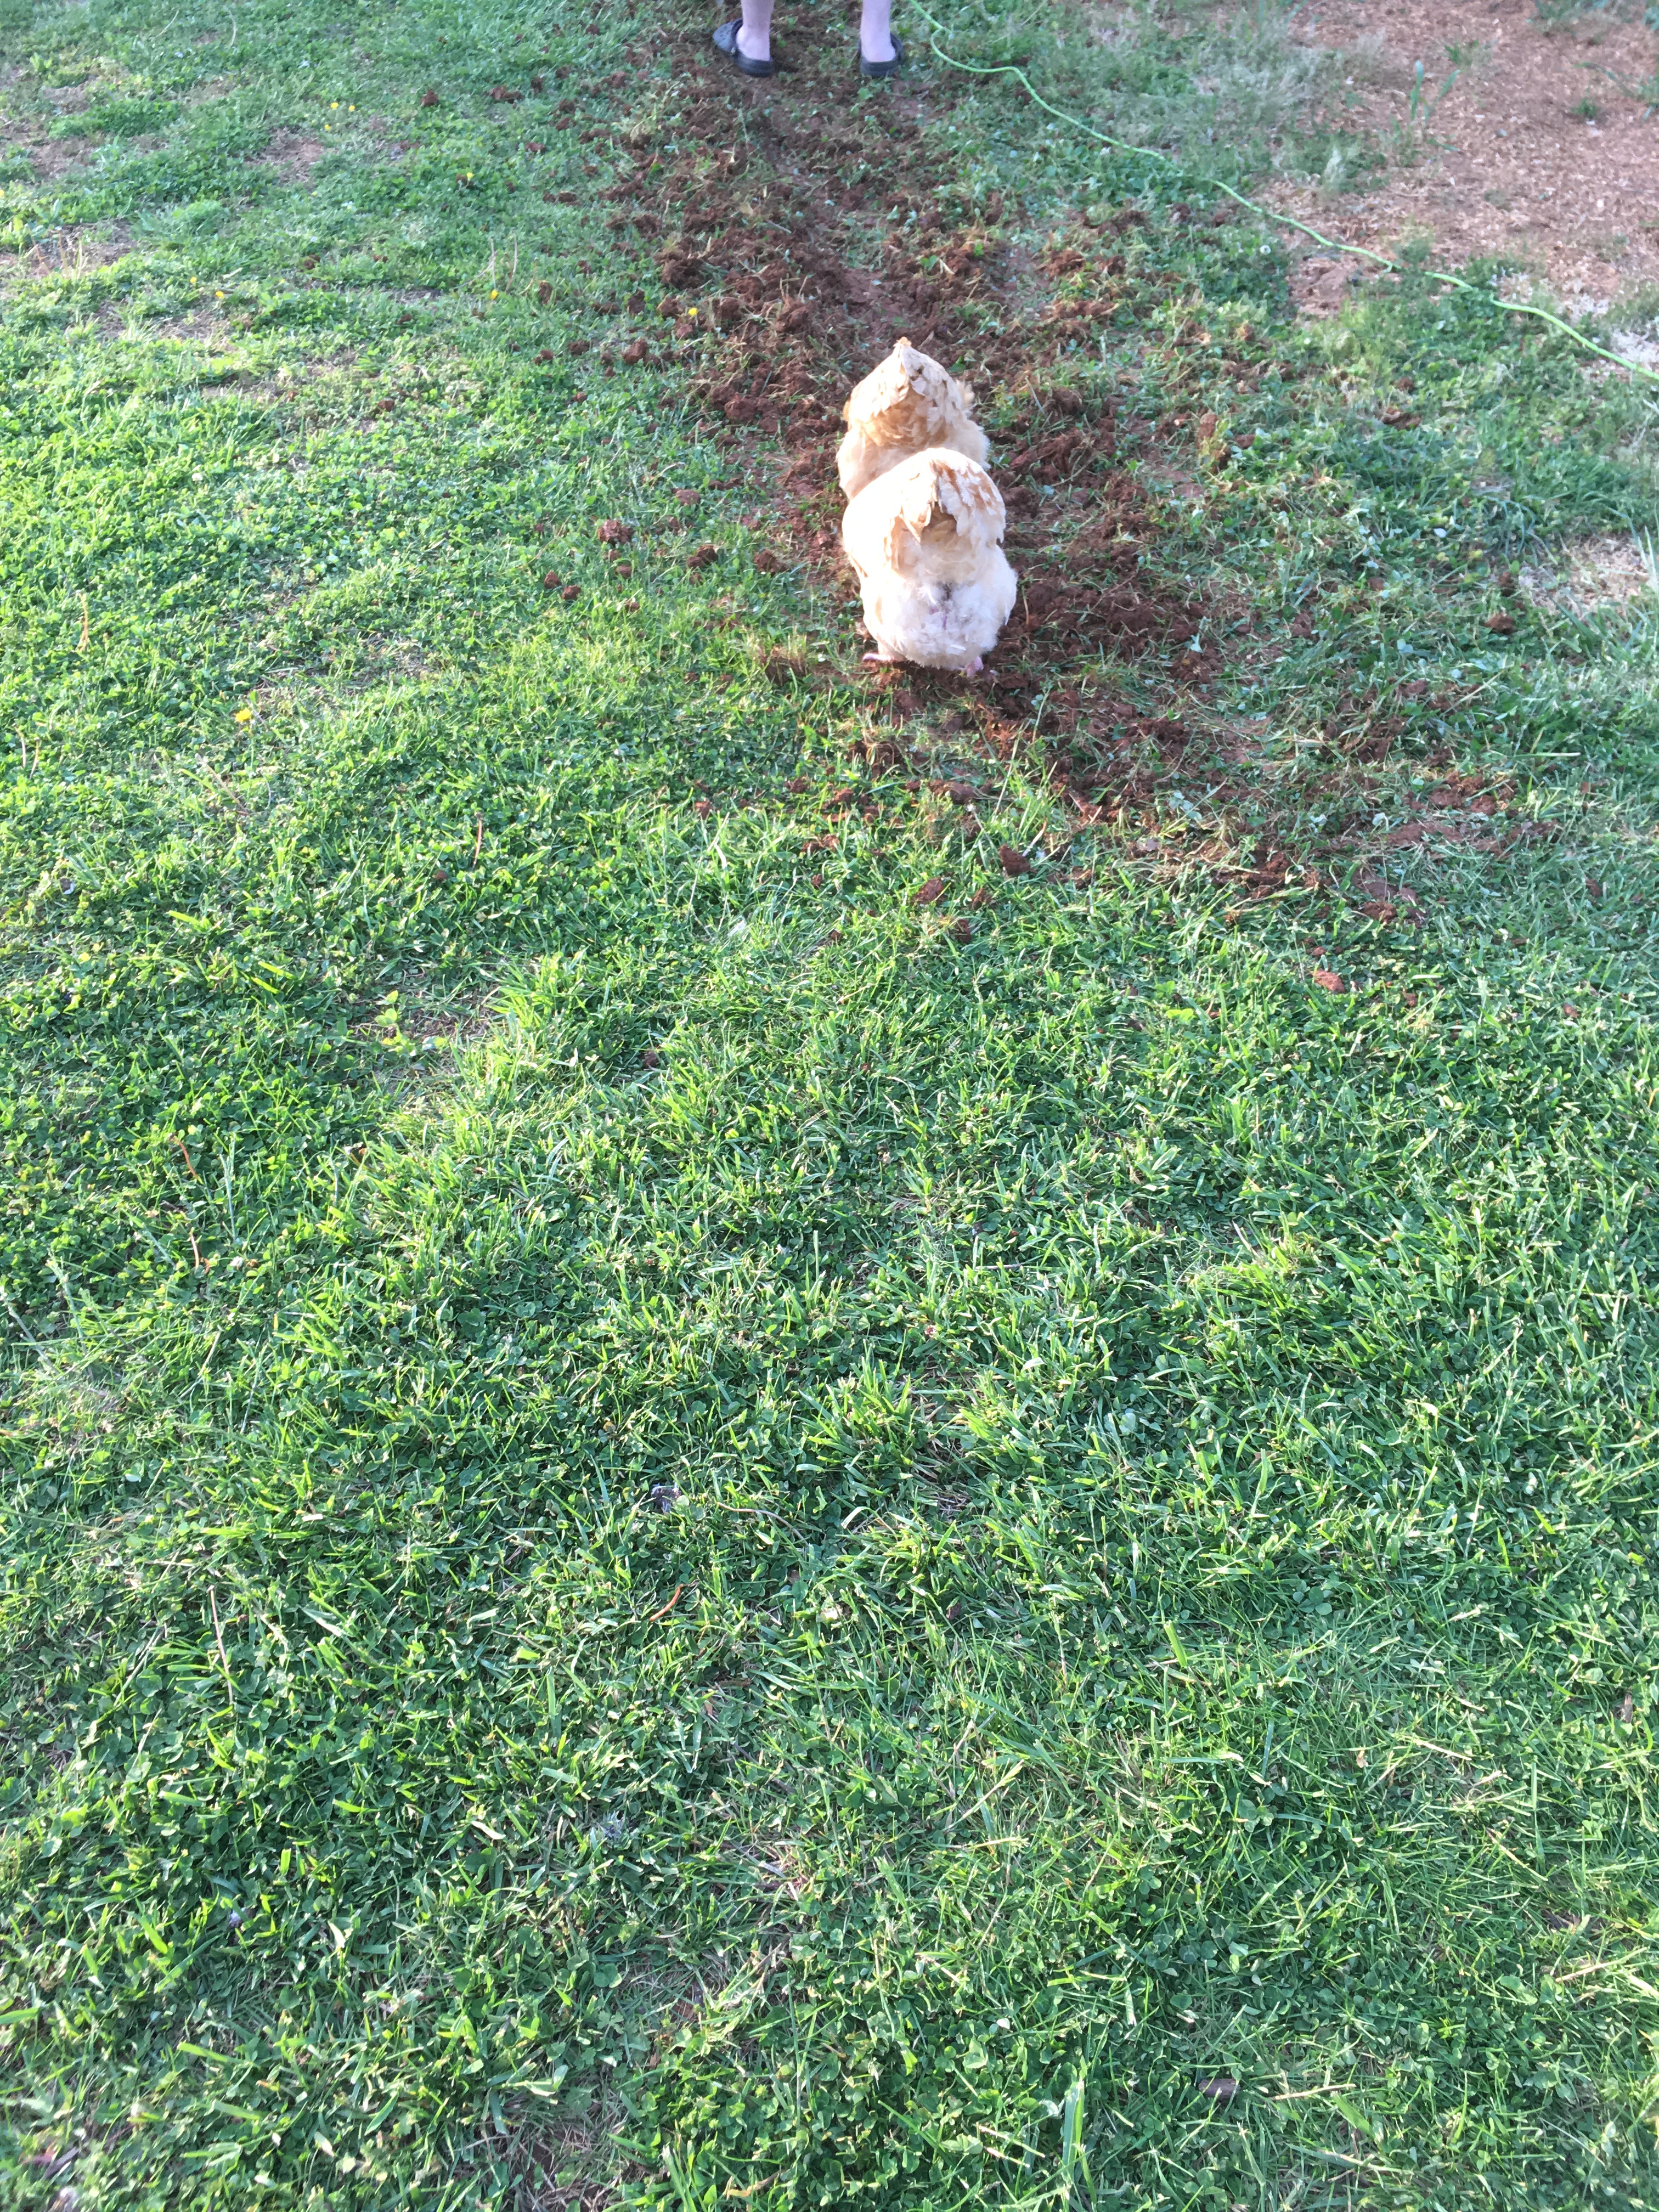
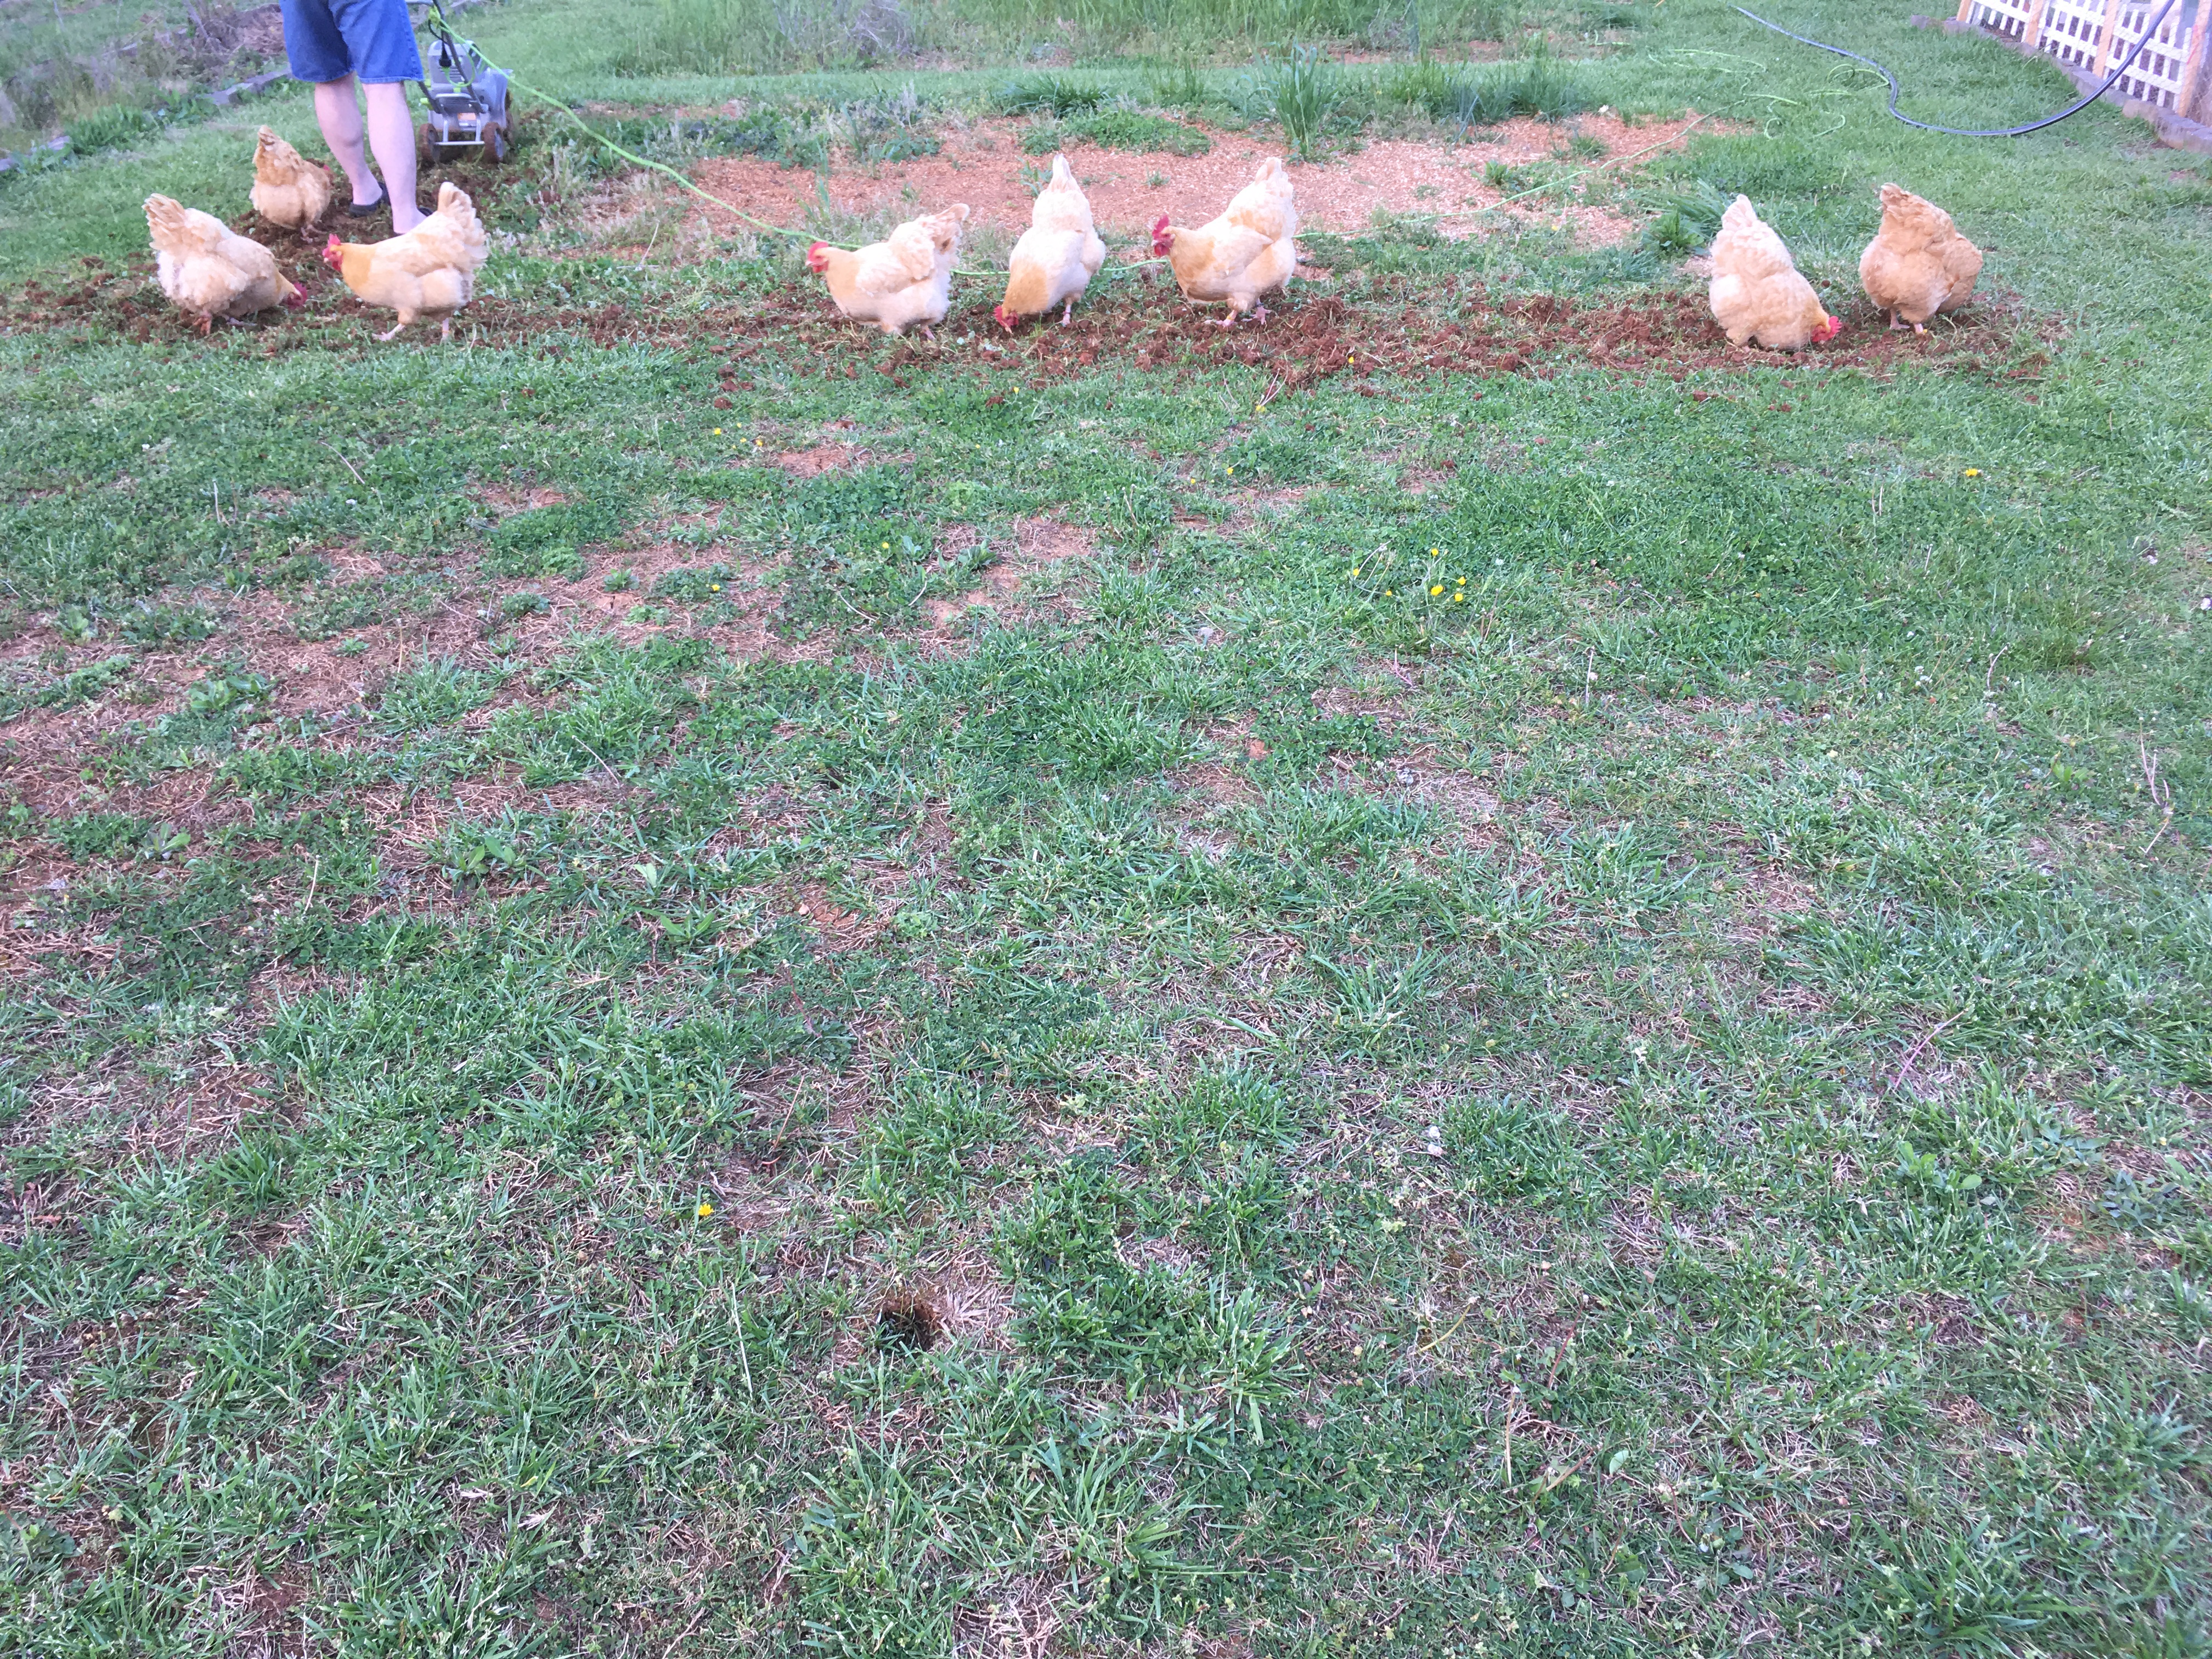
Welcome back everyone!! Today is the day that the girls look forward to the most, tilling day. For those who don’t understand what all the excitement is about, allow me to explain. Tilling means two things, one the start of the next growing season and two, worms!! I am more excited about planting crops while the girls are more excited about the worms and bugs.
I have lots of help here on the Kuntry Klucker Farm. My hubby willingly tills the garden for me while the girls enthusiastically follow him gobbling up any worms and bugs that the tiller disturbs. It’s a big deal here at the farm. Below I will chronical the events of the evening.
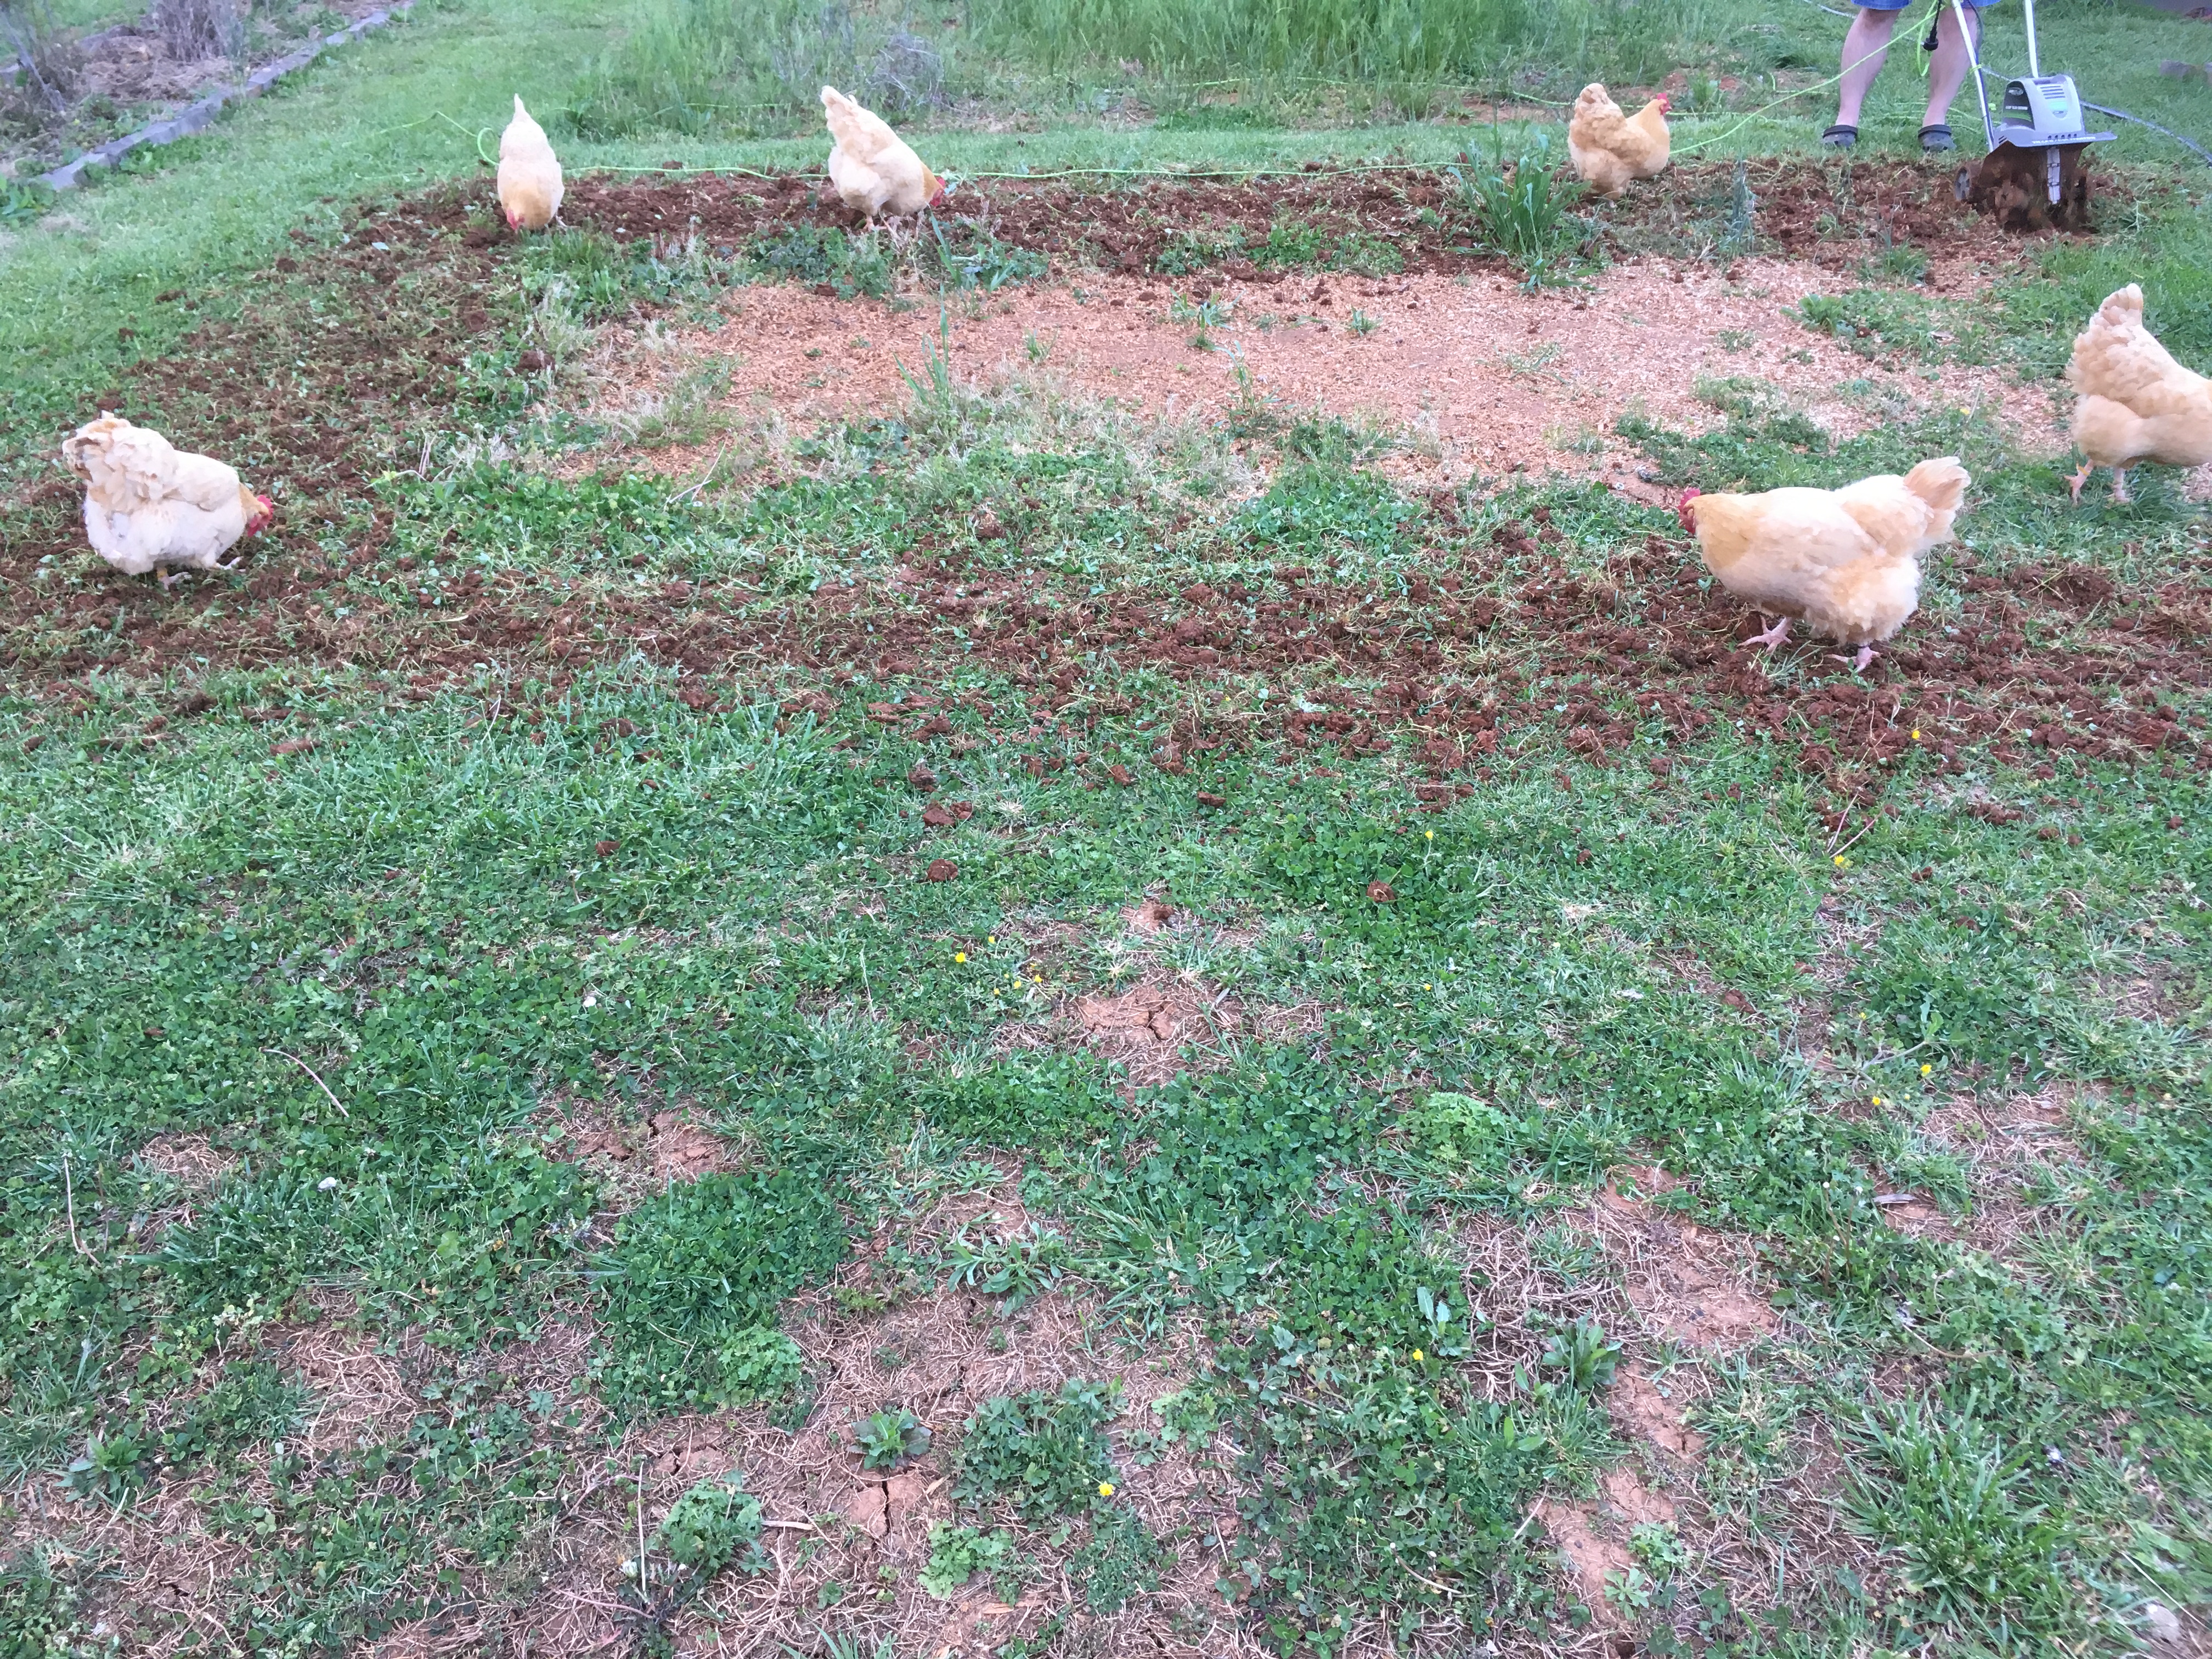
The tiller is awoken from its long winters slumber in the garden shed and brought to the backyard. Now most animals when they see something as scary looking like a tiller coming into the living quarters they respond in sheer panic, the girls not so much. The girls (with 8 years now under their wings) know exactly the bounty that shortly awaits them when the tiller makes it annual appearance. They flock to the tiller following the user to the garden where they line up for the imminent buffet.
As the tiller turns the soil, worms and other delectables come to the surface which the girls delightfully gobble up. Now the rules of this chicken game are to be the chicken right behind the tiller. The hen that is closest to the tiller gets the worms first. Its a literal game of “the early bird gets the worm”. As you can probably suspect, there are squabbles for the first-place position behind the tiller, but that’s all part of the fun.
As the garden is further tilled the worms are more abundant so being the first hen in line does not matter as much. As the tiller makes its way around the garden, so do the girls. Instead of a line of hungry chickens, we then have circles of worm inspectors following the tiller. The human perspective of the excitement that the girls experience is absolutely hilarious. We get as much joy out of watching them getting the worms as they do in getting the worms. Owning chickens is so much fun, this is just one of the delightful aspects that chickens bring to the backyard homestead.
When the tiller has done its job and is returned to its place in the garden shed, the girls still work for a while longer. They will continue to further till the soil for me for the next several l weeks. Once the last frost has passed it will be time to plant the crops and the growing season begins. The girls will continue to work in the garden all summer long patrolling the plants for bugs and turning the soil as they search for delicious worms to feast on.
The Bantam Boutique and TARDIS crew on the other hand are new to all of this excitement. This is their first experience with the tiller, this time last year they were still eggs not yet hatched. Enigma and the crew are not sure what to make of the tiller. But if life can teach a chicken anything it’s to love the worm god, AKA the tiller.
That is all the excitement for now, the girls will be busy the next several weeks helping us prepare for planting season. Thanks for stopping by, the girls and I will be back soon with a post on the new arrivals. New chicks will arrive May 11!! We here at the Kuntry Klucker Farm are anxiously awaiting their arrival.
I am a published author, multi-disciplinary writer and blog contributor. If you like this blog, please visit some of my other sites.


 3. Bring up your young well. They are the next generation, and the key to your legacy.