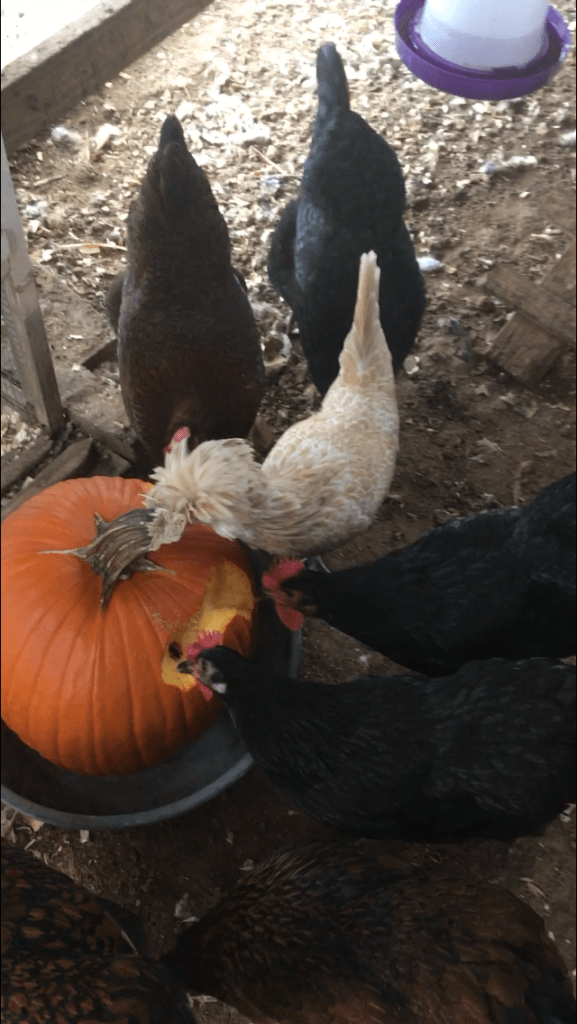
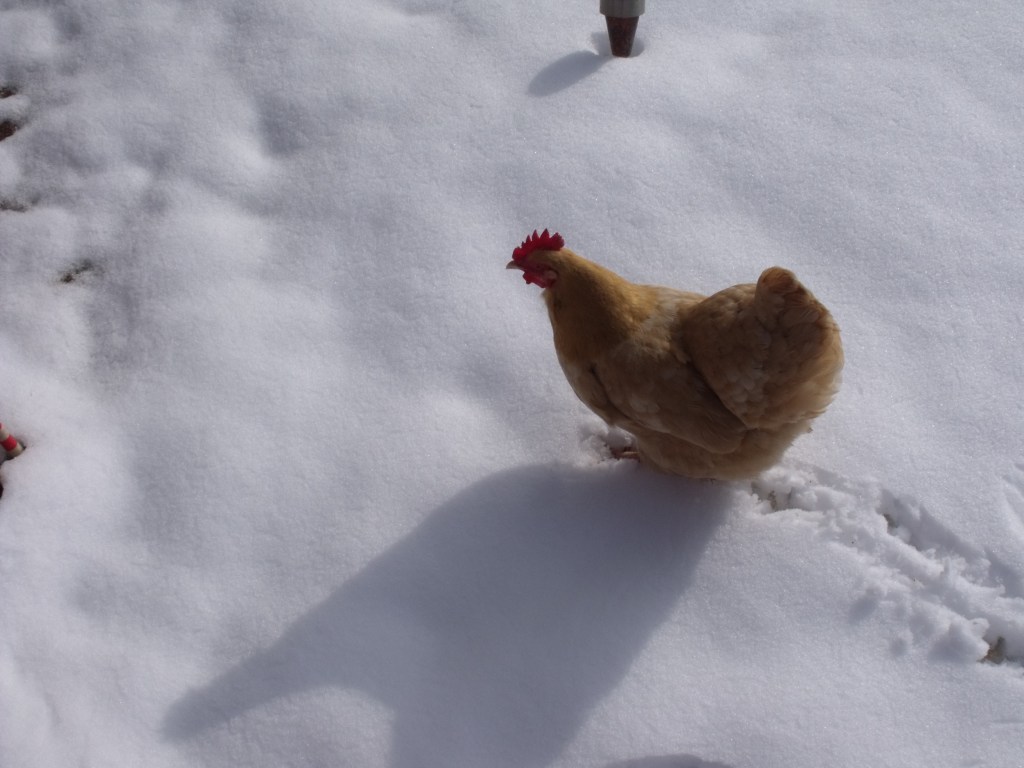
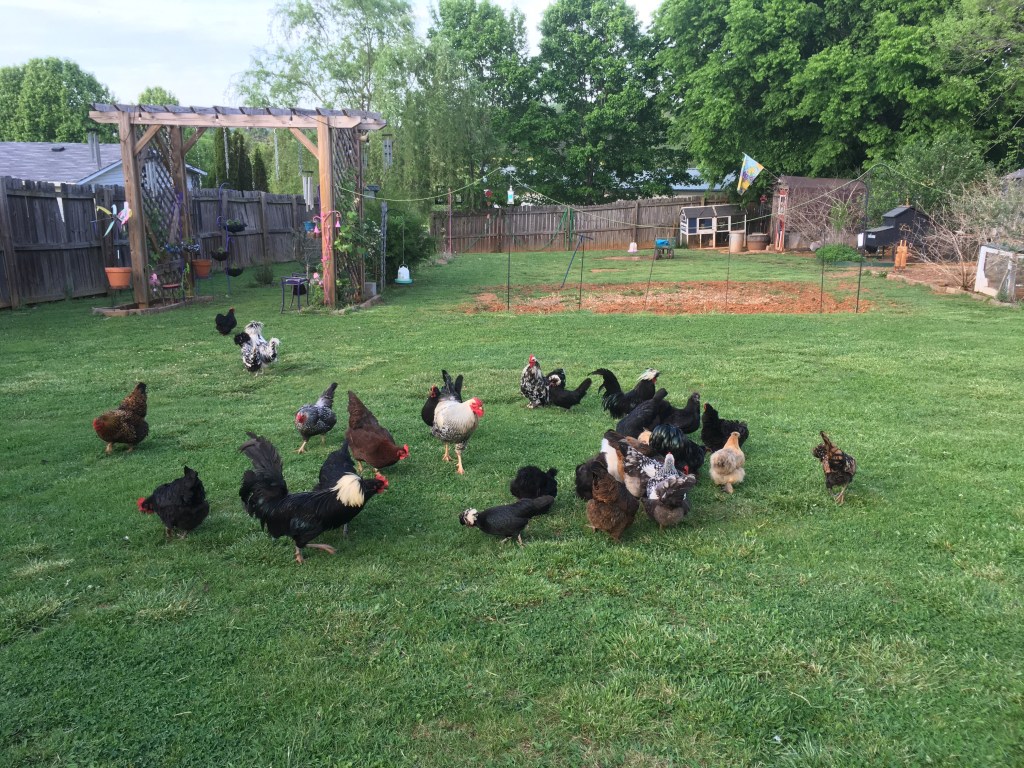
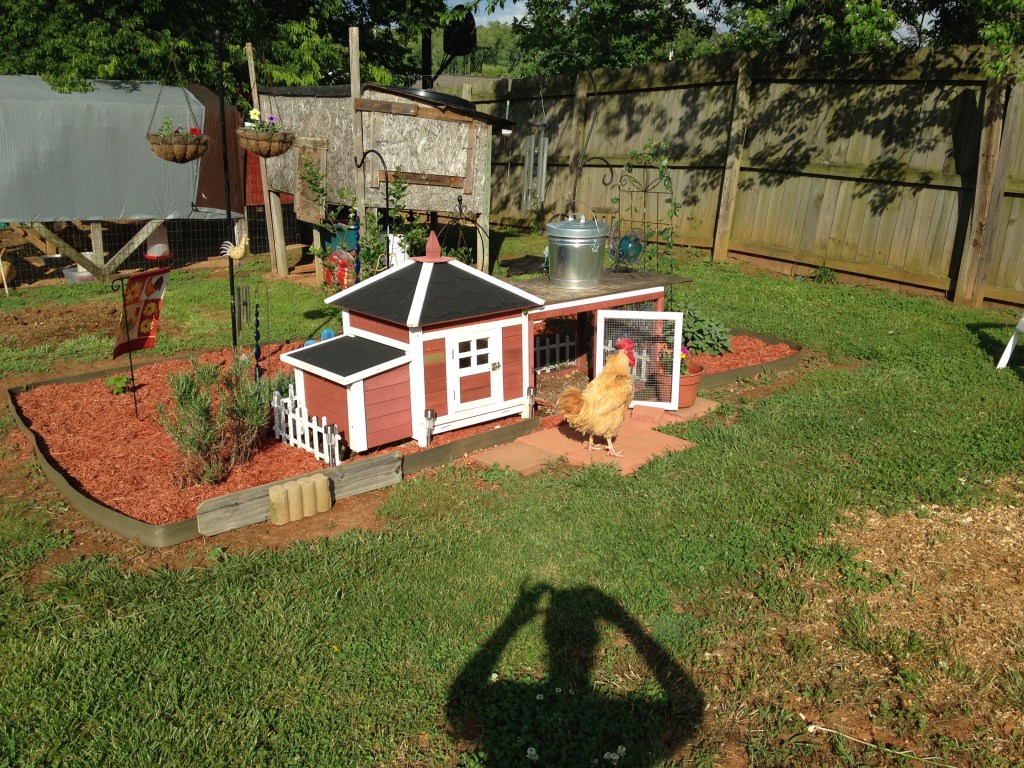
The flock scratching in the hay for delectable treats.
Trees display a variety of colors, store shelves brim with the excitement of trick-or-treating, and the weather cools as the days grow shorter. This signifies that a change from Mother Nature is on the horizon.
Halloween isn’t just for humans; the flock can also partake in fall and Halloween festivities. In this article, I will explore various autumn activities that both families and their feathered friends can enjoy together.
Pumpkin Carving Contest:
My chickens love pumpkins! Every fall, when pumpkins are discounted after Halloween, I buy several for my flock to enjoy. As they peck at the pumpkins to reach the delicious seeds inside, they carve the pumpkin. I provide each of my coops with a pumpkin, turning it into a fun pumpkin carving contest.
Every flock has its unique approach to pumpkin carving. Pumpkins carved by chickens make for a charming autumnal adornment in the backyard.
Note: To assist the flock in beginning to craft their pumpkin, create small holes to stimulate pecking, which will allow them to access the seeds inside.Contrary to popular belief, pumpkin seeds are not natural dewormers. If you suspect a worm infestation in your flock, proper management is required. For information and instructions on treating worms, please refer to my post for the correct worming dosage and techniqueor consult a veterinarian.
Mealworm Hay Hunt:
Lestat leads the flock in hunting for mealworms in the hay.
During the fall, when wet, muddy, or snow-covered ground is common, I create a barrier for my flock by scattering several bales of hay around the coops. To encourage activity on the dull days of late fall, I scatter mealworms on the hay.
The flock will spend hours engaged in the stimulating activity of finding mealworms in the hay. Mealworms are excellent for chickens because they provide a good source of protein, which helps with feather regrowth during the fall molt and boosts body energy for warmth on cool nights.
Note: If the hay becomes moldy, it should be promptly removed and replaced with fresh hay. Since moldy hay can cause illness in chickens, it’s important to monitor the quality of the hay, especially during damp conditions.I spread the moldy hay over my garden to decompose, which will serve as fertilizer for next season’s growth.
Haunted Coop:
Silhouettes of the Coop De Ville crew are illuminated by the red LED light inside the coop.
As daylight begins to recede, I place a light in the pen to give the flock extra time to get something to eat and drink before roosting. Additionally, the added light helps assists in egg production and evening chores as the coop is illuminated during long dark night of late fall and winter.
Red lights are ideal for this purpose because the red spectrum is not bright enough to disrupt sleep, yet it provides sufficient light to tend to the flock after dark. Additionally, red lights can give off an ominous glow reminiscent of a haunted house.
Note: LED lights are best because they remain cool to the touch unlike incandescent bulbs, are cost-effective, and have a long lifespan.Also, ensure that all cords are out of reach for the flock.
Sandbox Scratch Hunt:
The Kuntry Klucker Crew busily scratching in the sandbox, searching for the seeds I had sprinkled onto the sand.
During the cold days of winter when the ground is frozen or covered with snow, a sandbox placed in the pen provides the flock with a medium to engage in dust bathing and scratching keeping feathers and nails in top condition.
To promote this instinctive behavior, I sprinkle scratch grains over the sand, prompting the flock to eagerly forage through the sand for the grains.
Throughout the years, this ritual has grown to be a favorite among the flock. I spread scratch before roosting, providing a stimulating snack to fuel their internal furnace during the chilly nights of fall and winter.
Note: The ideal medium for a sandbox is play sand. To encourage dust bathing, you may add peat moss and natural wood ash. Avoid using materials that are harmful to chickens, such as cedar shavings, ash from barbecues, or mulchwhich can contain weed killer, dyes, and other harmful chemicals.
Flock Block Halloween Treat:
The flock enjoying a flock block on a cold winter day.
During cold, snowy days, I prepare a flock block for the girls who are confined due to inclement winter weather.
Flock blocks serve as both a distraction and a productive activity, offering additional nutrition through a stimulating activity that is essential for the flock to endure the harshest winter conditions.
A flock that is actively engaged during winter storms experiences less boredom, which can lead to destructive interactions and potential injuries. Introducing treats like raisins, mealworms, and sunflower seeds can pique their interest, as they will enthusiastically peck at the block to reach these tasty morsels.
Note: Store any leftover flock block in rodent-proof containers overnight to avoid attracting rodents to the coop. After two days, replace the flock block with a fresh one to prevent the flock from consuming mold.
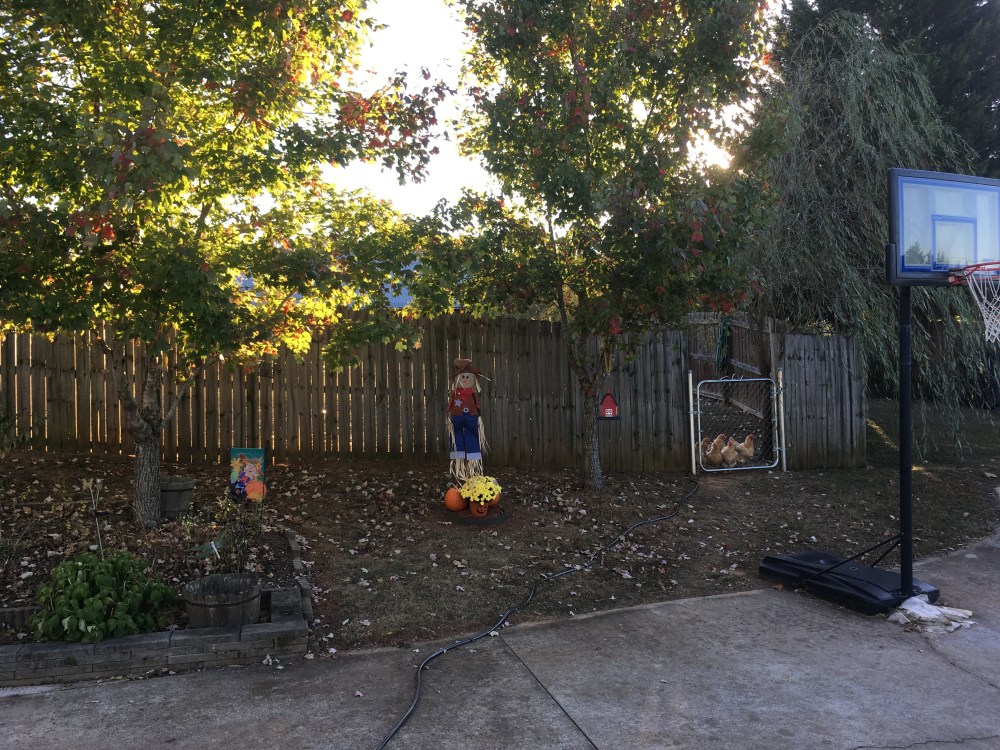
Halloween and autumn festivities aren’t just for humans—include your backyard flock in this year’s fall plans by decorating your coop and pen with inspiration from your hens.
A flock oversees an autumn arrangement adorned with pumpkins, chrysanthemums, and a scarecrow.
I am a multi-disciplinary writer, published author, and web content creator. If you like this post, visit some of my other sites or Online Writing Portfolio.
The red glow of a LED bulb in The Coop De Ville bachelor pen.
As fall transitions to winter and temperatures begin to plummet, many backyard chicken keepers are looking for ways to overwinter their flocks and prepare for the anticipated cold weather. While steps to winterize the coop and pen will yield positive impacts, there are potentially dangerous mistakes to avoid when overwintering your flock. The most destructive of these is heat lamps.
In this post, I will explore the dangers of heat lamps and new and safer methods to implement in overwintering backyard chickens. While it is good husbandry to see to the needs of your flock, the most dangerous mistake a chicken keeper can make is judging the flock’s comfort level by your own.
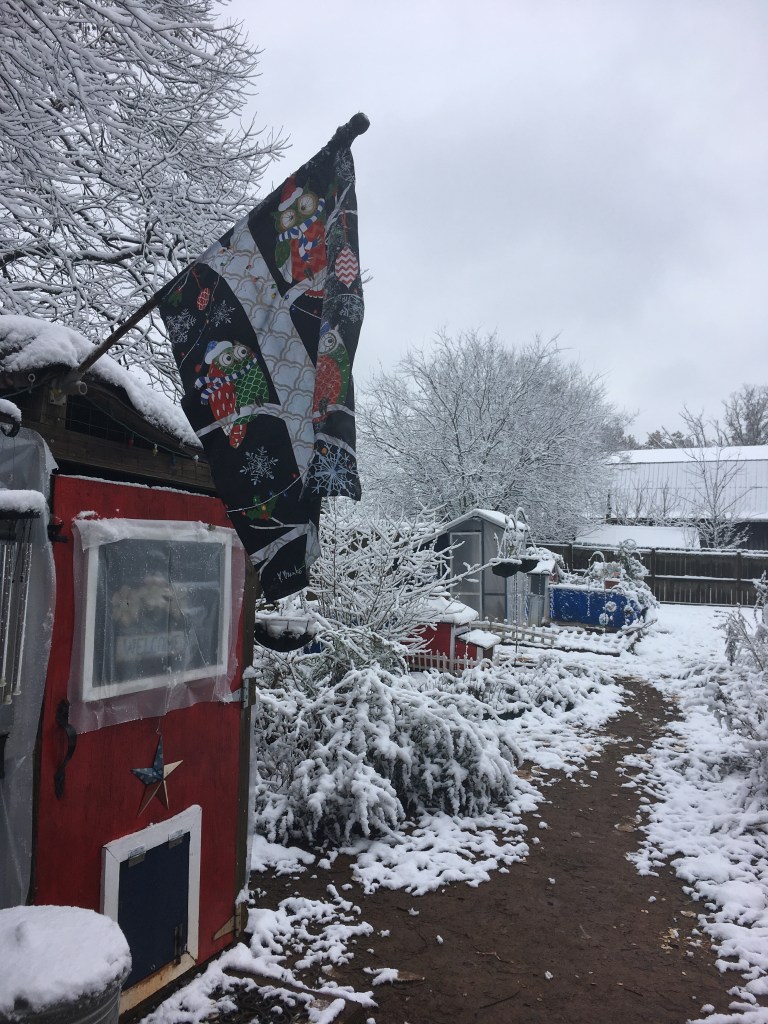
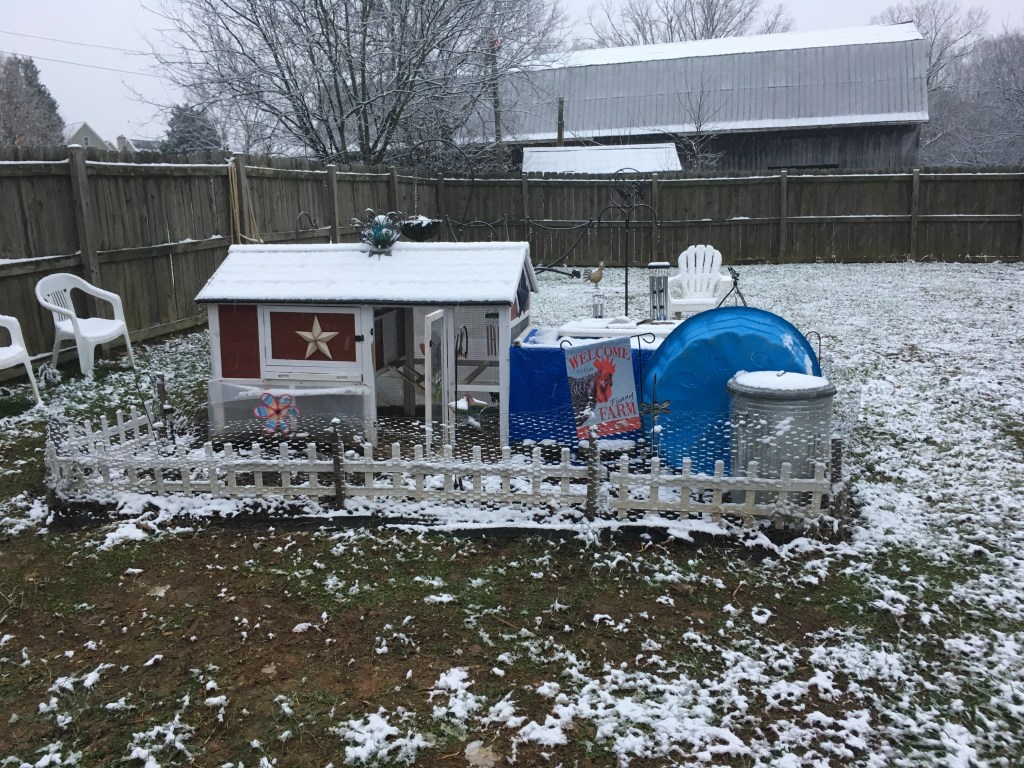
The Kuntry Klucker winterized to keep the coop and pen clean and dry.
Heat lamps-synonymous with chicken coops-began in our grandparents’ days. During the 1940s through the 1980s, heat lamps were used in brooders to keep chicks warm and then used in the coop during winter as a supplemental heat source. While the intentions of these generations of chicken keepers were good, many unfortunately suffered the consequences of using heat lamps in these settings.
During the early 2000s, better methods of providing heat to the brooder setting reduced the need for heat lamps and the associated unintended consequences. However, despite the development of safer products specifically designed for the needs of a backyard chicken keeper, the tradition of heat lamps has progressed through time.
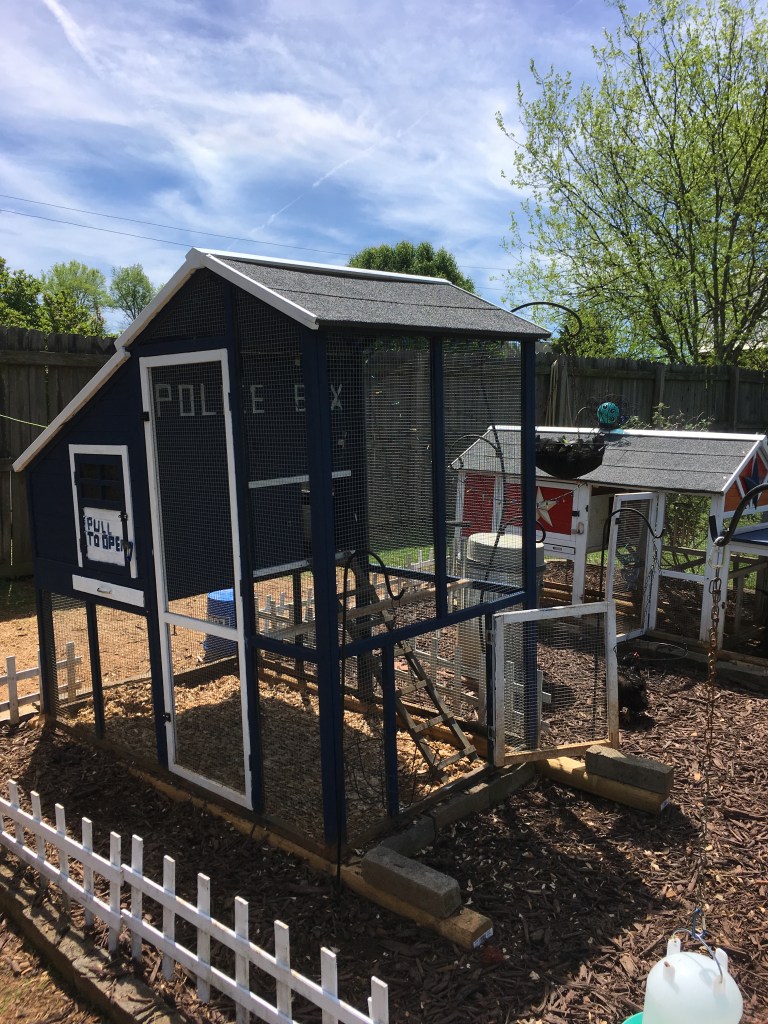
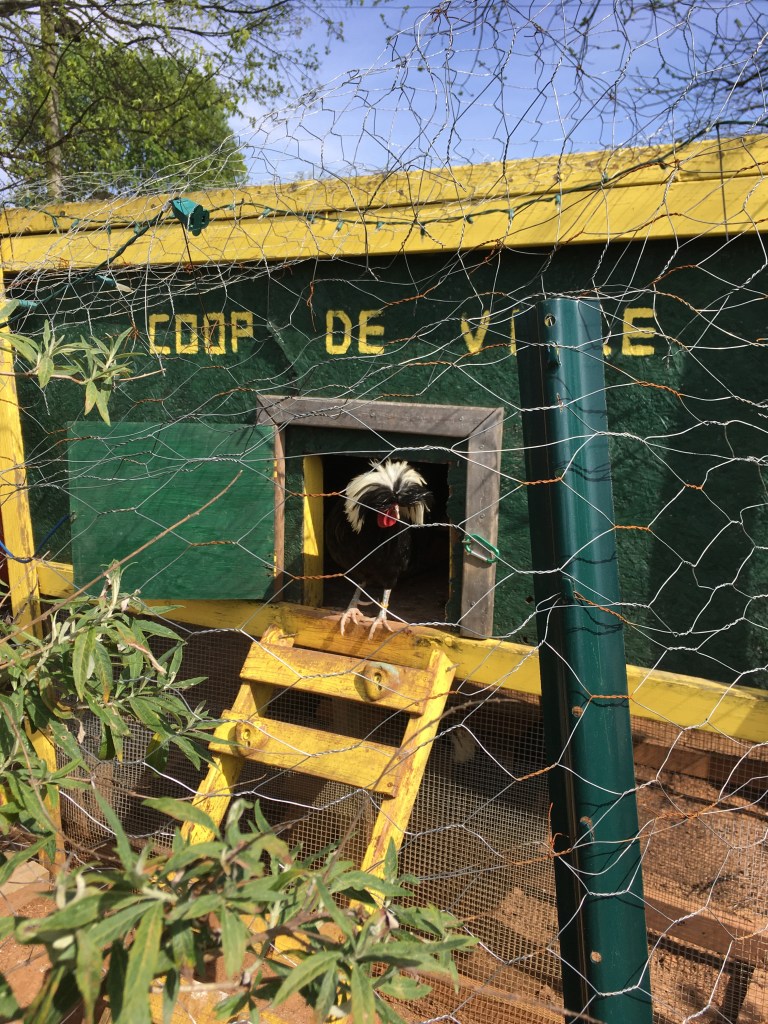
Ganondorf (white crested polish rooster) peering out of the window in the Coop De Ville illuminated by the red glow of a LED light in the coop.
Large, inconstant bulbs, blasting long wavelength red light at an impressive 250 or 500 watts, may seem benign, harmless, or passive. However, the dangers of these bulbs when used in the coop environment are anything but innocuous. A chicken coop filled with dry wood shavings, dust, and feathers is prime kindling for a swift, vehement, and exhaustive fire.
The path of destruction set forth by these bulbs is possible in two primary ways. First, there is no assured way to mount heat lamps in a habitat where the residents can fly. Heat lamps, by the antics of the chickens, are easily knocked down. Once they fall, if the bulb does not bust, the radiating heat will quickly ignite the dry shavings, and a fire ensues.
Secondly, due to the incandescent nature of heat lamp bulbs – at the end of their lifespan – the filament within the bulb can burst, causing the bulb to explode. Releasing a burst of light, heat, and sparks, the instability of heat lamp bulbs when making contact with the kindling in the coop will result in a fatal fire.
Silkie flock roosting in the coop.
Despite best efforts to mount a heat lamp in a chicken coop, the flighty nature of the residents inside makes a coop fire an ever-present danger. Given the volatility of heat lamps in an enclosed environment, there are much safer ways to keep the flock comfortable as the winter weather rages.
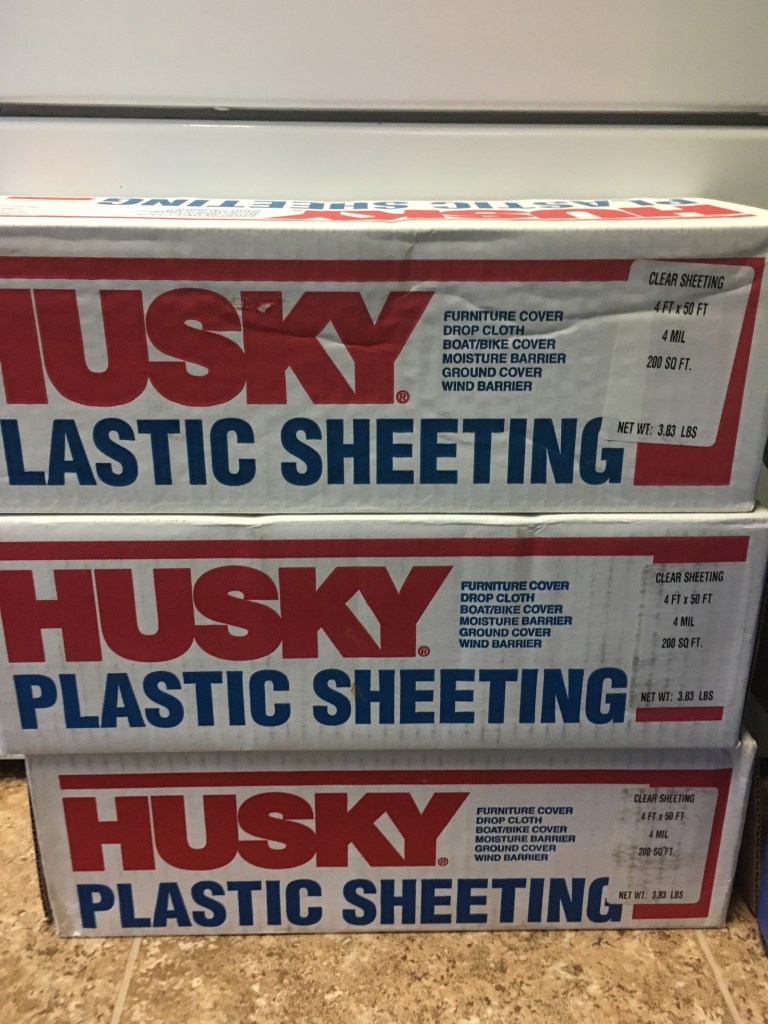
Plastic sheeting for winterizing coops.The TARDIS winterized.The Kuntry Klucker winterized to keep the coop and pen clean and dry.The flock in the Kuntry Klucker warm and cozy on a cold winter night.
To successfully overwinter a backyard flock, only two things are required – a clean and dry place to call home. Chickens are wearing down coats, factory installed. Artificially warming the coop can be life-threatening in severe winter weather. The loss of power is common in winter storms. We survive these events by wearing warmer clothes, huddling under thermal blankets, and consuming warm food and beverages. All of these creature comforts are unavailable to the freezing flock outside.
Miss Bossy (Buff Orpington Hen) trudging through the snow.
When faced with the same situation, a flock that has become dependent on supplemental heat can freeze to death. During the winter, I will receive several correspondences from other chicken keepers seeking help after a power outage that accompanied a winter storm resulted in death among their flock. In addition to sharing their sympathies, I will take the time to educate them on why this happened and how to avoid a reoccurrence in the future.
Chickens evolved to live outdoors and acclimate to the changing temperatures naturally. During molt, in addition to growing in new feathers, chickens will also grow in winter down to keep them warm during the winter. When the coop is artificially warm during this time, a variable that will cause a flock to be ill-equipped for the coming cold weather is introduced. With the added consequences of power loss during winter storms, flock’s dependent on artificial heat sources suffer when factors outside their control ensue.
The flock venturing out in the snow.The flock following paths cleared of snow.The flock investigating newly fallen snow.
Installing plastic sheeting around the coop and pen does two things. First, the plastic is a wind barrier. Secondly, winter precipitation will stay outside the pen and coop area. This simple improvement will keep the flock’s living habitat clean and dry, which makes cleaning much easier in the winter.
The natural body temperature of a chicken is between 107- and 109-degrees F, fatal for us but necessary for their survival; chickens are little furnaces wrapped in down feathers. A wind barrier is crucial for overwintering a flock because it allows the chickens to trap this heat next to their body where they need it to keep warm. Exposure to winds will lift their feathers, and they will lose the heat they worked hard to maintain. Given a draft-free place to call home, the chickens do the rest.
Roy (Buff Orpington Rooster) inspecting a snowman in the backyard.
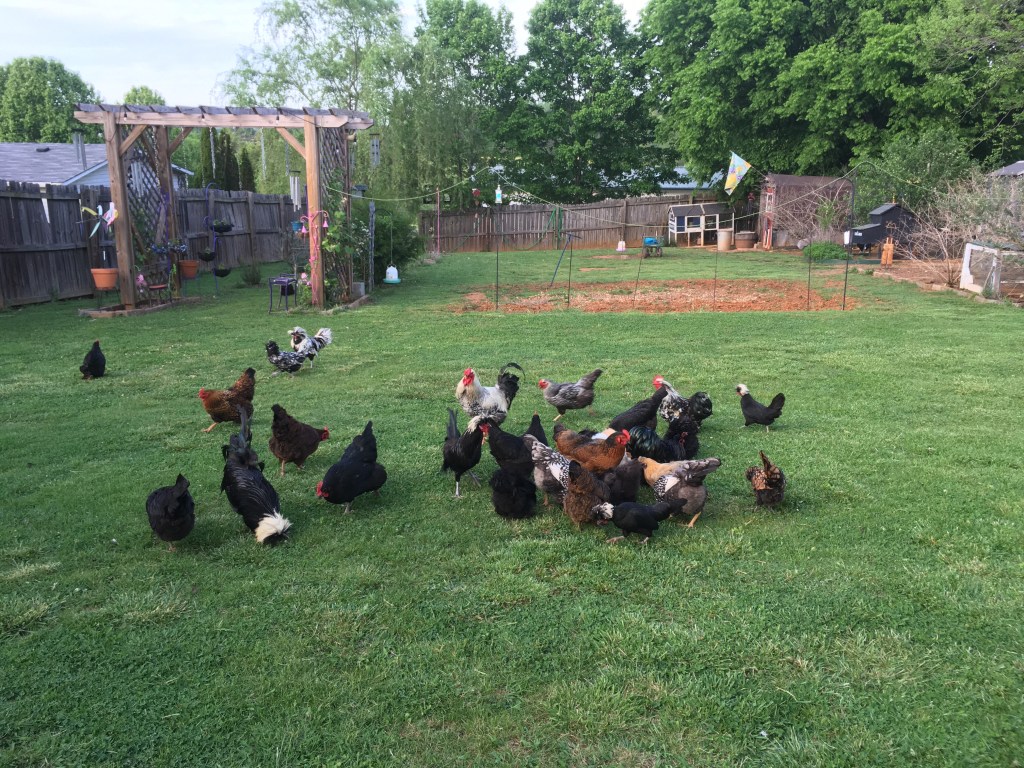
Is it safe to free-range the flock during the winter? The answer to this is absolutely yes. A winterized coop and pen protected from the wind, elements, and temperatures will allow flock members to determine their comfort level. Given access to the outdoors, individuals will spend some time free ranging, if they get a chill from the wind or precipitation, they will come to the coop, warm up, and then continue free ranging. Access to the outdoors will keep a flock happy and healthy as they have natural resources such as sunshine and fresh air.
While it may seem daunting, overwintering a backyard flock is simple and affordable. Providing a clean and dry coop and pen stocked with fresh water and feed is all that chickens require. Keep it simple and let the chickens do the rest.
I hope this post was helpful and made the process of winterizing your coop and overwintering your flock much easier. If you have any questions, feel free to leave a comment. You can also reach me as the following e-mail address: kuntryklucker@gmail.com
I check my e-mail often and will respond as soon as I can.
To watch a YouTube video on my procedure of winterizing The Kuntry Klucker, please click here.
To watch a YouTube video where I go more in depth on overwintering my flock, please click here.
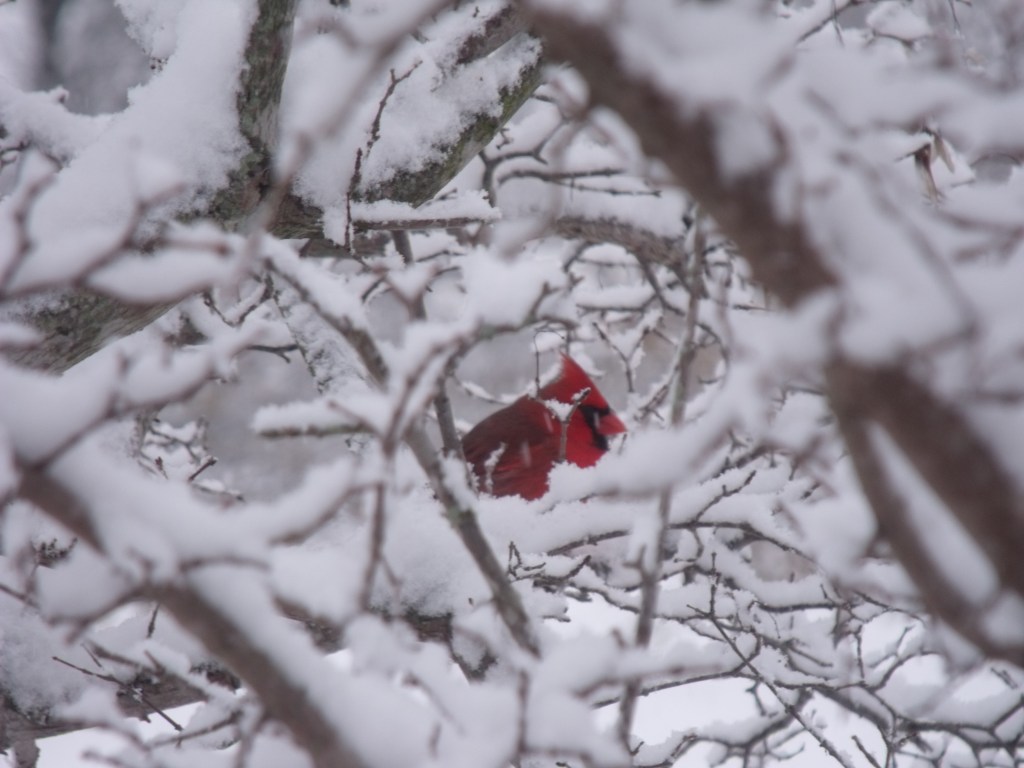
Image Credit: Noelle K. Moser. A male cardinal perching on a snow-covered tree.
I am a multi-disciplinary writer, blogger, and web content creator. If you like this post, please peck the subscribe button.
If you like this blog, please visit some of my other blogs and online writing portfolio.
In this post I will discuss a hot topic within the backyard chicken community. It’s a topic that is important, examining both side of the debate offers much in-depth knowledge. In this post, I will examine the topic of Prefab Vs. Hand-built coops. Showing that prefab coops can and do make very viable options for your flock.
Many chicken keepers do not like prefab coops, they recommend that newcomers build their own coop. I differ in regard to this opinion. I built my first coop, then added 5 prefab coops. I love prefab coops. They make viable options for those who cannot build a coop for various reasons be it financial, physical limitation, or conceptual. Wood working and carpentry is not for everyone, it’s a skill that requires hard work, training and can be very expensive. It can also be very dangerous if you have never worked with wood or high-powered tools before.
This is the story of my journey in both building a coop and owning prefabs. It’s my intention to help others who are not craftsman or builders to put your mind at ease with respect to prefab coops.
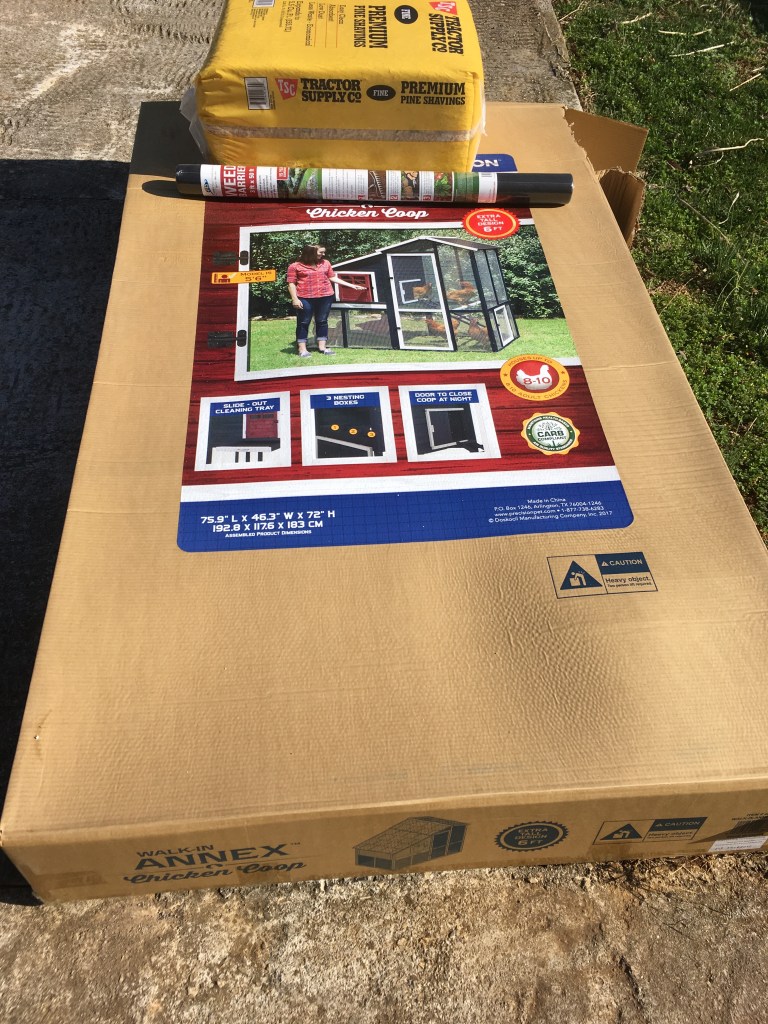
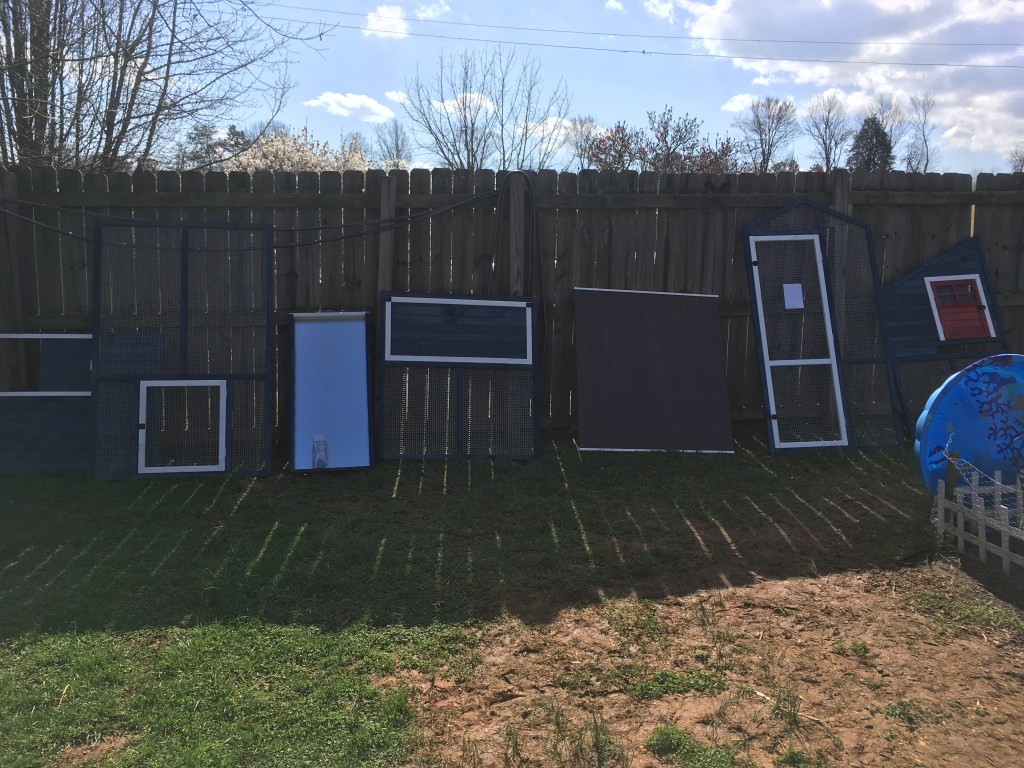
For those who are not familiar with what a prefab coop is, allow me to explain. When I refer to prefab coops, I am talking about coops that your see in farm stores, such as Tractor Supply or Rural King to name a few. They come in large boxes and require assembly which is very simple only requiring a screwdriver, a partner and a little elbow grease. Above I have pictured three of my largest prefab coops that I purchased from Tractor Supply (The TARDIS, Henwarts, and Hyrule). I will formally introduce you to all these coops a little later in this post.
I built my first coop, The Kuntry Klucker 10 years ago. I love my big coop, but I will say that it was the hardest, most dangerous project I ever undertook. I was new to chickens and followed the advice from more experienced keepers, which was “don’t buy a coop, build your own”. Not knowing much, that is what I did. I found out through this endeavor that I have no business using power tools. I nearly killed myself several times and spend $1000 more than I had intentionally set out to spend. After I cut the wood too short or at wrong angles, adding to those two trips to an Urgent Care Center, it got expensive. I realized that this was really bad advice that I followed from my experienced chicken keeper counterparts. Up till that point, I had no experience with wood working or carpentry in general.
So, how did I come to love prefab coops you may be asking. Well, as the saying goes, “you can’t have just one”. I fell in love with chickens and wanted more. I knew from my past experience that building my own coop was a suicide mission, so I began looking elsewhere. I began to entertain the thought of prefab coops against the better judgement of other poultry keepers. The fact was simple, I cannot build a coop, so I had to seek out other options.
To start, I read reviews, most will say something like this, “It looks good, but the quality is poor”. This is a general across the board review that you will see for a prefab coop. Don’t let this bother you, the coops given, and little love will do just fine. Anyway, knowing this I ordered my first prefab with a plan in mind. When it arrived, I put it together and was actually shocked at how well it was made. Drawing from the experience from my coop building disaster, I made a few adjustments. I updated the hardware cloth, the latches and gave the wood a good coat of barn and fence paint followed by a quality water seal. The results were stunning!! Not only did I not kill myself building the “kit coop” (all I needed was a screwdriver instead of a power saw) but after I made my adjustments it held up well, I mean really well! I live in the steamy south of East Tennessee. We get hot summers with lots of humidity, nasty spring storms, and ice in the winter. Mother Nature throws it all at us. Through all of this my prefab coops have held up very well. I do touch up the paint every other year, the hardware cloth and latches are still fine.
After the experience with my first prefab coop (which now has 5 years under its belt), I ordered more as my flock grew.
I now have 9 coops currently in operation, 7 of them are prefab coops. I have not had any predators get into my prefab coops, nor have I had any problems with the wood rotting (hence the water seal). The roof holds up well and the durability of the structures have withstood everything Mother Nature has thrown at them. I can honestly say that it would take a disastrous weather event to tear them down such as a tornado or derecho. If I get a tornado or other high wind event, I will have more to worry about than just damage to my prefab coops. Additionally, I have them insured under my homeowner’spropertydamageclause. If we experience a disastrous weather event, I will just put them in with all the other things that we need replaced should this unlikely situation actually occur.
Allow me to introduce you to the 6 prefab coops that call The Kuntry Klucker Farm home.
First came Roy’s Roost and Betsy’s Bliss. These two coops, (the smallest of all my coops) are situated in my spice and herb garden. Roy’s Roost was purchased to use as a hospital coop and hatch out coop. I use it for other purposes but these two are most predominate.
Betsy’s Bliss is my broody breaker. It is only big enough for one hen. The upper compartment is the coop area where food and water is kept, its also where the resident roosts at night. Below is the pen area. This coop is only used to restore a broody hen back to her normal behavior. Stints in Betsy’s Bliss are usually short lived. After a short stay in Betsy’s Bliss, the resident is granted parole pending good behavior.
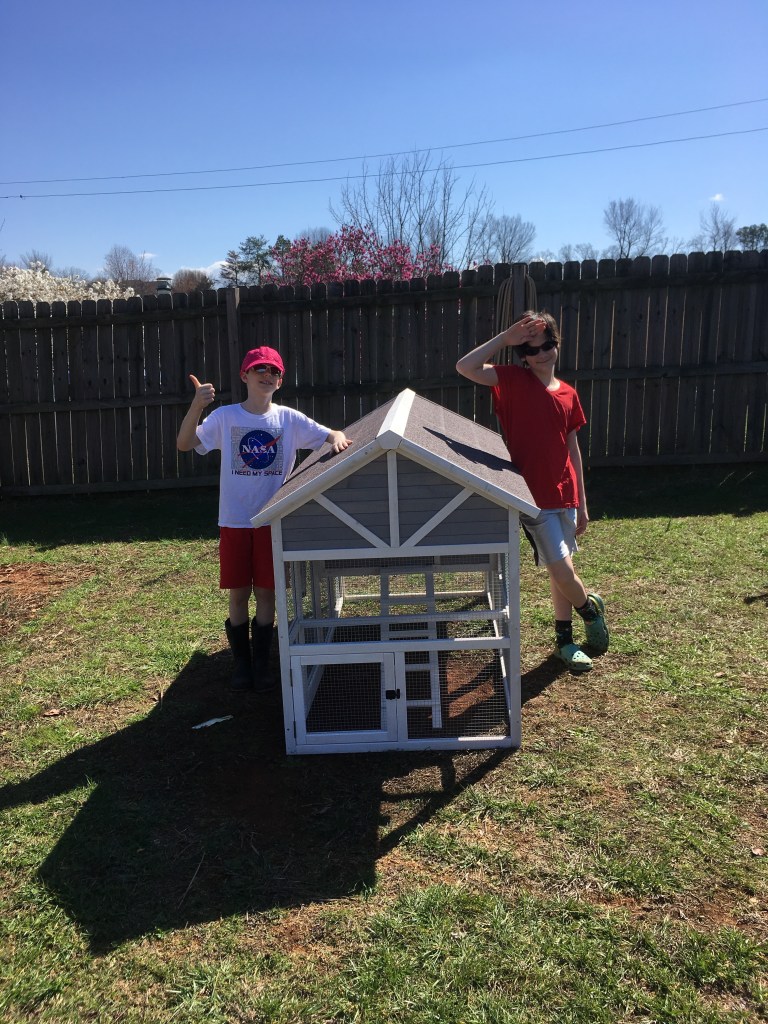
Next, and the first of my large prefab coops is Hyrule. This coop belongs to my youngest son. Hyrule houses White Crested Polish Bantams and Frizzle Cochin Bantams. After witnessing the durability of this large prefab coop, my chicken addiction really took off.
The next prefab coop to join the backyard “coop-hood” was the TARDIS.
Belonging to my eldest son and home to Bantam Silkies, the TARDIS was the next large prefab coop to land in the backyard. My son is a huge Dr. WHO fan and wanted to paint and name his coop after the TARDIS. His artistic skills really made this “Time and Relative Dimension in Space” machine come to life. I was concerned that due to its height it would be easily knocked over in strong winds. To my surprise it has held up remarkably well, surviving several very rough spring seasons. The TARDIS is 4 years old and still holding up very well. Even after being battered by several severe spring seasons, it is showing no signs of slowing down.
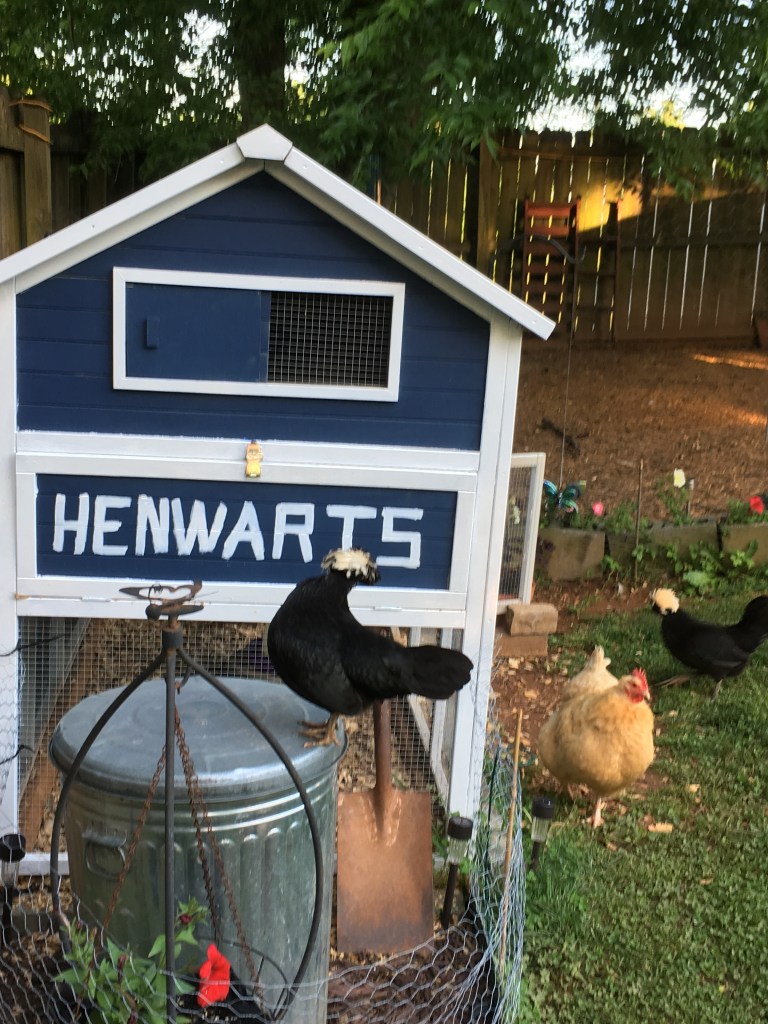
The final large prefab coop to be added to the “coop-hood” is Henwarts.
Silver Lace Wyandotte flock
Henwarts was added spring of 2018 and has so far survived several hails storms and a few ice storms. Henwarts is home to Silver Lace Wyondottes and Lavender Orpingtons. Painted the colors of the Ravenclaw house at Hogwarts, all the residents are named after characters from the “Harry Potter” series.
This spring (April 2020) we added one more coop to our coop-hood. A medium size coop bearing the name “Curisable”. This Dalek chook interplanetary ship belongs to my eldest son. Along with the TARDIS, the Crucible is home to 4 Silkie breeding roosters.
Now that I have introduced you to all the prefab coops that call the Kuntry Klucker Farm home, allow me to tell you how I preserve these coops for long lasting value.
How to extend the life of a prefab coop.
Just like everything else in life, a prefab coop needs maintenance. Here are some hacks that I have discovered along the way that resulted in the longevity and durability of my prefab coops.
1. Grounding: Make sure to set the prefab coop on large outdoor treated lumber planks. It is important to make sure that the prefab coop does not touch the ground. I am sure that it would be fine, but I like to raise my prefab coops off the ground a little bit. I set them on large outdoor treated landscaping 4×4’s or 4×6’s. These large heavy pieces of lumber serve as a buffer between the ground and the coop. With 4” deck screws, I secure the coop to these large timbers of wood. Although my prefab coops have held up well on their own, this adds a bit more stability to the coop. Furthermore, this ensures that the coop is well grounded and better withstand strong winds.
2. Latches: Prefab coops come with latches installed. I found that they do suffice for the purpose intended but I like to add a bit more security to my coops. Typically, I will add several more latches to the coops for added security. Most prefab coops come with barrel latches, I like to replace or add to these latches’ predator proof latches. Below is a photo of my preferred latching mechanism that I use on all my coops.
3. Paint: Prefab coops come painted but only with a primer or wood stain. Be sure to fully paint your prefab coops with a quality outdoor oil-based or latex paint. Then follow with a topcoat or water seal appropriate for the paint you used. This will aid in the life expectancy of the wood. I touch up or repaint my prefab coops about every other year depending on the need. In doing, so I have never had an issue with the painted wood rotting.
4. HardwareCloth: Prefab coops do come with hardware cloth already attached to the coop and pen sections. I like to add another layer for my own peace of mind. This is probably not necessary since the hardware cloth that comes on the coops is a heavy gauge. I also make sure that I add a few more staples to ensure that the hardware cloth stays on.
With these 4 simple adjustments and additions, my prefab coops have held up just as well as the coop I built 10 years ago.
This is my story, I learned from experience that building your own coop as many suggest, is just not feasible for everyone. Since I discovered prefab coops, I will never build one from scratch again.
I have extended experience with prefab coops; I can honestly recommend them as a viable option for others who cannot or do not have the skills necessary to build a chicken coop. In my opinion they are a worthwhile option.
I will add, I will only purchase my coops from Tractor Supply or a local CO-OP. Reason being…if it arrives damaged (so far none of mine have) they will replace or exchange it for me. If I order from retailers, it would be harder to return it to the store. Prefab coops are great, but get them from TSC, Rural King or other reputable local co-ops in your area that stock them. If you have problems, you are not far from help.
If you have any questions about prefab coops, please post them in the comments. You can also drop me a line at kuntryklucker@gmail.com.
To see a video of the “coop-hood”, visit our YouTube channel.
I am a published author, multi-disciplinary writer and blog contributor. If you like this blog, please visit some of my other sites.
So, you want to raise chickens but you have absolutely no idea where to begin. In this post, I will tell you how I began my adventure with raising chickens and show you how to begin your own backyard chicken endeavor.
It was about 10 years ago when the thought of keeping chickens first crossed my mind. I never had chickens before, nor was I raised around them. My grandparents had a farm where they raised produce and pigs. I visited every summer, that was the extent of my country upbringing. I had a good handle on how to garden and grow crops, as to livestock, I had to start from square one.
In a world where we can buy literally everything we need at the store, I waned to have a say as to where my food came from. I wanted to have farm fresh eggs and a garden where I could grow organic produce for my family. I also needed guidence on how to cultivate hard red clay here in Tennessee.
Backyard homestead and gardens.
I found through this endeavor, soil conditioning and fertilizer in the form of manure is a good place to start. I also found out that chicken manure is the best from of fertilizer. Chicken, as opposed to cow or horse manure does not contain seeds, chickens process everything they consume. Due to the grinding organ, the gizzard, all seeds are broken down into usable fuel for a garden. Cow and horses on the other hand do not process all the seeds they eat, resulting in fertile weed seeds for your garden. In order to have the homestead and garden I wanted, I had to get chickens. Thus stated the adventure with my backyard divas.
Why do you want chickens?
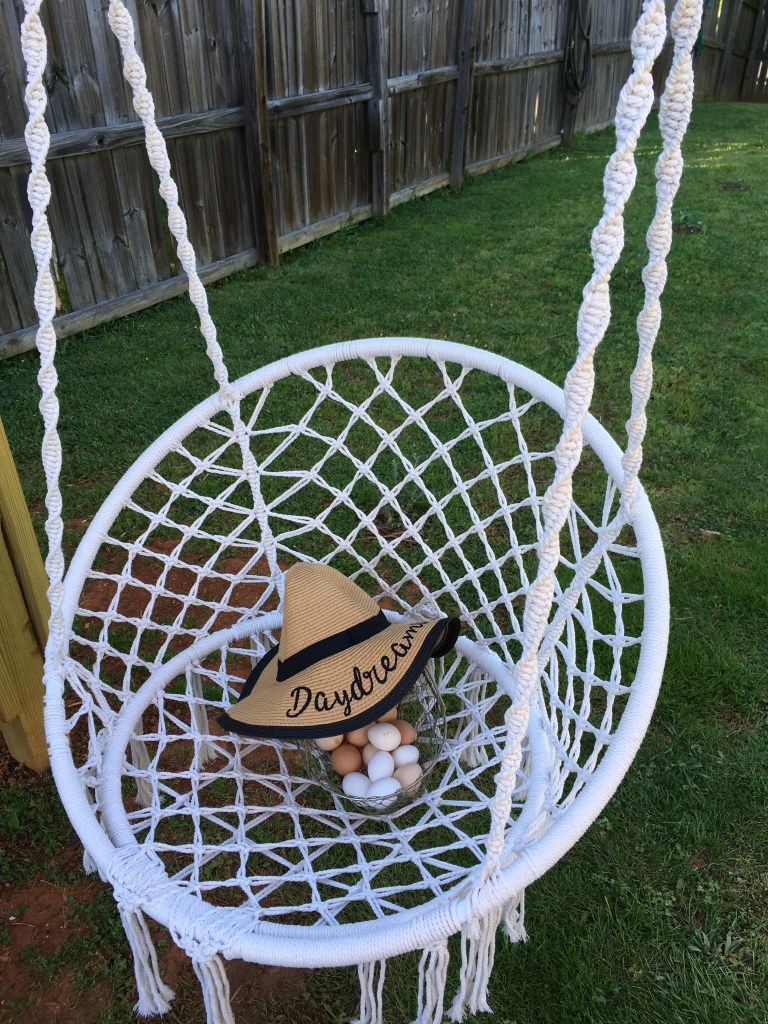
Buff Orpington eggs in a nesting box
If you are reading this blog post, you have already decided that you want to get chickens. This is the first and foremost thing to consider before getting your first flock. Keeping backyard chickens is very rewarding with many benefits. However, they do require daily care and attention. Knowing why you want to dedicate the time and resources required is very important.
Know your zoning laws.
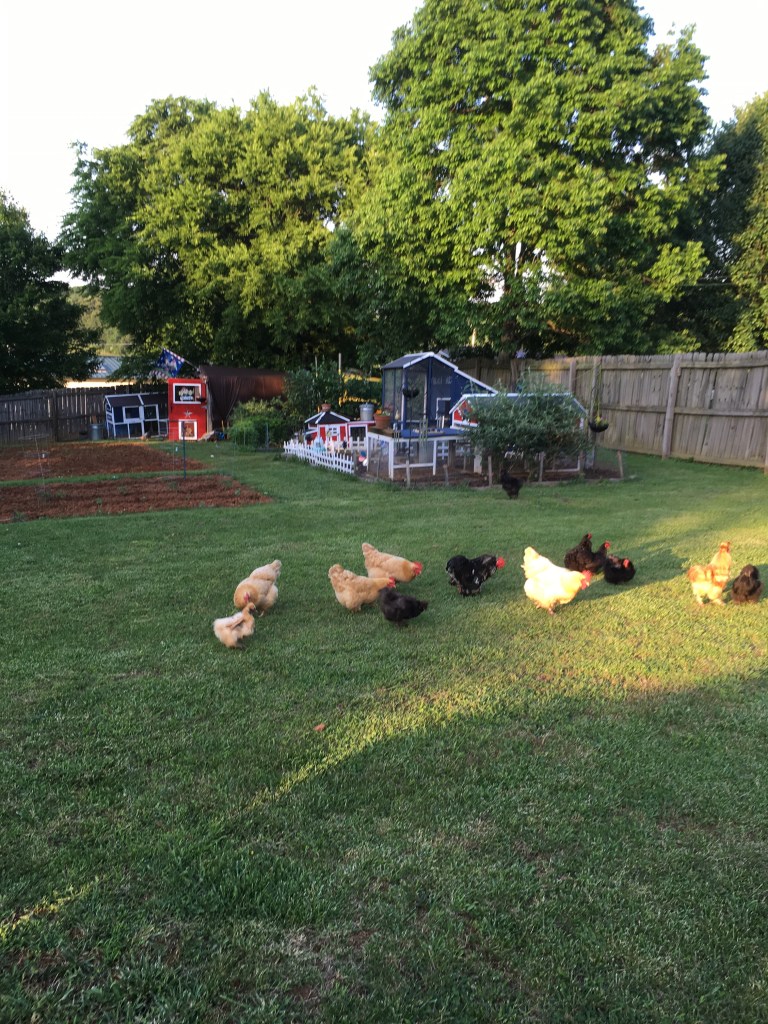
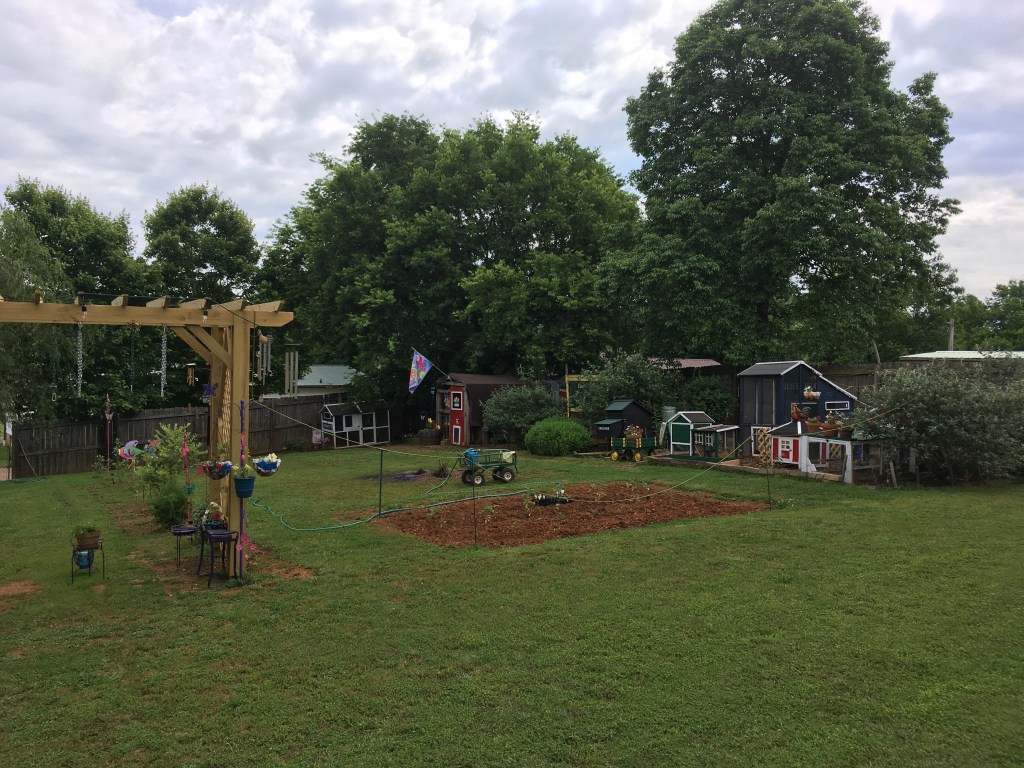
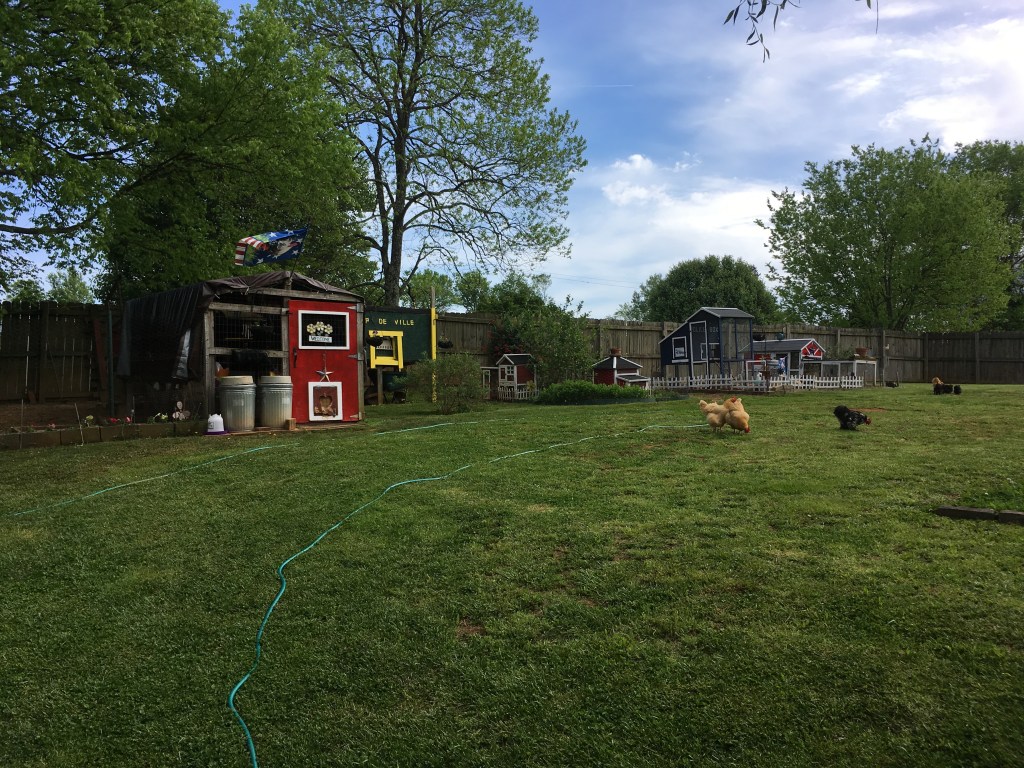
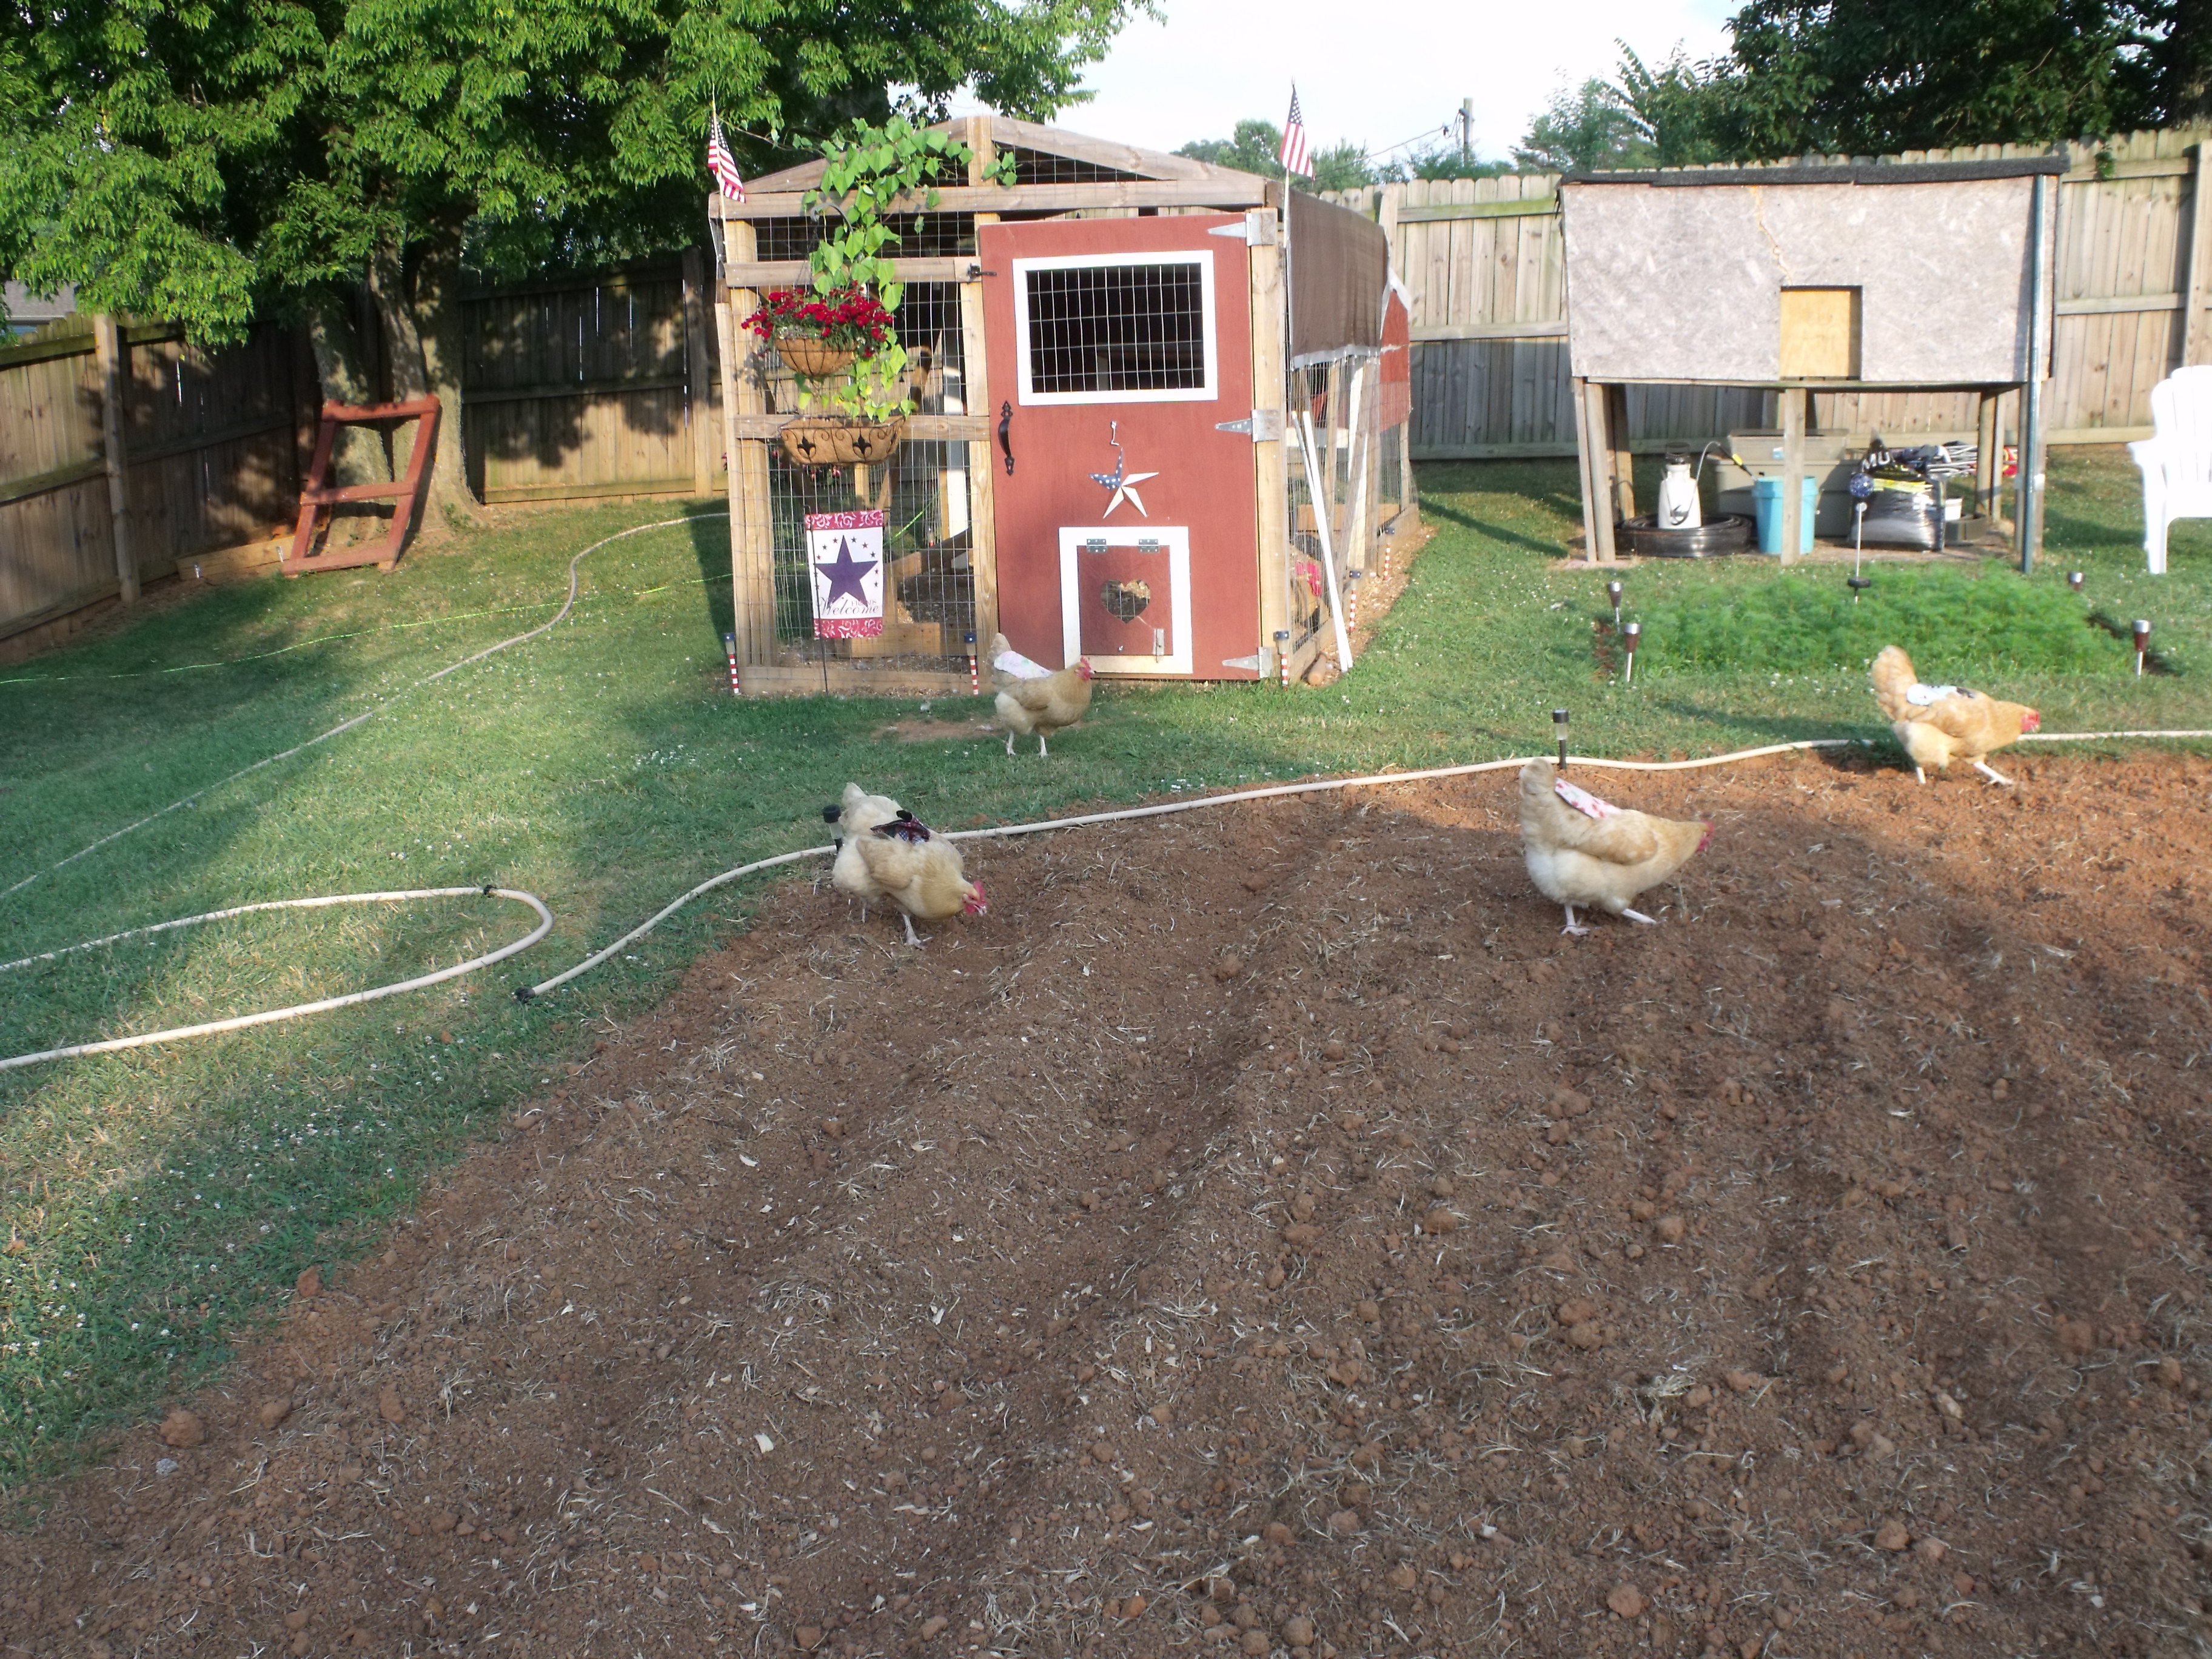
The Kuntry Klucker Farm “coop-hood”.
Before you even look at coop designs and hatcheries, you need to find out what your zoning laws require. Every state has a different zoning law when it comes to livestock. Unlike a cat or dog, there are strict laws concerning pet chickens, the state views them as “livestock”. If you are in the city, if allowed, you will be limited to a small number of hens in your backyard, usually 6 or so, omitting roosters. Most city ordinances do not allow roosters per the noise issue.
If you live in the county or country, livestock is most likely permitted. You still need to check your zoning laws to be sure of any and all restrictions. For example, I live in a rural county in East Tennessee. Although I am outside city limits, I have to abide by certain guidelines. For example, my coops need to be at least 250 feet away from my neighbor’s front door, my animals must be contained by either a fence or pen attached to their coop, and I need to have a good waste management routine implemented to reduce both varmints and odors that may bother my neighbors. I have met the requirements, stipulations and more. My girls’ coops are in our backyard, enclosed by a 6-foot wood privacy fence. Their coops and pens are cleaned and maintained daily, I practice good manure management, aiding in both good health and odor reduction.
The Kuntry Klucker Crew
Do your research..Breeds, temperament, disposition.
Ask yourself what kind of chickens you want? Do you want to keep a flock of chickens for eggs, or do you want them for meat?
Do you want to involve your kids in keeping backyard chickens? Do you want to keep them purely for the enjoyment and fun of owning backyard chickens? What temperament do you want in your backyard flock?
These are just a few of the questions to ask yourself. Of course, chickens can offer much more then eggs and meat, they can be pets, forms of entertainment and a companion like a family dog. The spectrum is so wide ranging when it comes to chickens, you can literally have your cake and eat it too.
Most people want to have a flock of chickens that are docile and friendly. If children will be involved with caring for the chickens, this is of upmost importance to beginning keepers. Luckily there are many breeds that would fit this need.
Below, I will list a few of the friendliest breeds. I have most of the breeds or have interacted with them and can vouch for calm and friendly behavior. As with people, chickens have personalities, some may not be as friendly as others. When viewed as a whole, these breeds are great choices for a beginning backyard setting. If roosters are a concern, I have much experience with roosters, I currently have 13 gents. I have examined the temperament and demeanor of various breeds. To read my research and experience with rooster, click here.
For egg potential, the best layer breeds are Orpingtons, Australorps, Easter Eggers, Rhode Island Reds, Production Reds, Leghorns and Plymouth Rocks.
As for meat chickens, typically any standard or large dual-purpose bird will do. However, Cornish Crosses are typically chosen to meet this need. I do not raise chickens for meat; thus, I am I am not able to speak into this. There are many YouTube and other sources on the net to help you get started on this path.
Where to get your chicks? Hatcheries or Feed Store.
After you have decided what purpose, you want your chickens to fill, you need to decide where to purchase chicks. I have purchased chicks from both feed stores and from hatcheries. There are pros and cons to both. I will list them below for your consideration.
Feed store chicks
~ pros: cheap, no waiting time, you can hand pick your chicks, usually older chicks typically a week old or more, don’t need to be picked up early in the morning at the post office.
~ Cons: usually only basic breeds, depending on store the care of the chicks can be poor, easy to purchase too many (I struggle with this one, I want them all), typically sold as straight runs (not sexed, you WILL get both hens and roosters), chicks tend to be more high strung and flighty due to feed store environment, sold during the spring months only (February thru April) although some locations may have chicks in the fall.
Hatchery
~ Pros: Chicks are sexed (you can purchase only pullets or hens, omitting roosters), chicks are usually in better health, can purchase rare breeds, chicks are typically of better quality, can order your chicks to be shipped any month (except winter months).
~ Cons: more expensive (you will need to pay shipping which can be as much as $45 depending on location), you will need to schedule a time to be home to receive your chicks ( you will need to clear two days from your calendar to pick up your chicks at the post office, they can be delayed in the mail), chicks will arrive at your post office (you will be called early usually between 5-7am to pick up your chicks when the overnight truck arrives), some chicks may die in transportation (be prepared to open your box and find dead chicks, this has only happened to me once in 10 years), orders typically need to be placed in November around Thanksgiving for spring chicks.
Given both methods of acquiring chicks, I prefer to work through hatcheries. Yes, it is a bit more expensive, I have several reasons for this preference. I will list them below.
1.)I like knowing I am the only one to care for them from the moment they arrive. Such things as the feed to the quality of the water and vitamins I administer in their water.
2.) I like the wider selection that hatcheries offer. I tend to gravitate towards more rare breeds not offered in the feed stores.
3.) I find that they are healthier and less traumatized than those purchased at the feed store.
4.) I have found that they are less flighty. Chicks sold in feed stores constantly have hands grabbing for them, causing them to be flightier and higher strung. The chicks that I purchased from the hatchery, despite traveling are much calmer and easier to hand raise. Chicks bought from the feed store are very skittish and harder to hand raise. Due to their exposure to the feed store setting, they are often terrified of hands.
If you decide that chicks from the feed store meet your needs, visit your local Tractor Supply or equivalent in your area and begin your backyard chicken adventure.
For those who decide after careful consideration that hatcheries are a better route for you, do your research before you order. There are many hatcheries out there to choose from. Who you order from will have a lot to do with what breeds you want. Some hatcheries specialize in heritage breeds, others offer rare breeds.
I have ordered from several hatcheries, all with good experiences. Below I will list the hatcheries I have done business with. I can vouch for their service and quality of chicks.
Cackle Hatchery – I ordered my first clutch of chicks from Cackle. 9 years later, I still have 5 of the original 17 Buff Orpingtons I ordered.
My Pet Chicken – I order all my Silkies and White Crested Polish Chickens from MPC. They are great outfit and offer some of the rarer breeds of chickens. Their customer service is top notch. If any chicks pass during shipping, they will reimburse you for the loss of chicks.
McMurray Hatchery – I have ordered some of my very rare Polish breeds through McMurray. They also stock some extremely rare breeds. If you are interested in something a little bit different for your backyard flock, they are the best place to go.
Preparing The Brooder.
Now that you have ordered or plan to pick up your chicks at your local feed store or co-op, it’s time to set up the brooder. A brooder is basically a heated home for your newly hatched chicks. In nature, the mother hen would be the brooder. She would keep them warm, teach them how to drink and what to eat. Since you picked up or ordered your chicks, essentially you have to be the mother hen to these little ones. Don’t worry, it’s not complicated. There are just a few very important steps that need to be taken to insure the successful transition of your chicks.
what you will need:
1. Enclosed container with sides and a top.
2. Heat source
3. Feeder and Feed
4. Waterer and vitamins to put in the water
5. Pine Shavings
6. Other accessories such as perches or toys to keep them occupied.
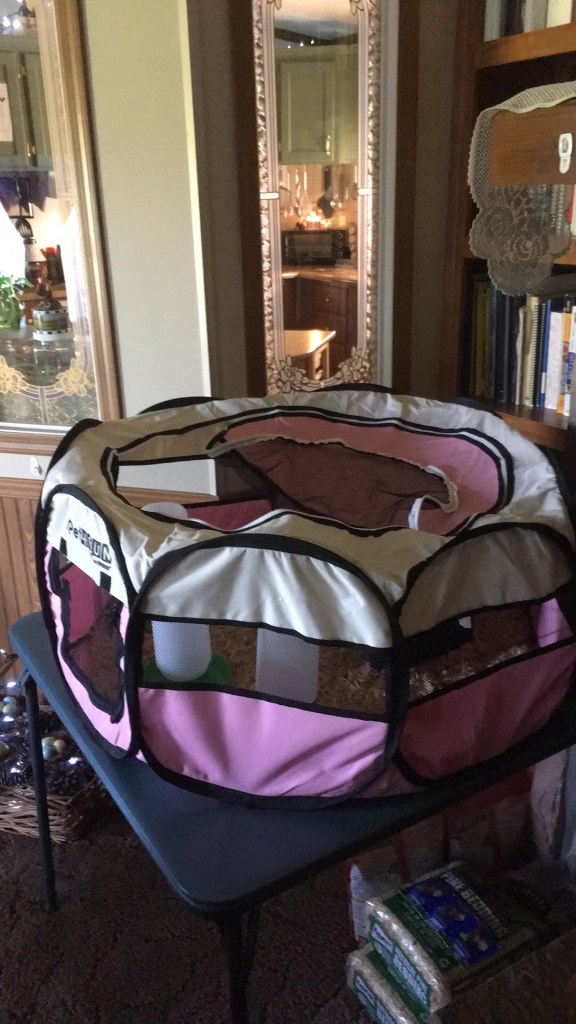
My brooder container or choice, puppy play pen.
For my brooder set up I use a Puppy Play Pen these can be found on Amazon and most pet stores. I like to use these for brooders for several reasons.
~ 1. They are completely enclosed, this means that all the shaving stays in the brooder, reducing much of the mess. The screened sides allow for air flow and visual access to your chicks. Due to the fact that the chicks can see and observe their world outside of the brooder, they are more laid back and less flighty.
~ 2. They have a top. This will become important when the chicks get to the flying phase of their development.
~ 3. They are easy to clean, fold up, and store easily.
Heat:
As for the heat source, I discourage the use of heat lamps. Most people associate brooding chicks with the big red 500-watt bulbs blasting the chicks with intense heat and light. This was the common way of brooding chicks during our grandparent’s day. As for today’s chicks, brooding has taken on a better much safer route to supplying heat to your chicks. Brooder lamps as they are known are very dangerous. There is no way to safely mount a heat lamp around shaving (kindling wood) and flying animals. I cannot recount how many times I have heard, or I see coop, barn, and house fires caused by the humble heat lamp.
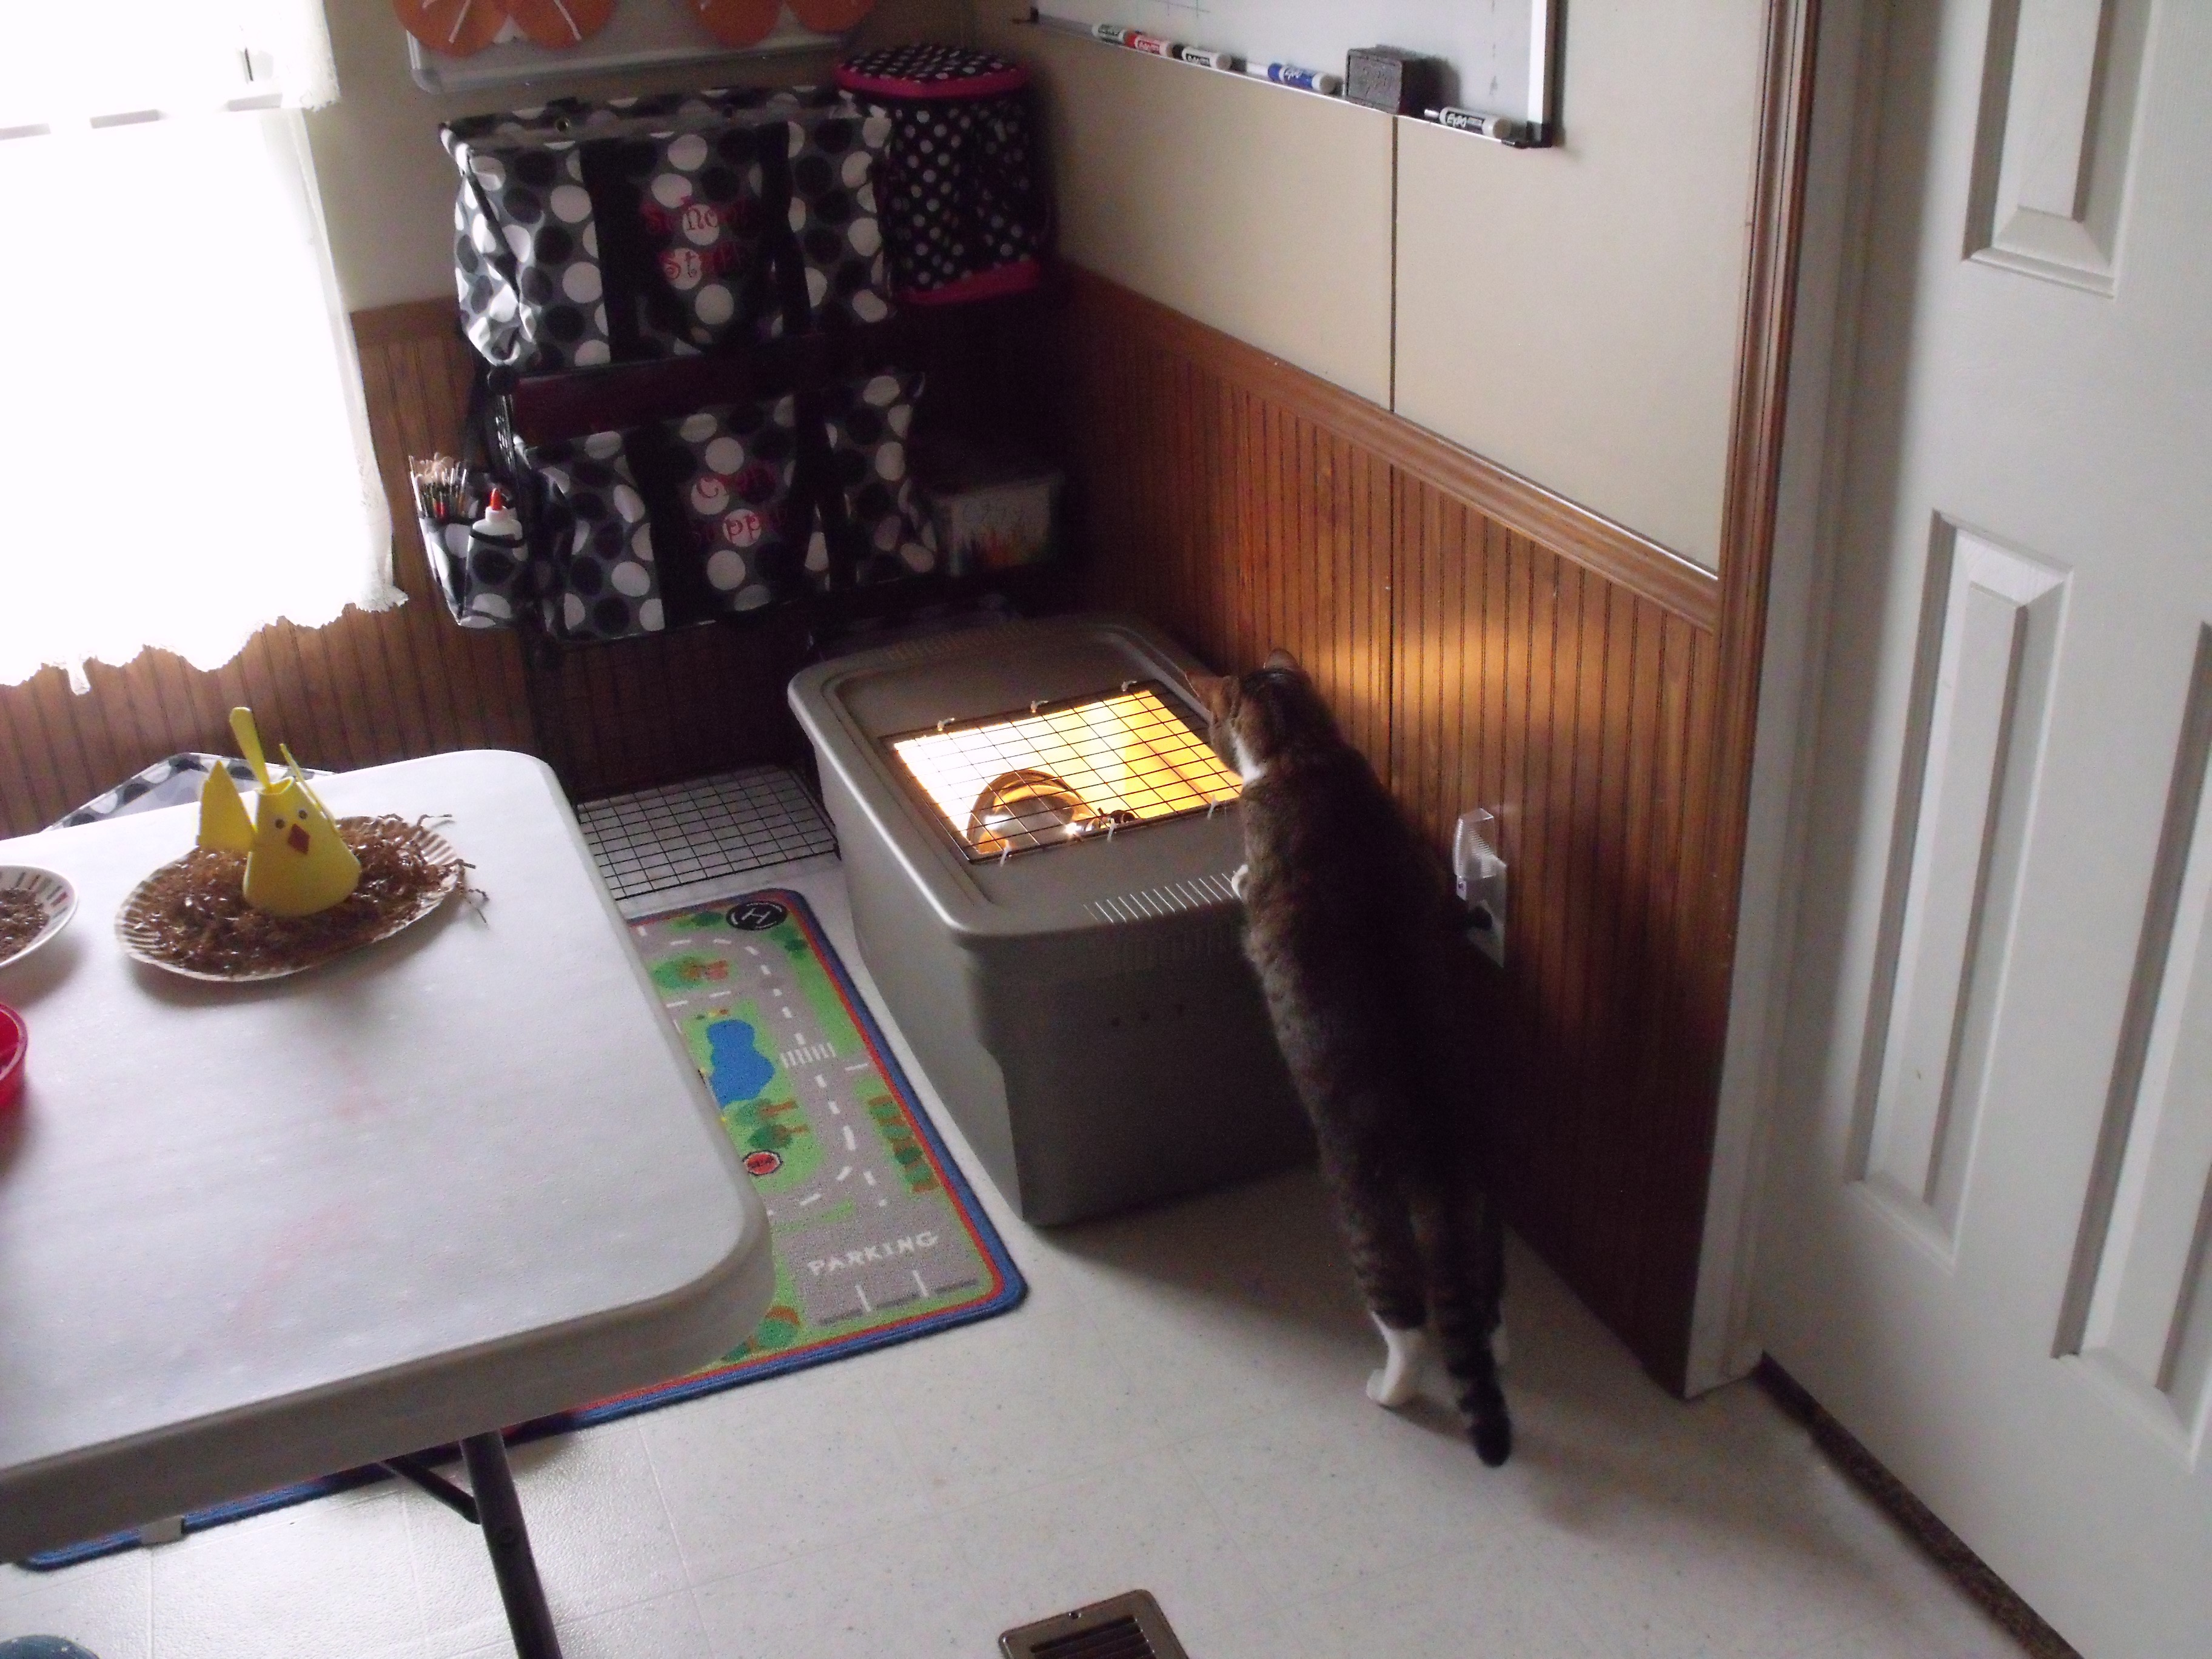
Brinsea Ecoglow heat plate in brooder.
In lieu of a hazardous heat lamp I use a Brinsea Ecoglow Radiant Heat Plate. These radiant heat plates mimic the heat from a mother hen, rather than blasting the chicks with unnatural light 24/7. These are a much safer option for heating and do not carry the risk of fires, injury, and death as the heat lamp of yesteryear.
Feeders:
Next, you will need chick feed and a feeder. When it comes to chick feed there are two school of thought. Medicated or unmedicated. Medicated chick feed has a medicine in the feed to prevent or give the chicks an immunity to coccidiosis. Coccidiosis is a disease of the intestinal track; chicks are very susceptible to this condition. Coccidiosis contributes to a large percentage of high mortality rates in young chicks. The medicated feed prevents this condition, giving them a much healthier start in life.
Unmedicated feed is also a good choice, used mainly by people who choose to give their chicks a more organic start to life. Either is fine, you as the caretaker need to decide which route is best for you. As for me, I am pro medicated chick feed. Since I switched to medicated feed, I find that I lose less chicks and that they are healthier from the beginning. As for the feeder, feed stores have a wide variety of feeders to choose from. Just pick the one that fits your brooder set up the best.
Waterers and vitamins:
The type of waterer you have is very important. The goal of the waterer is to give your chicks access to clean fresh water, taking great care that they do not get wet. Once again when it comes to waterers there are two schools of thought, traditional waterers or poultry nipple drinkers.
The traditional waterers are widely available at feed stores, just make sure that you get a small one to prevent the chicks from getting wet. The poultry nipples can be found at some feed stores, but most of them have to be ordered. I do not use the nipple drinkers, I cannot into how to train your chicks to use them. I know that others use them with much success. I find that the traditional waterers work best for me.
Like people, vitamins are very important to young growing chicks. I put vitamins in my chick’s water daily for the first several months. The vitamins ensure that the chicks are getting all the nutrients that they need to get a good start in life. Some vitamins have probiotics in them which gives them an additional boost in the right direction. Most feed stores have poultry vitamins available; I typically pick them up at Tractor Supply.
Shavings or bedding:
Brooder bedding serves the purpose of absorbing moisture, keeping your chicks healthy and happy. The safest bedding to use around chicks is pine shaving. Most feed stores stock pine shavings, they can also be found at Walmart and pet stores. An important note about shavings, cedar is toxic to chicks, take care to make sure that you use pine shavings in your brooder set up.
The pine shaving should be cleaned out once a week and replaced with fresh. More often if you have a quite a few chicks in your brooder.
How to Introduce your new chicks to the brooder and teach them to eat and drink.
When you first arrive home with your new chicks, the first thing you want to do is teach them what water is and where to find it. After traveling for several days, they will be thirsty. To relay this important survival information to your chicks, dip their beaks in the water. As you remove them from their shipping container and place them in the brooder, dip their beaks in the water. Do this for every one of the chicks. You may need to dip their beaks in the water more than once for them to make the connection. You will know that the connection has been made when they drink from the waterer on their own. They will be thirsty; it will not take them long to appreciate the water.
Chicks naturally have a pecking instinct; this means that they will peck at anything that is in front of them. It is your job as a caretaker to teach them what is food. The best way to do this is to line the bottom of your brooder with paper towels for the first few days. On top of the paper towels, scatter some chick feed. The chicks will instinctively peck at the feed, teaching them that “this is food”. If you put new chicks on the shavings, they may eat the shavings mistaking them for food. After they learn to identify their food, the source by eating from feeder, you can remove the paper towels and expose the shavings. They will enjoy scratching in the shavings looking for food, much like adult hens do when looking for bugs in the grass.
Once everyone is eating and drinking on their own, you can take a sigh of relief. From this point on they are able to take care of their needs, regulating their food as water intake as needed. The first week they will spend a lot of time under the heater and sleep a lot. Beginning in the second week, they will be a lot more active and enjoy interacting with their caretaker.
Once the young brood is completely feathered, they can move into their outdoor digs. The time of year you acquire your brood will make a huge difference on when they can be moved outside to their coop. If you get them during the colder months (February – April) depending on your location, you may have to keep them inside a bit longer. To get around this, I typically request my hatch dates to be in May and June. During these months, the temps are warmer especially at night. I do this so that I can get them outside a lot sooner. During these summer months, I can even brood my chicks outdoors in a protected coop. I often resort to this method of brooding. I find that the chicks do much better early on if raised outdoors. Additionally, it frees me from the shaving mess and dust that chicks produce, giving our allergies a much-needed break.
I set up a brooder outside just the same as I would set up one indoors. I provide the essentials food, water, and heat. I simply purchase an industrial outdoor extension cord, run it to the coop and hook the power up. I am currently brooding a clutch of 6 White Crested Polish Bantam chicks in The Coop De Ville. All are doing well and are enjoying the coop life.
Getting the Coop purchased and constructed
Now that that you have your new additions home and brooding, if you have not already, it’s time to get their outdoor digs ready.
Once again, when it comes to coops there are two schools of thought, hand-built or prefab. I have done both and will link the blog post where I discuss this in detail here. Whichever method you choose is up to you. I really don’t think one is necessary better than the other, its whatever works for you and your family.
Backyard “coop-hood”.
I have 5 prefab coops; with proper care they last a long time. I also have 2 hand-built coops also with proper care are long lasting. Both prefab and hand-built coops will require care and Maintenace. My oldest prefab coop is 5 years old. My first coop, The Kuntry Klucker I built 10 years ago. It comes down to your budget, skills in wood working, and time. It takes longer to build a coop, more money and the skills needed to conceptualize and execute.
If building a coop is not in your wheelhouse that’s ok. Tractor Supply and other co-ops have a great selection of coops in stores as well as online. I own three Tractor Supply prefab coops; I am pleased with all of them. They are holding up very well and make excellent homes for all my girls.
I hope that is you have found this post helpful in staring your own flock. It may seem daunting at first, especially if you were not raised around livestock. It takes a bit of time and research. Once you get rolling, you will find that chickens are simple creatures. They require little but give back a lot in return. Aside from the small amount of time they require, chickens really are lot of fun and are very rewarding.
Here is a short video of my chicken yard. As you can see, I have both prefab and hand-built coops. Both make excellent homes for your ladies and gent.
Link to my blog post entitled Bachelor Pens for Roosters, mentioned in the above video. If you need a solution for extra roosters, a bachelor pen is a great option.
If you have any questions, feel free to post in the comments. You can also drop me a line at kuntryklucker@gmail.com.
I am a published author, multi-disciplinary writer and blog contributor. If you like this blog, please visit some of my other sites.
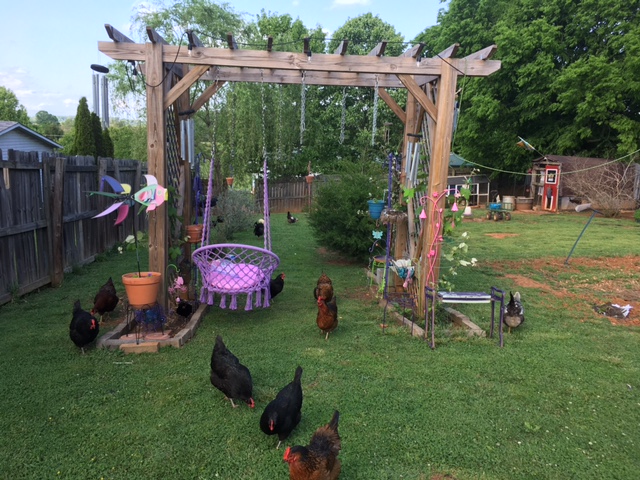
Spring has sprung at the Kuntry Klucker Farm, chicks are peeping and flowers blooming. In this post I will detail how I decorate my backyard for the coming growing season. It is no secret that I tend to go overboard when it comes to decorating the backyard for my girls, this will be a virtual tour, a flower walk if you will. We will start from the coop closest to the yard entrance and work out way out.
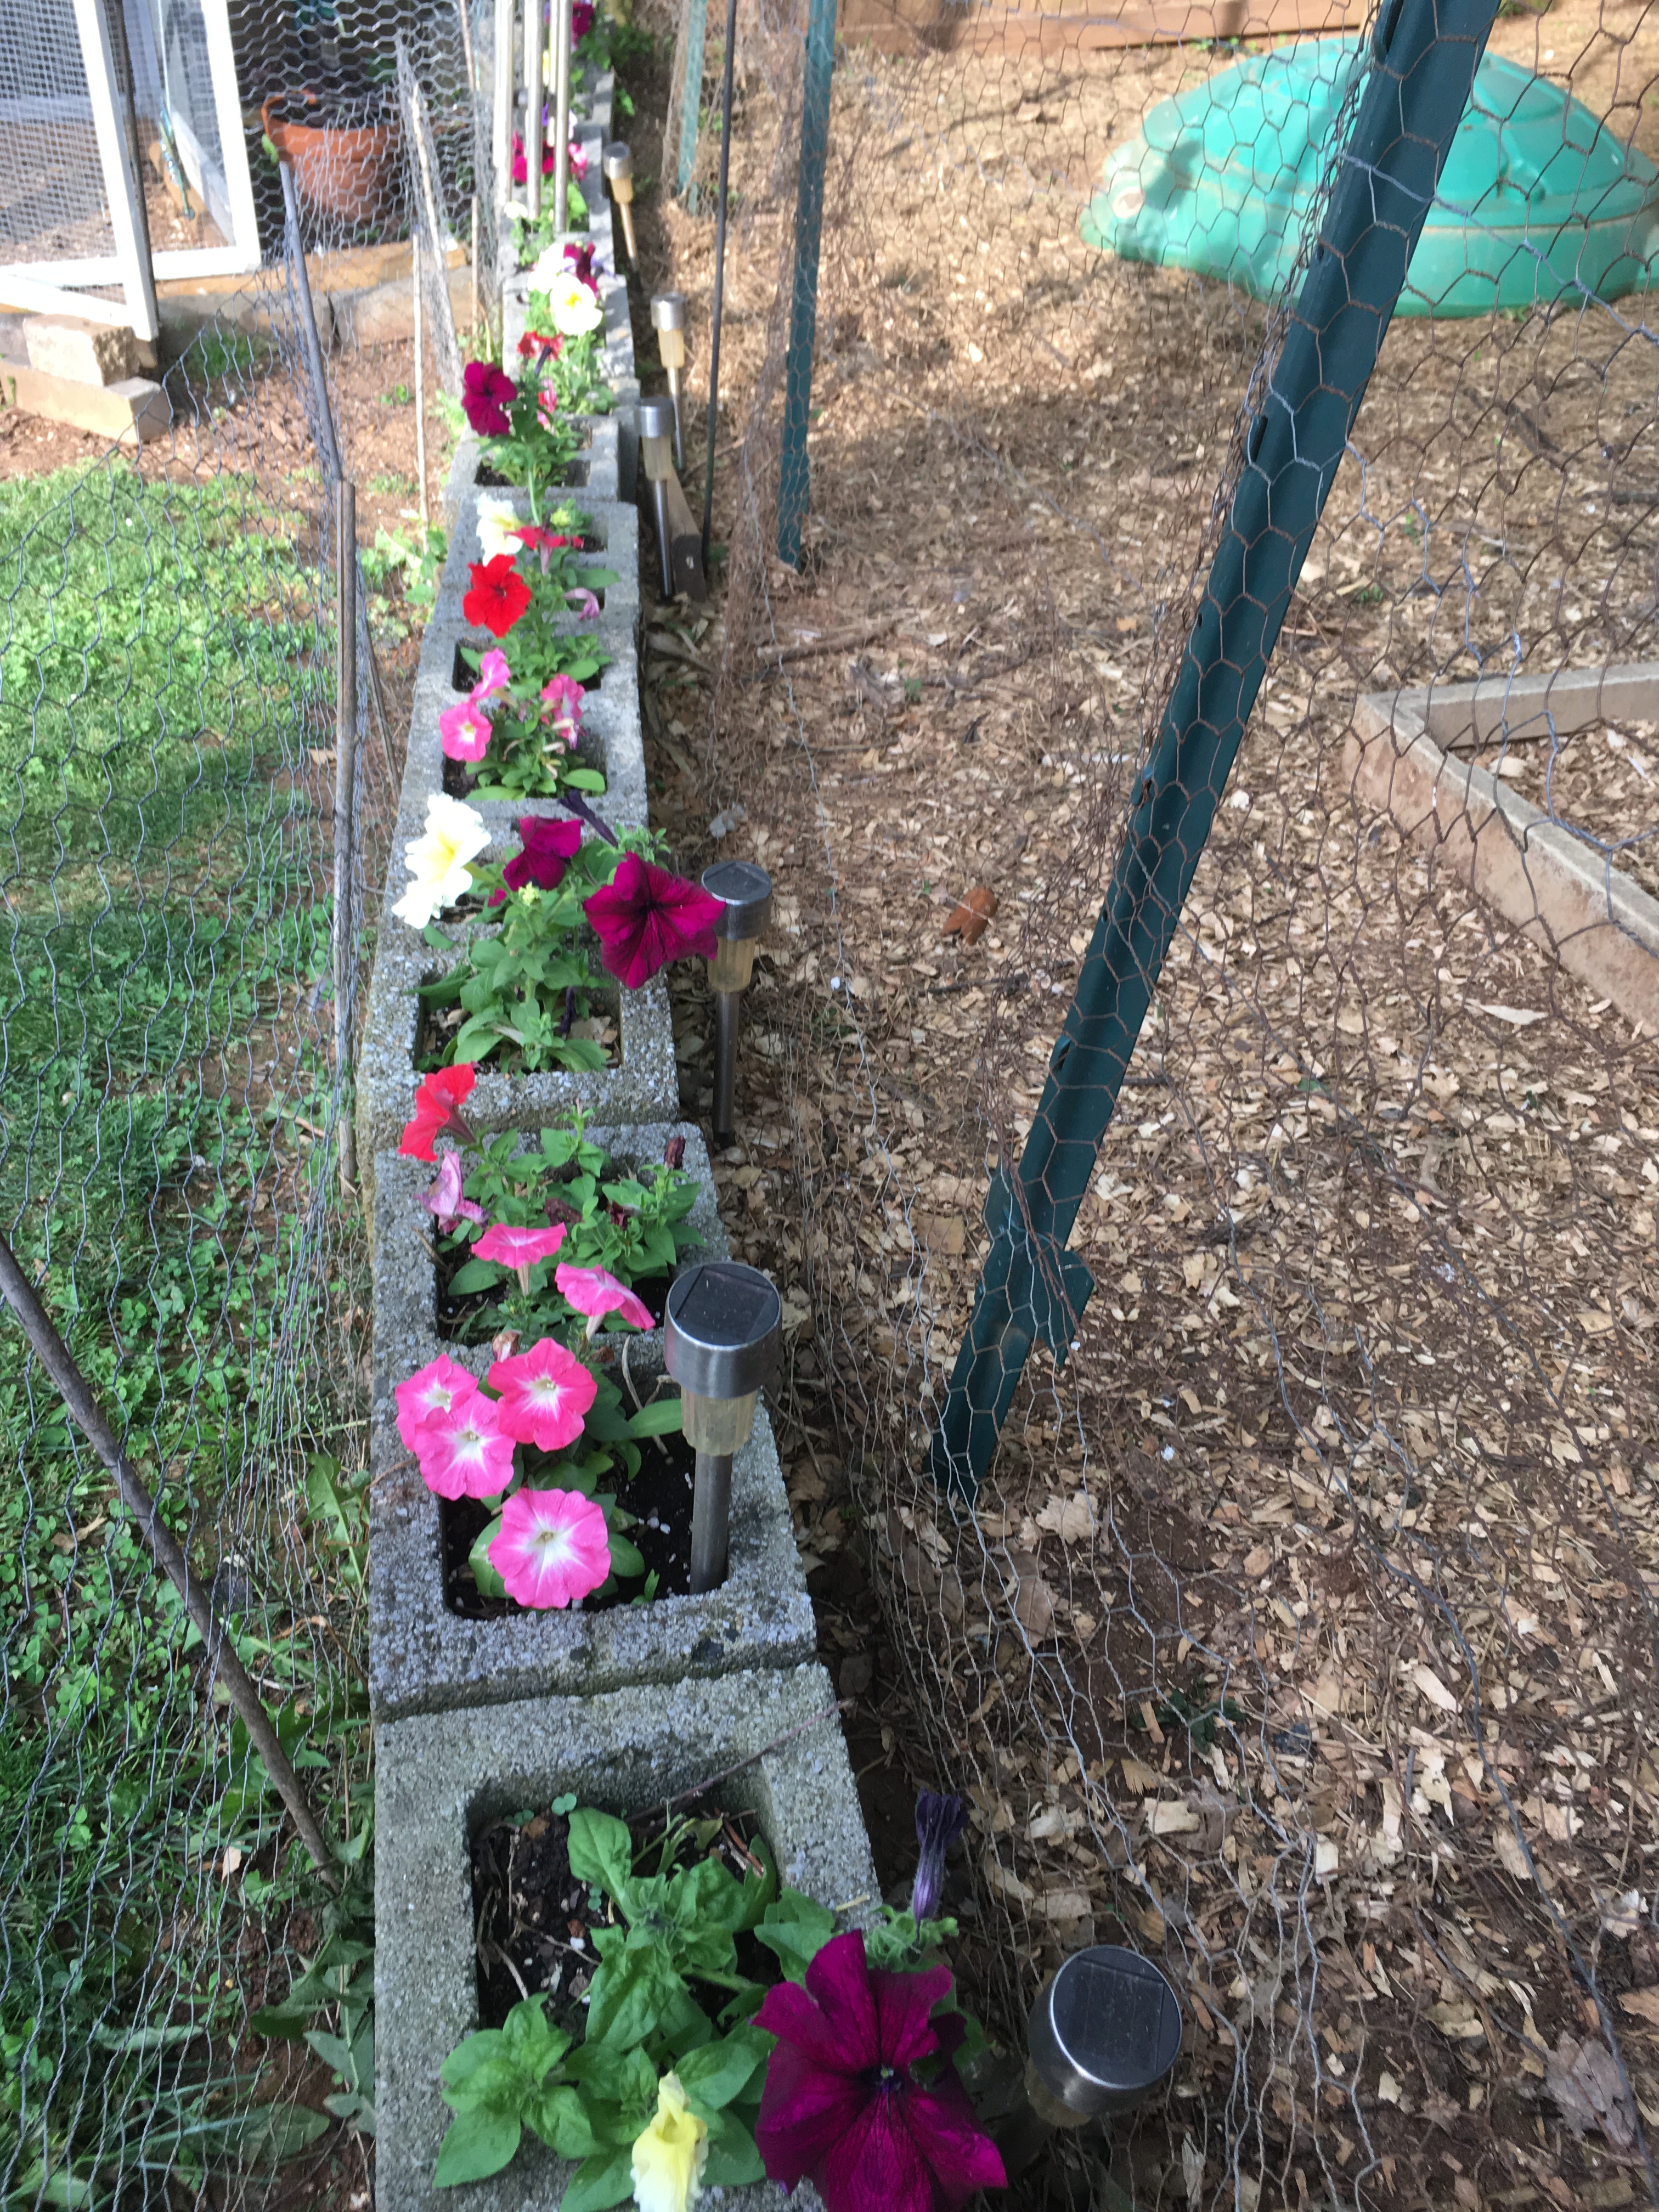
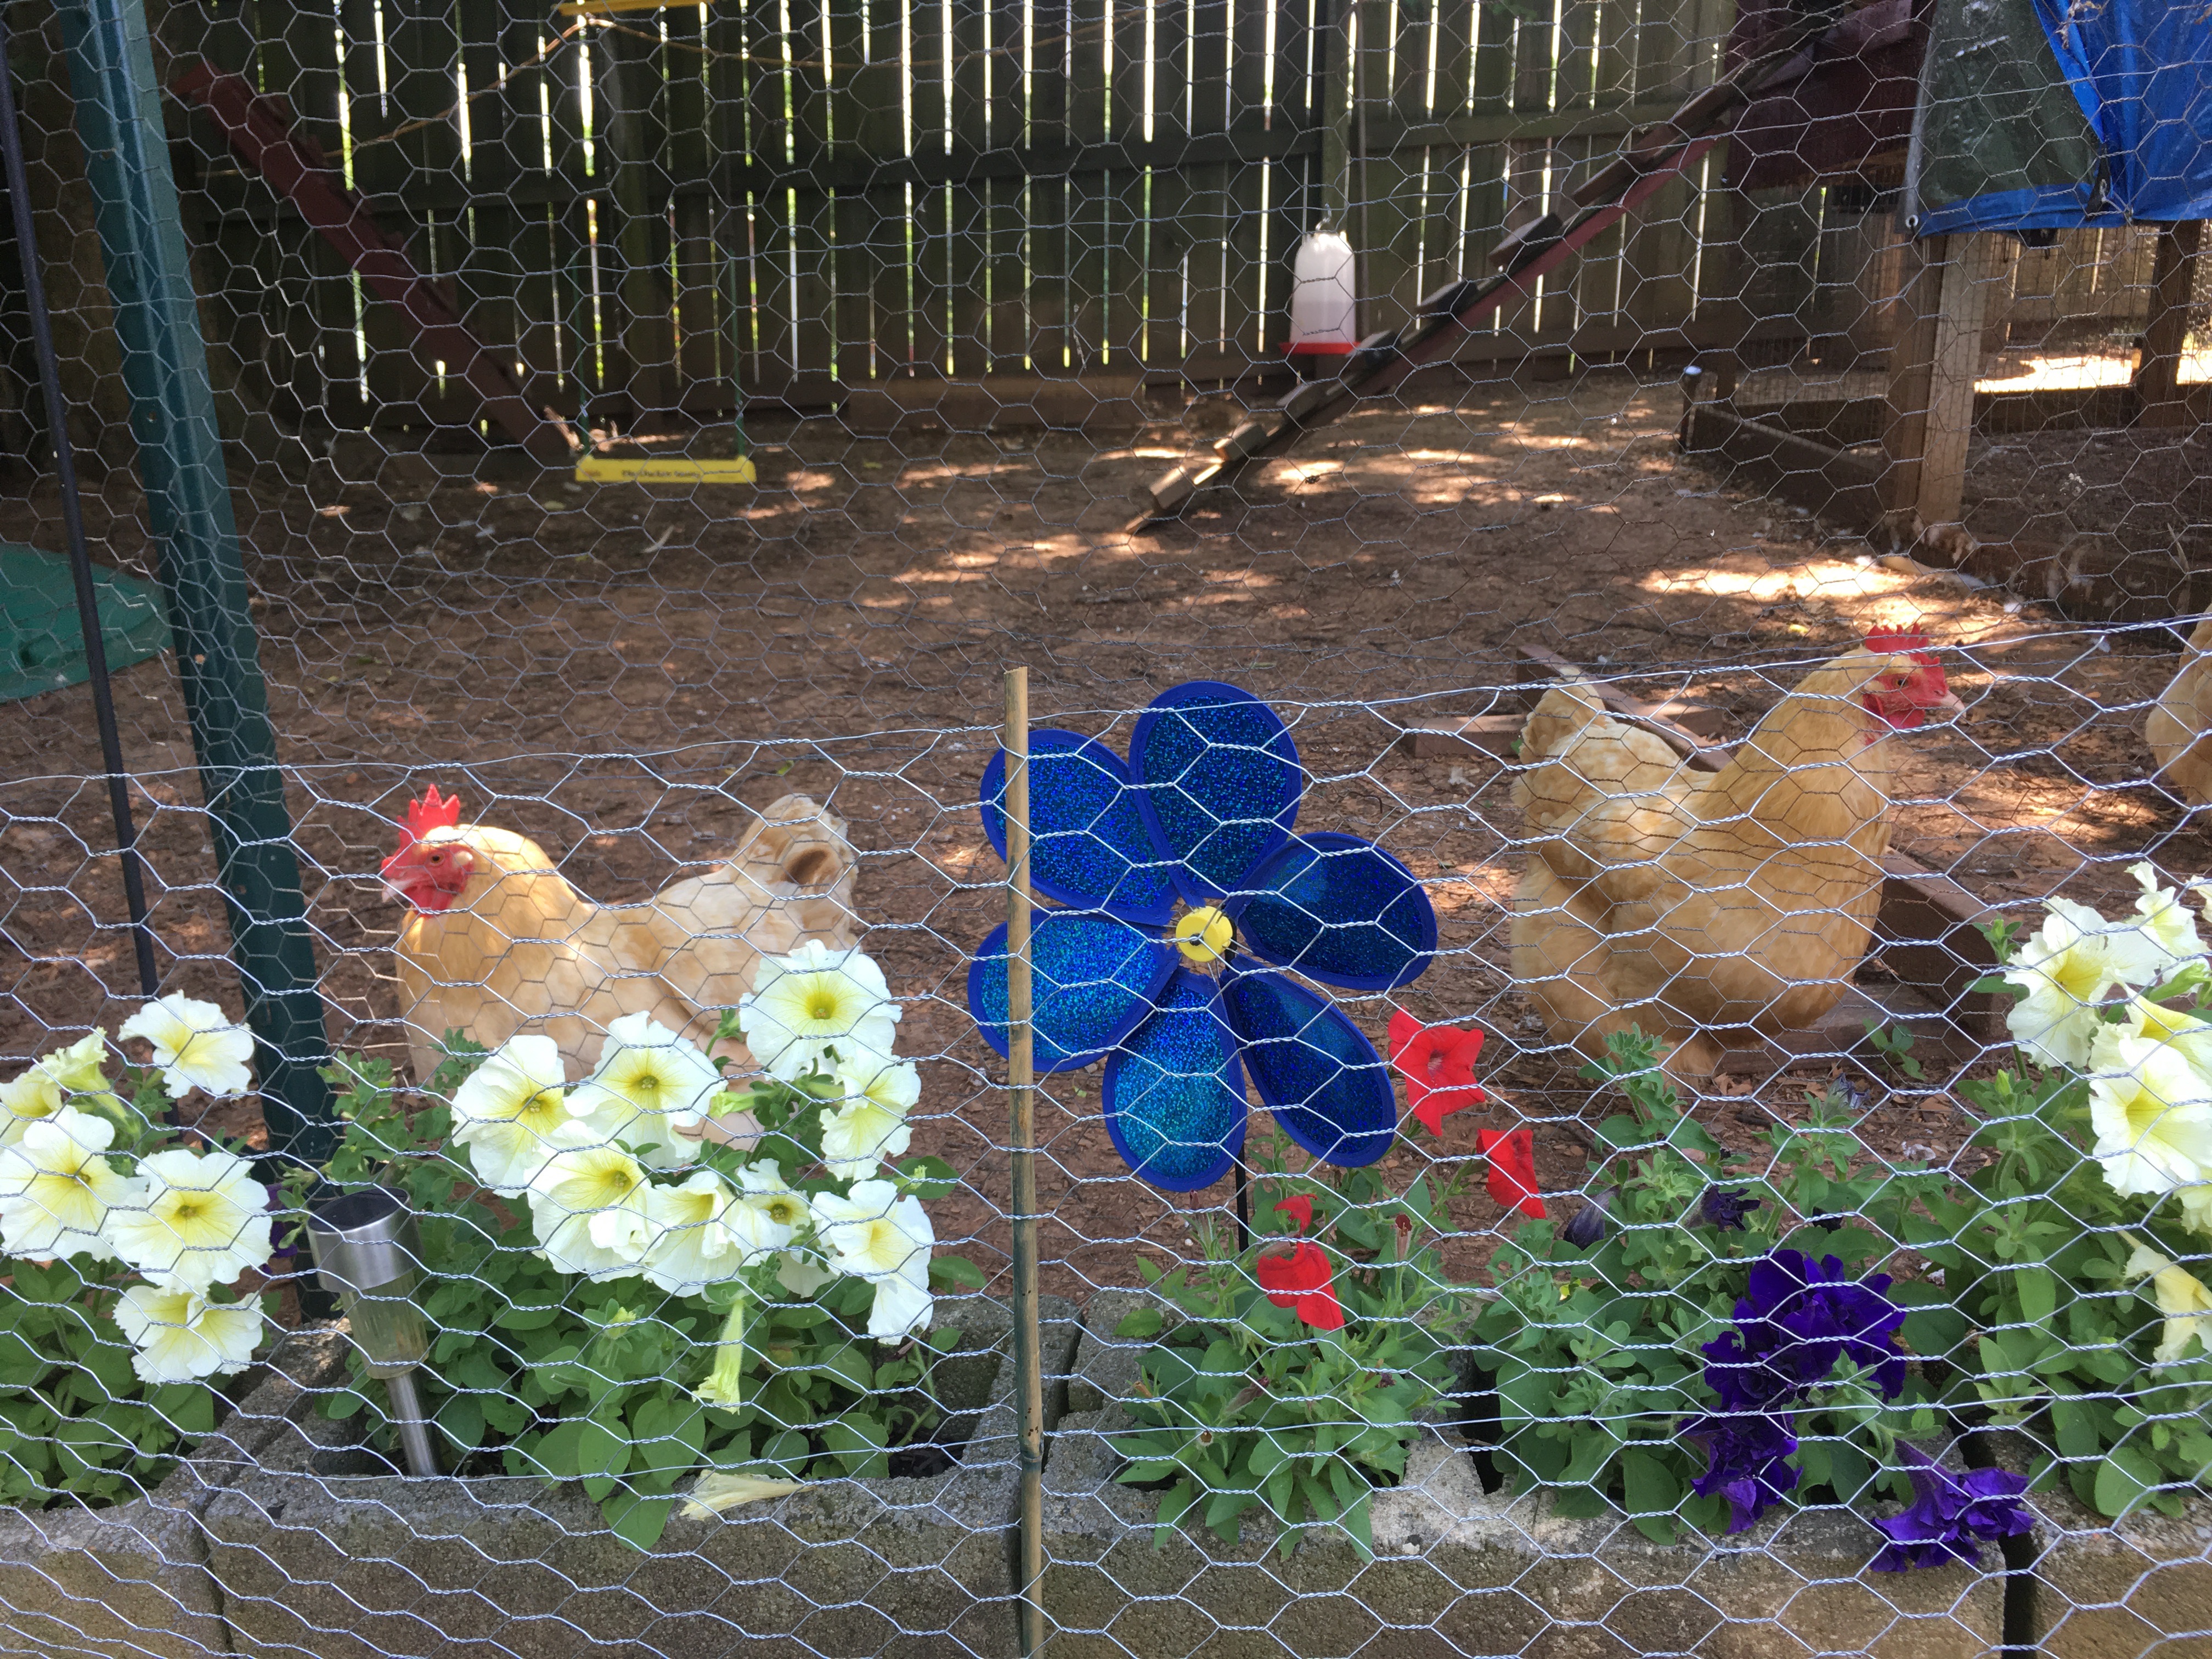
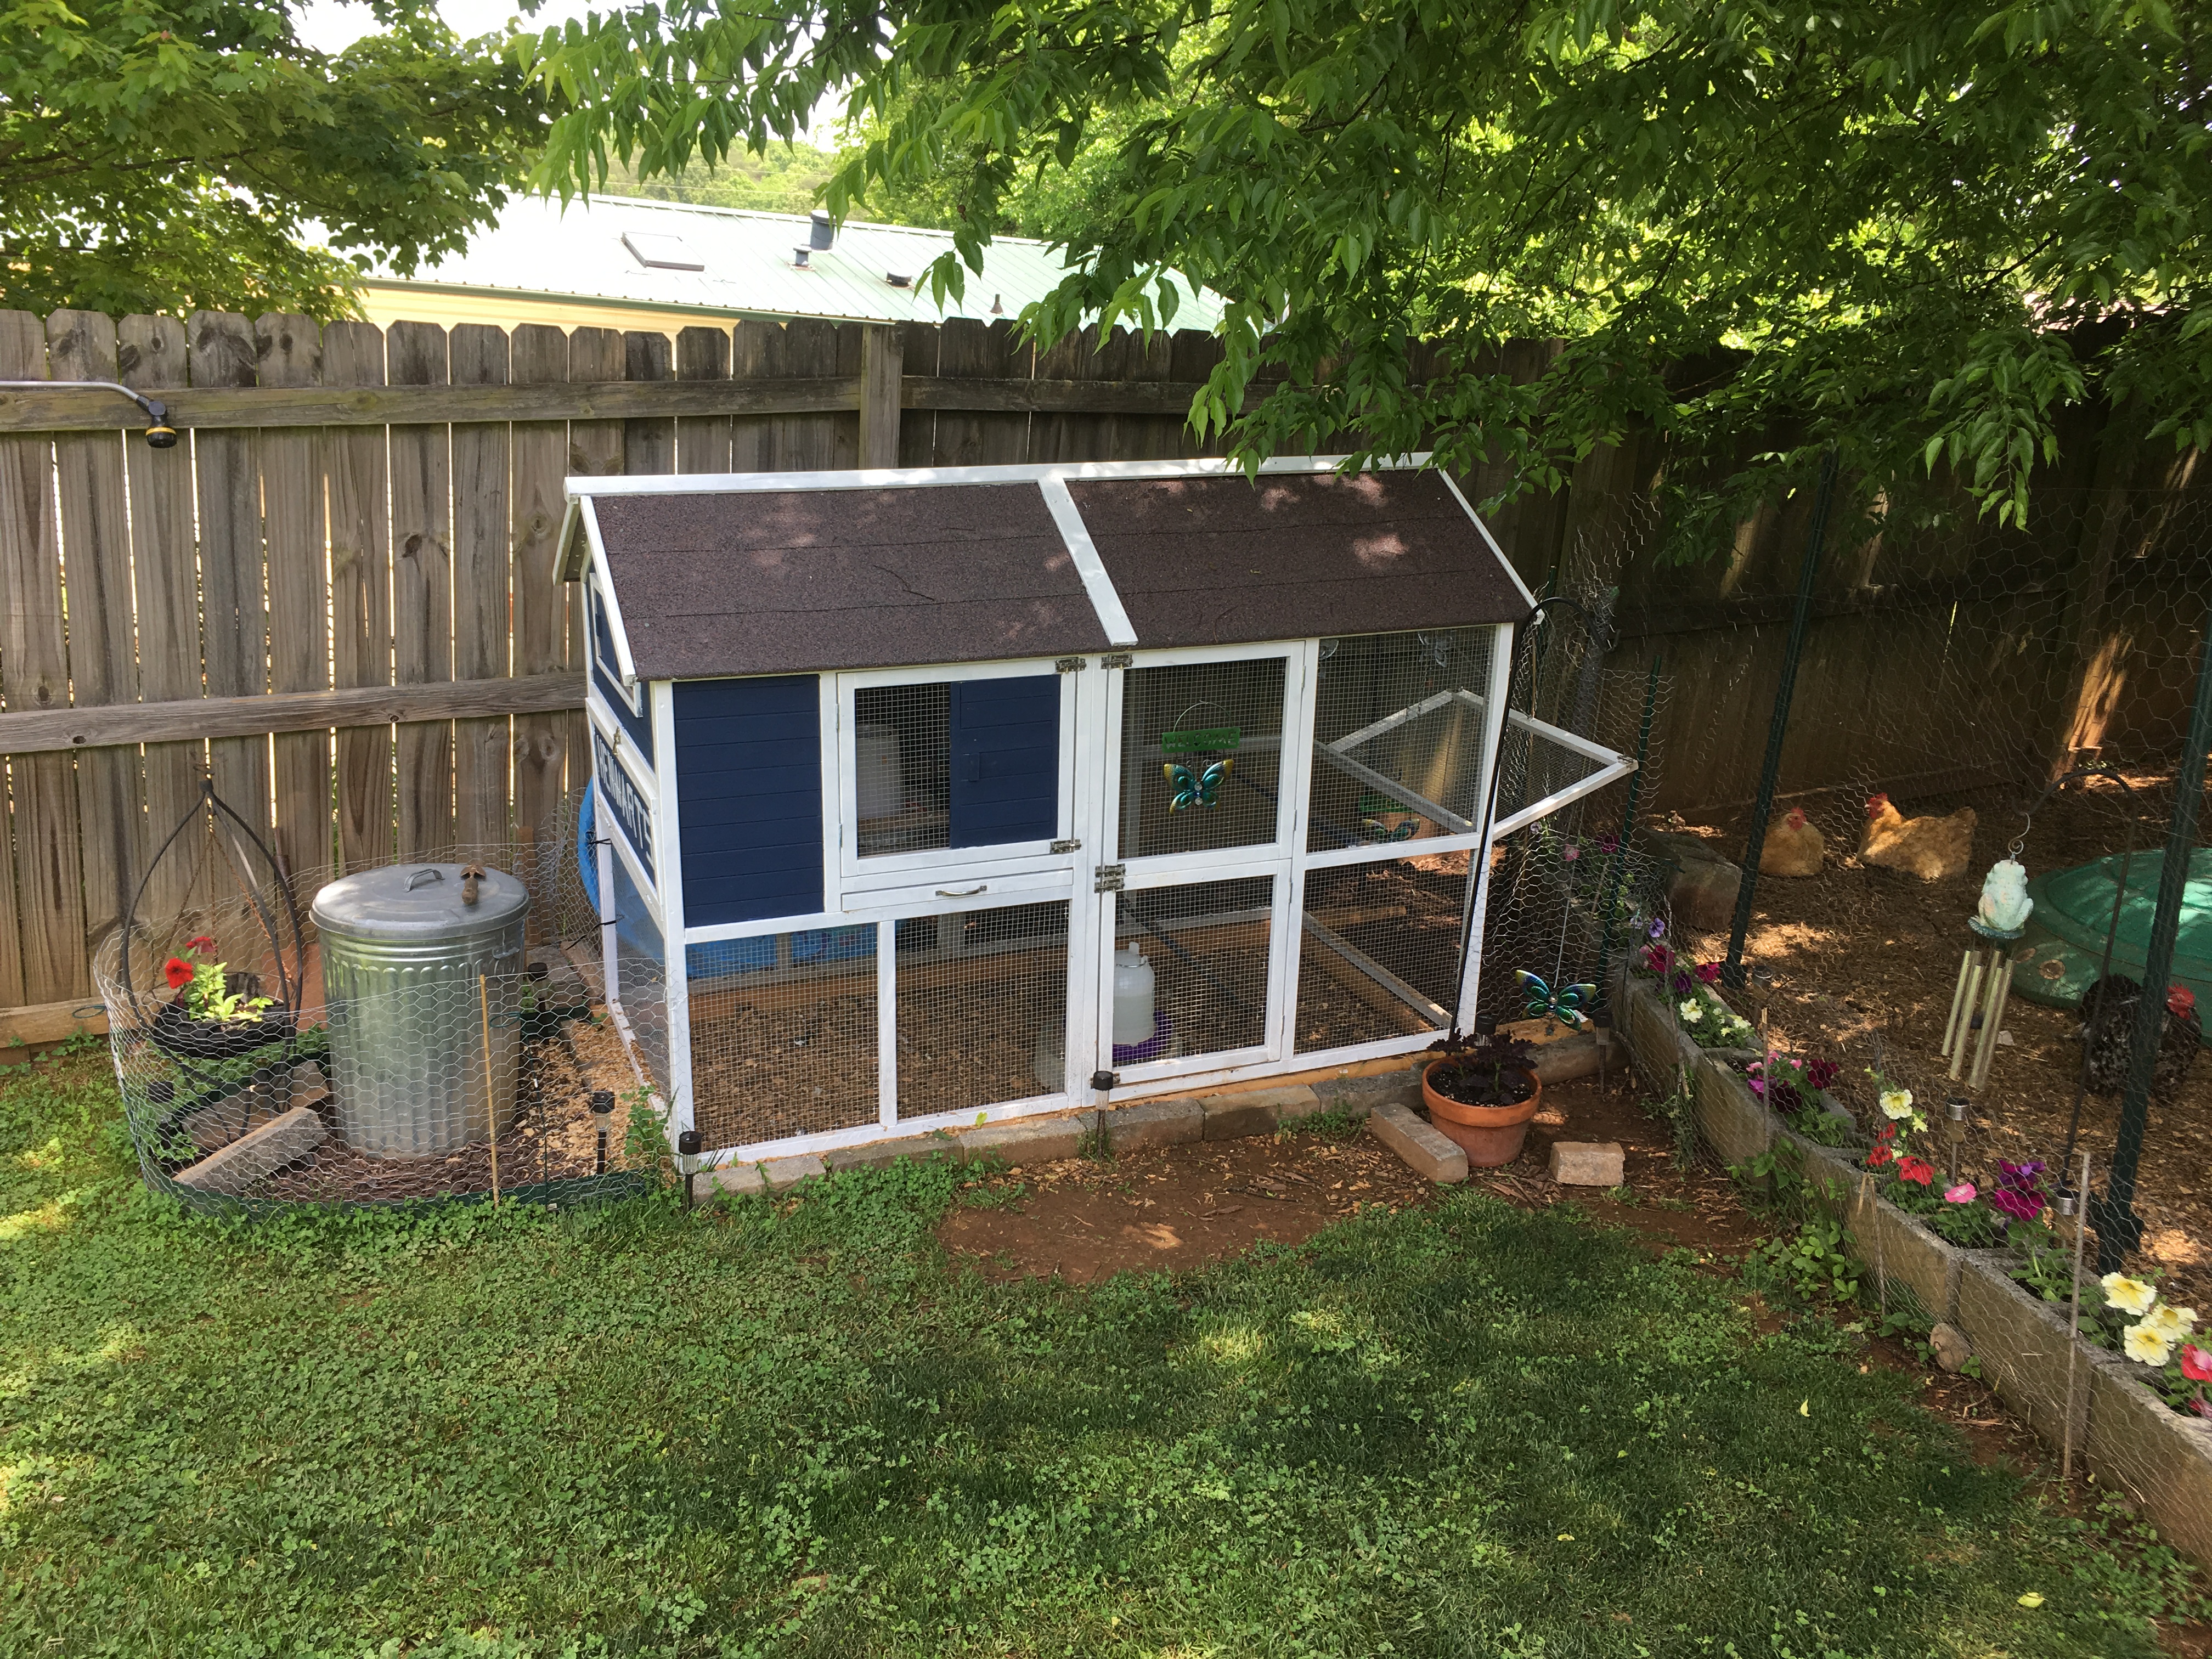
When entering the backyard, the first coop we come to is Henwarts. Henwarts is the newest addition to the “Coop-hood” and shares a large outdoor pen with The Kuntry Klucker. In front of The Kuntry Klucker I have a row of cinder blocks. These blocks have two purposes, keeps the girls and the dirt in the outdoor pen area and doubles as planters for flowers. Every year in this cinder block row I plant petunias. I love these little super bloomers for many reasons. A few of the most important are the fact that they display lot of color, tolerate the hot afternoon sun well, and most importantly hold up well around chickens. I have a few ladies that despite my efforts will help themselves to an afternoon snack of petunia blooms. The petunia’s being prolific bloomers look no worse for the wear, recovering very quickly.
The next coop we visit on our backyard tour is my largest coop, The Kuntry Klucker. In front of the Klucker I have a large whiskey barrel full of Gerbera Daisies. Additionally, I have hanging flower baskets. With chickens, keeping flowers above their heads is a must. If at their level, they will undoubtedly make a snack out of the blooms. Found at the dollar store, these cute little baskets are just the perfect size for a few flowers. Instead of using cocoa liners that seem to lose their shape after the first two waterings, I opt to use thick weed barrier to hold the potting soil. Attached to the wood of the pen I have planted a variety of flowers in these baskets. Petunias once again taking center stage. I feel that they add a bit of fun to the girls’ homes.
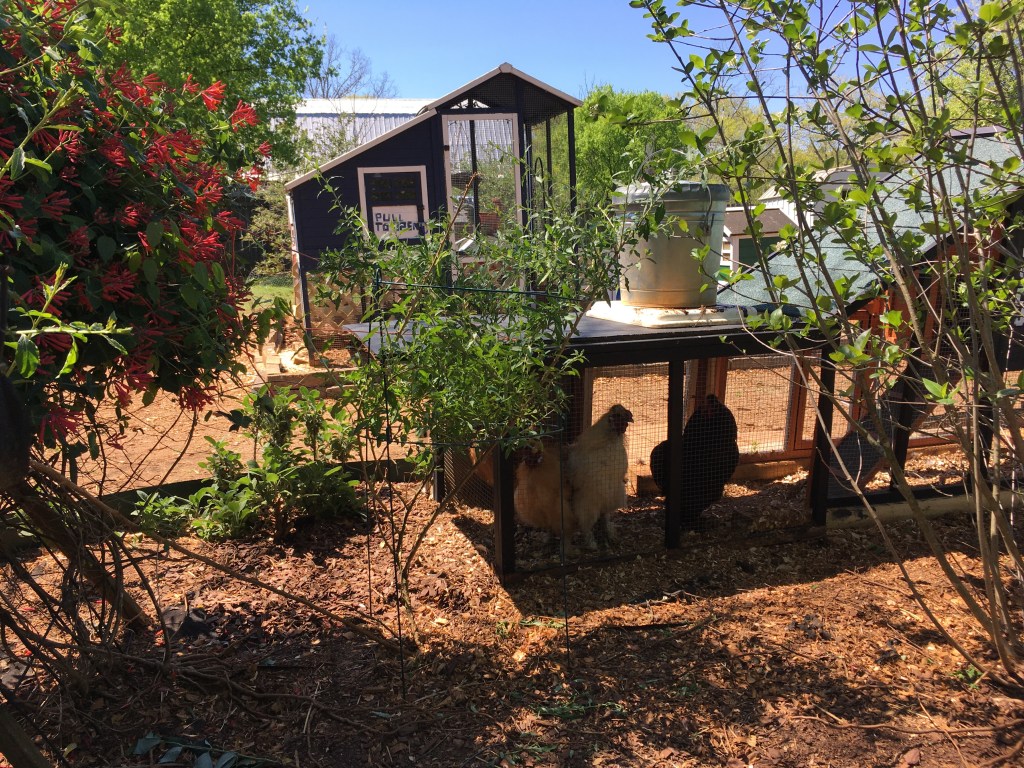
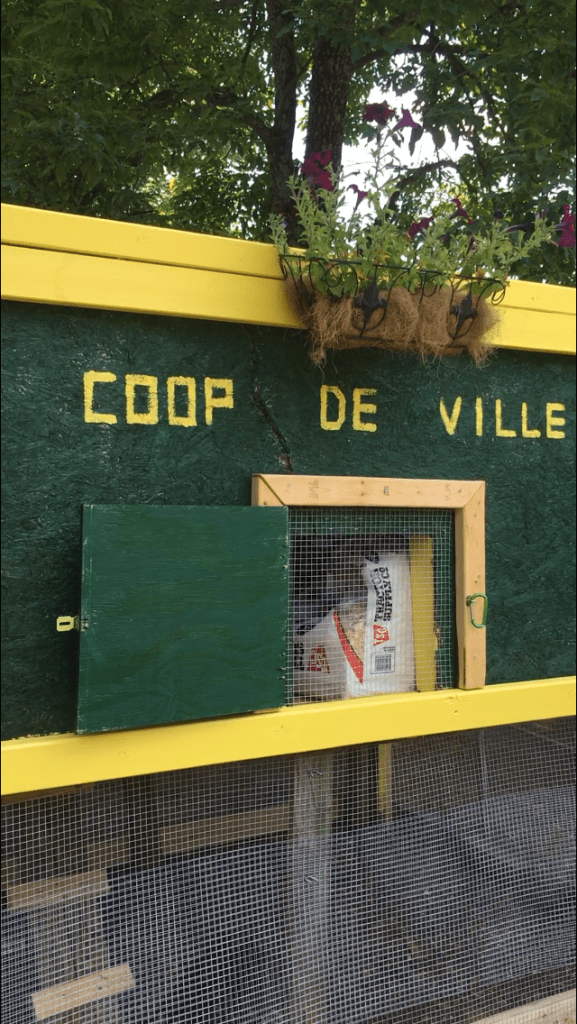
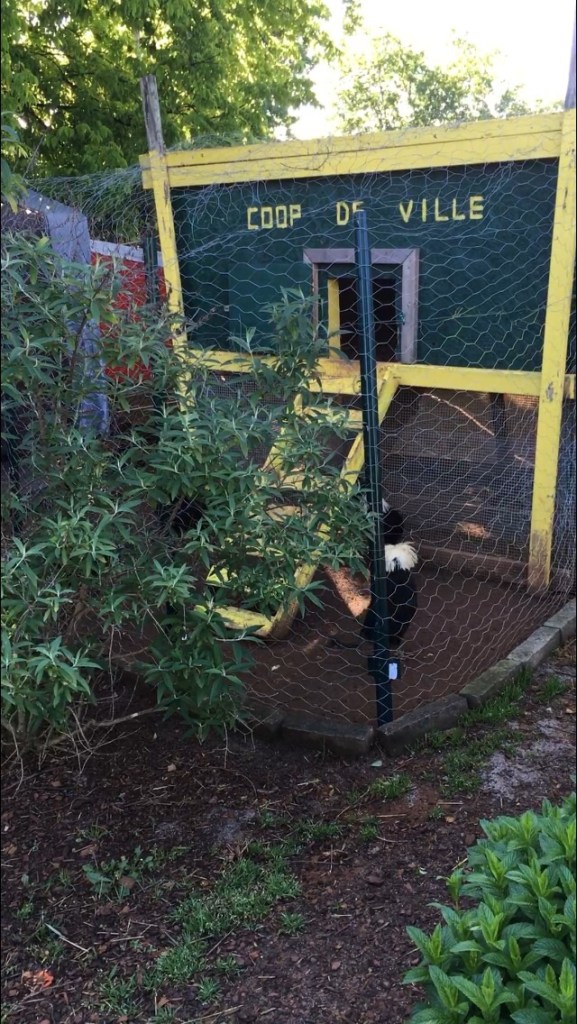
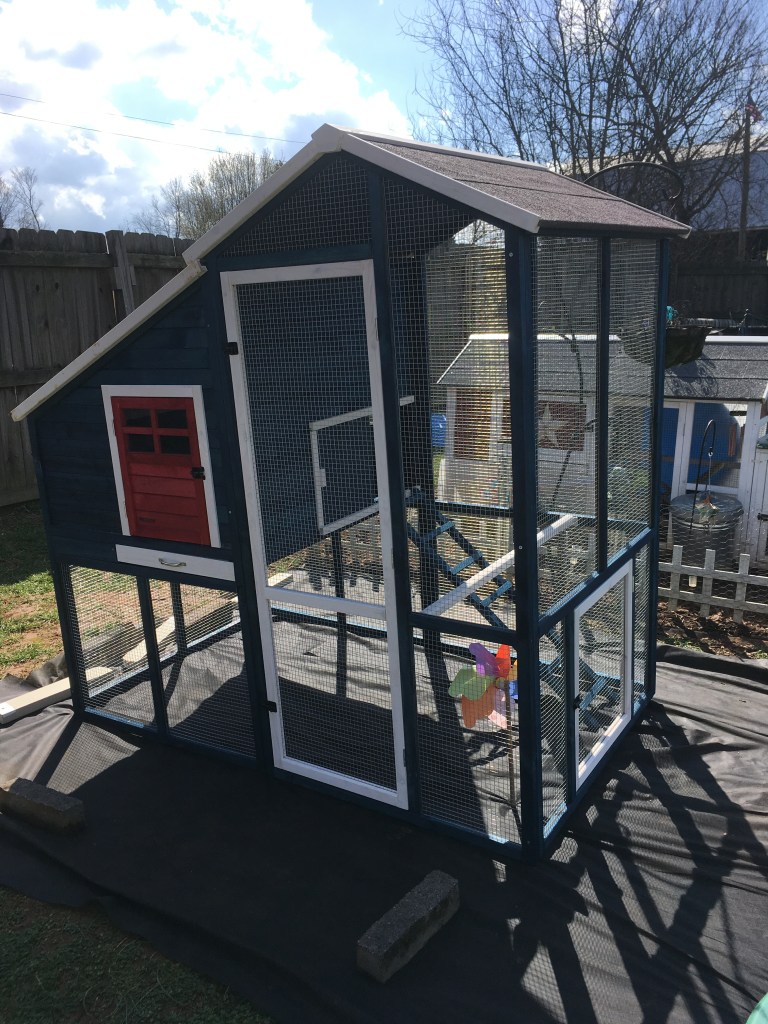
As we proceed on our coop tour, we come to The Coop De Ville. Serving as a Bachelor Pen, the Coop De Ville is home to 4 White Crested Polish Bantam breeding roosters. Situated between the Kuntry Klucker and the Spice Garden, the Coop De Vills shares space with many flowering plants. In front of the Coop De Ville I have planted a white butterfly bush. Butterfly bushes are prolific bloomers and due to their size, they hold up very well around chickens.
Next, we come to the spice garden. In this garden I have lot of things planted. The tall bush with the small red blooms is a red honeysuckle bush. Taller than me (I’m 5’8″), this bush is one of the largest in the garden. These highly fragrant little blooms blanket the whole backyard with a sweet fragrance and attract many butterflies and hummingbirds to the backyard, adding to the beauty of the girls’ surroundings.
I have many of my kitchen spices planted here among the two coops that call this plot home. Roy’s Roost and Betsy’s Bliss are situated here among all the plants and spices. This year I planted a red butterfly bush, in a few months it will be beautifully loaded down with blooms giving the butterflies another place to rest and spread their wings. The chickens are fenced out of this garden area so all the creatures that visit these plants are protected from the girls. This allows many caterpillars to spin cocoons among the thick foliage of many of the plants here.
Arona Berry bush loaded with berriesArona berry bushMint in spice gardenTARDIS seen between honeysuckle bush and Arona BerrySpice gardenDracula resting in the shade of the Arona Berry BushOreganoSageHoneysuckle Bloom
In the center of this garden, I have planted an Arona Berry bush (kin to the Acia Berry), this bush which too is taller than me has the most beautiful white blooms. I use many of the berries that this bush produces in my smoothies. The chickens also love these berries, another reason that I have to fence them out of this garden area. After the berries appear, I make sure that the girls get a good share of the spoil which they go absolutely nuts for. Amongst other plants in this garden, I have a Goji Berry Tree, Sage, Rosemary, Oregano, Thyme, and Mint.
Next, we come to the TARDIS! This is one of the funniest coops in the “coop-hood”. Painted like the TARDIS from Dr. Who, this coop is home to Silkie’s. Sharing a large plot with the Bantam Boutique I planted a rare Red Hydrangea. The deep red of the hydrangea blooms will add a pop of red and contrasting well with the blue of the TARDIS.
Finally, we come to the Bantam Boutique! At the end of the Bantam Boutique, I have a pot with several colorful annuals in it. The Polishes enjoy jumping on top of the pen to take a few samples from the flowers. On the far side of the Bantam Boutique, I have planted two yellow butterfly bushes. Not only are these bushes beautiful, but they also offer lots of afternoon shade for the Polishes that call this coop home.
The Kuntry Klucker Farm
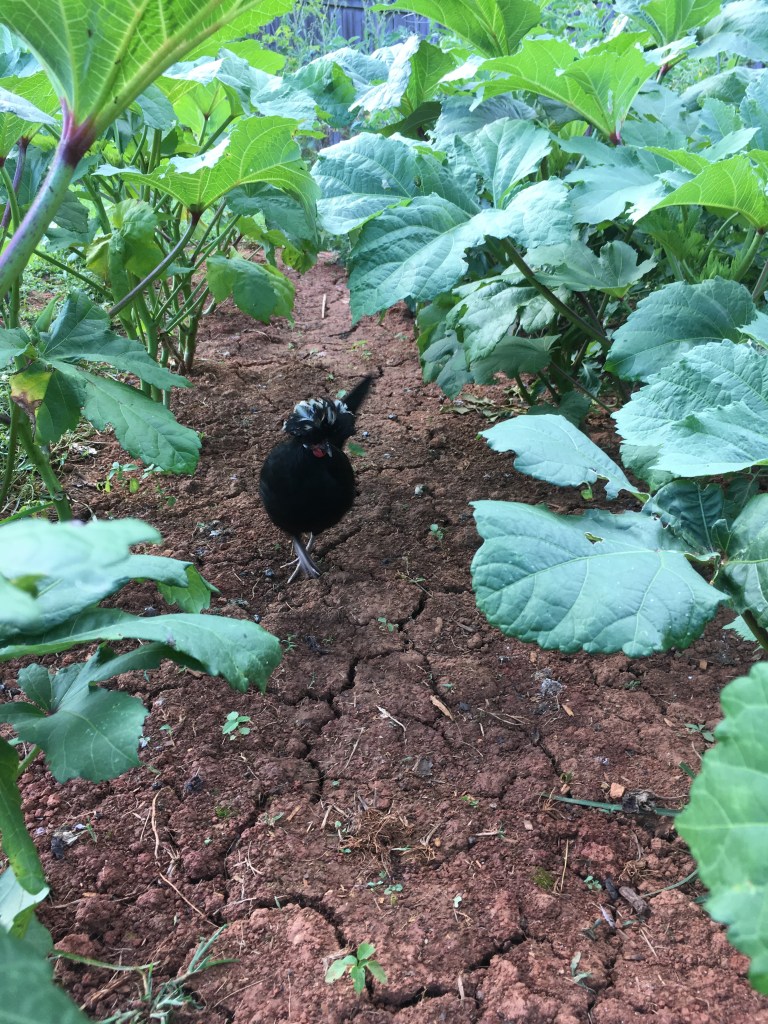
In the center of the backyard, resides our veggie garden. The chickens patrol the garden ridding the plants of any available bugs. As they till the soil in search of worms and grubs, they aerate the soil, further aiding the plants. With my theropod crew on duty, I eliminate the use of insecticides, allowing me to grow organic veggies for my family. I do lose a tomato or two to my carnosaur crew, I plant enough so there is plenty to go around. The girls get their share of the spoil in exchange for their hard work.
The Veggie Garden
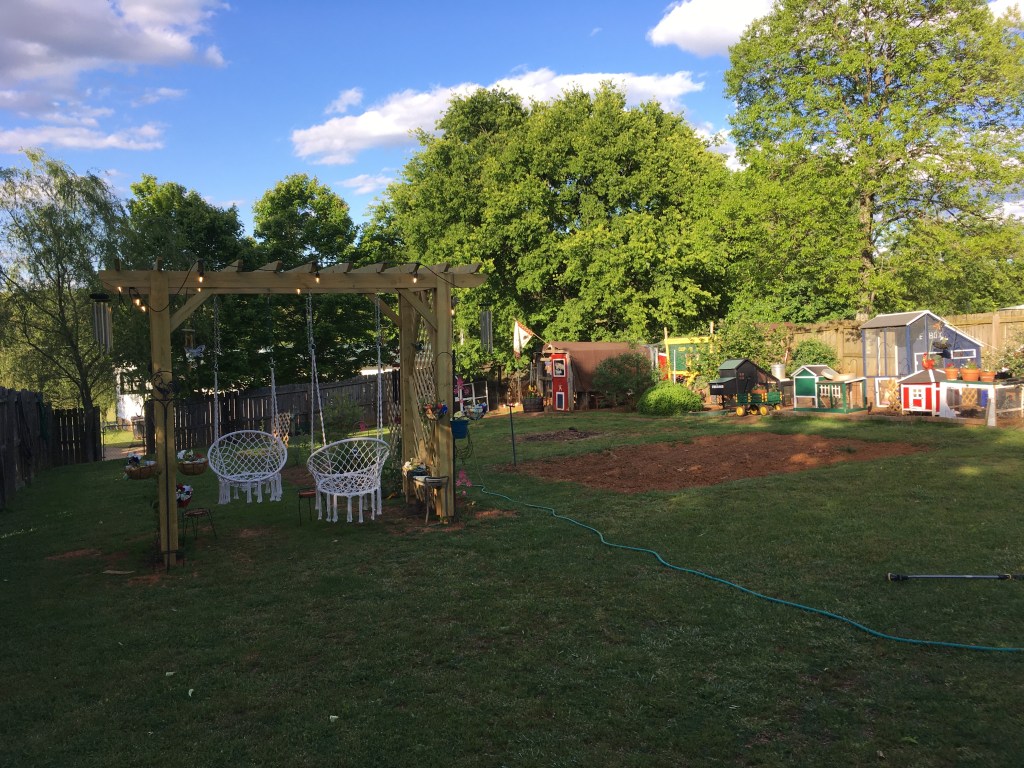
We now come to the pride and joy of my hobby farm, the grape arbor. Several years ago, I built a grape arbor in my backyard. Grapes have been on my dream list for a long time. Not only are grapes a fast-growing easy-care crop, but the arbor can also be used as a structure to hang a swing or hammock chairs from. Attaching some patio lights to the arbor adds a nice romantic evening feel. Complete with shade from the grape vines and a place to hand swings, a grape arbor is a great addition for any backyard garden enthusiasts.
I hope that this post has given new ideas on how to decorate a backyard garden paradise. Armed with some annuals, a few hanging baskets and a few pots, you can turn any backyard space into a magical getaway.
As always, thanks for reading. If you have any questions, feel free to post in the comments. or drop me a line at kuntryklucker@gmail.com.
I am a published author, multi-disciplinary writer and blog contributor. If you like this blog, please visit some of my other sites.
Hi everyone, this post is going to be a little bit different than my normal posting. I have received a lot of questions from my readers inquiring what chicken coops are best, prefab coops or hand build coops. For those who are not familiar with what a prefab coop is allow me to explain. When I refer to prefab coops, I am talking about coops that you see in farm stores, such as Tractor Supply or Rural King just to name a few. They come in boxes and require assembly which is very simple only needing a screwdriver and a little elbow grease.
Many chicken keepers do not like them and recommend that newcomers build their own coop. I for one am of a differing opinion. I built my first coop, and I added 4 prefab coops later. I will say that I love the prefab coops and that they make very viable options for those who cannot build a coop for various reasons whether they be financial, physical limitation, or conceptual reasons. Woodworking and carpentry are not for everyone, it is hard work and can be very expensive and dangerous especially if you have never worked with wood before. So, to those who want chickens and hear the “if you don’t build the coop it’s not a coop” rhetoric this post if for you. This is the story of my journey in both building a coop and owning prefabs. I hope that it helps.
I built my first coop, the Kuntry Klucker. I love my big coop, but I will say it was the hardest most dangerous project that I undertook. I was new to chickens and followed the advice of more experienced keepers, one of which was don’t buy a prefab coop build your own. Not knowing much this is what I did. I found through this endeavor that I have no business using power tools. I nearly killed myself twice and spent $1500 more than I had intentionally set out to spend. After I cut the wood too short or at wrong angels it got expensive. I realized that this was really bad advice that I followed from more experienced chicken keepers. I had never built anything before, so this was my first and last experience with wood working and carpentry in general.
So how did I come to love prefab coops. Well, as the saying goes you cannot have just one. I fell in love with chickens and wanted more. I knew from my past experience that building my coop was a suicide mission, so I looked elsewhere. I began to entertain the thought of prefab coops against the better judgement of other poultry keepers. The fact was simple, I cannot build a coop, so I had to seek out other options.
To start I read reviews, most will say something like this, “it looks good, but the quality is poor”. This is a general across the board review that you will see for a prefab coop. Don’t let this bother you, the coops given a little love will do just fine. Anyway, knowing this I ordered one with a plan in mind. When it arrived, I put it together and was actually shocked at how well it was made. Drawing from my experience from my coop building disaster I updated the hardware cloth, updated the latches, and gave the wood a good coat of barn paint followed by a good water seal. The results were stunning!!! Not only did I not kill myself building this “kit coop”, (all I needed was a screwdriver inserted of a power saw), but after I made my adjustments is held up well, and I mean well! I live in the steamy south of East Tennessee. We get hot summers with lots of humidity, nasty spring storms, and ice storms in the winter. Mother Nature throws it all at us. Through this my prefab coops have held up very well. I do touch up the paint about every other year, the hardware cloths and latches are still fine.
After my experience with my first prefab coop which now has 5 years under its belt, I ordered more as my flocks grew. I now have 5 coops currently in operation, 4 of them are prefab coops. I have not had any predators get into my prefab coop, nor have I had any problems with the wood rotting (hence the paint and water seal). The Roofs hold up well and the durability of the structures have withstood everything mother nature has thrown at it thus far. I can honestly say that it would take a disastrous weather event to tear them down such a tornado or derecho. But if I get a tornado here, I will have much more to worry about than just damage to my prefab coops. Additionally, I have them insured under my homeowner’s property damage clause. I will just put them in with all the other things we need replaced should we have to deal with a disastrous weather event.
So this is my story, I learned from experience that building your own coop as many suggest is just not feasible for everyone. I did it and nearly killed myself, I will never build a coop from scratch again. I have enough experience with prefab coops to honestly recommend them as a viable option for others who cannot or do not know how to build a chicken coop. They are a very good option. I will say that I will only get mine from Tractor Supply or a local co-op. Reason being… if it arrived damaged (so far none of mine have) they will replace or exchange it for me. If I order from Amazon, it’s a bit harder to get an exchange on such a large item. That would be my only advice. Prefab coops are great, but get it from TSC, Rural King, or local co-op that stocks them. If you have problems, you can get help.
I am a small voice with respect to prefab chicken coops in particular. But I like to think that my experience and opinions will help others understand that there are other options and that prefab coops can and do make great homes for your chickens.
Several years on from the original publication of this article my prefab coops are doing great, I have even added several more! To see the updated version of “Prefab Vs, Hand-Built Coops”, please click here.
To take a virtual tour of my Backyard “Coop-Hood” please visit my YouTube challenge by clicking here.
I have also added more tips and hacks to increase the longevity of prefab coops.
I am a published author, multi-disciplinary writer and blog contributor. If you like this blog, please visit some of my other sites.
Hi All, I hope that this post finds everyone well and staying cool if it is anything like it is here. Here in the hills of East Tennessee the girls and I have been braving near 100 degree temperatures. So far we are no worse of the ware just having to take things a bit slower and take care to keep the girls as cool as possible.
This post is going to be a bit different. I have had several readers express interest in the details of “The Kuntry Klucker”. I have several comment and inquires about the construction of the coop and pen so that they can use our design to make their own pen for their flock. So, in this post I am going to include as many pics and as much commentary as possible to describe the construction of our set up.
I do not have any plans or blueprints for our design, we really did just built this off the cuff. We have no formal experience in either carpentry or construction. So this was indeed hubby and I nailing together wood in the form of a pen to give our girls a nice home. So far it has withstood mother nature for 6 years, so apparently we did a pretty solid job for not being experts in the field of construction. Ok, so without further ado, I present the details of “The Kuntry Klucker”.
First lets talk about the coop. The coop itself is about 7×5 feet. The roof is a bit harder to pinpoint because it is slanted as to move the rain and water off the coop towards the back. The roof is noting special, it is just scrapyard sheet metal. I like metal because noting can chew or claw their way into the coop from the top. It stands about 2 feet off the ground to discourage any varmits from living under or digging into the coop from beneath it. Additionally, during the rainy season if the pens floods (which it has at times) the girls remain safe, dry, and warm inside the coop.
The coop has several features that I added to it that make it a great home for my girls. First off, the side door, which I call the egg door is a dual purpose door. I open this door to collect eggs which are right inside in the nesting box. Secondly, it is a great opening to use during the summer to put a box fan in the coop for extra ventilation and cooling in extreme summer heat. And Finally, when conditions are good I have a removable latter that I attach to allow the girls access to the outdoor run area. I currently have them in the pen due to severe storms expected later this afternoon. Once they are out in their play yard they hate to come in. So I have to keep them confined to the pen when we are expecting bad weather.
Two of the roosts are built into the coop, and one roost is removable. The one that is removable I use to keep the majority of the shavings on the side of the coop where the roosts are. Otherwise, they would spread them all over the entire floor of the coop.
The lower back of the coop in on hinges so that I can lift up the entire flap to get access to the coop for cleaning, filling feeders, and giving them fresh water. Inside the coop I keep a 1 gallon feeder and waterer. Doing times of severe weather they will often times reside in the coop till the storm has passed. In this summer heat I don’t want them to be without water so I keep a small supply of food and water in the coop. They tend to use it more in the winter time when it is too cold to go out into the pen.
cleaning the coop is very easy. Each morning I turn over the bedding with the droppings from the night before. I usually clean it out complete and replace with new shavings when it gets really dirty or stinky . Usually about twice a month or so. In the winter it is more frequent due to the fact that they spend more time in the coop.
The coop has a solid wood waterproofed floor. So they stay plenty warm in the winter and cleaning the wood floor is a breeze. A few times a year I will spray it out with a hose to get all the dust and other debris out. It dries fast and I put clean shavings in and other necessities back in their place.
Ok, so now for the pen. The pen is about 7×14. It is roughly 7 feet at the peak. I am 5’8″ and can stand up with my arm above my head to hang things and have no trouble. It is tall enough for a grown man to comfortably walk in and do chicken chores. I know this because hubby at times has to pitch in and he does not hit his head on the top beam of the pen.
the pen is connected to the coop. We literally have 4 2×4’s attached to the coop to both offer stability of the coop and closing gaps to not allow any critters access to the pen and coop. The large boards that serve as the foundation or footers of the pen are cemented into the ground by about 6 inches or so. they are very wide boards, I think they are 2×8 or something near to those dimensions. So nothing is able to dig under to get into the pen. Also, since we have a ring of cement under the pen providing the foundation it is impossible for the wind to lift the pen into the air if we have a huge storm.
Part of the design in the pen’s wind worthiness is that we allow the wind to pass through. Above the door is a triangular opening which allows wind to pass into the pen. Opposite it, above the coop is the same triangular opening allowing the wind to exit the pen. With the tarp being our roof, wind could easily get trapped and lift the tarp in attempts to decompress causing both damage to the construction and injury to the girls. With these wind funneling points and the fact that the pen is securely cemented into the ground it has braved some very instense storms .
Now for the form of the pen in general. It has 4 main 4×4’s forming the corners of the pen. Two in front at each corner, and two in back in front of the coop. One central bean where the “rafters” of the pen are attached to. The side beams are angled for a plumb attachment to the large 2×8 beams that are part way buried under the ground. The rest of the roof boards are 2×4’s which just attach the central beam.
The top of the pen is lined with galvanized fencing so that no animals can get access to the pen even if they manage to rip the tarp. The tarp which acts as the roof just lays on top of the fencing and is secured at the bottom of the tarp. The tarp is easily replaced if hail or other elements get the best of it. This was our way to construct a budget friends roof. With a pen this size, constructing an actual roof with shingles and so forth would be both hard and expensive. It could be done but we decided on this instead.
The tarp provides much shade and rain protection. If we get a storm that has some pretty severely wind driven rain the outer permitter of the pen will get wet. But for the most part the middle of the pen will stay nice a dry. The tarp has a long over hang which provides a lot of of protection even to wind driven rain. But once in a while when we get a doozy of a storm the permitter of the pen will get wet. Only once to twice has it actually flooded. This is usually when we get hurricane remnants pass over that drop rain for days. In these storms even basements flood so I don’t think anyone is really safe in these situations. When this happens, the girls usually stay in the coop so its not really a big deal. It drains pretty fast once the rain stops.
I hang the food and water from a beam forming the roof. I do this to keep them from accidentally spilling it, and also to keep debris from them scratching around from getting into the food and water. They are heavy galvanized chains to support the large waterer and feeder. I also hang various other decorations from the roof including the power cord that supplies power to the fan and their christmas light. I keep their lights on year around, and their fan going in the summer as long as it is hot.
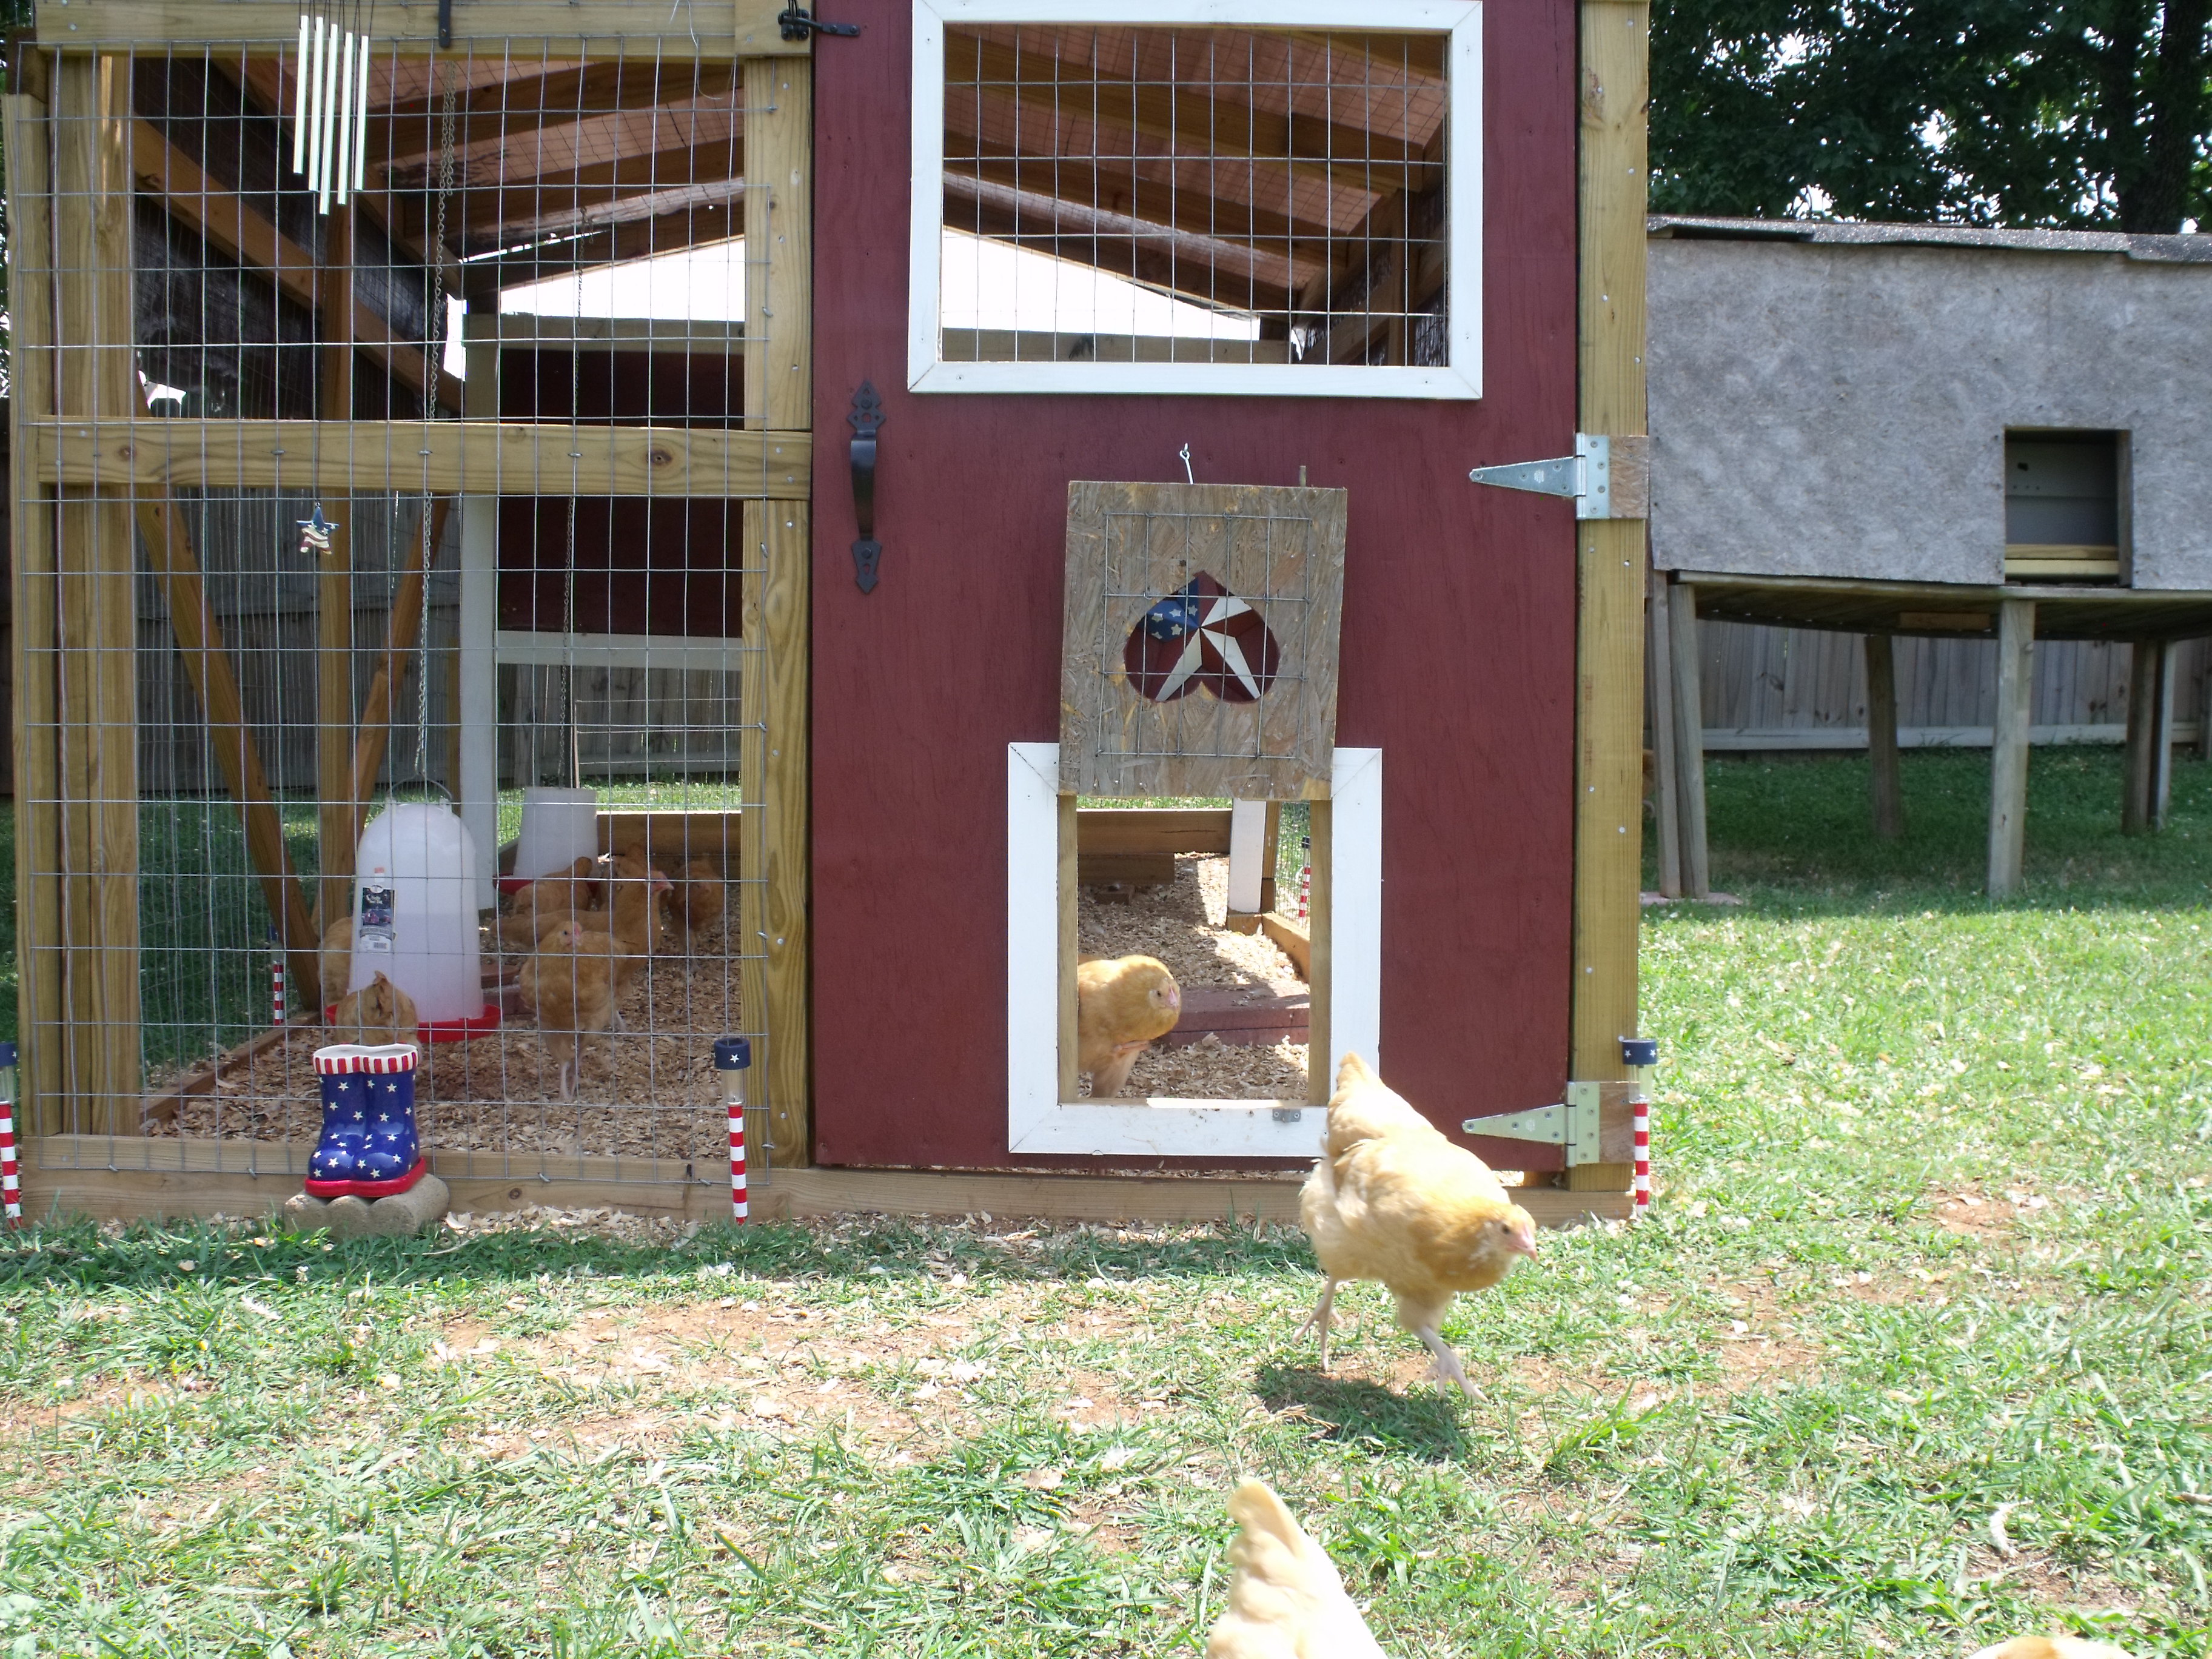
The door of the coop is just a large human sized door attached to the pen with heavy fencing hinges, handle, and latch. It is large enough to get a wheel borrow in the pen for cleaning if needed. It is a heavy door which also offers protection from predators. At the bottom of the door is what I call the “chicken door”. This little door opens to allow the girls access to the backyard. This way they can come and go in and out of the pen without leaving the door wide open. This keep wild birds and other things for getting into their pen when they are free ranging. I am not sure of the dimensions of this little door. It is large enough for my standard Buff Orphingtins girls to come and go comfortably without getting stuck. My big rooster Roy can even stand in the threshold without any problem. This is by far my favorite feature of the pen, people just love the little pet door on the large human sized door.
There is a heart cutout on the door so that the girls can see out from the other side of the door. They get pretty excited when I open it, I think they are trying to figure out the latch. It opens and attaches to the large human sized door so that it does not close on them leaving them stranded and no access to their pen. Every now and again we have to replace this door because they tend to peck at it more than any other part of the coop. We just trace the previous door, use a jig saw to cut a new one, reuse the hardware and a new door is installed. there is also a barrel latch in the inside of the door for extra protection. Should a critter figure out the outside latch they still cannot get to the inside latch to open it.
well, I think I am all out of details to talk about in terms of our coop and pen. I do hope that I was able to at least answer some of your questions. Hopeful all the pics were a big help too. They say a picture is worth a thousand words, I hope in this case it rings true.
Thank you for reading, till next time keep on crowing!
I thought I would take this time and dedicate a post to the beginning of the Kuntry Klucker Crew. I will also combine this post with the construction of their coop. I have received many comments on Facebook and other social media sites inquiring about our blueprints or plans that we used build their digs. To tell you the truth, we had no plans or blue prints. We also did not use a kit, we simply researched on what they needed, got the supplies and built what we could.
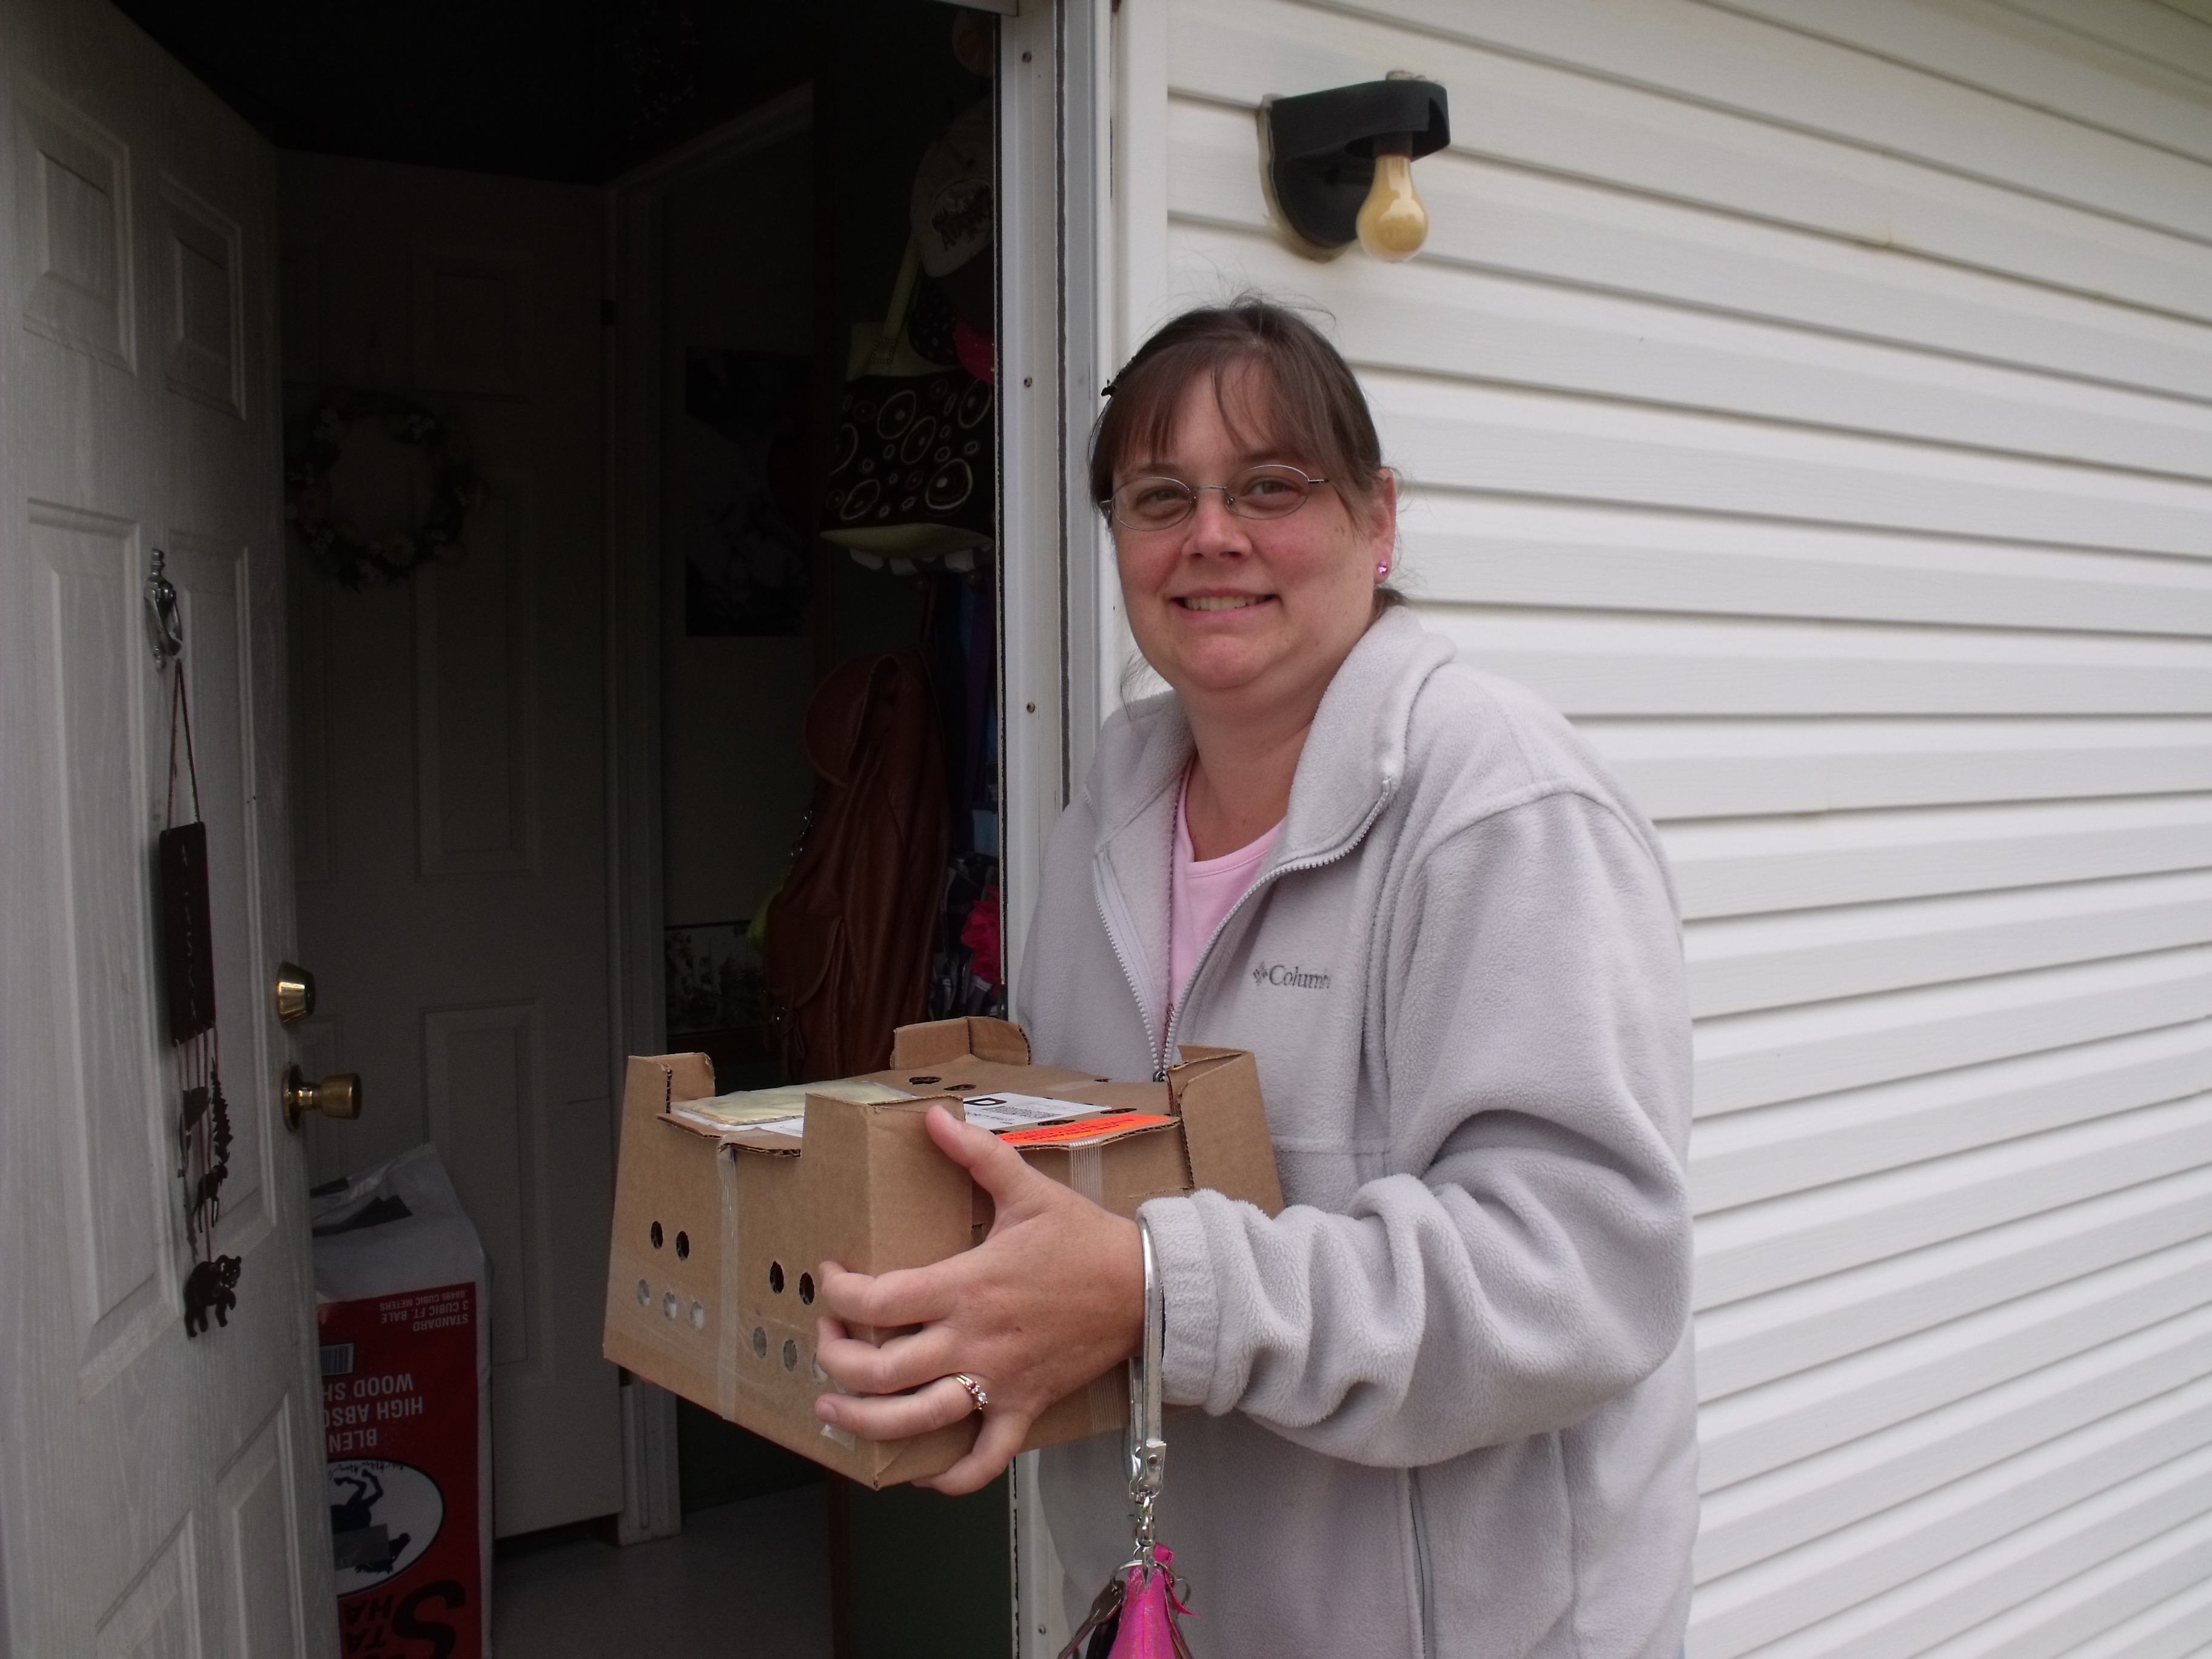
But first the crew. I mentioned in another post that the girls arrived via the mail in a small box. I am not kidding, they really did arrive in a small box, it was the cutest things I ever saw. I have never ordered chicks before, so this was a new one for me. I have ordered live plants via the mail that were delivered to my door, but never chicks. Below is a pic of their transportation digs.
It was a cold morning when they arrived. I could not wait to get the contents of the peeping box unpacked and transfered into their warm brooder.
After bring them inside I took them out of the box one by one, showed them their food and water then set them down softly into their brooder. Immediatly they began to eat, drink, and warm themselves under the heat lamp. They scratched, peeped, and took in their surroundings, and thus our journey began.
My brooder was origionally a large , grey, rubber made tote, which did not last long. As they grew, so did their digs. Instead of getting a new brooder I just added to it as they needed.
So as one living space got too small, I would cut hole in the box and attach on another box. By the time it was all said and done they had a network of several boxes to navigate through. It was almost like a brooder palace by the time I attached the final box.
They pretty much had a house and floor plan complete with rooms. Lets see, there was the room (box) with the food and water (kitchen), the room (box) with the heat lamp (lets call that the living room), and a room (box) for gathering (we can call that the recreation room). The brooder was quite a network of boxes. They seemed to navigate it well and had lots of fun scratching in all the shavings and running throughout their digs. The brooder days were fun, but they could not stay in there forever. So, while they were growing and discovering, we were busy building their new home in the backyard.
Our coop and pen are pretty much a very simple design. We have a penthouse coop, or a coop that is raised off the ground by about 2 feet. This keeps ground water from seeping into the coop and rodents from chewing into the coop or making a nest under it. I like this design, especially during seasons when we seem to get a lot of rain. Their pen has flooded several times and each time I am so glad they were clean and dry in their coop.
Once the coop was built, we then attached the pen. The pen is just a simple rafter design which we attached to the coop. After we assembled all the wood forming the roof and frame, we then enclosed the whole structure with hardware cloth and galvanized metal fencing. This protects the girls from predators and also keeps them from escaping out of the pen. The roof of the pen also has metal fencing, this is to keep anything from flying or dropping into the pen. They girls are very secure in their pen. When I am not home they stay safe and dry in their pen. I will also confine them to their pen if there is an unusual amount of hawk or other arial bird of prey activity. We have had several occasions where I had to keep them in the pen to discourage a scouting hawk or two. The girls seem to take it in stride, they know they are safe in their house.
For the roof we just use a large tarp. This provides them shade and of course protection from the rain and other elements. Since the top of the pen has metal fencing, we did not need to add the extra expense of building an actually roof. The tarp does the job well. We replace it every other year or so to keep it in good condition. It does start to ware out after a few years. They are fairly cheap and very durable. This design meets both our budget and needs of the girls.
After we had the pen built and attached to the coop, it was time to paint and decorate. I chose to paint their coop and pen door a barn red. I then painted the trim white. I knew from the beginning when we decided to have chickens that I wanted an Americana theme for their home. It has been a work in progress and has morphed as the years have gone by. It took some time find the decorations and accents that I wanted for their home. After several years I finally had the complete project. I repaint the coop about ever other year. I do this to keep the wood in good condition and protected from the elements. We change out screws and wood in the pen as needed.
The design for their front door is our unique take on allowing them access to the backyard. At the bottom of the large door leading into the pen you see a small pet door. We call this the “chicken door”, this allows us to let them out of their pen without having to keep the large human size door open. I do this to discourage birds and other arial prey from flying into the pen. If there is a hawk scare the girls will run back to their pen and find safely there because the hawk cannot follow them in. Additionally, we cut out a heart window at their level to allow them to see out the door.
This was my husbands idea and by far my favorite design feature of their home. I think it is just the cutest thing to see them peering at me as I make my way to see them. When I unlock the latch to let them out, I usually get a willing head to assist me in working the lock. The door just lifts up and latches onto the large pen door to keep it open.
That is all I have for now. If you have any questions about our coop that you would like an answer to, please post in the comments. As always, thanks for following our adventures.
Hi, well I guess I should introduce myself and give you a bit of info on the purpose of this blog. My name is Noelle, I am a backyard chicken keeper. I started my journey about 5 years ago when I wanted some chickens to help me on my hobby farm. Most people when they think of chickens, think of eggs. Well, that is definitely a plus of having your own hens in your backyard. However, I was thinking of them more of composers and garden associates.
Chickens make the best compost (poop) in their coop all winter long, which I then spread on my gardens in early spring. The plants love their coop shavings and in return give me a nice yield. But, even better, chickens make great exterminators, they eat just about anything that flies, craws, or hops in the backyard. I don’t have to use all the dangerous pesticides that I normally would because I have my feathered exterminators to do that for me. Most of all, they are my best friends in the backyard. I cannot work in the garden with out one of my girls looking for any grubs that I might have uncovered. They are great friends to have when I work in the garden. Additionally, they are attractive yard ornaments as they go about their days work of eating bugs, tilling, and clucking with glee when they find something delicious.
In this blog, I plan to share with you the joy of keeping chickens. When I tell people that I have chickens as pets, I get lots of different responses. Some think I am crazy to keep chickens as pets. Chickens are mostly viewed as live stock, void of all compassion and emotion. I am here to say put that myth to bed. I sometimes get response of curiosity. When people think about chickens the image of poor sad looking things in cages come to mind. They do not think of chickens as being attractive or even fun. I too will dispel the myth that chickens cannot be fun loving pets. But before I go to far I should probably introduce the flock and explain the name behind my blog.
Our coop is called The Kuntry Klucker. I chose this spelling because I thought it was fun and different. I like to be original and this name just fit. We live in the country and of course there is lots of “klucking” going on. So nope, I did not misspell the name of my blog, the spelling was intentional.
The gang consists of 12 hens and 1 Rooster named Roy. Roy is a character, he loves figs, spaghetti, and corn. I am the only one who can pick him up. Everyone else he deems as an enemy that must be exterminated. This even includes my own family members. He has mellowed out some as the years have passed, but he has never attacked anyone. He perfer to crow at them and pretend that he is a fearsome bird.
He is really the sweetest rooster I have ever known. I am not sure what I would do without him. I love to wake up in the morning and listen to him greet the dawn. He runs like clock work, an alarm clock that never goes out of power or relies on batteries. I never knew the joy of roosters till I had him. He is the king of the backyard.
Now for the girls. I have a dozen hens which I affectionally call “my girls”. We have…
Miss Bossie (The alpha hen) I will get to more of her later
Miss Katie (The forever broody mama) more on her later too
Miss Sweet Pea (The prize personality hen) more on her later too
Miss Little bit
Miss Little Pea
Miss Lady
Miss Betsy
Miss Piggy (The hungriest Hen) she is always eating
Miss Liberty
Miss Lady Bug
Miss Tennessee
Miss Lucy Goosie
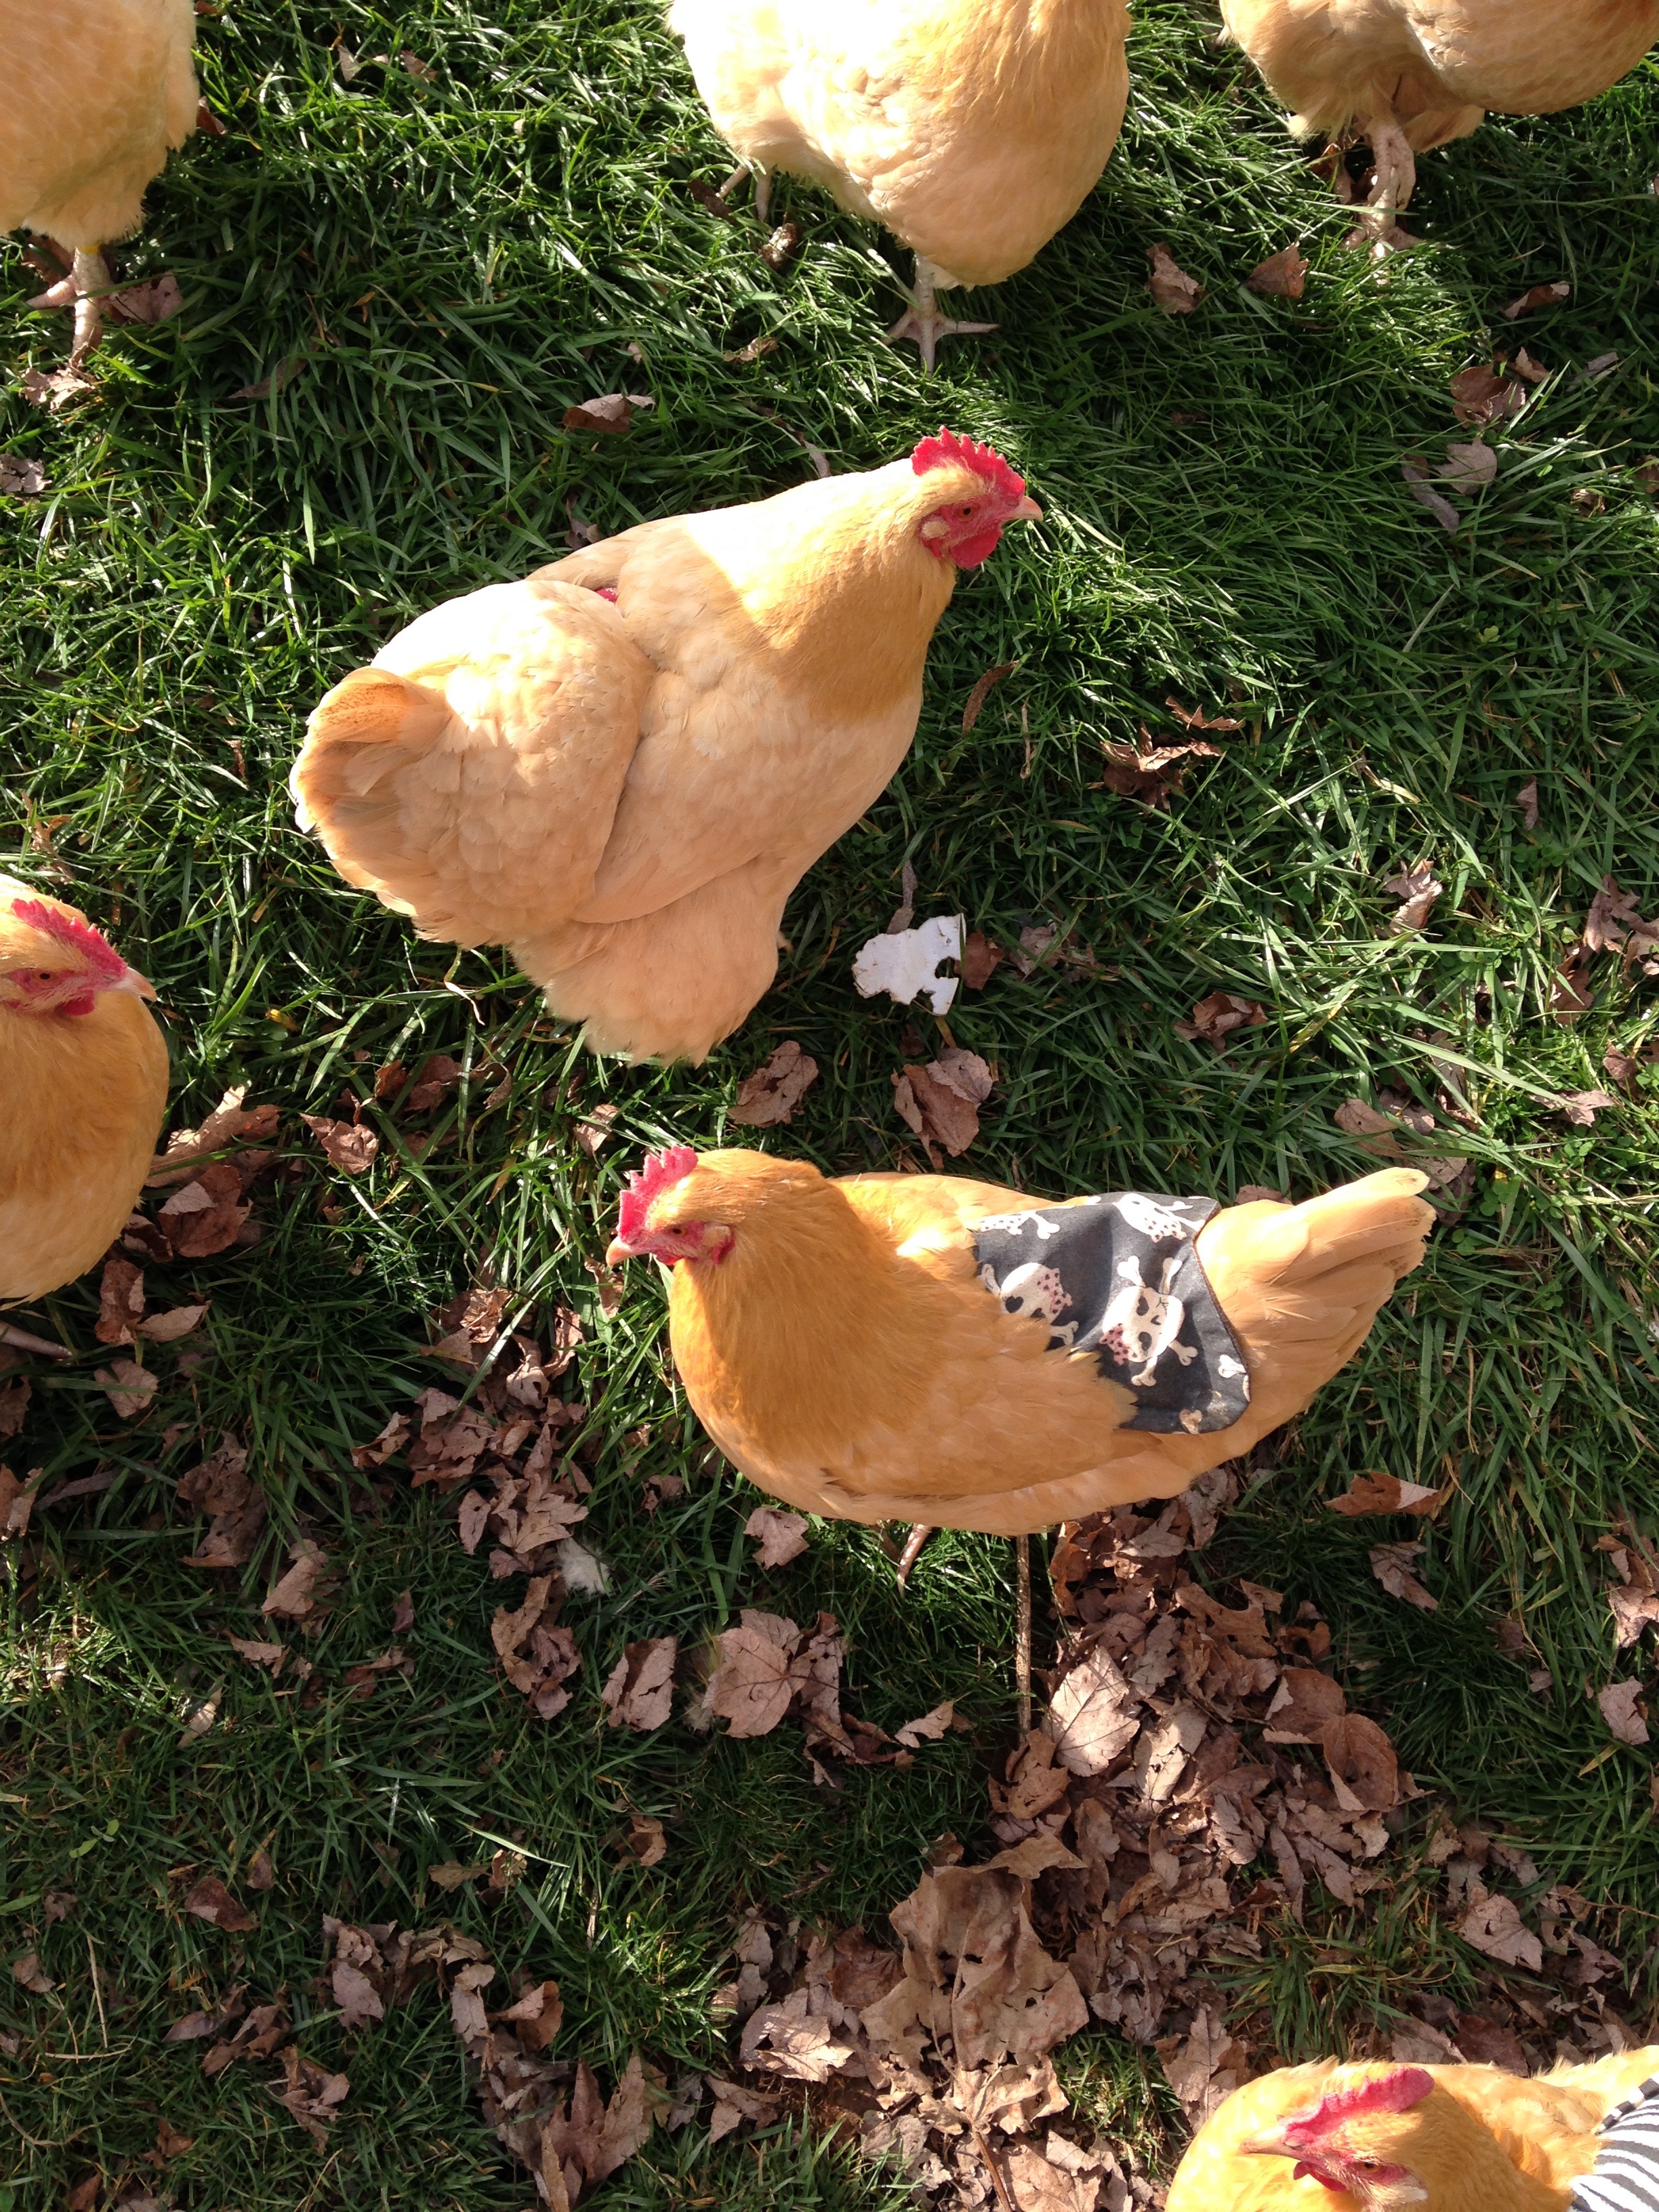
Now most people ask me how I tell them all apart. Well, I have a little secret. I dress my hens up, that is right, they all wear the latest in Hen Fashions. I do this because it protects their back from the rooster but has the added side effect of a name tag.
Yep, that is right my girls wear dresses!! They love their outfits and protest when I take them off for washing. They each have their own individual personalities, I try to match the outfit to it. For example, here is Miss Sweet Pea, she is the smallest of all the hens, and the sweetest. However, she is also a flight risk. You see, she is so light that if we get a big gust of wind it is not uncommon for her to ride the wind over my 6 foot wood privacy fence. I have to make sure she stays in the pen on really windy days or days when we have severe weather, because she will ride the wind. So her outfit always has butterflies because she is a free spirit.
Now Miss Katie, she is my perpetual momma hen. She loves sitting on egg and hatching babies. She has hatched two clutches for me. She is the best momma and has earned her name as the Momma Hen. She is blind in one eye, has been since hatch, but that does not stop her.
Then we have Miss Bossie, she is the alpha hen. This means she is at the top of the pecking order directly under Roy. I am sure you have head the term “pecking order”. Chickens are very social animals and have a rigid social structure. Every individual knows their place within the hierarchy. Members in a flock compete for their position and must hang on to it. Miss Bossie has made the climbe to the top of the hen ranks. She is also my bad girl, in a funny sense. She is my escape artist, my “hen-didi”. If there is a breach in the coop security, she will find it. But she is also my helper, I use her to make their coop safer by securing up escape routs. For that reason, she has skulls on her outfit. There is one outlaw in every barnyard, she is ours.
I have many more chicken adventures to share, I will stop here. It has occurred to me that it is snack time. I am running a bit late, Roy is letting me know with his constant calling (crowing) for treats. Speaking of treats, that is a subject of much entertainment, chickens love treats. I will post about that next time.
Till next time take care, and keep on crowing. The girls and I will be back soon!!