Buff, Silver-lace, and Golden lace Polishes gathered for routine health inspections.
Performing routine health inspections on chickens is essential and a prerequisite for a healthy flock. Like a check-up at a physician’s office, health inspections for chickens are much the same. Catching problematic pathologies before they occur requires routine health inspections.
I will discuss the process and procedure for conducting successful health inspections in a backyard flock. Beginning at the head down to the body and tail, I will include all the vital indications to prevent illness in the backyard flock.
Head, Eyes, Comb, and Waddles:
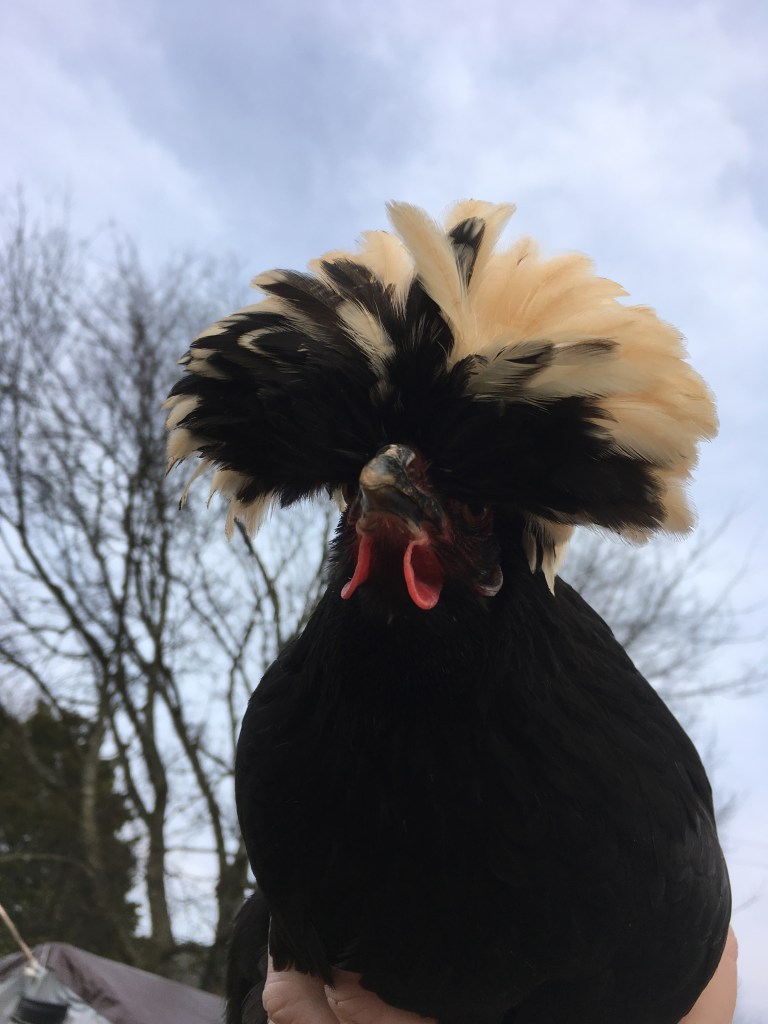
Apollo (White Crested Polish Hen) posing as I inspect her eyes for indications of ill health.
Starting at the crown of the head, inspect for mites and lice on the individual. If mites and lice are present treatment will be required. The eyes should be clear and free of debris. If crusting is present around the eye, gently wipe it away with a paper towel moistened with clean, warm water.
Dracula (Silver Lace Easter Egger) shaking his waddles for the camera.
The comb and waddles should be red and warm to the touch. Dried blood or pecking marks indicate flock disharmony and bullying. Monitor the flock and take appropriate actions to rectify the problem by isolating the bully or establishing a bachelor pen if roosters are sparring.
Legions or sores indicate fowl pocks (a common virus) or parasites such as fleas or ticks. Treatment with Eprinex will clear up external parasite infections. I have a video on my YouTube Channel showing my methodology to treat external parasites in my flock.
Neck:
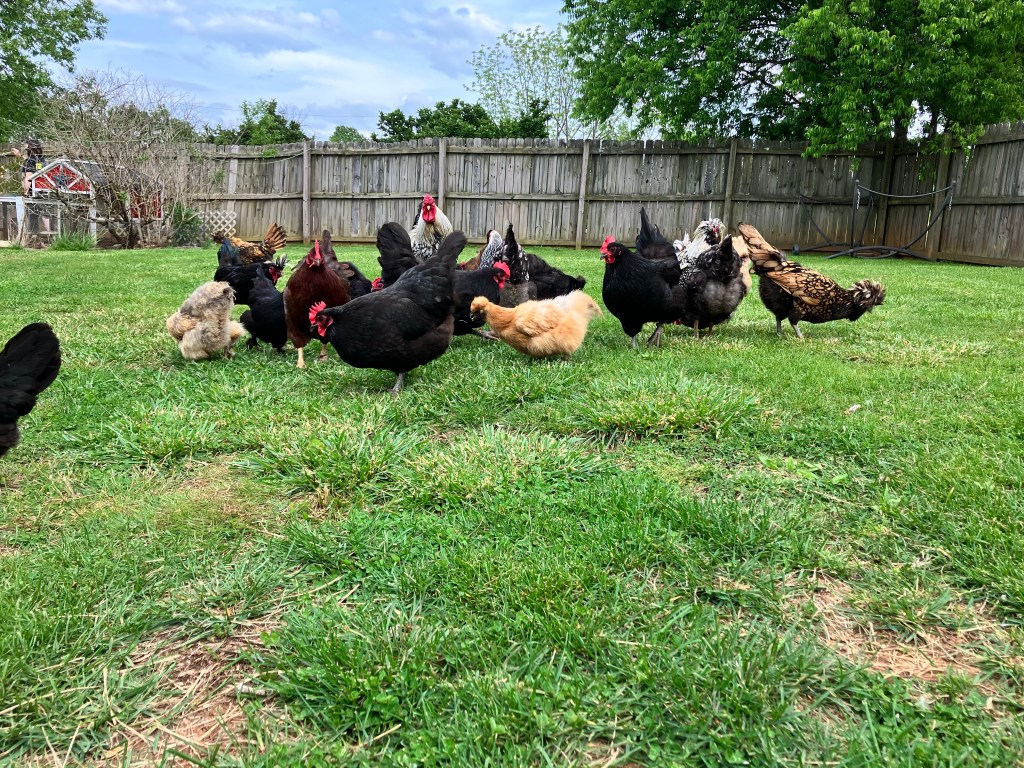
Buff and Golden Lace Polish hens hunting and pecking as they search for delicious morsels.
Moving down the body, examine the neck of the bird. Feathers should be clean, and the base of the shaft should be visible. If clumps or residue surrounding the base of the quill is noticed, this indicates the presence of lice. Treatment with eprinex is warranted to address these external parasites.
Wings:
Lestat (White Crested Polish Rooster) proudly displaying his feathers to attract his favorite hens.
The wings of birds are among one of the favorite places for external parasites to congregate. Due to the warmth and protection from disruption, mites and lice can live rent-free. Parting the feathers and exposing the skin, tiny moving dark spots indicate red fowl mites. These small parasites feed on the host’s blood and must be addressed. Again, Eprinex works very well to address and abruptly stop a mite and lice infestation on the bird.
Tail and Vent:
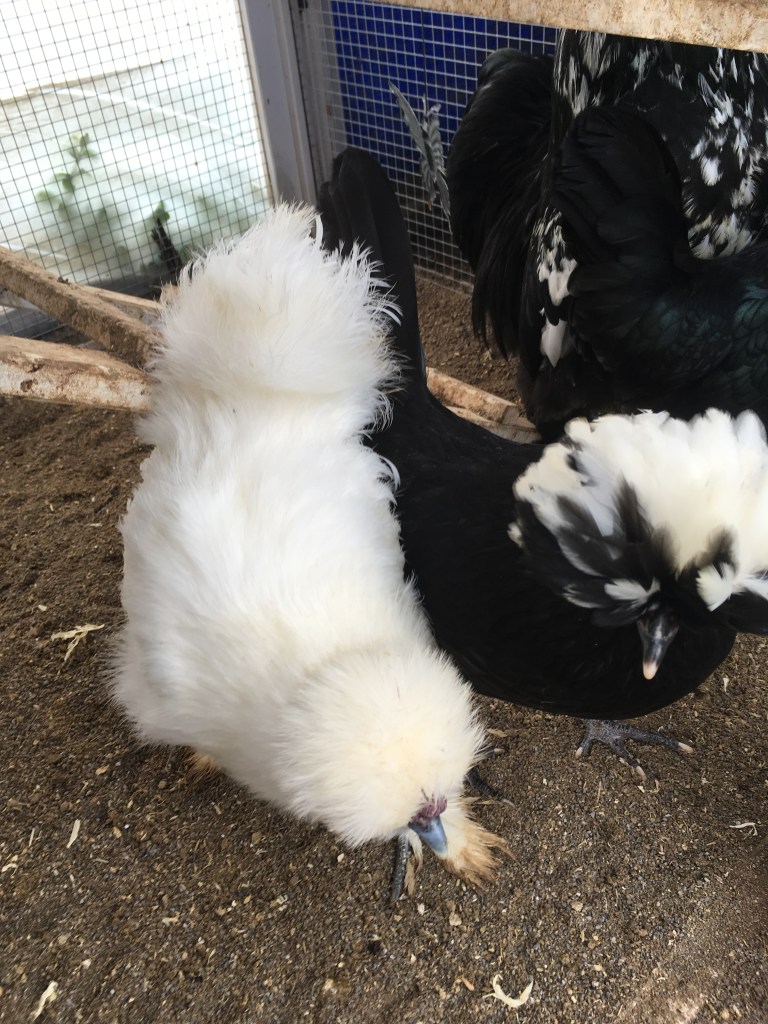
Clean and health fluffy bottoms of a Buff Silkie, Black Australorp, and Silver Lace Wyandotte Rooster.
Like the wings, the vent is a favorite place for mites and lice to congregate. Due to the inability of the bird to preen this location, mites and lice will multiply unencumbered. Treatment for external parasites will rectify the infestation.
If the vent area is dirty or caked with dried or wet excrement, this indicates worms. Left untreated, intestinal worms will weaken and eventually cause death in affected individuals. Natural wormers such as Diamateous earth, pumpkin seeds, or apple cider vinegar will not address a high worm load in chickens. Worm infections should be treated with products developed to kill worms and the eggs in the intestinal tract. Another indication of worms is finding roundworms on the poop boards or worms visible in the eggs. See the video on my YouTube Channel using my flock to demonstrate proper dosage and administration.
Shanks, Feet, and Toes:
Bumblefoot in a Buff Orpingtons Hen
The shanks (legs) of the chicken should be neat; the scales should lie uniformly. Uplifted scales are a sign of leg mites and can be addressed by soaking the legs in warm Epsom salt, followed by applying Vaseline to the legs to smother the mites. Treatment with Eprinex is also helpful in advanced infestations.
The pad of the foot should be clean and without puncture wounds or signs of trauma. If a round scab is present on the foot, this is bumblefoot and can be addressed with simple steps to remove the corn (infection) and wrapped in gauze and vet wrap for healing. Bumblefoot is common in backyard flocks and not necessarily a reflection of poor flock management. For instructions on how to treat bumblefoot, please see my blog post on treatment in my flock.
Take care to use proper protection when treating bumblefoot
Use caution when treating bumblefoot as these infections are usually staph infections and zoonotic (passing from one species to another) and can affect humans. Medical gloves and masks for treatment are recommended. Sanitize all instruments with bleach to kill any bacteria before storage.
Routine health inspections are key for proper flock husbandry as problematic illnesses can be caught early and prevented through preventative efforts. For more information on caring for backyard chickens, please visit my YouTube Channel.
Stan (BHI 3303) Tyrannosaurus Rex and I. Perot Natural History Museum. Dallas, Texas.
I am a multi-disciplinary writer, blogger, and web content creator. To see more of my work visit my online writing portfolio and other sites.
Summer has surrendered to fall, leaves wrestle in the wind, fall, then scatter on the ground. The gardens have been harvested, tilled under and prepared for the coming seasons rest. The girls are finishing their yearly molt, roosting increasingly earlier each evening. All this signifies the coming of winter, along with all its challenges for the backyard chicken keeper.
Many new backyard chicken keepers find themselves intimitated and overwhelmed wondering how to overwinter their flock. I know because I have been there. Over the years, I have learned a trick or two on how to keep your girls happy, healthy, and comfortable as outside temperatures plummet and winter weather rages.
The secret to successfully overwintering your flock is to keep it simple, enhancing your flocks naturally ability to weather the elements. Many new backyard chicken owners make the mistake of judging their flocks comfort by their own. This is the first and essentially the riskiest mistake that a flock owner can make. This is true for several reasons.
Chickens come factory installed with a down coat, the same coat that we put on when the mercury dips below a certain point. Many owners often forget that their ladies and gents are already bundled up for winter. Increasing the temperature in the coop hinders their health and can even cause death. Reasons are these.
Heating the coop: Additional heat to the coop or pen hinders the flocks ability to naturally adjust to falling temps. In the presence of a heated coop, your ladies will fail to grow in the down coat necessary for winter temperatures. This becomes problematic in events such as a winter storm knocking out power for hours or even days. The flock has acclimated to a warmer living environment, when this heat source is abruptly removed, shock and death can result. Like us, if resources to keep warm are removed, inability to adequately adapt to the cold environment may result in one falling prey to the harsh conditions . In the same situation we put on warmer cloths, huddle under blankets, sit by a fire, or drink and eat warm substances. All these necessities are not available to the backyard flock who suddenly finds themselves freezing due to depedence on a heat source. This is the first and the most serious mistake that a backyard chicken keeper can make. It is best to let them adjust to the cooler temps gradually, growing in their thick and heavy down coat as nature intended.
Heat lamps: The second mistake that new backyard chicken owners can make is the use of the humble heat lamp. Heat lamps = coop fires!!! I cannot recount how many times I saw on social media or heard about coops destroyed due to heat lamps. Heat lamps are very dangerous for a variety of reason, when used as a winter heat source, they can be deadly. Heat lamps, (sometimes called brooder lamps), consist of a large 500 watt red bulb that is used to create a warm environment to raise chicks. While heat lamps are a danger even when used as a brooder heat source, they are even more dangerous when used around adult birds in an enclosed space. Why? There is no way to safely mount a 500 watt heat lamp in an enclosed space where the occupants can fly, accidentally knocking them down. With a coop full of pine shavings, dry straw, dust and feathers, this is perfect kindling and prime to start a fast, furious and complete coop fire. If you take anything away from this post please, please do not use heat/brooder lamps to heat your coop. They will in most cases cause a devastating disaster. There are much better natural ways to assist your girls in overwintering the cold months. Below I will share with you safe methods that I employ to keep my flock happy, healthy, entertained and content during the long winter season.
But first, let’s answer a simple question. What does a backyard flock need in order to weather the worst of Old Man Winter? The needs of backyard chickens in winter are very few. All they really need is a clean and dry place to call home. They do the rest. It is the job of a keeper to provide the necessary accommodations in order to meet their basic needs. Chickens are well adapted to live outside, all they need is a little help to weather the bitter winds and elements.
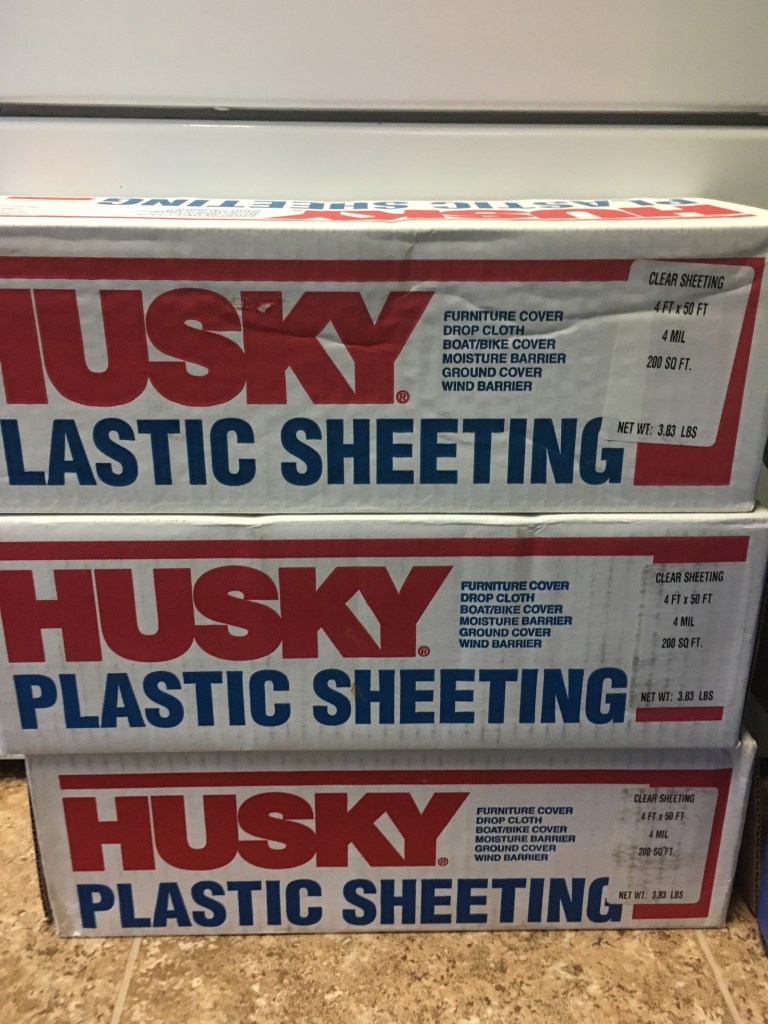
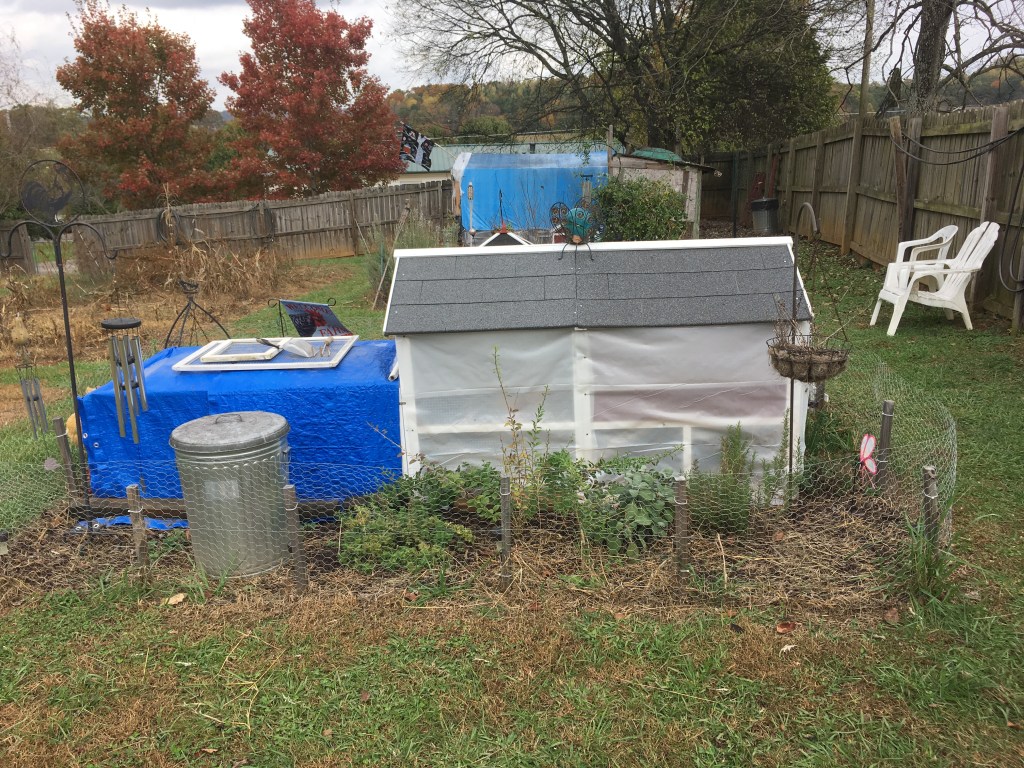
How is this achieved? The main thing I do to overwinter my flock is enclosing their pen with construction grade plastic sheeting. The purposes are tripple fold.
Wind Break: The plastic acts as a wind break. As the bitter winter winds blow, the plastic surrounding the pen blocks the wind, allowing the girls to retain their body heat. Chickens are more than capable of generating their own body heat. Using their feathers and down coats, they can regulate heat their bodies produce, thereby keeping warm in the winter. The cold winter winds disrupt this thermal regulation by lifting up their feathers, exposing their skin to the bitter winter winds, loosing the warmth they worked so hard to maintain. A simple wind barrier helps them immensely. If allowed access to free range on a cold day, they will come and go from the protected pen as needed depending on their individual needs. If it’s a cold day, they will stay in the wind free environment of the pen. If it’s warmer, they may spend more time outdoors hunting and pecking. Allowing them access to the outdoors while providing a wind free place to retreat, will keep them happy and content as they weather Old Man Winter.
Precipitation Barrier: The plastic keep the elements out of the pen, providing a dry place to call home. We are all familiar with the mystery that the cold winter rains can elitist. The same can be said for the snow and ice. Chickens prefer to avoid these elements if they can. However, since they live outside, their options may be few. This is another benified of enclosing the pen with plastic sheeting. As the elements rage outside, the girls are protected from the snow, rain, sleet, and ice that pleague the winter season. This simple barrier from the elements creates a dry and wind free place for your flock to call home. Simply keeping the elements out of the pen helps them immensely as they weather the worst of Old Man Winter. If protected from the wind and precipitation, the cold temperatures are not an issue for the flock.
Clean and Dry Digs: Providing clean and dry digs for your flock is essential. Along with providing a wind and precipitation break, a clean coop and pen goes a long way. The flock will undoubtedly spend more time in the protection of the coop/pen during winter. It’s a keepers job to see that their digs remain clean and dry. This is simply done by making sure the coop and pen are cleaned and maintained on a daily basis. This is necessary to keep moisture down their living areas. We all know that chicken poo can be wet and sticky. Due to the moisture content of their poo, this creates the ideal situation for frost bite. When too much moisture is presnent in the coop, frost bite will settle on the combs and wattles of your roosters and larger combed ladies. Removing the poo daily from both the coop and pen prevents these conditions. Frost bite is no fun, it hurts and can be dangerous if not properly treated. As they say, an ounce of prevention is better than a cure.
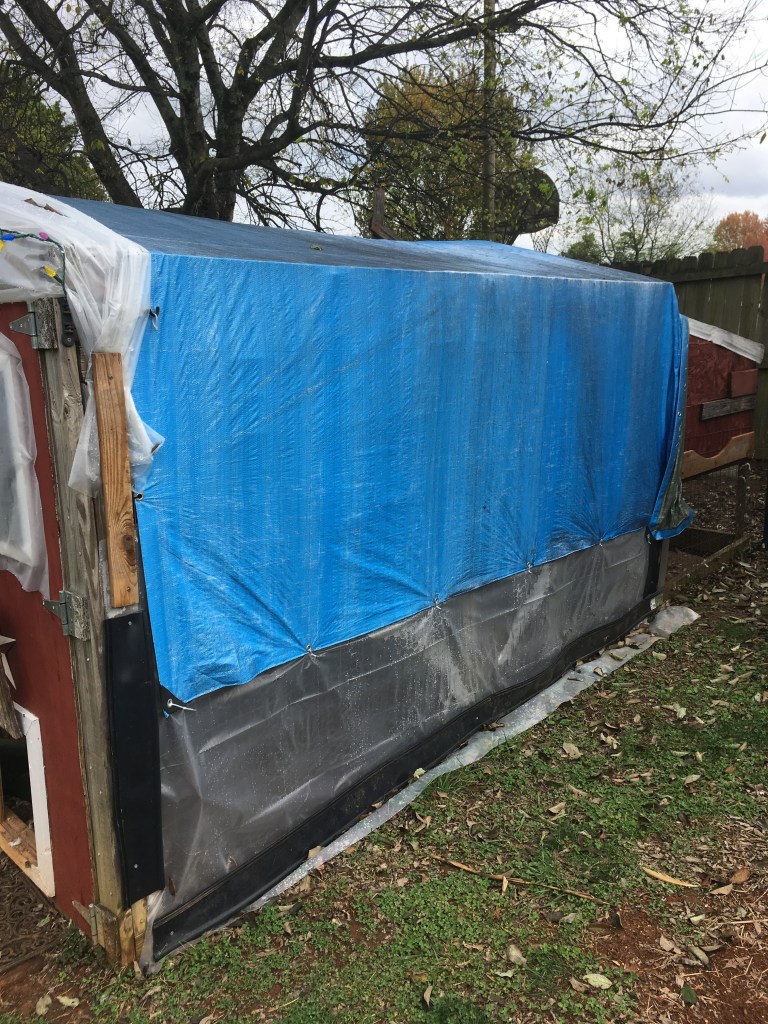
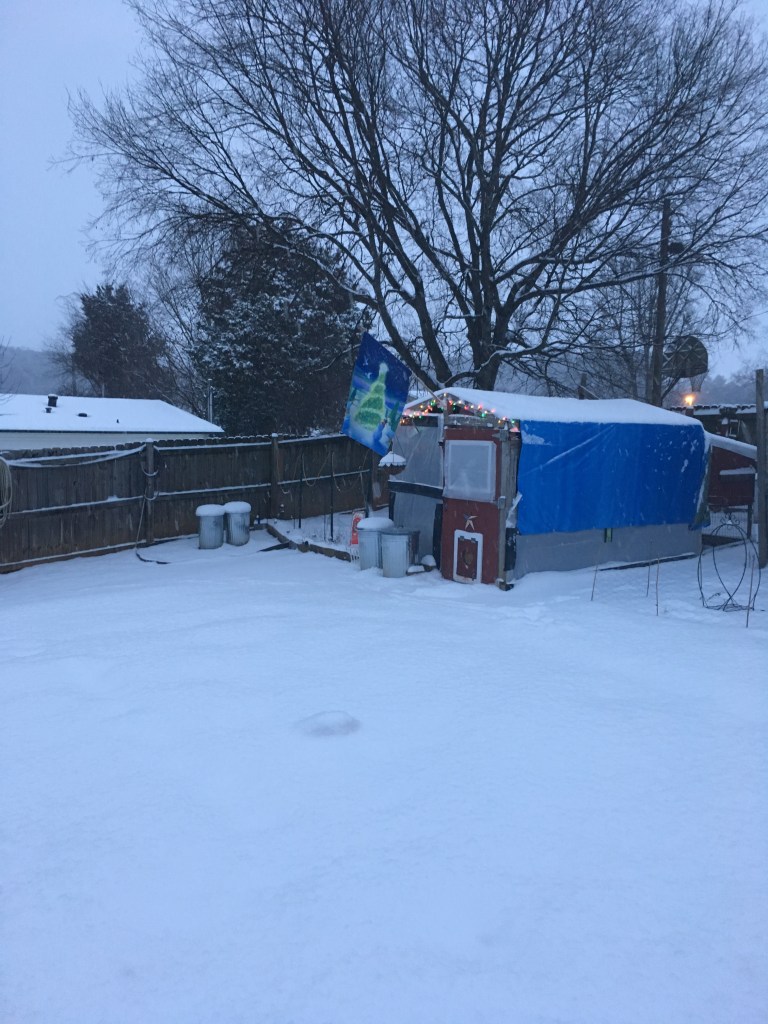
By simply enclosing your coop/pen in construction grade plastic, you provided a condusive habitat for your flock to weather Old Man Winter. Below are some pictures of my coops and pens that have been prepared for the coming bitter season.
As the bitter weather rages, the girls will be safe and warm in their pens. Below are some pictures of the ladies braving the elements in their winter digs.
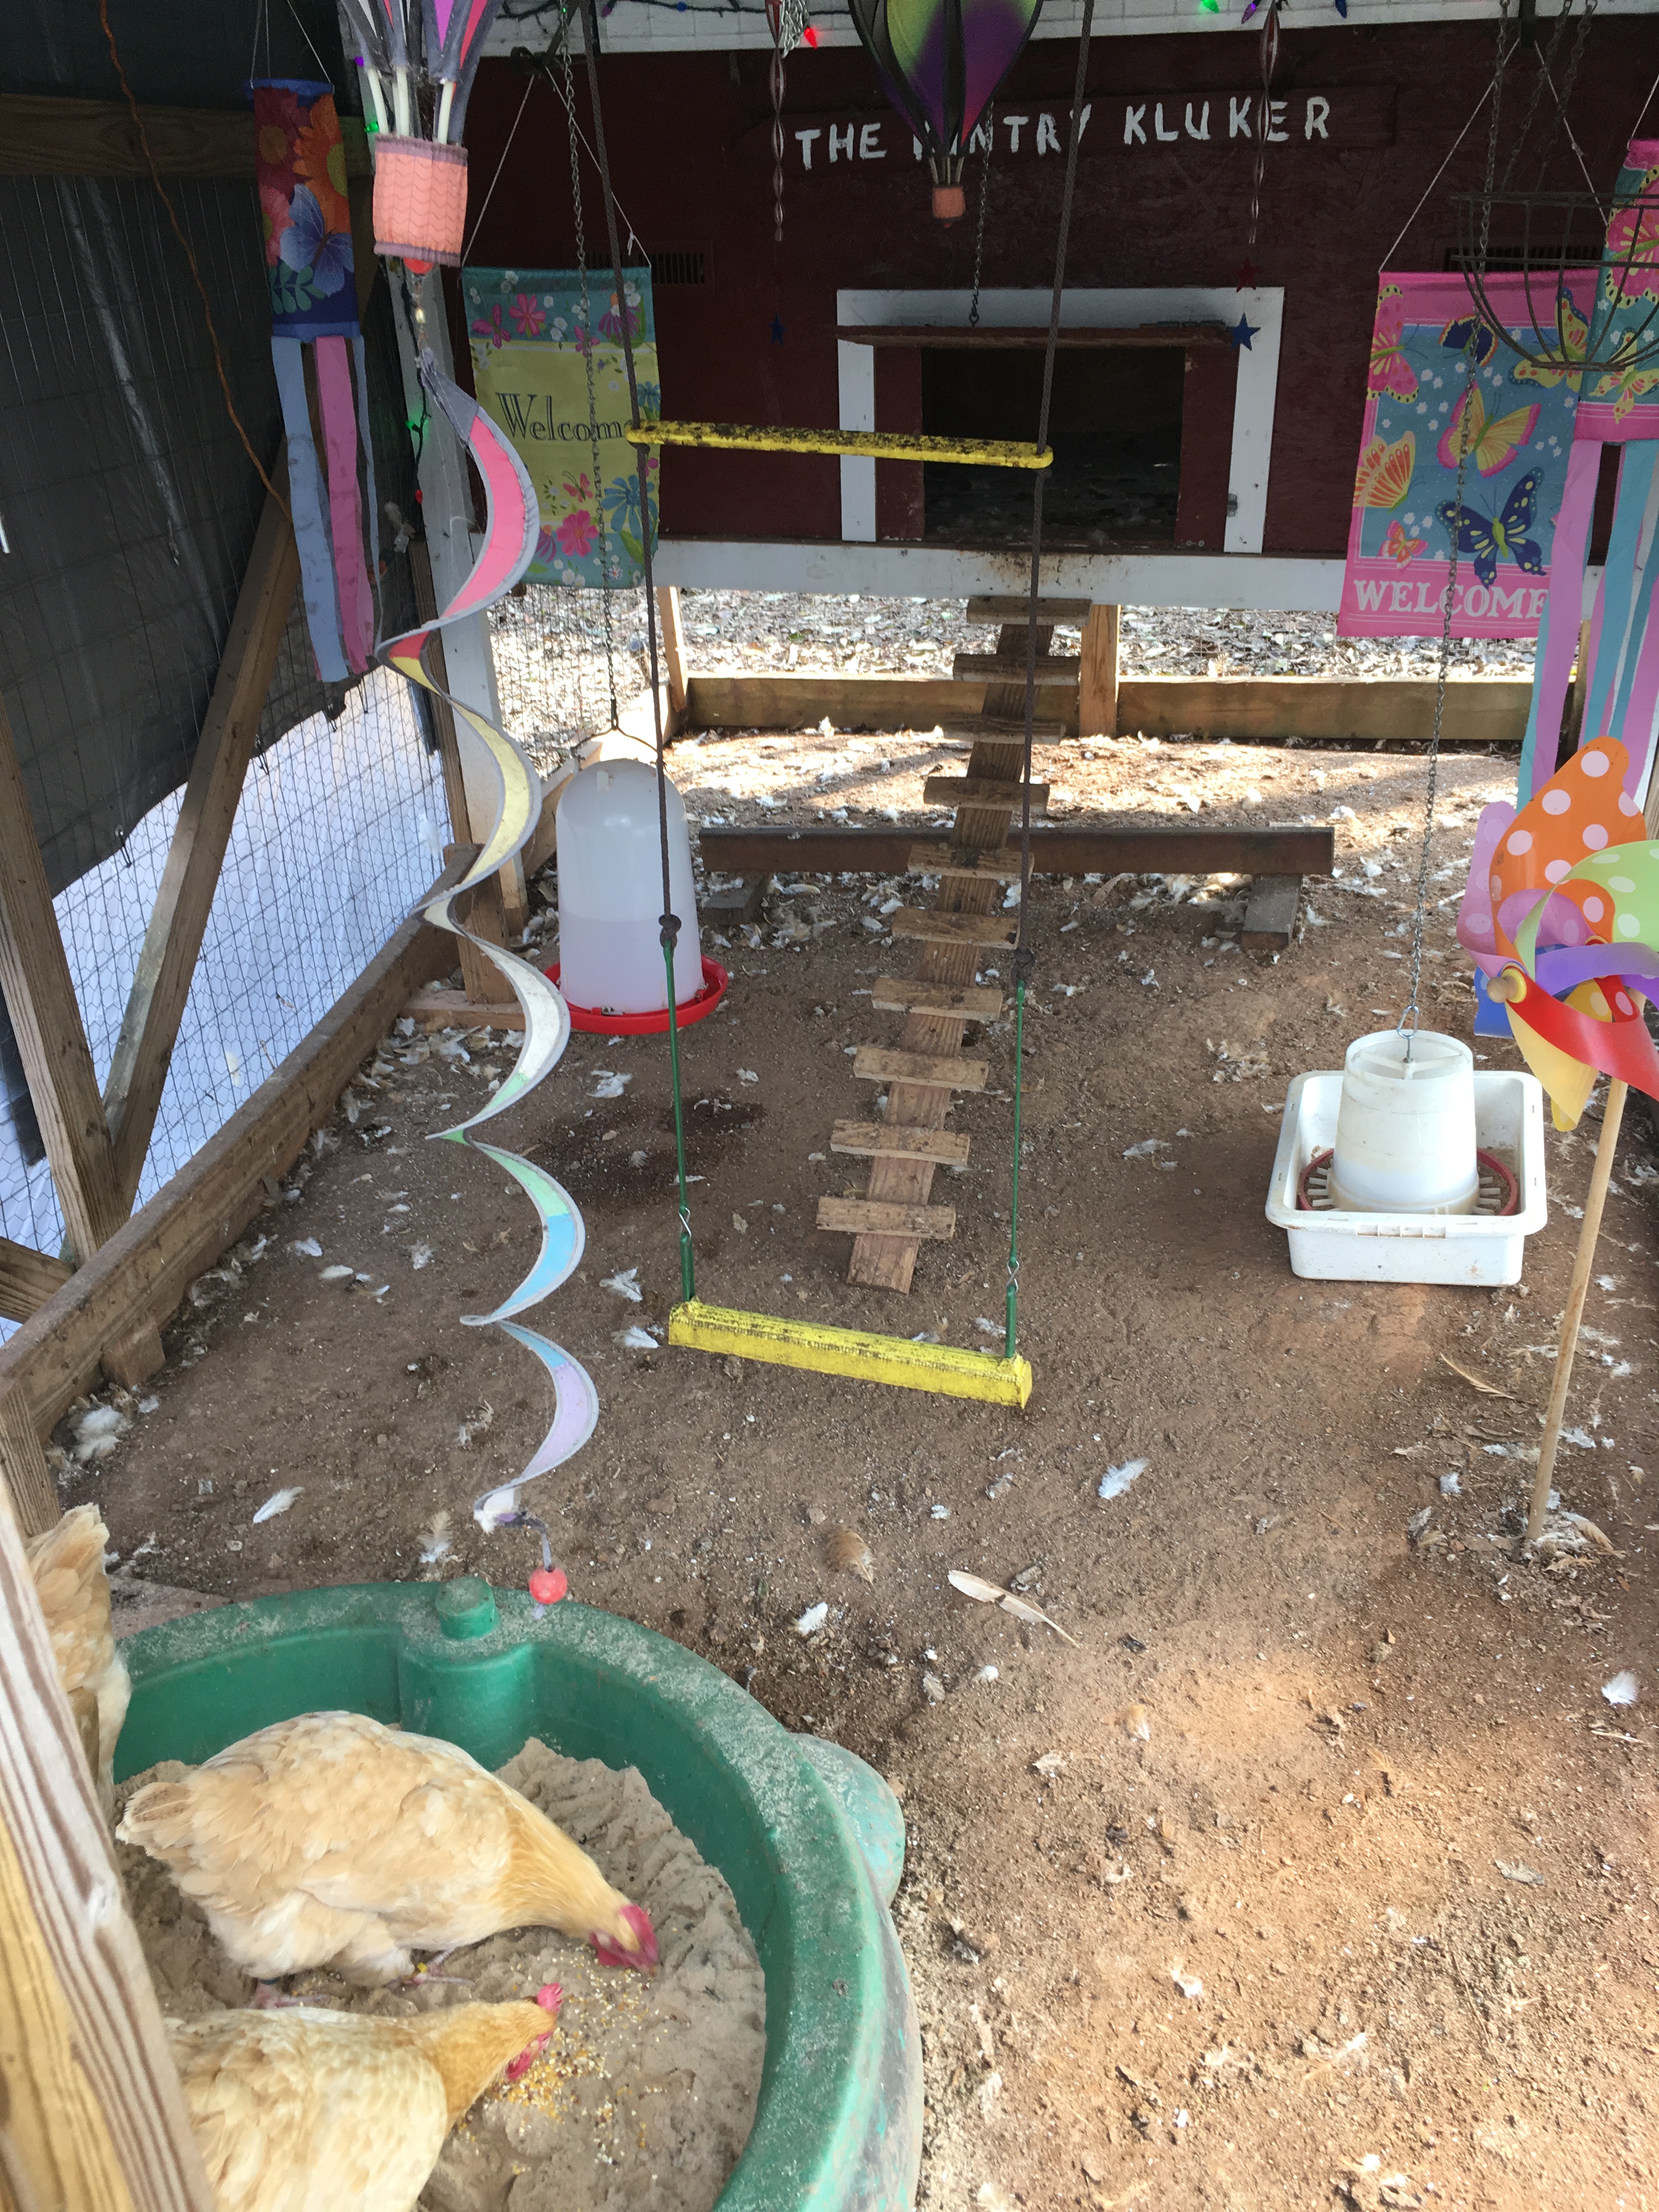
Along with enclosing the coops and pens in plastic, providing your flock with some entertainment will go a long way. During the coldest days, your flock will undoubtedly spend more time in their pen. If this occurs for consecutive days, they may begin to suffer from coop boredom. Just like us, if we spend a lot of time in a tight enclosure, we get a little restless and bored. Chickens are no different, it left too long in these conditions, they will begin to peck at each other, creating injury and a hostile flock environment. To prevent this, provide games to play and things to peck. Below are a few things that I do for my flock, keeping them happy and healthy.
Flock Block: A flock block is a very simple entertainment tool I often use during the harshest part of winter. Additionally, due to the fact that they are unable to forage for grains and seeds, a flock block provides these nutrients. Flock blocks are large blocks that consists of seeds and other goodies compacted in a hard square shaped formation. The chickens will spend hours happily pecking at the block, keeping them entertained for days on end. One block will last my flock for an entire winter. They are found at most feed stores, usually under $20. It is also possible to make your own. At the end of this post, I will leave a recipe that I use when I want something a little more tailor made for my girls.
2. Peck the Bottle: This is a little chicken game that keeps my girls busy for hours. Additionally, it is very entertainment to watch them peck at the bottle. The supplies needed for this game are very simple. An empty plastic water bottle add some scratch or cracked corn. Take the bottle and poke some small holes large enough for the corn or scratch to fall through. Inside the bottle, fill the bottle half full of the treat. Place the bottle in the pen.
The flock will peck at the bottle, trying to free the corn or scratch contained inside. One by one, the flock will each peck at the bottle, moving it around the pen in efforts to consume the treat. This will keep a flock busy for days. If you have a larger flock, place a few more bottles in the pen. If you want to step up their game, fill the bottle with dry meal worms. Your flock will go crazy, working extra hard to get the worms out of the bottle.
3. Cabbage in a basket: If you want to add some greens to your chickens winter diet, veggies in a basket or suit feeder is a great choice. With grass and other delectables long since dormant for the season, greens are in short supply. To supplement your ladies diet with green veggies, this winter time trick is ideal. Simply take a suit feeder, open it, and place the veggies inside. Hang the feeder in the coop and let the games begin. Your ladies will go crazy for some fresh greens. Since it is cold outside, the greens will stay fresh for a while. Once the suit cage is empty, refill and play again. You can also put a head of cabbage in a metal hanging basket, placing it in the pen or yard for you girls to pick at. They will enjoy the fresh greens, all the while staying healthy and entertained.
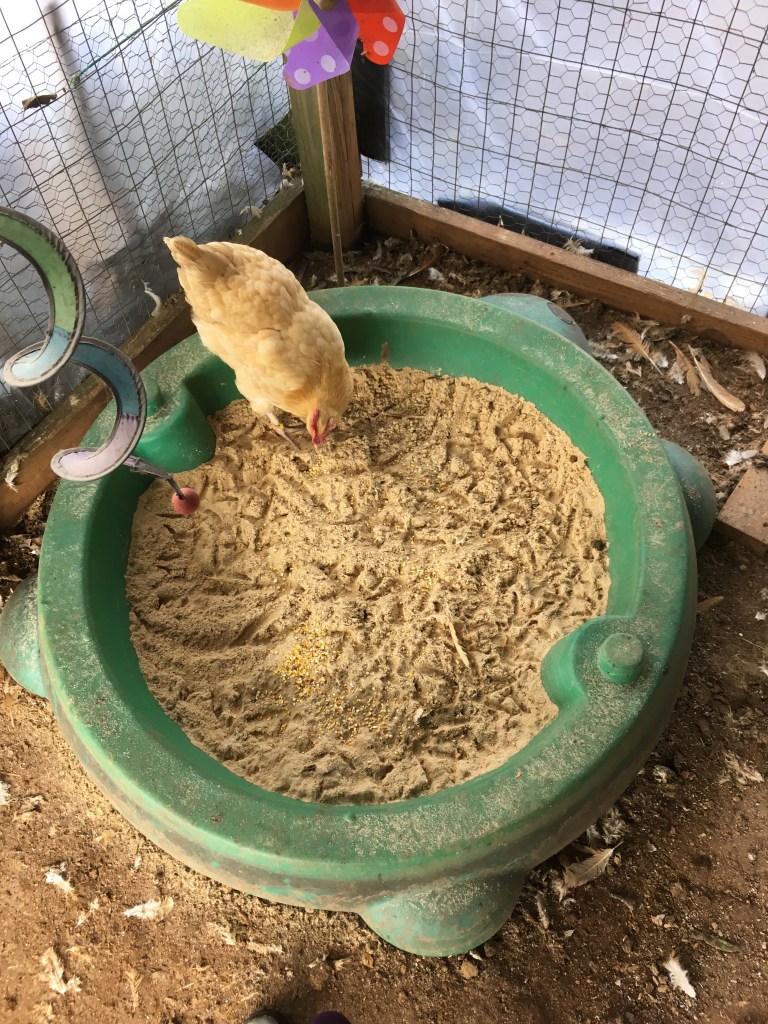
4. Sand Box Spa: As winter sets in, the ground becomes covered, saturated with snow or rain, the girls will find it hard to keep up their beauty regiments. Simply placing a sand box in the pen and filling it with sand goes a long way. If your pen is too small for fit a sand box, pour the sand directly on the pen floor. Not only does this provide them a place to dust bath, it is also provides them a great way to scratch around.
Chickens love to scratch at the ground as they hunt and peck for delectable to dine on. In winter however, this past time is hindered due to the ground conditions caused by winter. To keep them further entertained, sprinkle some scratch or mealworms on top of the sand and watch the fun begin. They will spend hours digging in the sandbox, making sure that they have found and consumed every last morsel. This will quickly become a flock activity that they love and relish during the cold miserable days of winter.
Finally, I come to my last tip for winter care for your flock, water. Many keepers underestimate the need for clean and fresh water during the winter months. While they will drink more water in the summer to stay hydrated and cool, water is necessary for them to regulate their body temperature. During the cold months while a flock is working hard to regulate their body temperature, water is essential. For their little bodies to keep their furnaces stoked, access to liquid water is necessary. One of the major hinderances to this process is the cold temps causing the water to freeze. To combat this, I use several methods.
The haul it method: For those who do not have a large flock, simply hauling fresh unfrozen water to the backyard several times a day is ideal. If your flock is small and someone is at home during the day, this is the simplest and cheapest method to combat freezing waterers. Since it requires no electricity or expensive accessories, this method is best if applicable.
Heated waterer: If your flock is larger and no one is home to see to the water needs of the flock, a heated waterer is ideal. Although these waterers are a little bit on the pricy side, they are a life saver. You can find electric heated waterer at most feed stores. They range from $40 to $60 and long lasting. I am still using the one I purchased 5 years ago and its still going strong.
3. Light bulb in a metal tin: The last method that I use is the light bulb in a metal tin. Like the heated poultry drinker, this method requires electricity supplied to your coop. If you have several coops, purchasing a heated poultry drinker for each one can get expensive. I use the purchased heated drinker for my largest coop, the rest I use this simpler method.
Simply take a metal tin (cookie or other round tin), drill a hole just large enough for a cord, string the cord through the hole in the tin, purchase a light bulb and a socket cord (used for restiringing lamps) and simply screw the light bulb into the socket that is connected to the tin. Put the tin lid on, place the plastic or metal drinker on top and presto, you have a heated poultry drinker.
The radiant heat from the bulb will keep the water from freezing. Since all you need to keep the water warm enough to remain liquid a 15 or 25 watt bulb is best. You don’t want to heat the water too high, making it too warm for the flock drink. The goal here is to keep the water from freezing. This low watt bulb will supply just enough heat to keep the water in a liquid, drinkable state. If you don’t have any metal tins around suitable for this purpose, a terra cotta flower put turned upside down will also do the trick.
That’s a wrap. Above are all the techniques, tools and tricks of the trade I use to keep my flock happy, healthy, and content during the harsh winter months. As promised, below I will leave the recipe that I use to make a homemade suit treat for my girls. The ingredients used in this flock treat are typically found in every kitchen and cheap to purchase if needed.
The Kuntry Klucker Crew’s Favorite Flock Block
2 cups scratch grains
1 cup layer feed
1 cup old-fashioned oats
1 1/2 cup of raisins (for added fun)
1/4 cup whole wheat flower
1 teaspoon ground cinnamon (aids in respiratory health)
1/2 teaspoon cayenne pepper (helps circulation)
3 whole eggs (provides calcuim , shells included, crushed to fine pieces)
1/2 cup blackstrap molasses
1/2 coconut oil, liquified
preheat oven to 325 degrees. In a large mixing bowl, mix the dry ingredients. Add the wet ingredients and mix well. Pat into several small baking dishes, so your blocks are approximately 2″ thick (this way they can fit into suit feeders).
If you plan to hang the flock block treat in your chicken pen, use a chopstick to make a hole large enough for twine or rope to fit though.
Bake for 30 minus, then cool completely. If you try to remove them from the pan while still warm they will fall apart. Once cool, run a knife around the inside rim of each pan and invert to remove the block. Serve to a flock of very happy girls.
Leftovers can be refrigerated or wrapped in foil and frozen then defrosted as needed.
Enjoy!!
I hope you have enjoyed reading this post and found it helpful or useful. If you have any questions please post them in the comments.
As always, thanks for reading. Till next time, keep on crowing!
When it comes to keeping backyard chickens, there are lots of decisions that a keeper needs to make. In addition to breeds, coops, whether or not to have a rooster, there is NPIP certification. In the post I will detail what NPIP Certification is and if it is something that you want to do for your flock.
What is NPIP Certification?
In short NPIP stands for National Poultry Improvement Plan. The NPIP is a voluntary program overseen by the United States of Agriculture (USDA) and managed by each state. The program monitors flocks and hatcheries for a variety of serious diseases that can devastate chicken populations, creating serious problems for the poultry industry or backyard chicken enthusiasts.
NPIP Certified hatcheries adhere to a set of established standards that ensure that the birds sold are free from diseases listed above. Testing involves taking blood samples from their flocks, swabs from their bird’s throats, adhering to sanitation and biosecurity procedures.
Hatcheries are required to test their flocks for the diseases, included in the certification set out by the USDA. Testing procedures can vary from state to state, most require testing for Avian Influenza (AI) and various forms of Salmonella. Typically, a cross selection of 300 birds will be tested. If a hatchery has less than 300 birds, than every single bird is then tested. Hatcheries must re-test annually to keep their certification up to date.
So what does this mean for the backyard flock owner?
As a perspective backyard chicken keeper looking to start or add to an existing flock, it is best to buy from a breeder that is NPIP Certified. Most hatcheries are certified, there are a few out there that are not. Some hatcheries will list on their webpage that they are NPIP Certified along with their certification number. If you do not see where they are NPIP certified just ask. Any hatchery that is NPIP certified will readily and freely prove to you that they are certified and will give your their NPIP certification number. If they are certified, you can be sure that you are buying from a reputable breeder or hatchery that holds animal husbandry to the highest standard.
As a backyard chicken keeper, if you plan on breeding, selling chicks or chickens it is a good idea to get your flock NPIP Certified. Not only are you ensured that your flock is healthy and selling healthy birds, but it offers you a hedge of protection should the birds you sold be reported sick. If there is an investigation into the origin of the birds sold, you will have a hedge of protection proving that your flock is NPIP Certified. That’s not to say that just because a source is NPIP Certified that birds cannot get sick. It will reveal in the event of an investigation that your flock is healthy and gets routine health inspections documented by your State Veterinarian.
It also gives you a peace of mind as well. For example, if there is an outbreak of AI in your area, a State Veterinarian will be dispatched to your home to test your birds for AI. Some feel that registering your flock and having them NPIP Certified relinquishes too much control to “Big Brother”. This is where the individual keeper’s preference comes into play. I personally have my flock NPIP Certified. Not only do I find it comforting that should AI be detected in my area, the USDA would be on it testing my birds. But if I sell any chicks or adult laying hens, I am confident that I am selling healthy birds and have the certification to back it up.
How does an owner certify their flock?
If you decide that NPIP certification is something that you want to do, getting them certified is very easy. Simply look up your State Veterinarian on the web or in the phone book and give them a call. Simply tell them that you are a backyard chicken keeper and that you want to have your flock NPIP certified.
At that time your information will be recorded, and you will get a call from a USDA agent in a few days to schedule a testing date. If you have a large flock, say 50 birds or more, plan on taking the day off work to have your flock certified. The agents will literally test every one of your birds individually.
They will take a small sample of blood and swab their throats. You as the keeper will be responsible for retrieving each bird, bringing them to the inspectors, and keeping track of who has been tested. Once tested each bird will be issued an ankle bracelet with a number on it, each number is specific to each bird and is logged into a computer. This number is their state ID. Should you need to call the State Veterinarian at a later date about a bird you will need to reference the number on their ankle bracelet.
This is another perk of having your flock NPIP Certified. If you have any questions about health or other illness related questions, you have someone to call. Many local Vets will not see “livestock” in their office. They may be able to answer some general questions but as for advising you in detail they may be limited. The State Veterinarian will know how to answer or direct your questions relating to your flock to qualified sources.
In my early days, I called my local State Vet several time to clarity issues or find treatment direction for basic illness. They were an amazing resource that I readily used. If you call with a suspicious illness such as symptoms of AI, an inspector will be dispatched to your property to test your birds. If you have suspicious deaths (you do not know the cause of death) they will conduct a necropsy or an animal autopsy on the deceased birds to determine what took the animals life. It will then be determined if this is something to be concerned about in relation to the rest of your flock. They are an immense source of information and guidance if you find yourself in a situation where you need expert advice or help.
How much does it cost to get your flock NPIP Certified?
The final aspect the of NPIP Certification that I will touch on is how much it costs. The cost depends on your state, each state will have different rates and procedures of how they go about conducting a NPIP certification. In my state of Tennessee, our State Vet charged $25 for an inspection and certification. It is in the best interest of the state that keepers certify their flocks, so they try to make it simple and affordable.
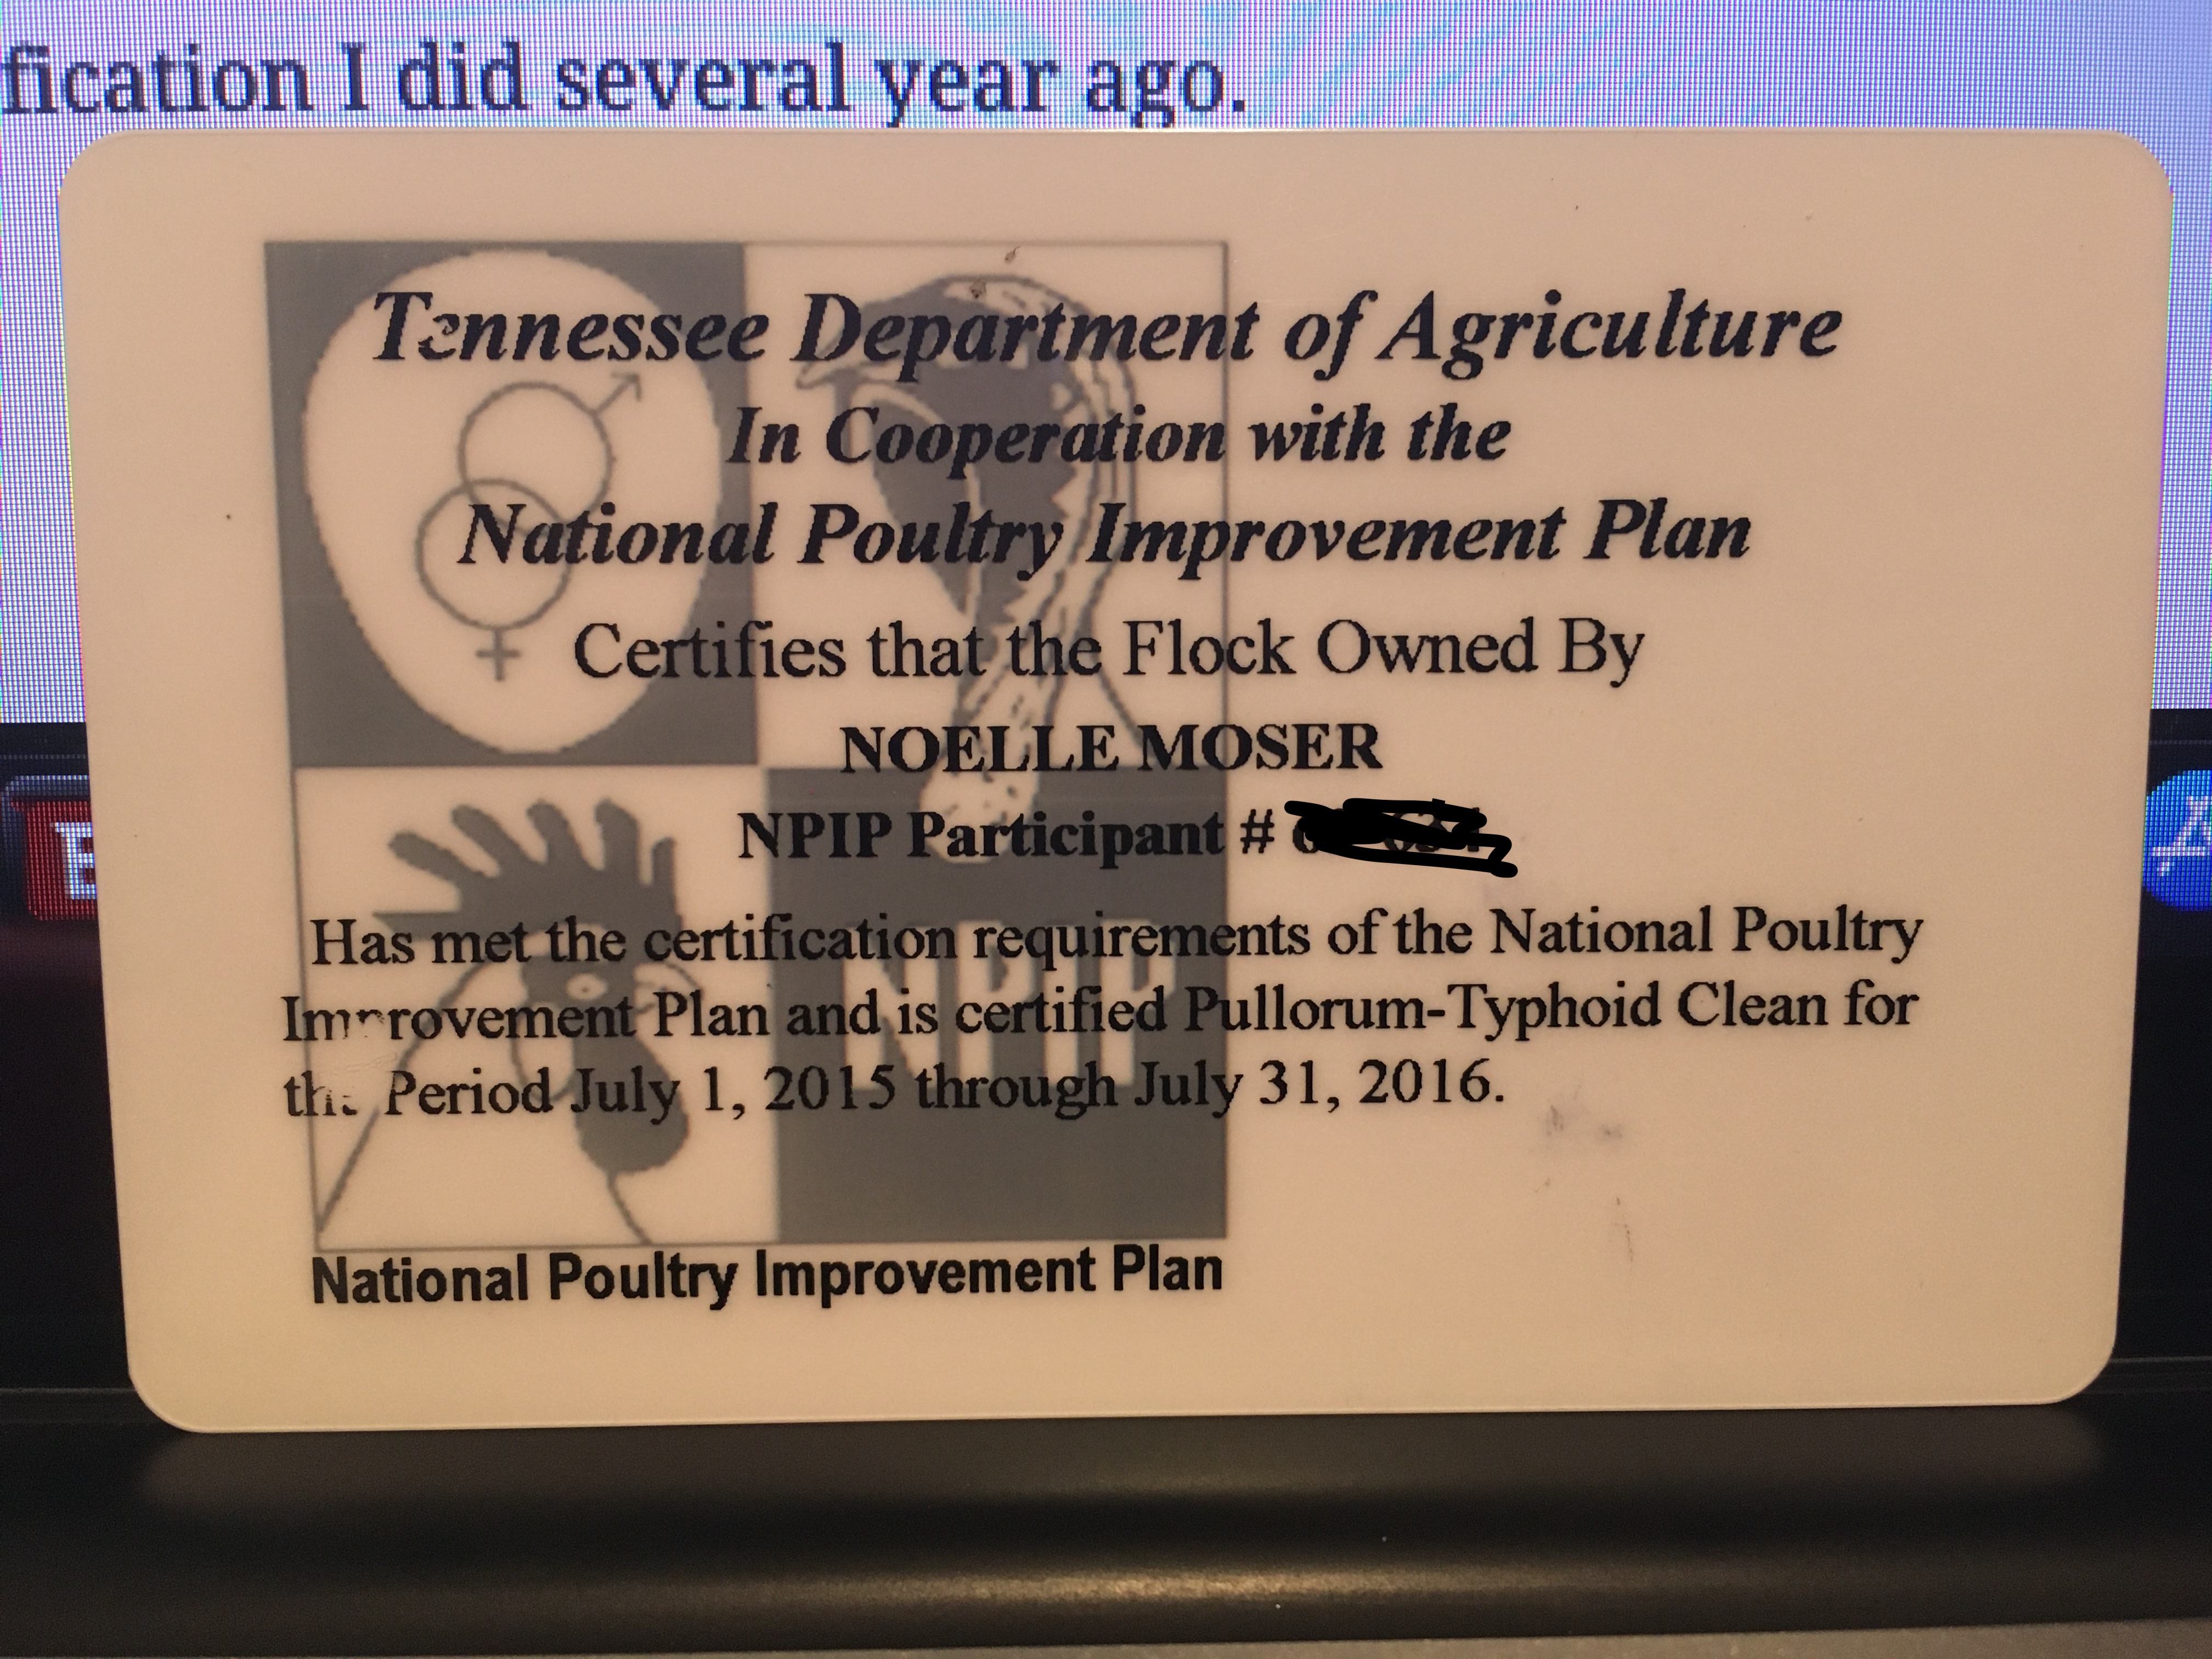
Each year or every other year depending on your state, your flock will be up for renewal. Each year the flock owner is required to pay the nominal fee to renew their NPIP Certificate. The fee in my case was rendered at time of service directly the inspectors after they tested all my birds. Several days after the inspection takes place, you will receive a card in the mail with your issued NPIP Participant #. This is for your records or anytime you need to prove your NPIP status. Below is an old card that I received for a NPIP Certification several year ago.
I have never regretted getting my flock NPIP Certified. Although I am not an active breeder, I find value in knowing that my flock is healthy. I also found the NPIP certification process valuable in learning how to conduct my own health inspections on my birds. The most important aspect that I value from the NPIP process is the network of contacts. There is a peace of mind knowing that I am only a phone call away from people who are knowledgeable, should I need to tap into that resource.
I hope that this post has helped answer some question relating to NPIP Certification. If you have any questions, please feel free to leave me a comment. You can also drop me a line at kuntryklucker@gmail.com.
I am a published author, multi-disciplinary writer and blog contributor. If you like this blog, please visit some of my other sites.
This post is dedicated to the care and wellbeing of backyard laying hens. In the post, I will answer the following questions. What are oysters shells? What does it do for your hens? and why are they important?
But before we get into the specifics of oyster shells, I first need to discuss some of the basics of what your hens body goes though when she lays an egg.
One of the most common questions I get is, “do I need to have a rooster for hens to lay eggs?” The answer to that is No. Your hens will lay eggs in the absence of a rooster. If you want to populate your flock and hatch chicks on your farm, for that you will need a rooster. But that’s a post for another time. For now, we are just going to talk about how you hen lays eggs.
Each egg that your hen lays take about 24-26 hours to complete. There are 4 stages in the egg laying process that I will cover.
Stage 1: The Yolk Releases
A hen is born with all the egg yolk cells that she will lay throughout her life. Each yolk is contained within its own follicle. When the yolk is released from the follicle, it travels from the ovary to the oviduct, commonly known as the reproductive track. This entire journey this far only takes about 15 minutes.
Stage 2: The White forms
The formation of the egg white takes your hen 4+ hours to complete. As the yolk leaves the ovary and travels through the oviduct, it can be fertilized by a rooster. An unfertilized egg is known as a blastodisc,a fertilized egg is known as a blastoderm. If you do not have any roosters, the blastodisc will continue its progress in his absence. The yolk (now known as a blastodisc or blastoderm) travels through the magnum and the isthmus sections of the oviduct. This is where most of the albumen (egg white) forms around the yolk, the thin outer shell membrane holding everything loosely together. When you break open an egg you will notice white spiral strands connected to the yolk. These spindles are called chalaza and attach the yolk to the shell. At this point the blastodisc resembles an egg missing the outer shell.
Stage 3: The Eggshell
The blastodisc (egg) receives the shell in the uterus via a shell gland. The shell takes about 20 hours to form and another hour or more for the pigment or color to be applied to the outer shell. It is this phase of egg development that requires calcium from your hen’s body. If she does not have access to calcium through her feed or supplemented in oyster shells, her body takes this critical nutrition from her bones. Over time, the depletion of calcium from the hen’s body weakens her bones leading to injury. This is why making oyster shells available to you hens is very important. Most feeds come “enriched” with oyster shells, but this does not meet all the calcium requirements needed by your laying hens.
State 4: The Nest Box
Your hens lay eggs through their cloaca (the vent). Eggs exit through the same vent used for everything a chicken excretes. Tissues of the uterus expands with the egg until the entire egg passes through the vent. During the act of laying the egg, a bloom layer is applied to the shell to protect the egg and keep it clean. This bloom keeps bacteria from entering the egg which can spoil the yolk and contents inside the egg. It is for this reason; we refrigerate eggs after washing them. Once the bloom is washed off the egg, the egg will begin spoiling. The outer layer of protection is removed, no long protecting the egg from bacteria.
Unwashed eggs can remain at room temperature for several weeks before they begin to break down. This is why eggs bought at the grocery store are sold in the refrigerated sections and kept cold. Farm fresh eggs only need to be washed prior to use. Otherwise, your farm fresh eggs can be stored at room temperature, only needing refrigeration if you will not use them for an extended period of time.
Now that you have a better understanding about you hens’ body and the process of laying eggs, let’s discuss and answer some common questions about oyster shells.
What are Oyster Shells?
Oyster shells are pretty much what they sound like, ground up oyster shells. They are an excellent source of calcium, a much-needed supplement for your hens. Most chicken feed contains some oyster shell in the feed. However, it is quickly absorbed by your hens, not longing enough for them to gain the full benefit. Don’t get me wrong, its better than nothing, but your hens are not getting what they need for their daily calcium requirements. Your hens require a long release calcium source which is not in all chicken feed brands.
The only feed brand that contains a long release oyster shell in the feed is Purina Poultry Feed. Purina can be found at Tractor Supply and many other farm and feed stores. If you cannot find Purina, don’t panic. You can still use the feed that you currently purchase, just make oyster shells available to your girls in addition to the feed.
I have found that a small dish attached to the side of their pen filled with oyster shell does the trick. You don’t need to worry about them going through it like scratch or even feed. A hen will only consume what she needs. Her body will tell her when she needs extra calcium and how much she needs to lay her eggs. Each hen’s body is different, some may consume more than others. Don’t worry is if one hen consumes a lot while another hen consumes very little, their bodies know what their supplement needs are.
What do Oyster Shells do for your hens?
Oyster Shells supply your girls with the calcium that they need to form strong eggshells. Most chicken feed brands have some oyster shell in the feed but not enough. Since hens do the majority of the hard work of making eggs shells during the night, they need a supplement that will provide calcium during this time. The Oyster Shell that is contained in the feed is only accessible to the hen while she is eating. Oyster Shells that are supplied in addition to the feed are larger pieces. Sitting in her crop during the night, they slowly grind down, supplying the hen with calcium as she sleeps. It is in this way that your hens are able to make strong eggshells, reducing the stress on her body and depleting her calcium resources.
Why are Oyster Shells important?
Oyster shells are important because they provide a calcium source that is required to make eggshells. If a hen does not have adequate calcium resources for her body to produce the eggshell, it will weaken her bone structure. An eggshell is made almost entirely of calcium, in the absence of a calcium source her body will take the needed resource from her bones. Over time this can lead to bone issues with hens who are not getting enough calcium, in particular the leg bones. Often time the weakened bones lead to painful injury, even breaking during normal activity. For the optimal health of your hens, providing Oyster Shells aids in their overall health and longevity.
After providing supplemental calcium to you girls, you will notice that the eggs she lays will be harder and have firmer shells. This is also beneficial to your hens; eggs are less likely to break during the process of laying. This is another risk to your hen. If an egg breaks inside a hen during the process of laying a soft-shelled egg, it can cause internal injury. Broken eggshells are sharp and can cut the delicate skin of her tract and vent. A broken shell during laying can often lead to infection, pain and discomfort. Recovery is not always possible depending on where and how the egg broke inside of her. To prevent this and other unwanted issues with egg laying, simply supply oyster shells to your laying hens.
I hope that you have found this post helpful. Keeping backyard chickens is a fun and rewarding endeavor. Like us, hens need a little help in supplementing their diet. They can’t get everything they need from their feed, but that’s an easy fix. Taking proper dietary care of your girls will lend to a long and happy life for your special ladies.
If you have any questions, please feel free to post them in the comments. You can also drop me a line at kuntryklucker@gmail.com.
I am a published author, multi-disciplinary writer and blog contributor. If you like this blog, please visit some of my other sites.
Raising chickens is a fun and affordable hobby. Its called backyard chickens for a reason, this implies that one wants to raise a mini flock of chickens rather than a large operation. Now, don’t get me wrong, chicken math is a force of nature not to be taken lightly. But for the average backyard chicken enthusiast, keeping your flock at a manageable number is relatively easy. Its just takes the persistent enforcement of chicken birth control (aka. collecting eggs) and obtaining only a few number of chicks from reliable hatcheries. You can also ask one of your backyard chicken friends to hatch you off a small starter flock. Other than that, keeping a small flock of backyard chickens is not inherently difficult.
Chickens are very simple creatures, they do not demand a lot from their owners. Since chickens are very social animals they have plenty of company among their flock members. The needs of a chicken are simple. They need clean, fresh water daily. It does not need to be filtered or bottled but it does need to be fresh and clean daily. Simply filling up a clean water container every morning when letting the flock out of the coop is all this entails. They also need fresh and dry feed daily. It is always best to keep your feed in galvanized trash cans if you plan on keeping it outside. Not only will this keep your feed uncontaminated (from rats, coons and other wildlife) it will ensure that the feed will remain dry and thus not spoil. Chicken feed comes in large 25 to 50 pound bags, you will have enough feed to last a while depending on the size of your flock. As you can see in the image below, I keep two galvanized trash cans outside of the pen, this is were I store the feed for the girls. Be warned, your chickens will very quickly learn to associate the sound of the lids being removed from the cans as a makeshift dinner bell. My girls get very excited when they hear the all too familiar”clank” of the trash cans lids. I am suddenly surrounded by a group of girls eagerly anticipating its contents.
Next, you will need a habitat. This is where a lot of chicken owners can be creative and inventive. You can do whatever you want to make your backyard chickens home personable to you, just make sure that is has a few very important qualities.
Your chickens home needs to be large enough to accommodate the size of your birds as well as your flock. A lot of coop descriptions will say that “this coop will fit 2-4 standard size birds”. What does that mean? Well chickens come in two sizes, standard or large fowl and bantam or miniature chickens. If you have 6 standard size birds you need to make sure that you choose a coop that can fit 6-8 standard size birds. Choosing a coop that fits less than that will cause stress in the flock. If the birds do not have ample room and feel over crowded many problems can result. Over mating of the hens by the rooster, cannabolism caused by pecking of flock mates, and of course illness due to the birds being under stress. So when choosing a coop, first know the size of your birds and based on the dimensions of the coop how many can fit comfortably.
Your chickens home needs to be secure. This means not only does it need latches on the door to keep predators out, the coop also needs to have a pen if you choose to keep your girls in a pen vs free ranging. Most if not all coops bought in the stores usually come with an attached pen in its design. Make sure that the pen is enclosed with wire mesh that is galvanized with holes small enough to keep even the peskiest mouse out of your girls home.
Your coop must be easy to clean. Most coops are designed with a drawer that can be pulled out from under the roosts to clean the dropping off from the previous night. Many chicken owner put pine shaving on this drawer to absorb moisture from the dropping and simply with gloves or a small hand shovel remove the dropping like you would clean a litter box. Either method is fine, just make sure the you clean the dropping out daily to keep flies and illness at bay.
your coop must be draft free. When looking for or constructing a coop make sure that the coop has both ample ventilation while at the same time being draft free. It sounds like a double edged sword, I know. What this basically means is leave room at the top for air to escape while also protecting the birds from fridgid winter wind, rains, and other elements. Your coop does not need to be warm or heated. In fact, heat lamps are the number one cause of coop fires. Not only will a heat lamp fire kill your birds, coop fires can also damage other structures on your property including your home. Never use Heat lamps in coops, they are just too dangerous. Instead focus on keeping your chicken coop clean and dry. Chickens do not need heat, they come with down jackets factory installed and are well able to regulate their own body temperature given the right conditions, that being a coop that is clean, dry, and draft free. As long as your birds remain dry and protected from the wind and rain they will do just fine when it comes to surviving winter.
The design of the coop. The design of chicken coops are endless. I have seen everything from little cottages to barn style chicken coops. Quite honestly, I think that picking out the perfect chicken coop is almost as fun as picking out what breed or breeds you want to raise. You don’t have to buy your coop prefab you can get plans off the internet and make your own from raw materials. Either way its up to you. We have done both. We made our first coop and pen from scratch. It was fun and we really enjoyed the process. The additional coops I bought as prefab kits that I put together.Both have advantages and disadvantages. The advantage of making your own coop is that you can make it as big as you want, the disadvantage is that it takes a while to construct and can be expensive. The advantage of prefab kit coops is that they come already made all you have to do is screw them together and you have a coop in about 45 minutes. The disadvantage is that you are limited by the designs that are available. Personally I like the prefab coops better. They are made with quality materials and are easy to maintain and clean. I cannot keep large numbers of birds in them so I usually have to get several but I don’t mind having to take care of more than one coop. Coop chores are so simple, more than one coop really does not make that much more work.
Here are a few pics of my coops. I currently have three and have plans to purchase one more. The first one is The Kuntry Klucker, this is the coop that hubby and I made from scratch. It took about 4 months and roughly $1000 from start to finish. This will house up to 20 standard size birds. The most I have ever had in this coop is 17. Even then they still had plenty of room.
Next is Roy’s Roost, it is a prefab coop. It will house two standard size birds or 3 bantom size birds. I bough it for Roy as his hospital coop when he was sick. Since his passing its purpose still remains as my hospital coop. When I have a girl that needs separated from the flock due to injury or illness I place her in this coop. I can better monitor her eating and drinking habits as well as administer medication if needed. The patient will remain here till she can be returned to the flock.
This last coop is Betsy’s Bliss. I bought this coop to serve as a broody coop. This is where I will house a broody momma as she sits on her nest. This allows the mamma hen some privacy while still allowing her to eat, drink, and dust bathe normally. When the chicks hatch both mamma and chicks are protected from predators and curious flock mates. It will house one standard size bird and a few chicks or two bantam size chickens.
I have placed these two smaller kit coops in my spice garden. When not in use they serve a decorative accents in my garden. I purchased these two coops about two years ago. They have survived the elements and mother nature very well. In the fall I put a coat of wood protectant on them to protect them from the harsh elements of winter. If we have heavy snow or ice in the forecast I will put 6×8 tarps over the top of them just to give them a bit of extra protection. Other than their size, I really do not experience any different in their function or durability. I am very pleased with these kit coops and will plan on purchasing more as my needs arise.
Other than the basic needs of food, water, and housing chickens are very simple to raise. The only other thing I can suggest is to have a chicken first aid kit on hand. I have built up my first aid kit slowly over the years. Basically you will need items to treat a chicken that may have injuries or illness. When taken care of properly chickens do not encounter much illness. The most complicated condition I have ever had to deal with was when several of my girls coming down with Bumble foot. I have a blog post on Bumble foot for those who wish to learn how to affectively and simply treat this condition.
Your first aid kit should include basic items such as: epsom salts, rubbing alcohol, peroxide, cotton balls, triple antibiotic cream, salve, and vet wrap. Vet wrap is very handy because unlike a band-aid it will stick to itself making it ideal for animal use. I cannot tell you how many feet of vet wrap I have used throughout my years as a backyard chicken keeper.
My girls have never needed any antibiotic treatment. I am usually able to treat minor ailment with natural methods such as apple cider vinegar in the water, electrolytes, and chicken rx herbal drops. Should my girls ever develop an infection that needs antibiotic I would consult a vet to assist me. In my experience, given proper care my girls have never developed any conditions that I could not treat at home.
As for the cost of keeping backyard chickens, once you have their habitat purchased or constructed they are very affordable to maintain. My 10 girls will go through a 50 pound of feed in about a month. I find compared to a medium size dog chickens are much cheaper to keep. Additionally, for all your work and dedication they will give you something in return, a beautiful farm fresh egg. In my book a pet that makes me breakfast is worth its weight in gold.
Thanks for stopping by and spending time with the girls and I. As always if you have any questions please feel free to post in the comments. I will do my best to get back to you as soon as I can.
Thanks for visiting, the girls and I will see you soon.
Hey there again, the girls and I have a winter’s tale to share.
Last year we had the most snow that I have ever seen here in these hills in about 10 or so years. We were battered with two ice storms then several snow storms all within a span of a few weeks. When it was all said and done, we had an accumulation of 12 inches of snow on the ground. Now most people know that farm animals are all weather, not much seems to bother them. Well for my pampered poultry, this was not the case. You see, I found out that my girls hate snow. They are scared to death of it. The white lava might as well be an enemy that needs immediate extermination. I make sure the they are protected from predators in both their coop and pen. But snow, I can do nothing about. So, after a few days of being cooped up (quite literally), I decided to try to get them out of their coop and pen for some fresh air. The result was as funny as can be.
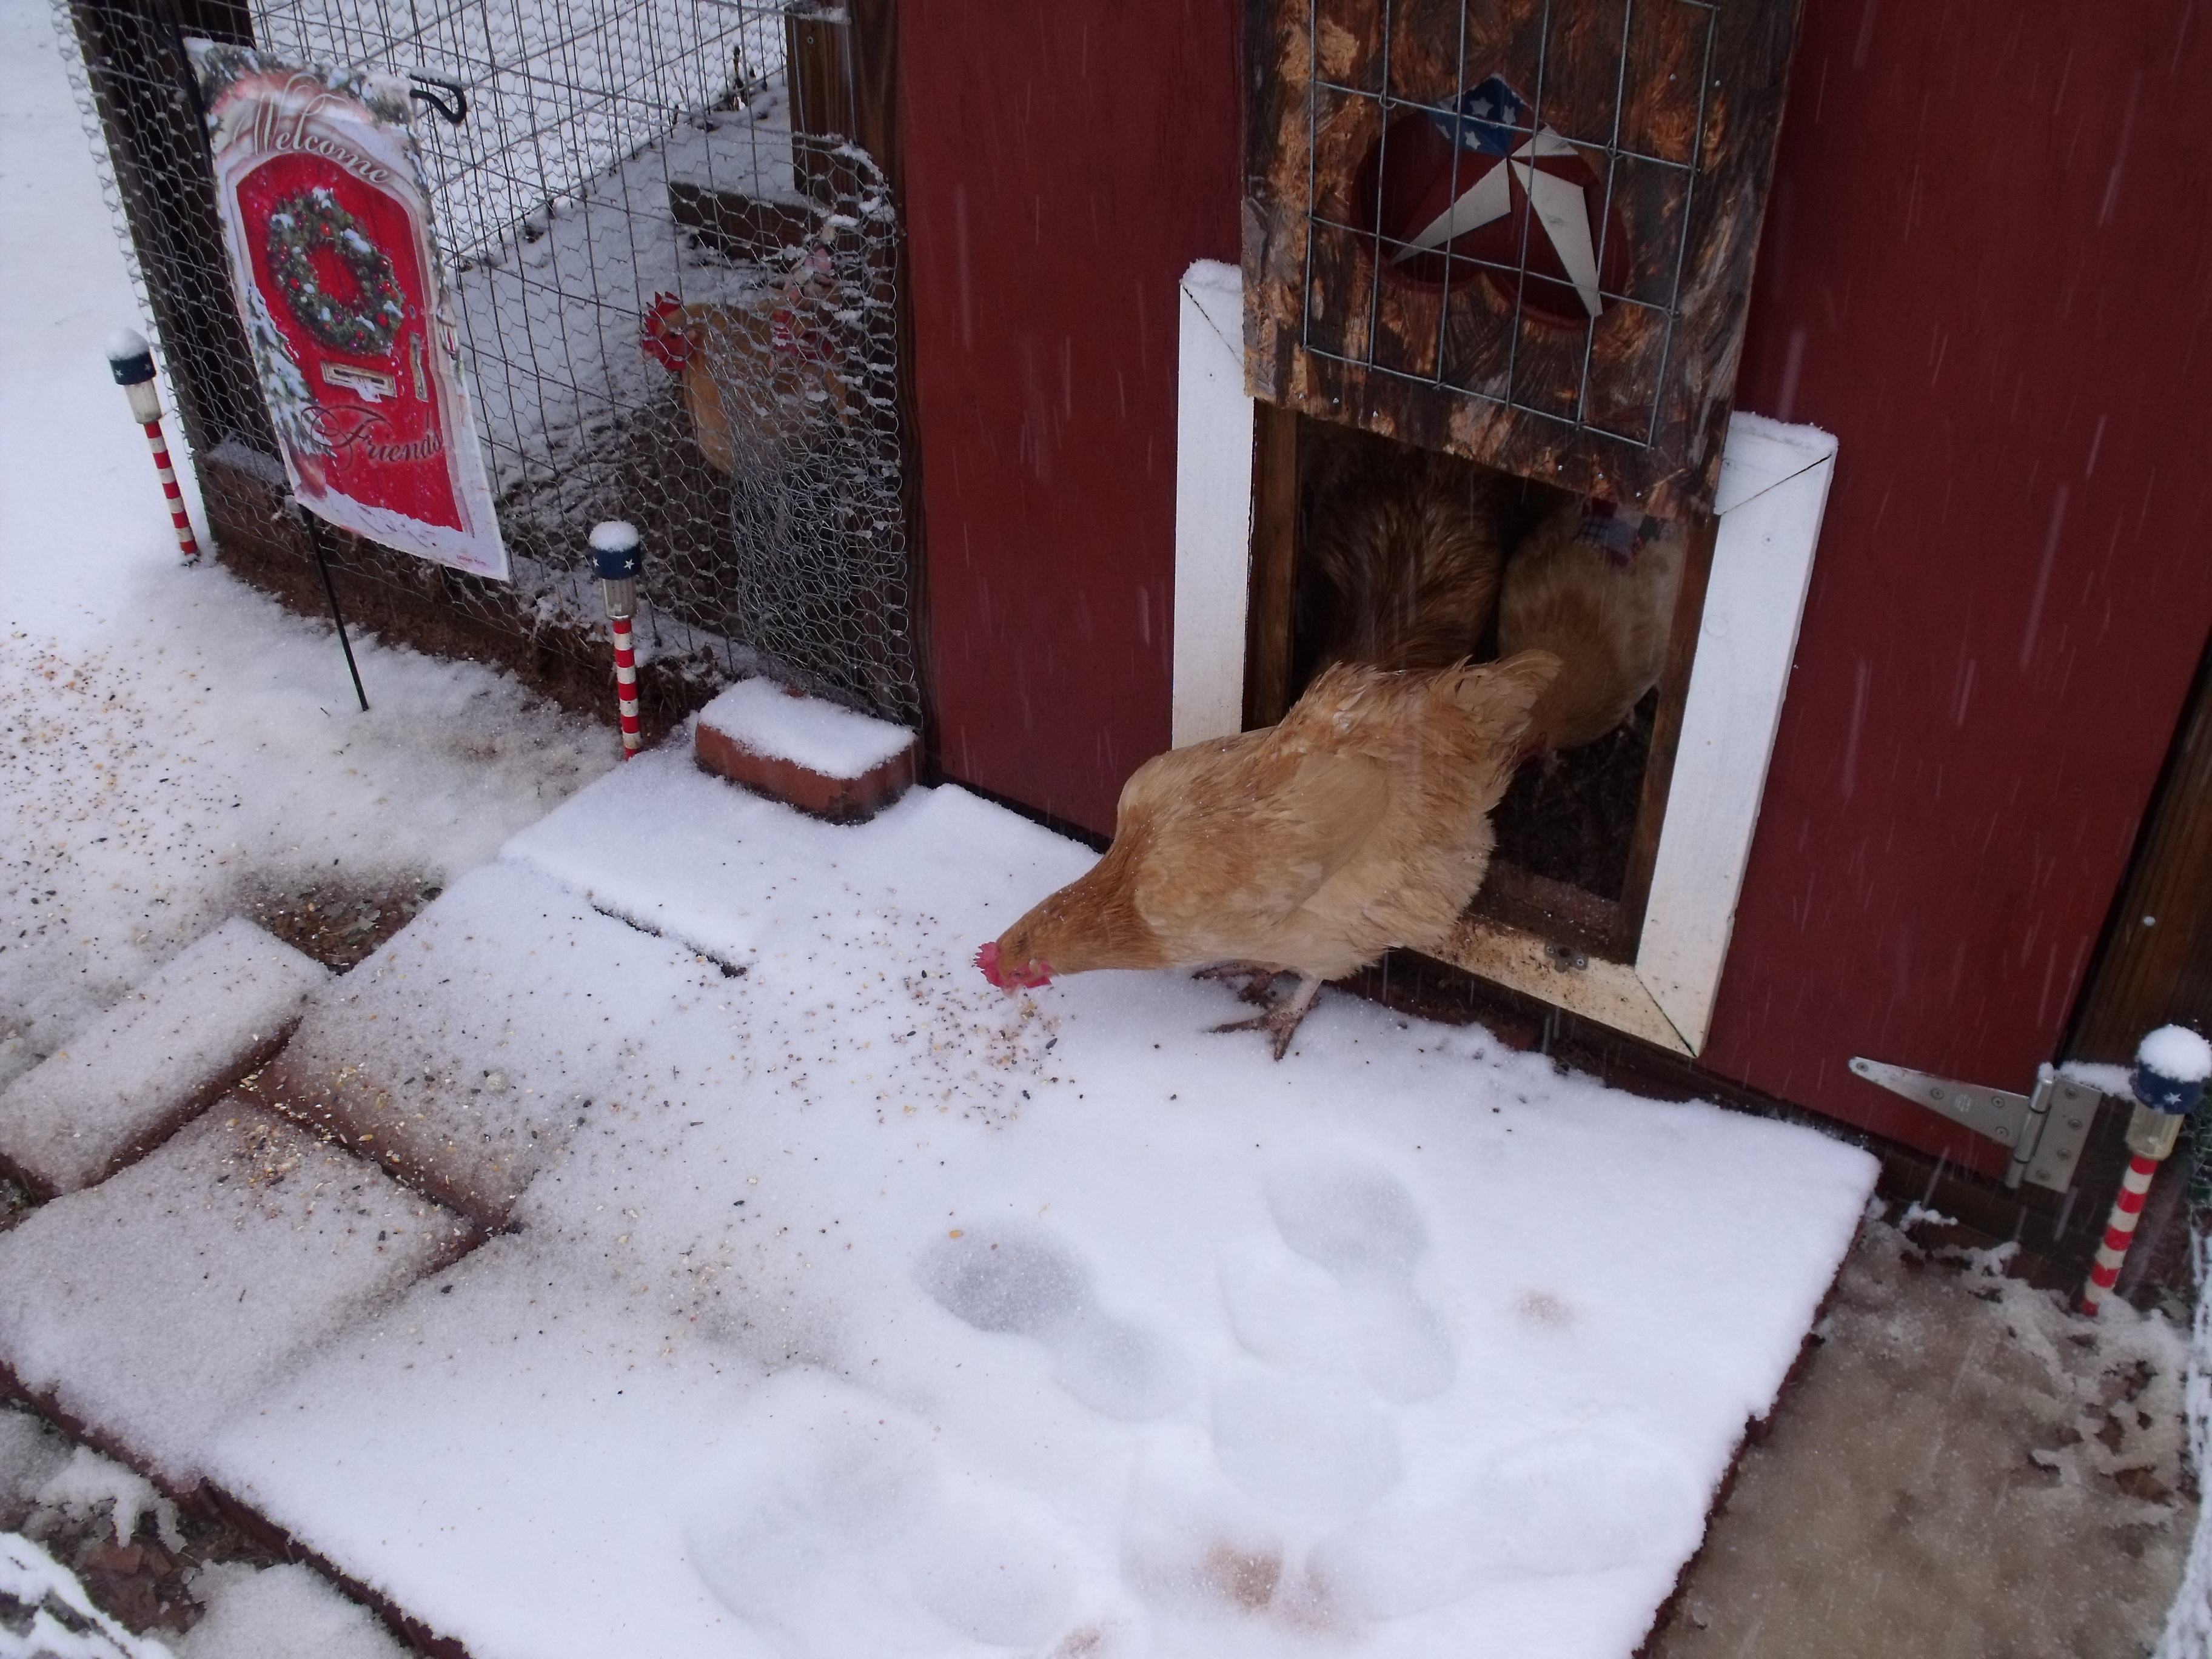
First, after I plowed my way to the coop, I had to convince the girls that the snow was not going to kill them. Upon getting to the coop I found this, Miss Betsy trying to get as far away from the nemesis white stuff as possible. She would not even put her pampered pedies on the pen floor, which was dry except for the parts near the edges where the snow had drifted in.
Next, I had to lure them out with their favorite treat. Scratch! Chicken scratch is a treat from the gods, they love this stuff. They practically fall over each other when I come out the the coop with a cup full of their choice eats.
Miss Bossy was our brave taker, she cautiously approached her favorite treat laying in the dreaded white stuff. As the others watched carefully to make sure that it was not going to kill her. Eventually they too ever so cautiously started to approach.
After some time the rest of the gang got the idea that the white stuff was not a complete threat. The power of the scratch was just too strong. The girls started coming out one by one. They are still not too sure about the stuff, so for a while they pecked at it and scratched at it, finally deeming it safe to take the plunge.
The sole brave taker again was Miss Bossy who took the plunge, wading in snow that covered her legs. If you have ever seen a chicken attempt to walk in deep snow, it is quite a funny sight. So while the girls are taking the snow in stride, Roy on the other hand is thoroughly convinced that he needs to somehow exterminate the white stuff. Since he is terrified of the white stuff, he decided that a decent growing was in order.
For the first day, this was as brave as Roy got. He stood in the door way and restlessly crowed at the white stuff. After, he finally decided that his efforts were to no avail, finally accepting defeat. He stayed in the pen the rest of the day sulking. After all tomorrow is a new day, right? Well…
More snow fell the following night, the girls decided they had enough of the white stuff and refused to come out of the pen. So I decided to plow paths for them to walk on in the backyard. Apparently they do not like the feel of the snow on their feet. Come to think about it, I don’t think I would like it either. So with my snow shovel in hand, I cleared several paths for the girls to walk on. I had no idea at the time, this turned out to be the funniest thing ever.
You see, once I cleaned them a few paths, they would only go as far as the path would take them. In other words, when the path ends the chickens stopped. On the heels of that, I plowed them a maze in the backyard. It was the funniest thing ever, I still regret not getting a video of the girls working the backyard maze. However, I did snap a few pics that day, below are pics of the girls trying to figure out how to navigate the maze in the backyard.
I will have to say they failed miserably. They could not understand why they could not get back to the coop once they got far into the maze. They would take a path and get stuck because it lead nowhere. Since they refused to walk in the snow, the flock botted necked at a dead end. After a while to help them out, I put a trail of scratch on the paths that lead back to the coop. The flock readily accepted the offer. It event was an educational experiment in testing the my flockss ability to learn, remember, and problem solve.
We will see what the rest of the winter brings. If we get more snow I will be prepared again to plow them a maze to solve. When presented with fresh snow some people build snowmen, others conduct experiments on the mental capacities of a flock of backyard chickens. However, we could not resist the urge to build a snowman.
Thanks for reading. We wish everyone an Merry Kluckmas and an Egg-celent New Year.