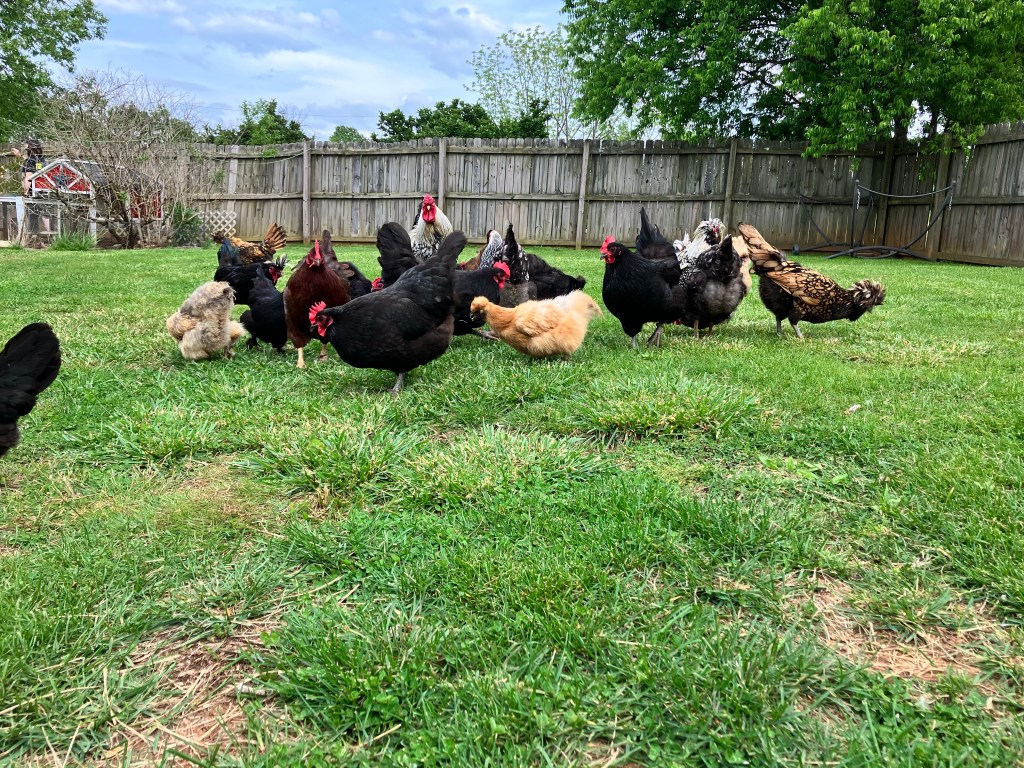
Snow covers the ground as flurries silently whisp through the air. The flock anxiously waits for me to open the coop door to the outdoors as the sun illuminates the land. Nature has intelligently equipped chickens to live outdoors and embrace the winter season. Winterizing a flock includes preparing the pen and coop for winter while allowing the flock access to fresh air and a few rays from the winter sun. Here are my five tips to free-range a flock in winter.
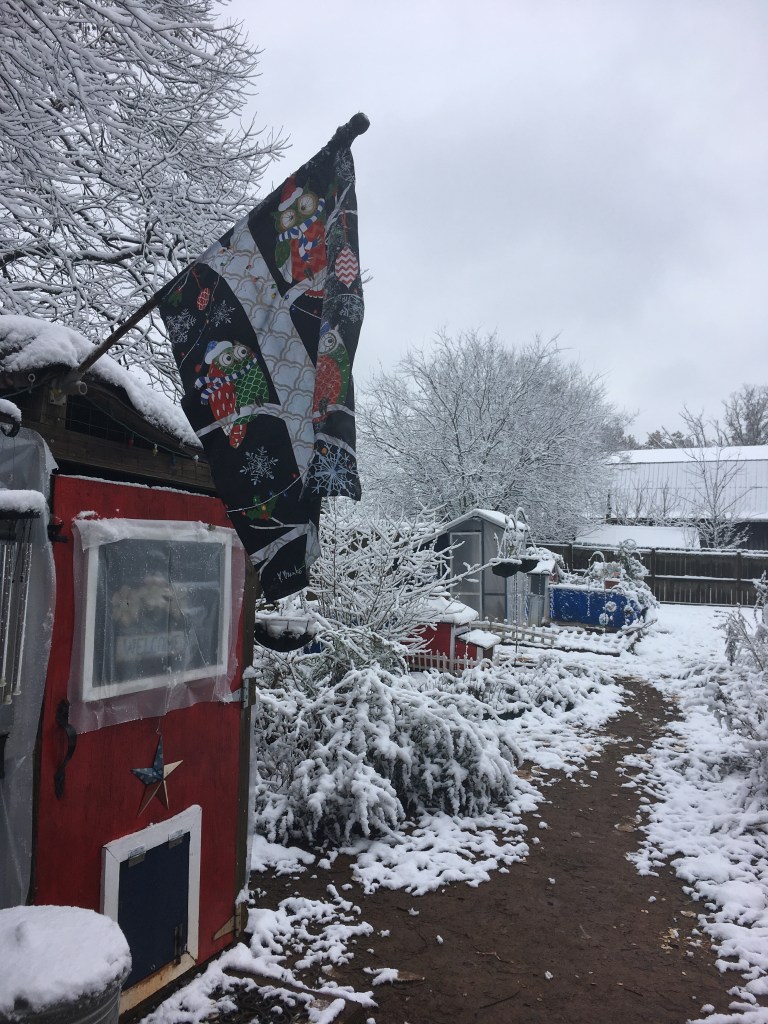
A Winterized Coop and Pen.
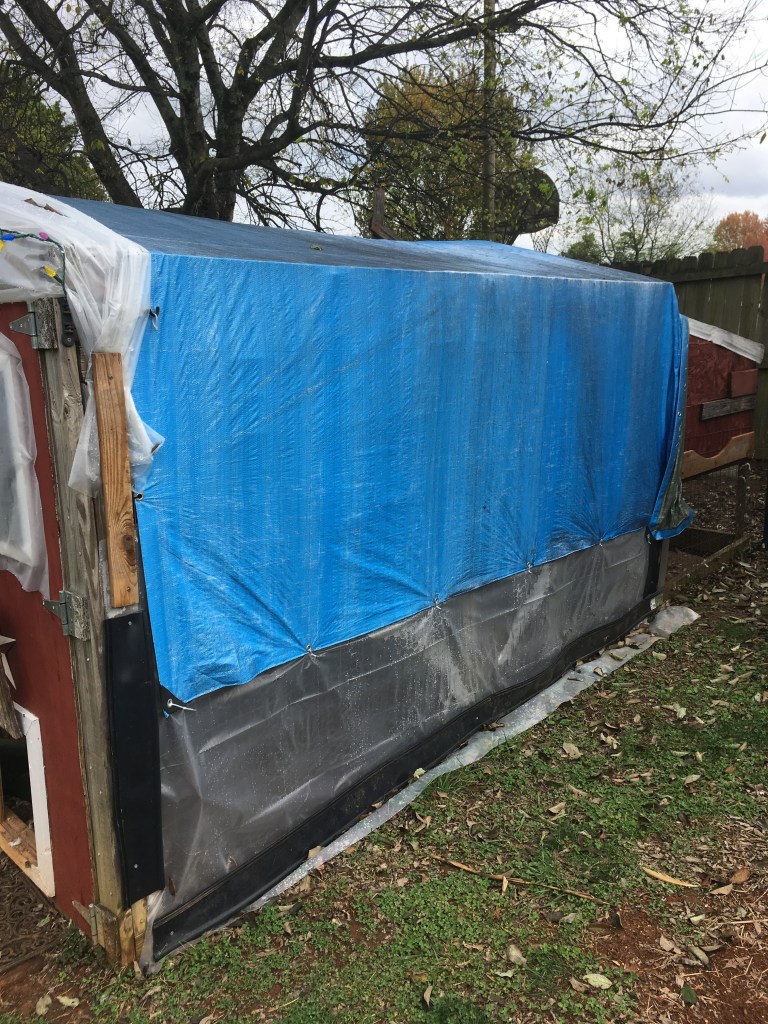
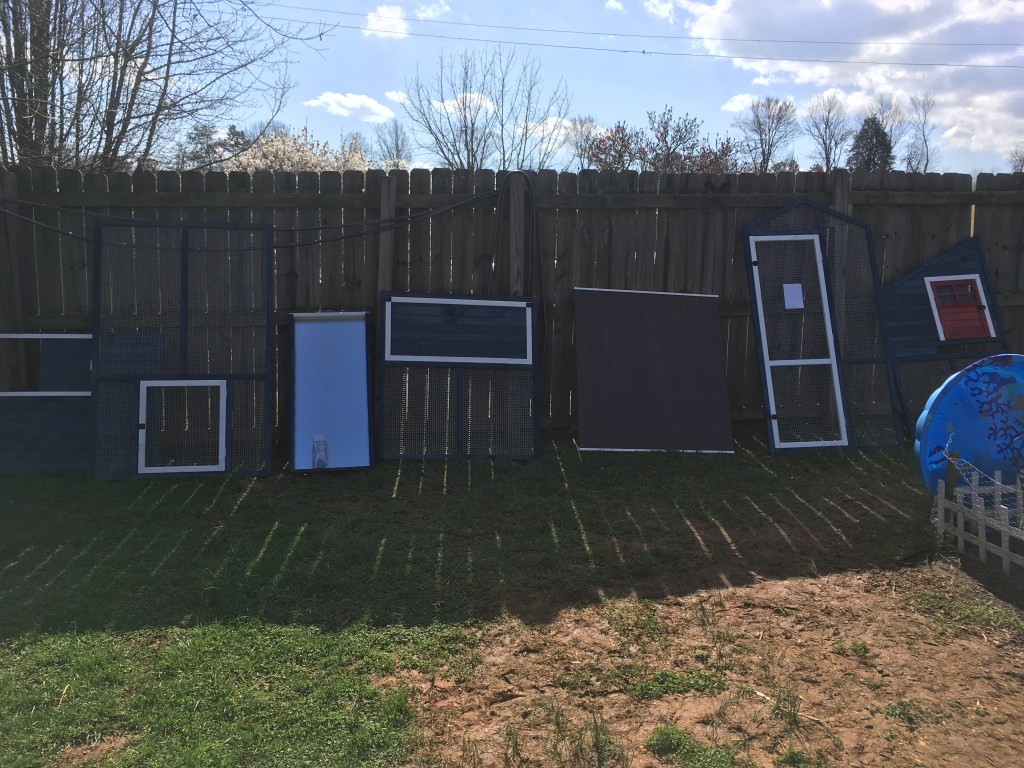
The Kuntry Klucker wrapped in plastic to keep the coop and pen clean and dry.
To successfully free-range a flock in winter, a winterized coop and pen are necessary. In addition to growing in new feathers, chickens will grow in winter down for the coming winter during the annual molt; the coats we put on when the temperature dips are the same coats the flock is wearing factory-installed. A backyard flock does not need artificial heat to survive the winter elements, just a draft-free, dry, and clean. A draft-free winterized coop allows the flock to gauge their comfort level, venturing outside and returning as necessary.
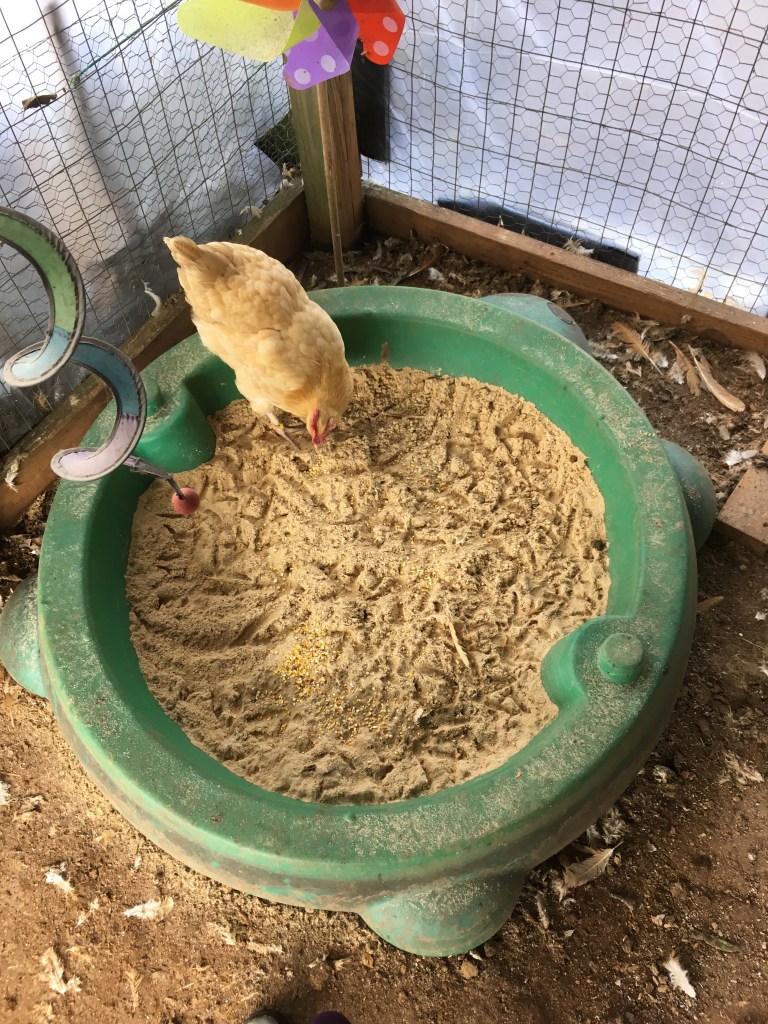
Access to a dust bath.
Buff Orpington Hens taking advantage of a prepared dust bath in The Kuntry Klucker pen.
Dust bathing is a natural instinctive behavior in chickens. Dust baths help to keep feathers clean and in good condition. During the winter, the ground covered with snow or wet limits access to natural dust bathing sites outside the coop. Providing a dust bath in a winterized pen allows the flock to continue their natural behaviors in the bleak winter. A mixture of peat moss, play sand, and wood ash is the perfect medium for a dust bath.
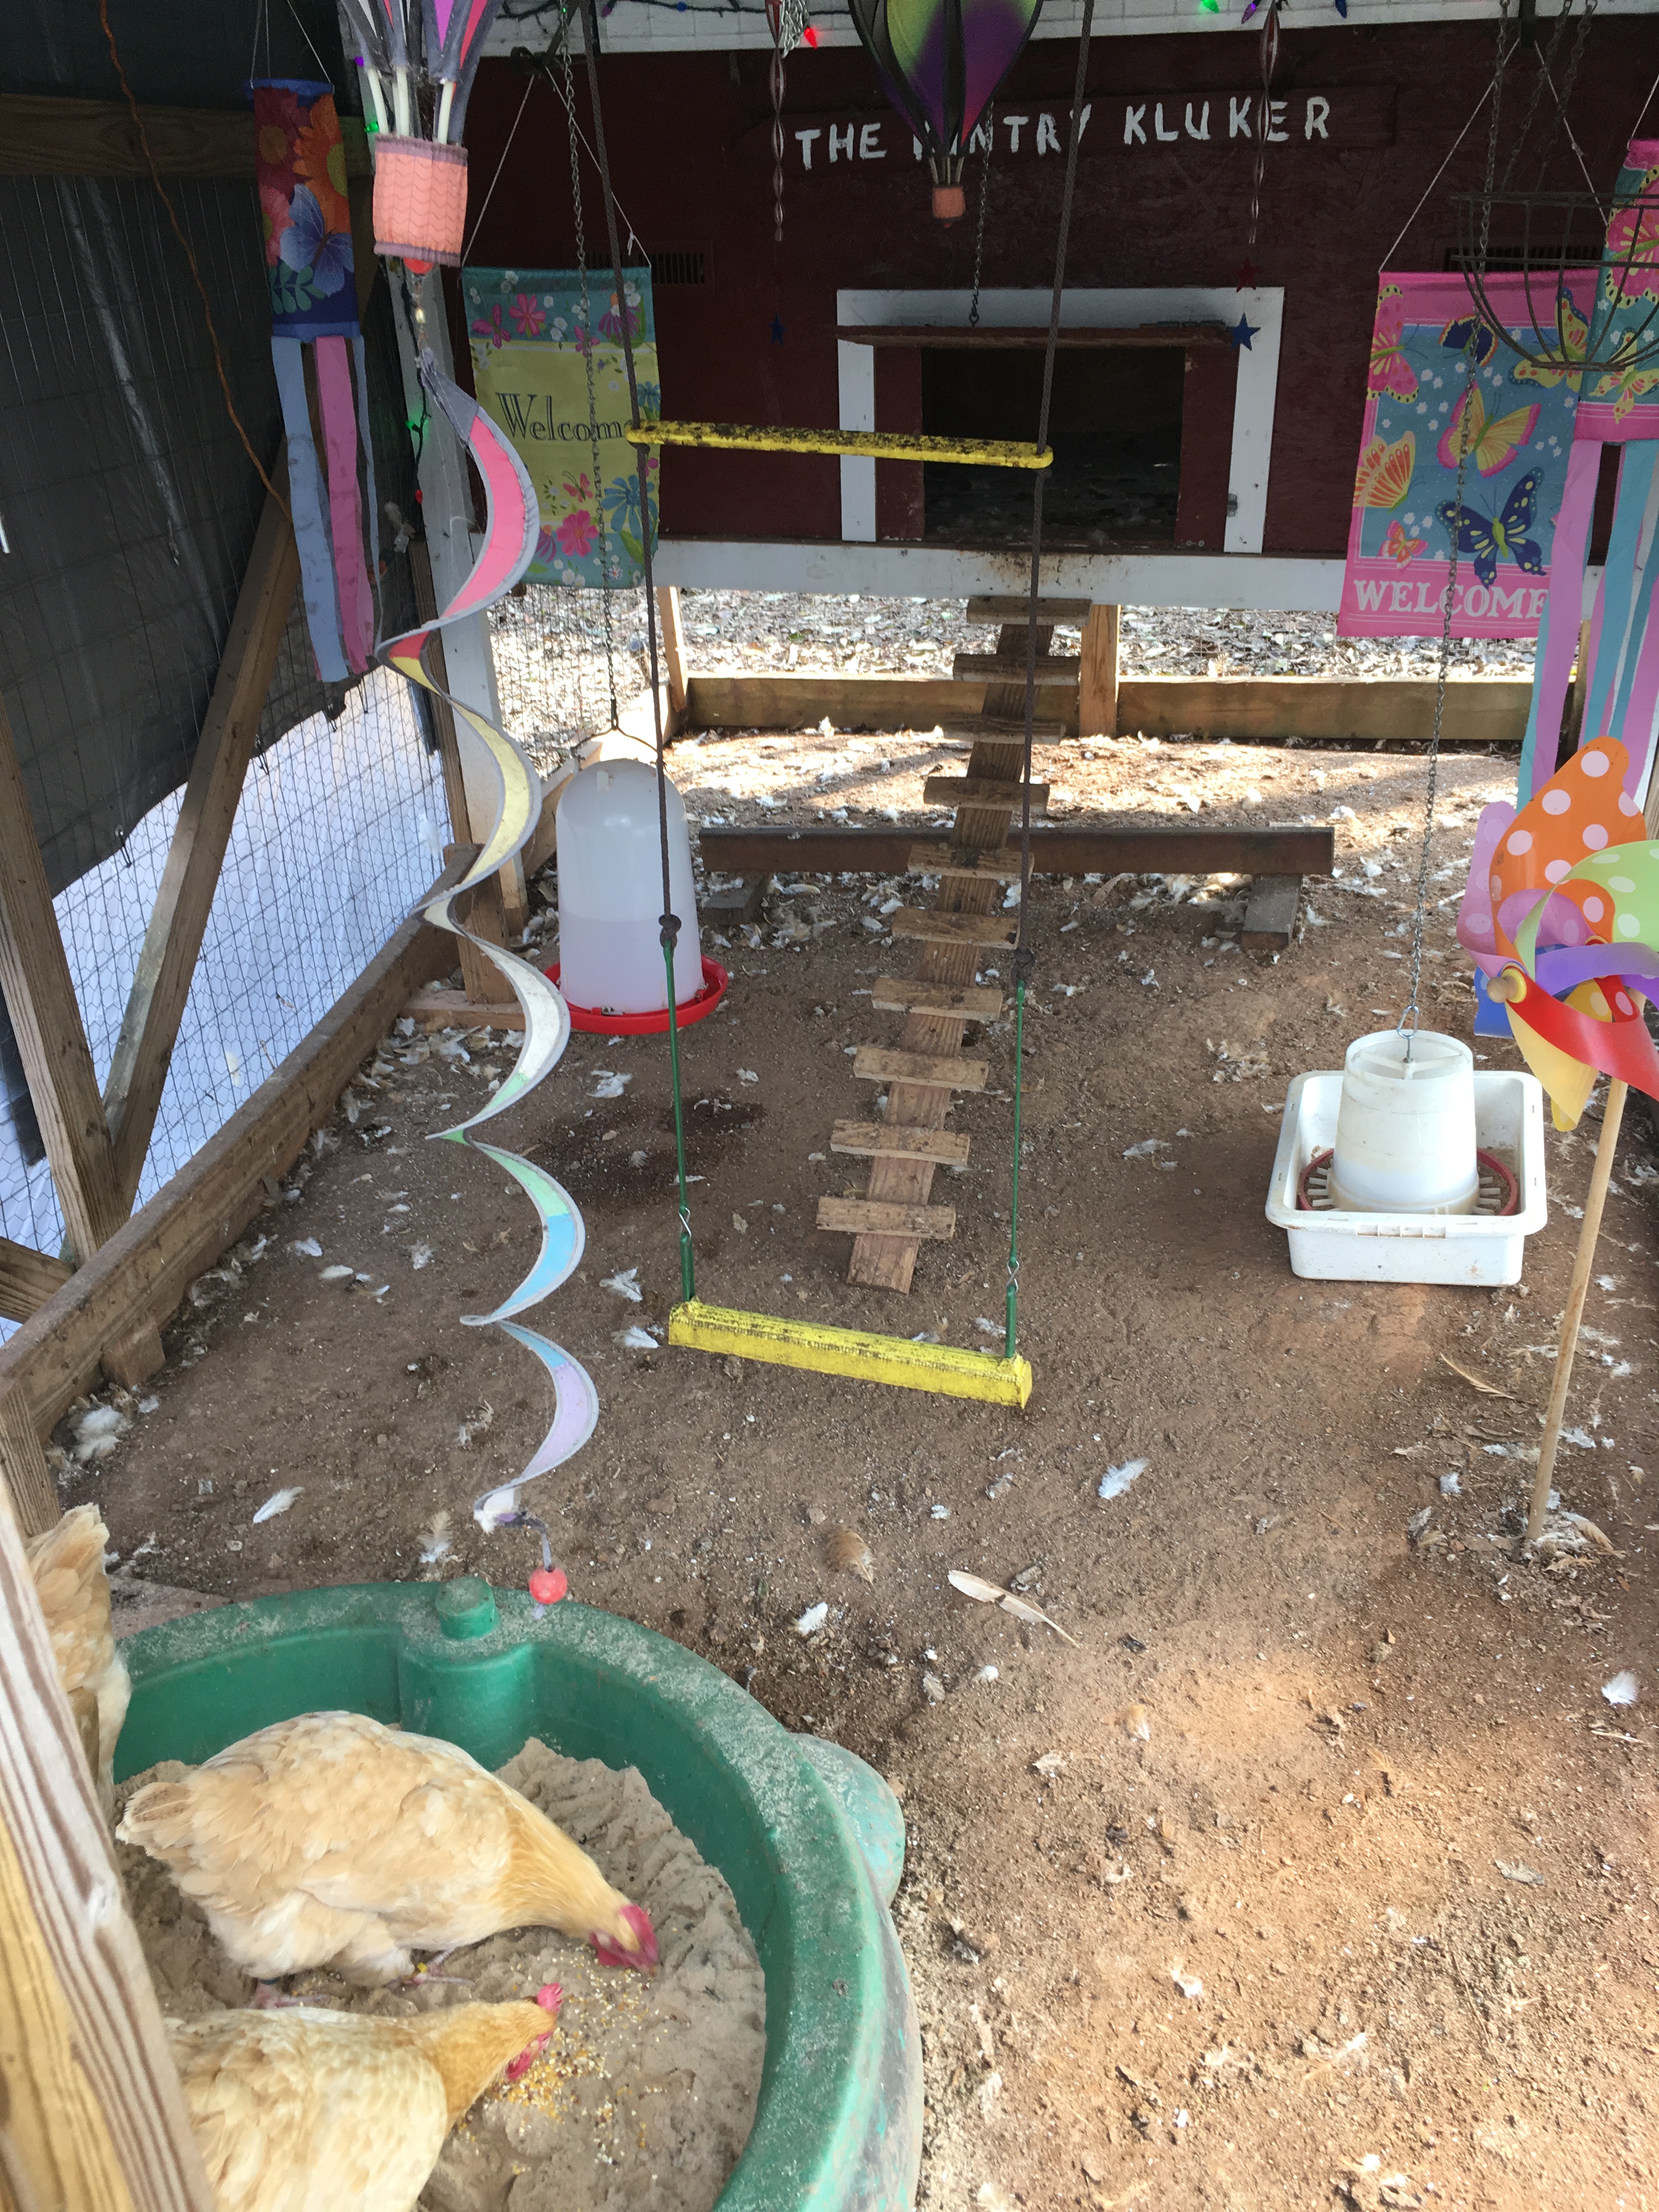
Boredom Busters.
The flock pecking at a pumpkin.Scratch in a peanut butter jar is perfect for a winter game.A flock block to keep the flock entertained on cold days.
During the winter, when snow covers the ground, the flock will appreciate boredom busters that will keep them entertained and engaged. Throwing some chicken scratch or corn on the ground will keep the flock entertained as they forage for the morsels. A flock block in the free-ranging area will help engage pecking instincts while snow covers the ground. Scratch placed in a plastic jar with holes will engage the flock with game play on cold winter days. Boredom busters keep the flock mentally engaged, promoting position behaviors that ease the winter blues.
Provide paths in deep snow for the flock to follow.
The flock following paths in the deep snow left by a winter storm.
Clearing paths in snow will allow the flock access to the outdoors. Chickens do not like snow and resist going outside if the snow is deep. Paths will encourage the flock to venture outside and natural behaviors. Scattering scratch or cracked corn on the paths will engage the flock in foraging behaviors that will keep the flock happy on the worst snow days.
Install Lighting in the Pen.
The Coop De Ville residents silhouetted by the glow of a red light in the coop.
During the short days of winter, the flock appreciates an illuminated pen. Placing a light in the pen will guide the free-ranging flock toward the coop as the sun sets. An illuminated pen will allow the flock to consume sufficient nutrients before roosting for a cold winter’s night. Laying hens will also produce eggs during winter in a well-light pen. Once the flock is locked up and secured, turn off the light to allow the flock adequate sleep.
I am a multi-disciplinary writer, blogger and web content creator. If you like this post, peck the subscribe button below.
As always, thanks for reading. If you have any questions, please post in the comments or drop me an email at kuntryklucker@gmail.com. I will get back to you as soon as possible.
The red glow of a LED bulb in The Coop De Ville bachelor pen.
As fall transitions to winter and temperatures begin to plummet, many backyard chicken keepers are looking for ways to overwinter their flocks and prepare for the anticipated cold weather. While steps to winterize the coop and pen will yield positive impacts, there are potentially dangerous mistakes to avoid when overwintering your flock. The most destructive of these is heat lamps.
In this post, I will explore the dangers of heat lamps and new and safer methods to implement in overwintering backyard chickens. While it is good husbandry to see to the needs of your flock, the most dangerous mistake a chicken keeper can make is judging the flock’s comfort level by your own.
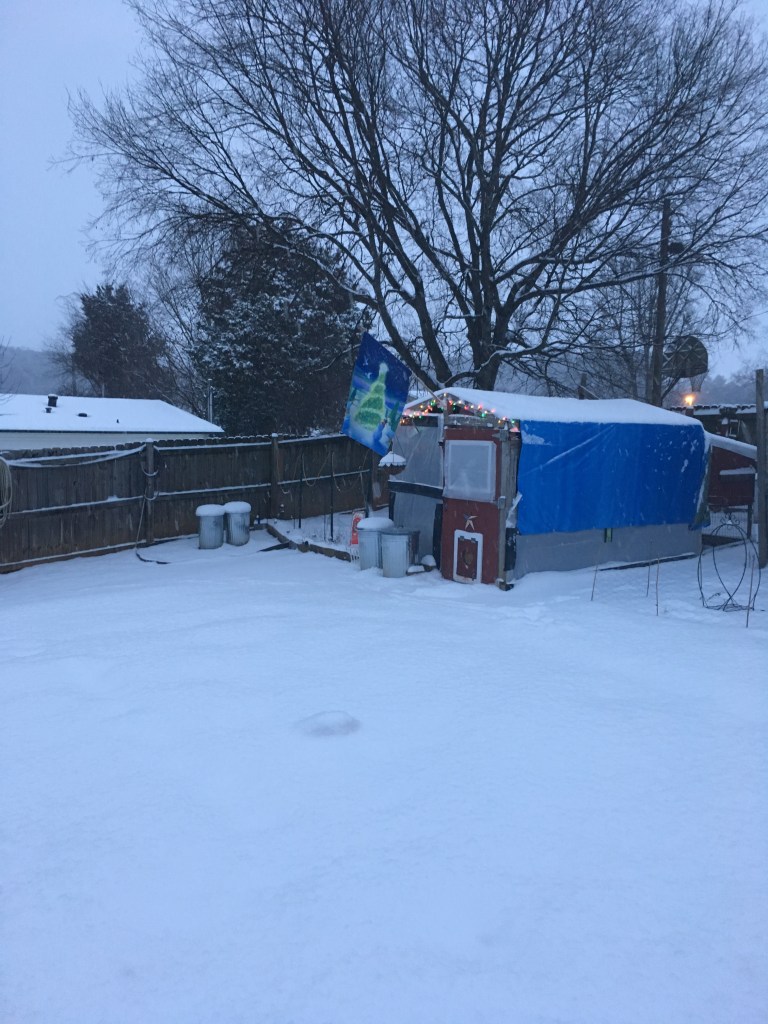
The Kuntry Klucker winterized to keep the coop and pen clean and dry.
Heat lamps-synonymous with chicken coops-began in our grandparents’ days. During the 1940s through the 1980s, heat lamps were used in brooders to keep chicks warm and then used in the coop during winter as a supplemental heat source. While the intentions of these generations of chicken keepers were good, many unfortunately suffered the consequences of using heat lamps in these settings.
During the early 2000s, better methods of providing heat to the brooder setting reduced the need for heat lamps and the associated unintended consequences. However, despite the development of safer products specifically designed for the needs of a backyard chicken keeper, the tradition of heat lamps has progressed through time.
Ganondorf (white crested polish rooster) peering out of the window in the Coop De Ville illuminated by the red glow of a LED light in the coop.
Large, inconstant bulbs, blasting long wavelength red light at an impressive 250 or 500 watts, may seem benign, harmless, or passive. However, the dangers of these bulbs when used in the coop environment are anything but innocuous. A chicken coop filled with dry wood shavings, dust, and feathers is prime kindling for a swift, vehement, and exhaustive fire.
The path of destruction set forth by these bulbs is possible in two primary ways. First, there is no assured way to mount heat lamps in a habitat where the residents can fly. Heat lamps, by the antics of the chickens, are easily knocked down. Once they fall, if the bulb does not bust, the radiating heat will quickly ignite the dry shavings, and a fire ensues.
Secondly, due to the incandescent nature of heat lamp bulbs – at the end of their lifespan – the filament within the bulb can burst, causing the bulb to explode. Releasing a burst of light, heat, and sparks, the instability of heat lamp bulbs when making contact with the kindling in the coop will result in a fatal fire.
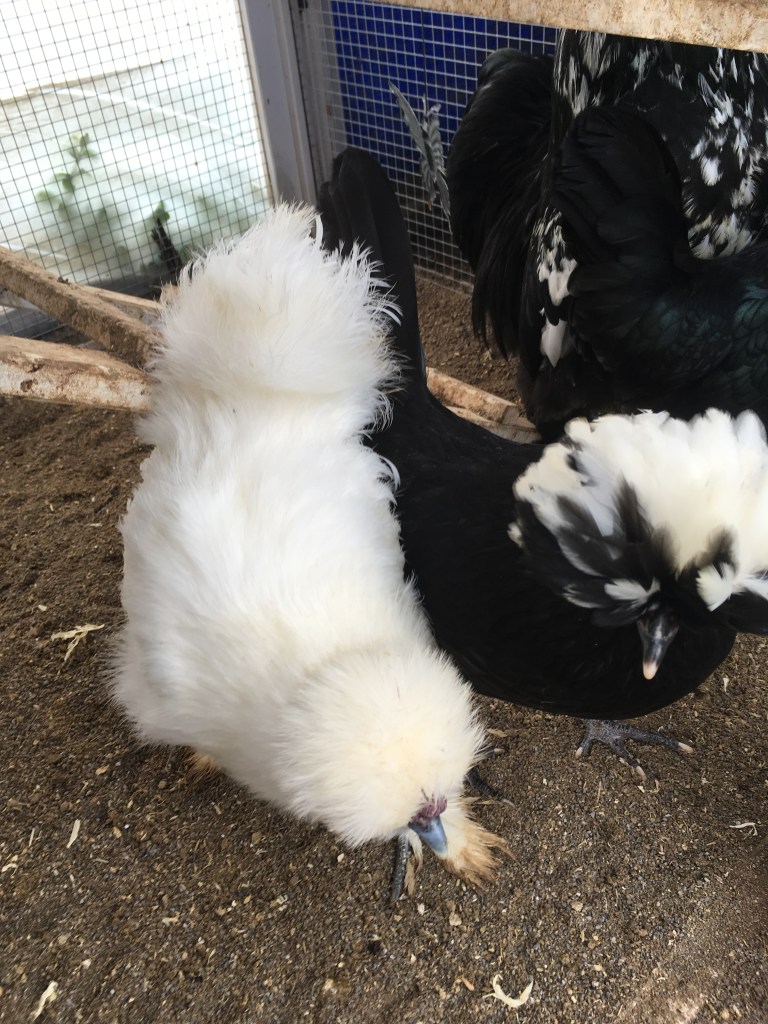
Silkie flock roosting in the coop.
Despite best efforts to mount a heat lamp in a chicken coop, the flighty nature of the residents inside makes a coop fire an ever-present danger. Given the volatility of heat lamps in an enclosed environment, there are much safer ways to keep the flock comfortable as the winter weather rages.
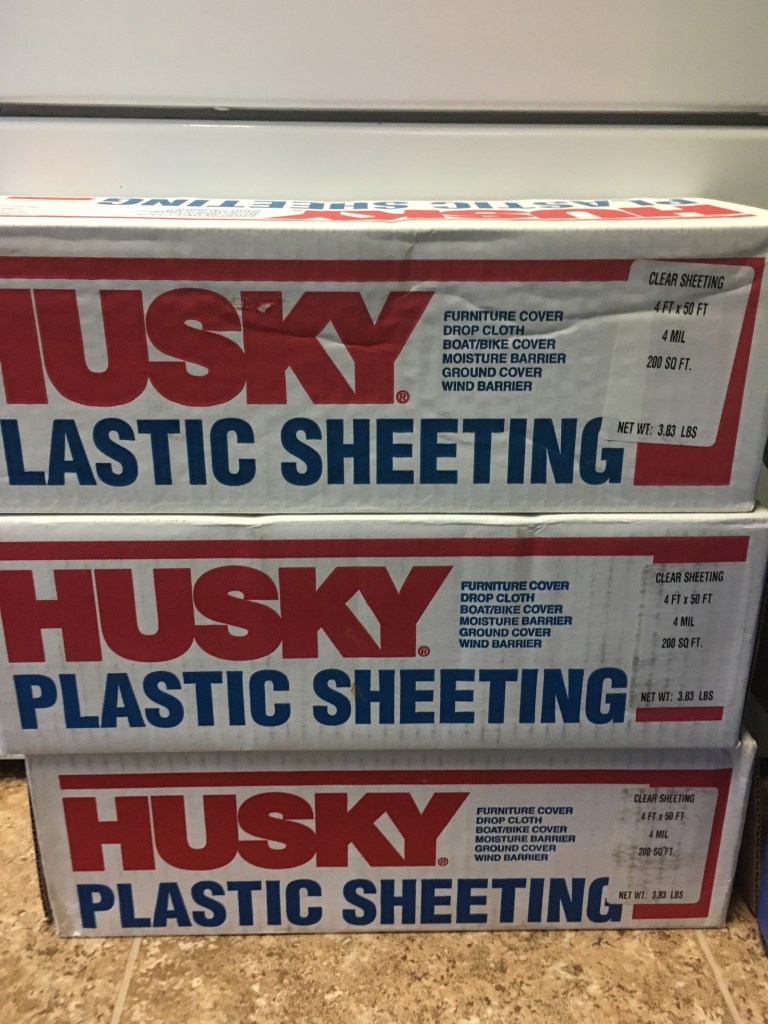
Plastic sheeting for winterizing coops.The TARDIS winterized.The Kuntry Klucker winterized to keep the coop and pen clean and dry.The flock in the Kuntry Klucker warm and cozy on a cold winter night.
To successfully overwinter a backyard flock, only two things are required – a clean and dry place to call home. Chickens are wearing down coats, factory installed. Artificially warming the coop can be life-threatening in severe winter weather. The loss of power is common in winter storms. We survive these events by wearing warmer clothes, huddling under thermal blankets, and consuming warm food and beverages. All of these creature comforts are unavailable to the freezing flock outside.
Miss Bossy (Buff Orpington Hen) trudging through the snow.
When faced with the same situation, a flock that has become dependent on supplemental heat can freeze to death. During the winter, I will receive several correspondences from other chicken keepers seeking help after a power outage that accompanied a winter storm resulted in death among their flock. In addition to sharing their sympathies, I will take the time to educate them on why this happened and how to avoid a reoccurrence in the future.
Chickens evolved to live outdoors and acclimate to the changing temperatures naturally. During molt, in addition to growing in new feathers, chickens will also grow in winter down to keep them warm during the winter. When the coop is artificially warm during this time, a variable that will cause a flock to be ill-equipped for the coming cold weather is introduced. With the added consequences of power loss during winter storms, flock’s dependent on artificial heat sources suffer when factors outside their control ensue.
The flock venturing out in the snow.The flock following paths cleared of snow.The flock investigating newly fallen snow.
Installing plastic sheeting around the coop and pen does two things. First, the plastic is a wind barrier. Secondly, winter precipitation will stay outside the pen and coop area. This simple improvement will keep the flock’s living habitat clean and dry, which makes cleaning much easier in the winter.
The natural body temperature of a chicken is between 107- and 109-degrees F, fatal for us but necessary for their survival; chickens are little furnaces wrapped in down feathers. A wind barrier is crucial for overwintering a flock because it allows the chickens to trap this heat next to their body where they need it to keep warm. Exposure to winds will lift their feathers, and they will lose the heat they worked hard to maintain. Given a draft-free place to call home, the chickens do the rest.
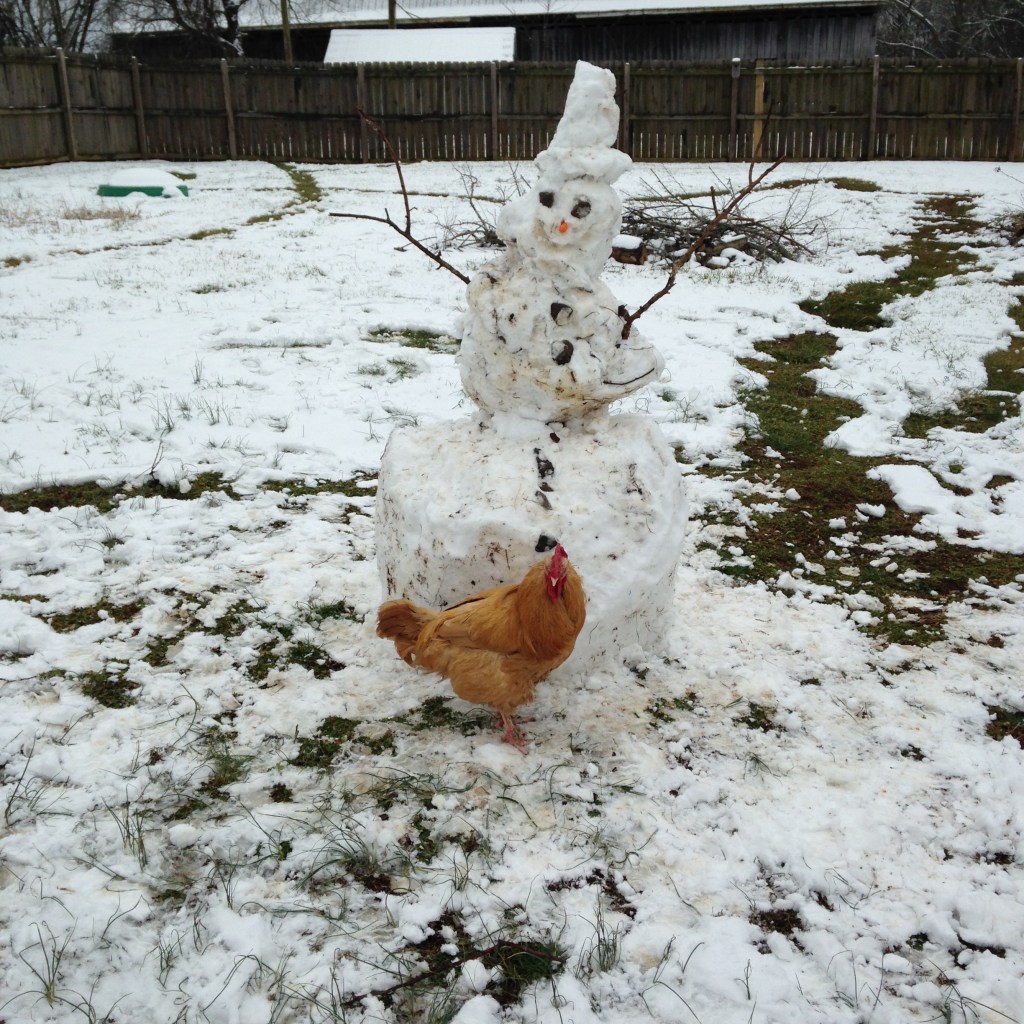
Roy (Buff Orpington Rooster) inspecting a snowman in the backyard.
Is it safe to free-range the flock during the winter? The answer to this is absolutely yes. A winterized coop and pen protected from the wind, elements, and temperatures will allow flock members to determine their comfort level. Given access to the outdoors, individuals will spend some time free ranging, if they get a chill from the wind or precipitation, they will come to the coop, warm up, and then continue free ranging. Access to the outdoors will keep a flock happy and healthy as they have natural resources such as sunshine and fresh air.
While it may seem daunting, overwintering a backyard flock is simple and affordable. Providing a clean and dry coop and pen stocked with fresh water and feed is all that chickens require. Keep it simple and let the chickens do the rest.
I hope this post was helpful and made the process of winterizing your coop and overwintering your flock much easier. If you have any questions, feel free to leave a comment. You can also reach me as the following e-mail address: kuntryklucker@gmail.com
I check my e-mail often and will respond as soon as I can.
To watch a YouTube video on my procedure of winterizing The Kuntry Klucker, please click here.
To watch a YouTube video where I go more in depth on overwintering my flock, please click here.
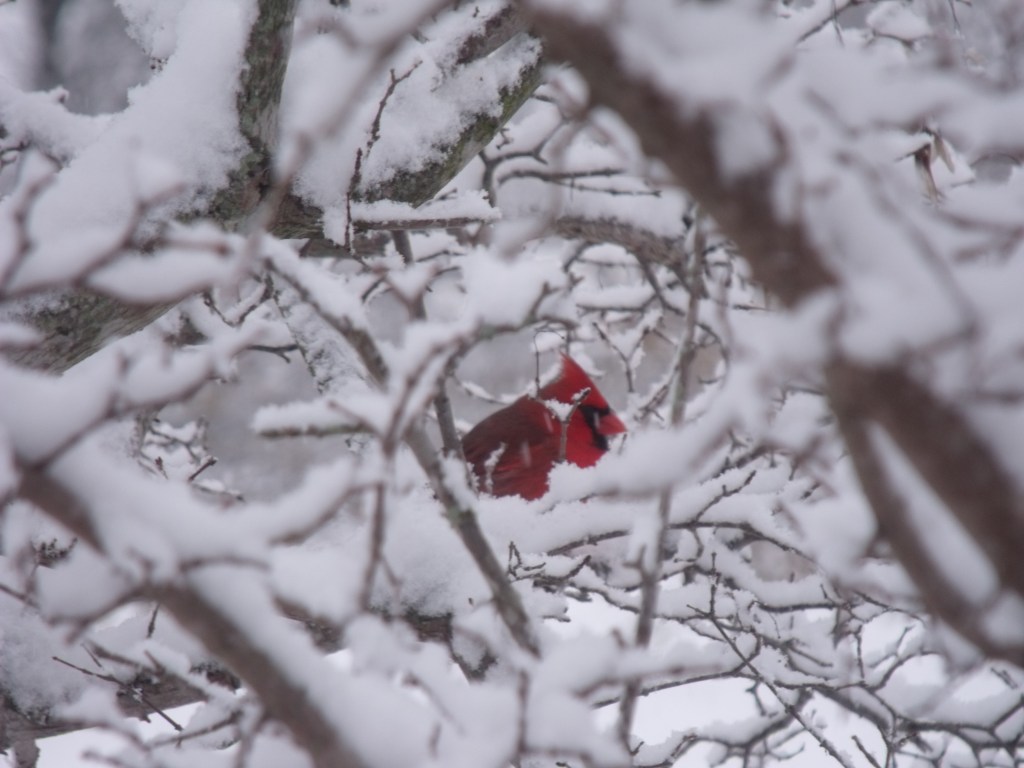
Image Credit: Noelle K. Moser. A male cardinal perching on a snow-covered tree.
I am a multi-disciplinary writer, blogger, and web content creator. If you like this post, please peck the subscribe button.
If you like this blog, please visit some of my other blogs and online writing portfolio.
Summer has surrendered to fall, leaves wrestle in the wind, fall, then scatter on the ground. The gardens have been harvested, tilled under and prepared for the coming seasons rest. The girls are finishing their yearly molt, roosting increasingly earlier each evening. All this signifies the coming of winter, along with all its challenges for the backyard chicken keeper.
Many new backyard chicken keepers find themselves intimitated and overwhelmed wondering how to overwinter their flock. I know because I have been there. Over the years, I have learned a trick or two on how to keep your girls happy, healthy, and comfortable as outside temperatures plummet and winter weather rages.
The secret to successfully overwintering your flock is to keep it simple, enhancing your flocks naturally ability to weather the elements. Many new backyard chicken owners make the mistake of judging their flocks comfort by their own. This is the first and essentially the riskiest mistake that a flock owner can make. This is true for several reasons.
Chickens come factory installed with a down coat, the same coat that we put on when the mercury dips below a certain point. Many owners often forget that their ladies and gents are already bundled up for winter. Increasing the temperature in the coop hinders their health and can even cause death. Reasons are these.
Heating the coop: Additional heat to the coop or pen hinders the flocks ability to naturally adjust to falling temps. In the presence of a heated coop, your ladies will fail to grow in the down coat necessary for winter temperatures. This becomes problematic in events such as a winter storm knocking out power for hours or even days. The flock has acclimated to a warmer living environment, when this heat source is abruptly removed, shock and death can result. Like us, if resources to keep warm are removed, inability to adequately adapt to the cold environment may result in one falling prey to the harsh conditions . In the same situation we put on warmer cloths, huddle under blankets, sit by a fire, or drink and eat warm substances. All these necessities are not available to the backyard flock who suddenly finds themselves freezing due to depedence on a heat source. This is the first and the most serious mistake that a backyard chicken keeper can make. It is best to let them adjust to the cooler temps gradually, growing in their thick and heavy down coat as nature intended.
Heat lamps: The second mistake that new backyard chicken owners can make is the use of the humble heat lamp. Heat lamps = coop fires!!! I cannot recount how many times I saw on social media or heard about coops destroyed due to heat lamps. Heat lamps are very dangerous for a variety of reason, when used as a winter heat source, they can be deadly. Heat lamps, (sometimes called brooder lamps), consist of a large 500 watt red bulb that is used to create a warm environment to raise chicks. While heat lamps are a danger even when used as a brooder heat source, they are even more dangerous when used around adult birds in an enclosed space. Why? There is no way to safely mount a 500 watt heat lamp in an enclosed space where the occupants can fly, accidentally knocking them down. With a coop full of pine shavings, dry straw, dust and feathers, this is perfect kindling and prime to start a fast, furious and complete coop fire. If you take anything away from this post please, please do not use heat/brooder lamps to heat your coop. They will in most cases cause a devastating disaster. There are much better natural ways to assist your girls in overwintering the cold months. Below I will share with you safe methods that I employ to keep my flock happy, healthy, entertained and content during the long winter season.
But first, let’s answer a simple question. What does a backyard flock need in order to weather the worst of Old Man Winter? The needs of backyard chickens in winter are very few. All they really need is a clean and dry place to call home. They do the rest. It is the job of a keeper to provide the necessary accommodations in order to meet their basic needs. Chickens are well adapted to live outside, all they need is a little help to weather the bitter winds and elements.
How is this achieved? The main thing I do to overwinter my flock is enclosing their pen with construction grade plastic sheeting. The purposes are tripple fold.
Wind Break: The plastic acts as a wind break. As the bitter winter winds blow, the plastic surrounding the pen blocks the wind, allowing the girls to retain their body heat. Chickens are more than capable of generating their own body heat. Using their feathers and down coats, they can regulate heat their bodies produce, thereby keeping warm in the winter. The cold winter winds disrupt this thermal regulation by lifting up their feathers, exposing their skin to the bitter winter winds, loosing the warmth they worked so hard to maintain. A simple wind barrier helps them immensely. If allowed access to free range on a cold day, they will come and go from the protected pen as needed depending on their individual needs. If it’s a cold day, they will stay in the wind free environment of the pen. If it’s warmer, they may spend more time outdoors hunting and pecking. Allowing them access to the outdoors while providing a wind free place to retreat, will keep them happy and content as they weather Old Man Winter.
Precipitation Barrier: The plastic keep the elements out of the pen, providing a dry place to call home. We are all familiar with the mystery that the cold winter rains can elitist. The same can be said for the snow and ice. Chickens prefer to avoid these elements if they can. However, since they live outside, their options may be few. This is another benified of enclosing the pen with plastic sheeting. As the elements rage outside, the girls are protected from the snow, rain, sleet, and ice that pleague the winter season. This simple barrier from the elements creates a dry and wind free place for your flock to call home. Simply keeping the elements out of the pen helps them immensely as they weather the worst of Old Man Winter. If protected from the wind and precipitation, the cold temperatures are not an issue for the flock.
Clean and Dry Digs: Providing clean and dry digs for your flock is essential. Along with providing a wind and precipitation break, a clean coop and pen goes a long way. The flock will undoubtedly spend more time in the protection of the coop/pen during winter. It’s a keepers job to see that their digs remain clean and dry. This is simply done by making sure the coop and pen are cleaned and maintained on a daily basis. This is necessary to keep moisture down their living areas. We all know that chicken poo can be wet and sticky. Due to the moisture content of their poo, this creates the ideal situation for frost bite. When too much moisture is presnent in the coop, frost bite will settle on the combs and wattles of your roosters and larger combed ladies. Removing the poo daily from both the coop and pen prevents these conditions. Frost bite is no fun, it hurts and can be dangerous if not properly treated. As they say, an ounce of prevention is better than a cure.
By simply enclosing your coop/pen in construction grade plastic, you provided a condusive habitat for your flock to weather Old Man Winter. Below are some pictures of my coops and pens that have been prepared for the coming bitter season.
As the bitter weather rages, the girls will be safe and warm in their pens. Below are some pictures of the ladies braving the elements in their winter digs.
Along with enclosing the coops and pens in plastic, providing your flock with some entertainment will go a long way. During the coldest days, your flock will undoubtedly spend more time in their pen. If this occurs for consecutive days, they may begin to suffer from coop boredom. Just like us, if we spend a lot of time in a tight enclosure, we get a little restless and bored. Chickens are no different, it left too long in these conditions, they will begin to peck at each other, creating injury and a hostile flock environment. To prevent this, provide games to play and things to peck. Below are a few things that I do for my flock, keeping them happy and healthy.
Flock Block: A flock block is a very simple entertainment tool I often use during the harshest part of winter. Additionally, due to the fact that they are unable to forage for grains and seeds, a flock block provides these nutrients. Flock blocks are large blocks that consists of seeds and other goodies compacted in a hard square shaped formation. The chickens will spend hours happily pecking at the block, keeping them entertained for days on end. One block will last my flock for an entire winter. They are found at most feed stores, usually under $20. It is also possible to make your own. At the end of this post, I will leave a recipe that I use when I want something a little more tailor made for my girls.
2. Peck the Bottle: This is a little chicken game that keeps my girls busy for hours. Additionally, it is very entertainment to watch them peck at the bottle. The supplies needed for this game are very simple. An empty plastic water bottle add some scratch or cracked corn. Take the bottle and poke some small holes large enough for the corn or scratch to fall through. Inside the bottle, fill the bottle half full of the treat. Place the bottle in the pen.
The flock will peck at the bottle, trying to free the corn or scratch contained inside. One by one, the flock will each peck at the bottle, moving it around the pen in efforts to consume the treat. This will keep a flock busy for days. If you have a larger flock, place a few more bottles in the pen. If you want to step up their game, fill the bottle with dry meal worms. Your flock will go crazy, working extra hard to get the worms out of the bottle.
3. Cabbage in a basket: If you want to add some greens to your chickens winter diet, veggies in a basket or suit feeder is a great choice. With grass and other delectables long since dormant for the season, greens are in short supply. To supplement your ladies diet with green veggies, this winter time trick is ideal. Simply take a suit feeder, open it, and place the veggies inside. Hang the feeder in the coop and let the games begin. Your ladies will go crazy for some fresh greens. Since it is cold outside, the greens will stay fresh for a while. Once the suit cage is empty, refill and play again. You can also put a head of cabbage in a metal hanging basket, placing it in the pen or yard for you girls to pick at. They will enjoy the fresh greens, all the while staying healthy and entertained.
4. Sand Box Spa: As winter sets in, the ground becomes covered, saturated with snow or rain, the girls will find it hard to keep up their beauty regiments. Simply placing a sand box in the pen and filling it with sand goes a long way. If your pen is too small for fit a sand box, pour the sand directly on the pen floor. Not only does this provide them a place to dust bath, it is also provides them a great way to scratch around.
Chickens love to scratch at the ground as they hunt and peck for delectable to dine on. In winter however, this past time is hindered due to the ground conditions caused by winter. To keep them further entertained, sprinkle some scratch or mealworms on top of the sand and watch the fun begin. They will spend hours digging in the sandbox, making sure that they have found and consumed every last morsel. This will quickly become a flock activity that they love and relish during the cold miserable days of winter.
Finally, I come to my last tip for winter care for your flock, water. Many keepers underestimate the need for clean and fresh water during the winter months. While they will drink more water in the summer to stay hydrated and cool, water is necessary for them to regulate their body temperature. During the cold months while a flock is working hard to regulate their body temperature, water is essential. For their little bodies to keep their furnaces stoked, access to liquid water is necessary. One of the major hinderances to this process is the cold temps causing the water to freeze. To combat this, I use several methods.
The haul it method: For those who do not have a large flock, simply hauling fresh unfrozen water to the backyard several times a day is ideal. If your flock is small and someone is at home during the day, this is the simplest and cheapest method to combat freezing waterers. Since it requires no electricity or expensive accessories, this method is best if applicable.
Heated waterer: If your flock is larger and no one is home to see to the water needs of the flock, a heated waterer is ideal. Although these waterers are a little bit on the pricy side, they are a life saver. You can find electric heated waterer at most feed stores. They range from $40 to $60 and long lasting. I am still using the one I purchased 5 years ago and its still going strong.
3. Light bulb in a metal tin: The last method that I use is the light bulb in a metal tin. Like the heated poultry drinker, this method requires electricity supplied to your coop. If you have several coops, purchasing a heated poultry drinker for each one can get expensive. I use the purchased heated drinker for my largest coop, the rest I use this simpler method.
Simply take a metal tin (cookie or other round tin), drill a hole just large enough for a cord, string the cord through the hole in the tin, purchase a light bulb and a socket cord (used for restiringing lamps) and simply screw the light bulb into the socket that is connected to the tin. Put the tin lid on, place the plastic or metal drinker on top and presto, you have a heated poultry drinker.
The radiant heat from the bulb will keep the water from freezing. Since all you need to keep the water warm enough to remain liquid a 15 or 25 watt bulb is best. You don’t want to heat the water too high, making it too warm for the flock drink. The goal here is to keep the water from freezing. This low watt bulb will supply just enough heat to keep the water in a liquid, drinkable state. If you don’t have any metal tins around suitable for this purpose, a terra cotta flower put turned upside down will also do the trick.
That’s a wrap. Above are all the techniques, tools and tricks of the trade I use to keep my flock happy, healthy, and content during the harsh winter months. As promised, below I will leave the recipe that I use to make a homemade suit treat for my girls. The ingredients used in this flock treat are typically found in every kitchen and cheap to purchase if needed.
The Kuntry Klucker Crew’s Favorite Flock Block
2 cups scratch grains
1 cup layer feed
1 cup old-fashioned oats
1 1/2 cup of raisins (for added fun)
1/4 cup whole wheat flower
1 teaspoon ground cinnamon (aids in respiratory health)
1/2 teaspoon cayenne pepper (helps circulation)
3 whole eggs (provides calcuim , shells included, crushed to fine pieces)
1/2 cup blackstrap molasses
1/2 coconut oil, liquified
preheat oven to 325 degrees. In a large mixing bowl, mix the dry ingredients. Add the wet ingredients and mix well. Pat into several small baking dishes, so your blocks are approximately 2″ thick (this way they can fit into suit feeders).
If you plan to hang the flock block treat in your chicken pen, use a chopstick to make a hole large enough for twine or rope to fit though.
Bake for 30 minus, then cool completely. If you try to remove them from the pan while still warm they will fall apart. Once cool, run a knife around the inside rim of each pan and invert to remove the block. Serve to a flock of very happy girls.
Leftovers can be refrigerated or wrapped in foil and frozen then defrosted as needed.
Enjoy!!
I hope you have enjoyed reading this post and found it helpful or useful. If you have any questions please post them in the comments.
As always, thanks for reading. Till next time, keep on crowing!
Chickens owners know the struggle to keep a brooder neat and clean all too well: The bedding that covers the feed, the water absorbing into the bedding and causing a wet mess, the creative means required to keep the feed and water accessible to the chicks, and the flock growing faster than one can keep up with. Managing a brooder can be exhausting and frustrating.
Roosty’s, a brand dedicated to bringing the highest quality products to chicken owners across the globe, has engineered an ingenious chick feeder and waterer that eliminates much of the brooder hassle.
Adult White Crester Polish hens (Ruto and Zelda) eating from Roosty’s chick feeder
Made of durable construction and designed with a 2-stage elevation leg system, this feeder and waterer will keep feed and water fresh and accessible. Raising the feeder and water above the bedding level will keep the brooder neat. As the chicks grow, the legs raise to a higher level keeping the brooder environment tidy and clean.
With a large capacity and an option to hang, this feeder and waterer will accompany the flock as they acclimate to the coop. Most feeders do not have the growing brood in mind requiring a backyard chicken owner to purchase another feeder and waterer when the chicks outgrow the brooder and move outdoors. Roosty’s all-in-one design meets the need of a growing flock meaning that a chicken keeper planning for the brooder and beyond will only need to buy one feeder and waterer for their flock.
The Kuntry Klucker Crew enjoying fresh feed from Roosty’s Chick Feeder.
Nesting Box Pads:
Fresh eggs from happy Silkie hens on Roosty’s soft nesting box pads.
Soft, durable, and easy to clean, Roosty’s nesting box pads provide comfort and security to laying hens while helping to keep the coop neat and clean.
Other nesting pads on the market are rough and uncomfortable, which would discourage laying hens from using the nesting box. My hens transitioned from pine shaving to Roosty’s nesting box pads overnight. I expected my hens to resist the pads being unfamiliar, but I was pleasantly surprised when two eggs rested in the nesting box the following morning.
Easy cleaning of Roosty’s nesting box pads.
The lightweight and soft mesh allows ventilation, and holes on the underside of the nesting pads make cleaning convenient and easy. Spray with water to clean and release the debris, shake it, and place it back in the coop. Keeping the nesting box clean and tidy has never been so effortless.
My hens are happier because the nesting boxes are tidy. I am thrilled with the ease of care required to keep the coop clean and nesting boxes orderly.
The backyard chicken movement has taken the nation by storm with chickens being the most popular backyard pet. Quality products for backyard chickens make maintaining a healthy flock straightforward, effortless, and enjoyable. Roosty’s chick feeder, waterer, and nesting box pads will take the hassle out of keeping a brooder and coop well-kept and tidy.
To watch a video of this product review, please visit my YouTube Channel.
Roosty’s understands what chicken owners need and designs high-quality products to take the frustration and mess out of caring for chickens so you can spend more time enjoying your flock. The girls give Roosty’s chick feeder/waterer and nesting box pads a 10/10. Roosty’s can be found on Amazon.
I am a multi-disciplinary writer, blogger, web-content creator, and published author. If you like this post, please visit my writing portfolio and larger body of work.
Featured on Rent Blog “How to Start A Thriving Patio Vegetable Garden”.
You don’t need a large property to enjoy gardening. Indoor and container gardening is becoming increasingly popular due to the accessibility and easy maintenance of the hobby. If you don’t like weeding or having to worry about time-consuming chores, container gardening just might be for you. In this post, I will share how I implemented container and indoor gardening into my hobby.
One advantage of container gardening is the ability to garden year around. During the cold months, you don’t have to say goodbye to the flowers you have tended to all summer and grown attached to. Not only can you bring them indoors, but you can also even grow them exclusively inside.
The keys to container gardening are light, water, humidity, and soil. If you are familiar with houseplants, you are well aware of these parameters. If not, don’t worry, I will walk you through how I utilize container gardening in my home as well as outside.
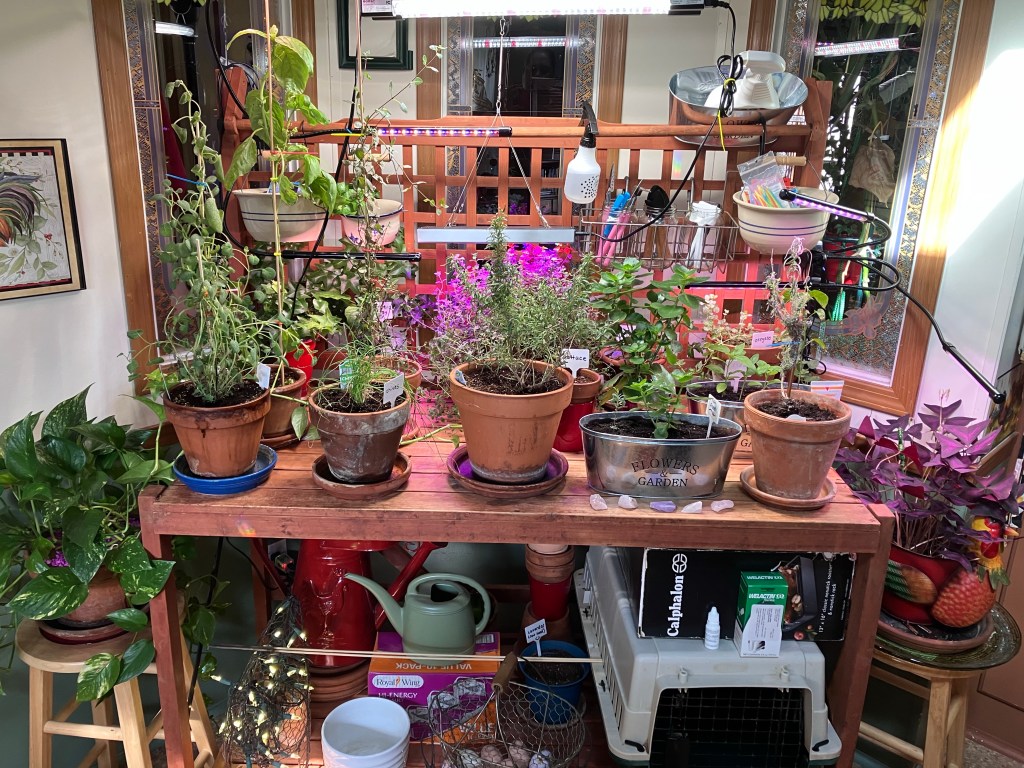
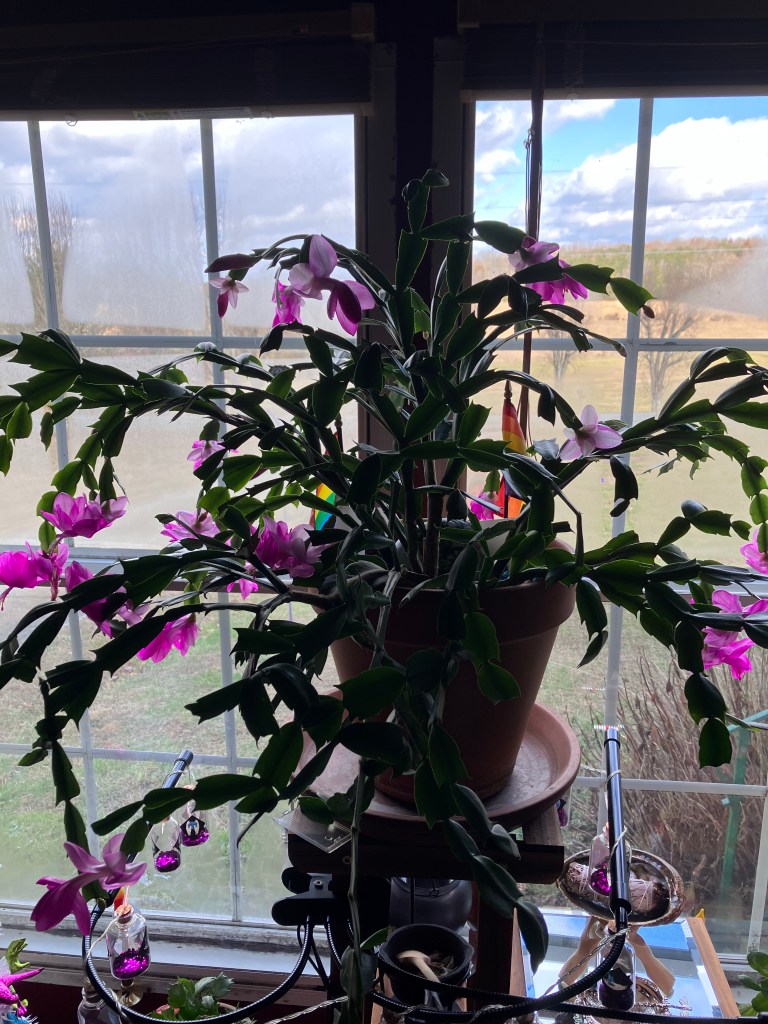
Schlumbergera (Thanksgiving Cactus) in bloomThriving Monstera DeliciosaHouseplant Assortment on Hearth
Lighting:
Plants need light to photosynthesize. Outside, these conditions are provided by the sun, and indoor lighting needs to be replicated as naturally as possible. Plants need specific wavelengths of light to photosynthesize; not all light is created equal in the indoor environment. To mediate this, growing plants need light in the spectral range of 400-700 nm. Light near 400 nm humans see as the color violate, and light around 700 nm our eyes percieve as red. Many grow lights emit light with LED lights, making them both bright and cost-effective. I will link the grow lights here, here, and here that I like and produce good growth for my plants. Natural sunlight is always best. If you have large windows that allow natural light to fill the room, your plants will be very grateful. If not, grow lights are a good investment for a container gardening hobby.
Kitchen Herb GardenLiving Room Monstera D. leavesMonestra D. plant basking in the light from a LED growlight.
Water:
Sage Leaves after a gentle rain.
All plants need water. Without water, plants can not absorb nutrients from the soil or complete the photosynthesis process. Unlike outdoor plants that reap the benefits of rainwater, indoor plants rely on the gardener for all essential water. Additionally, due to the controlled indoor environment, the needs of plants are much different. To tell if your plant needs water place your finger about 2 inches into the soil. If the soil is dry, your plant needs water. If the soil is damp, wait a few more days and check again. The most common mistake indoor gardeners make is overestimating how much water their plants need. In the indoor environment, plants need water less often but more deeply. When watering your plants, soak the pot until water pours out from the bottom. Wait a few weeks and check the soil before watering again.
Humidity:
Humidity is often the most overlooked element of growing plants indoors. In their natural environment outdoors, plants can regulate how much water they release through their leaves by judging the humidity levels allowing them to maintain a healthy balance. Indoors, especially in the dry climate-controlled air, plants will release more moisture into the air at a greater rate leading to dry leaves. Adding a humidifier or placing plants in naturally humid rooms such as a bathroom will help to meditate humidity issues with your plants.
Soil:
Soil is necessary for all plants, but indoor gardens need special attention concerning growing medium. Luckily, most garden centers will have multiple formulas, and knowing your plant specifications will help in soil selection. For houseplants, a general all-purpose soil formulated for indoor plants is ideal, as the growing medium will contain all essential fertilizers and food needed for the proper growth of houseplants. For cactus or succulents medium that drains well is ideal for the health and vitality of these plants. Citrus, cactus, or palm soil has the desired balance for growing these water-sensitive plants. Indoor herbs and other vegetable plants thrive in indoor soil made for houseplants mixed with a little seed starter. This mixture allows for the proper fertilizer balance and growth but resists holding too much water leading to root rot. Mixing equal amounts of houseplants soil and cactus soil or seed starter in the pot is an easy way to provide the ideal growing medium for your plants. A word of caution, do not use outdoor flower gardens or vegetable garden soil for indoor plants. Indoor potting soil has been sterilized and is free of annoyances and bugs in outdoor soil mixtures.
Container Gardening:
My patio container garden.
Light:
Outdoor container gardening is much like growing plants indoors with a few exceptions. The light requirement for your container garden will largely depend on how much sun exposure the plants need. A more sensitive plant is best placed in the shade while a plant that loves light is best suited in a sunny location.
Water:
Unlike plants placed in the ground, potted plants cannot source water. It falls to the gardener to gauge the needs of the plants and water appropriately. During the summer, it is common for outdoor container gardens to need water daily. As with indoor plants, check the soil before watering to avoid over-watering.
Soil:
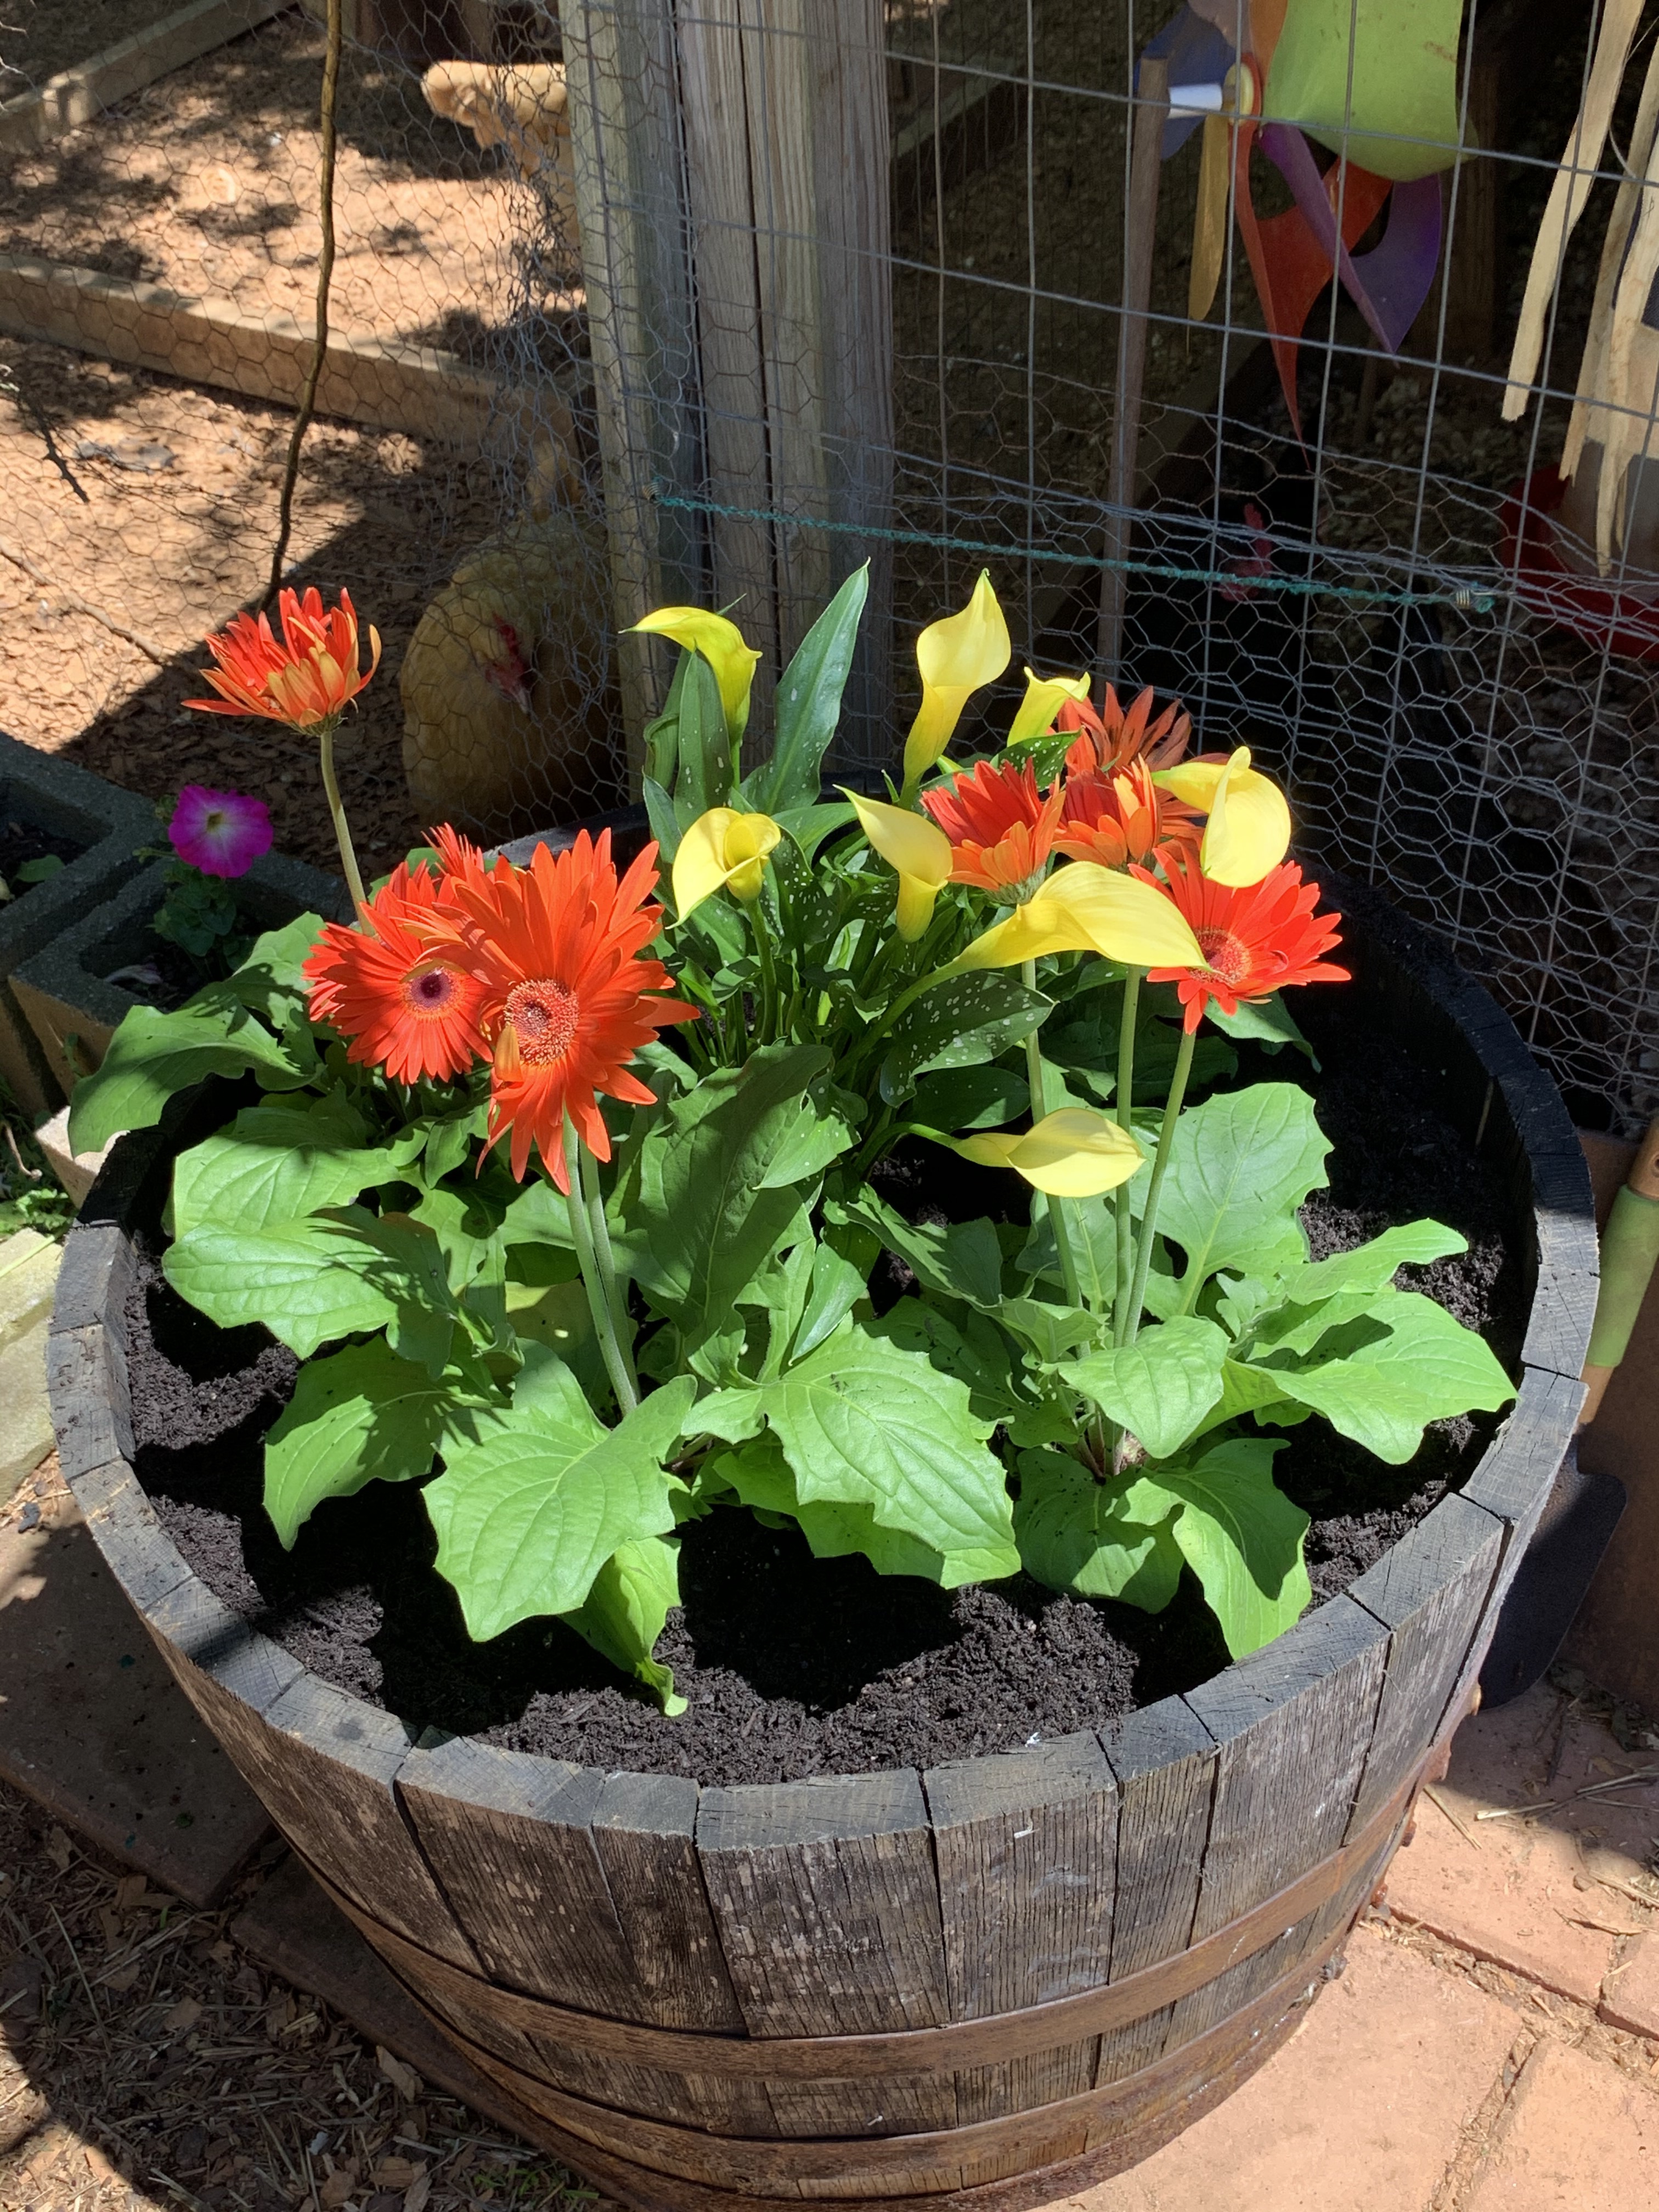
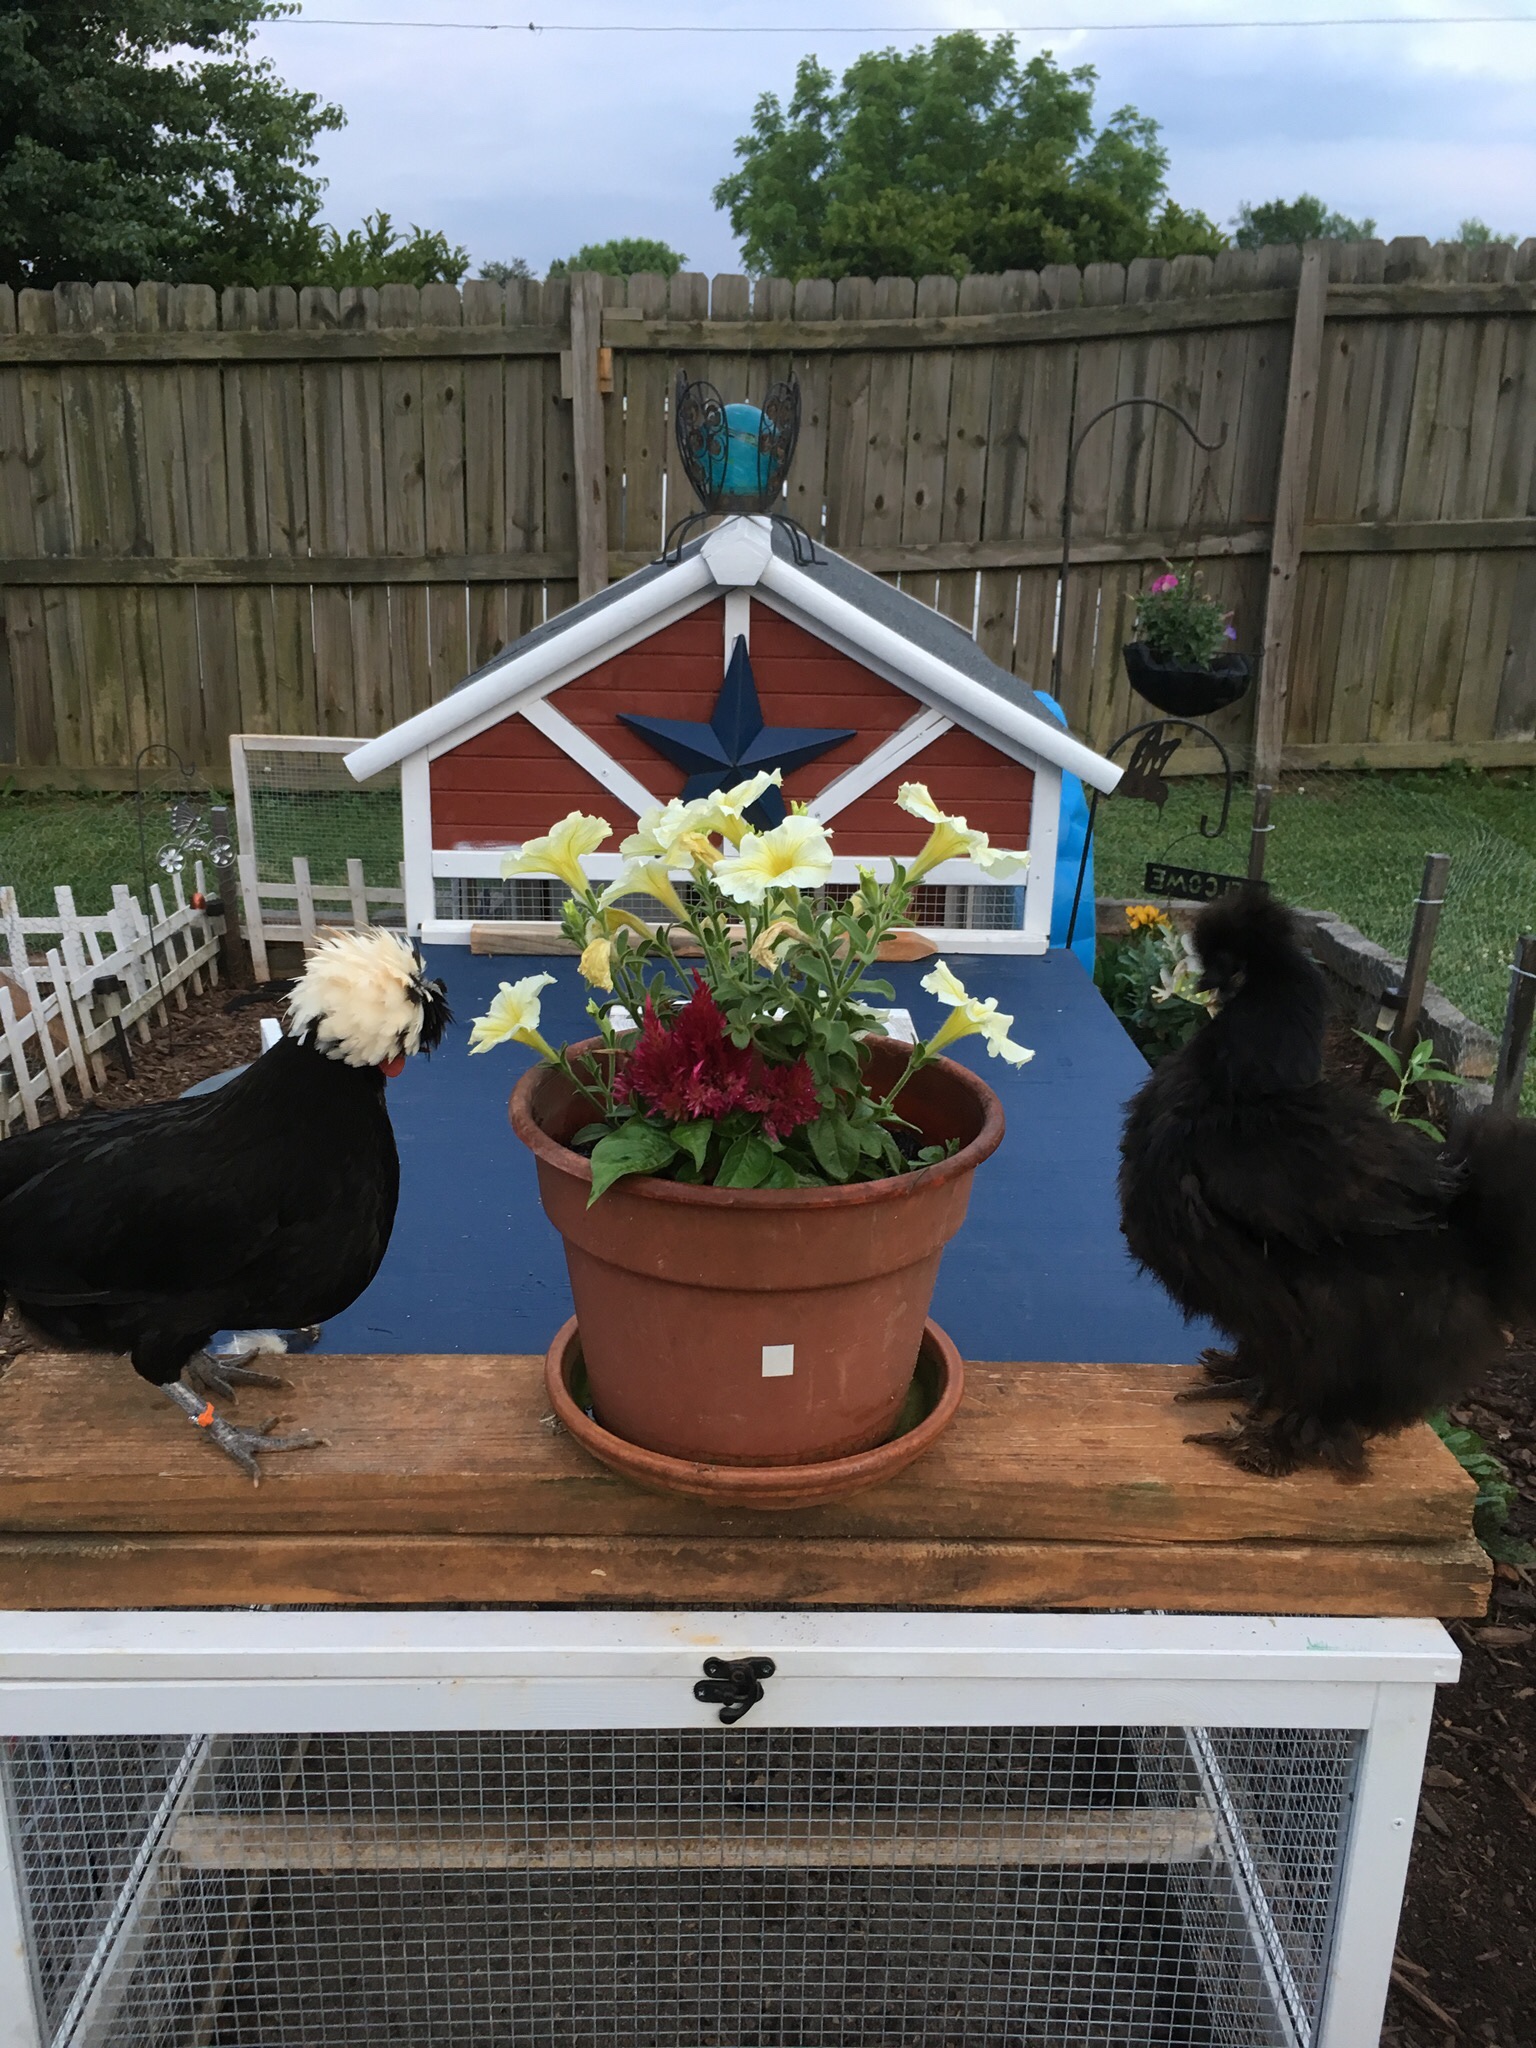
Flower pot atop the Bantam Botique Pen.
As with indoor gardening, soil is a critical element in the success of the plants. For outdoor container gardens, an all-purpose outdoor potter container soil is ideal. Select a soil that is formulated for containers as the in-ground garden soil will have a higher fertilizer concentration that could burn the sensitive roots of plants in pots.
Container:
Besides watching your container garden grow, choosing the right pot is an enjoyable process. When selecting a pot size is key. Choose a pot that is not too large but allows the plant some room to grow, as the plant matures you can repot into a larger pot if needed. A pot that is too large can stress the plant as the soil remain moist for too long leading to root rot and fungal issues.
There are so many types of pots available it can be over-overwhelming. To help narrow the selection look for pots that have ample drainage holes. Many planters look attractive but are not functional for plant health. Terra-cotta pots are great for outdoor container gardens. As they are porous, air can exchange, allowing the roots to breathe. Wooden planters or large whiskey barrels are other attractive options that allow air to reach the roots and drain well. Choosing a container is the beginning of a wonderful adventure in the world of container gardening.
Above all, have fun and enjoy your gardening advanture. Happy growing!
I am a multi-disciplinary writer, blogger, and content creator. If you like this post, please visit my writing portfolio.
Flowering bushes and gardens are most definitely atheistically pleasing. I have flower gardens plenty but edible landscaping is a joy that is unique in and of itself.
Just about everything in my backyard is edible. Going to my backyard is like going to a farmers’ market on my property. There are lots of options when it comes to landscaping.
In this post, I will reveal how I use plants to landscape my backyard into an edible mini paradise.
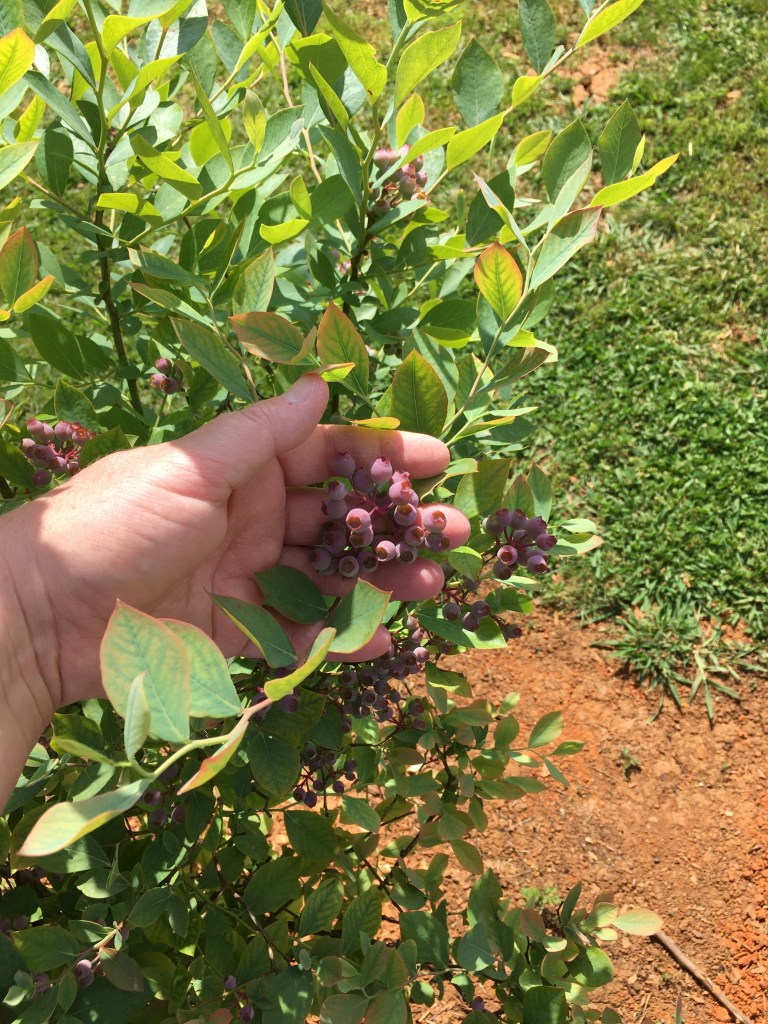
Blueberry Bushes:
Blueberry bushes loaded with berries.
There are lots of ways to add edible landscaping to your property. Blueberry bushes are not only producers of wonderful deep blue berries but have beautiful spring green leaves. When planted in a row, they create a hedge of greenery and goodness. In the fall, their leaves turn to a beautiful red that is stunning in the fall landscape.
Blueberries ripening on one of the blueberry bushes
As the blueberries ripen throughout the season, they add a lot of beauty to the yard. They turn from green to deep blue or purple depending on the variety.
When planting blueberry bushes, plant at least 6 of 2 or 3 different varieties. Doing this will ensure adequate cross-pollination and a large yield. Blueberries need a few different varieties nearby to cross-pollinate well. If too few are planted, the harvest will be reduced as they will not be as prolific.
Arona Berry Bushes:
Arona Berry Bush. Related to the Acai Berry, Arona Berries are a superfood high in antioxidants and are great additions to smoothies. –Arona Bush loaded with berries Arona Berry bush. 8ft tall.TARDIS in the background behind Arona Berry bush.
Arona Berry bushes are another great way to add edible landscaping to your property. Topping out at about 8-10 ft tall and a spread of 5 to 6 ft wide, these bushes are showstoppers.
In the Spring they are filled with white delicate blooms that turn into dark purple berries around mid-summer. They have a sweet/tart taste, somewhere between a cranberry and a cherry. They are dense little berries that are great to add to smoothies or other berry dishes. My chickens love the Arona Berries. They will readily pick all the berries they can near the bottom, luckily these bushes are tall so there is plenty to go around.
Arona berry blooms
Unlike blueberries, Arona Berry bushes do not need another bush to cross-pollinate. Given their size, 1 or 2 will be enough. I have two of these bushes in my backyard, both are beautiful and produce a lot of berries come mid-summer.
Black Berry Bushes:
Another beautiful trailing berry bush to add to an edible landscape are Blackberries. Unlike Blueberries or the Arona Berries, Blackberries do best on a trellis. While they can grow independently of a trellis, they do better if they have support to keep the branches off the ground. If too low to the ground the berries tend to rot before they can be picked.
Fresh Black Berries and Raspberries picked from my backyard. After dinner, for dessert I serve my family and guests fresh berries.
If you have tasted Blackberry jam or Blackberry pie, then you know exactly what to do with these prolific little berry producers. Blackberries are great in many things from smoothies to jams to pies. If the bushes produce an abundance, then frozen berries are a treat in the winter months when all the bushes are dormant.
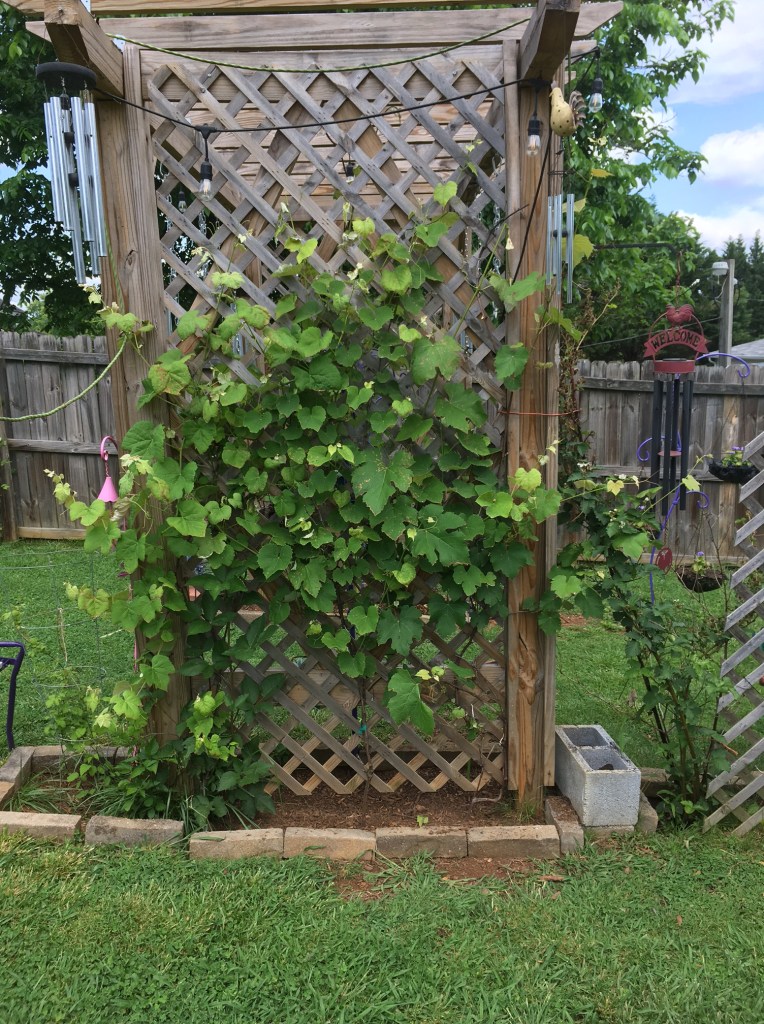
The possibilities are limitless with what one can do with a bushel of Blackberries. I have my Blackberry bushes near the Grape Arbor. They climb the trellis along with the grapes as they grow taller. Instead of keeping them pruned to a smaller size, I allow them to grow long and attach them to the Arbor as they need more support.
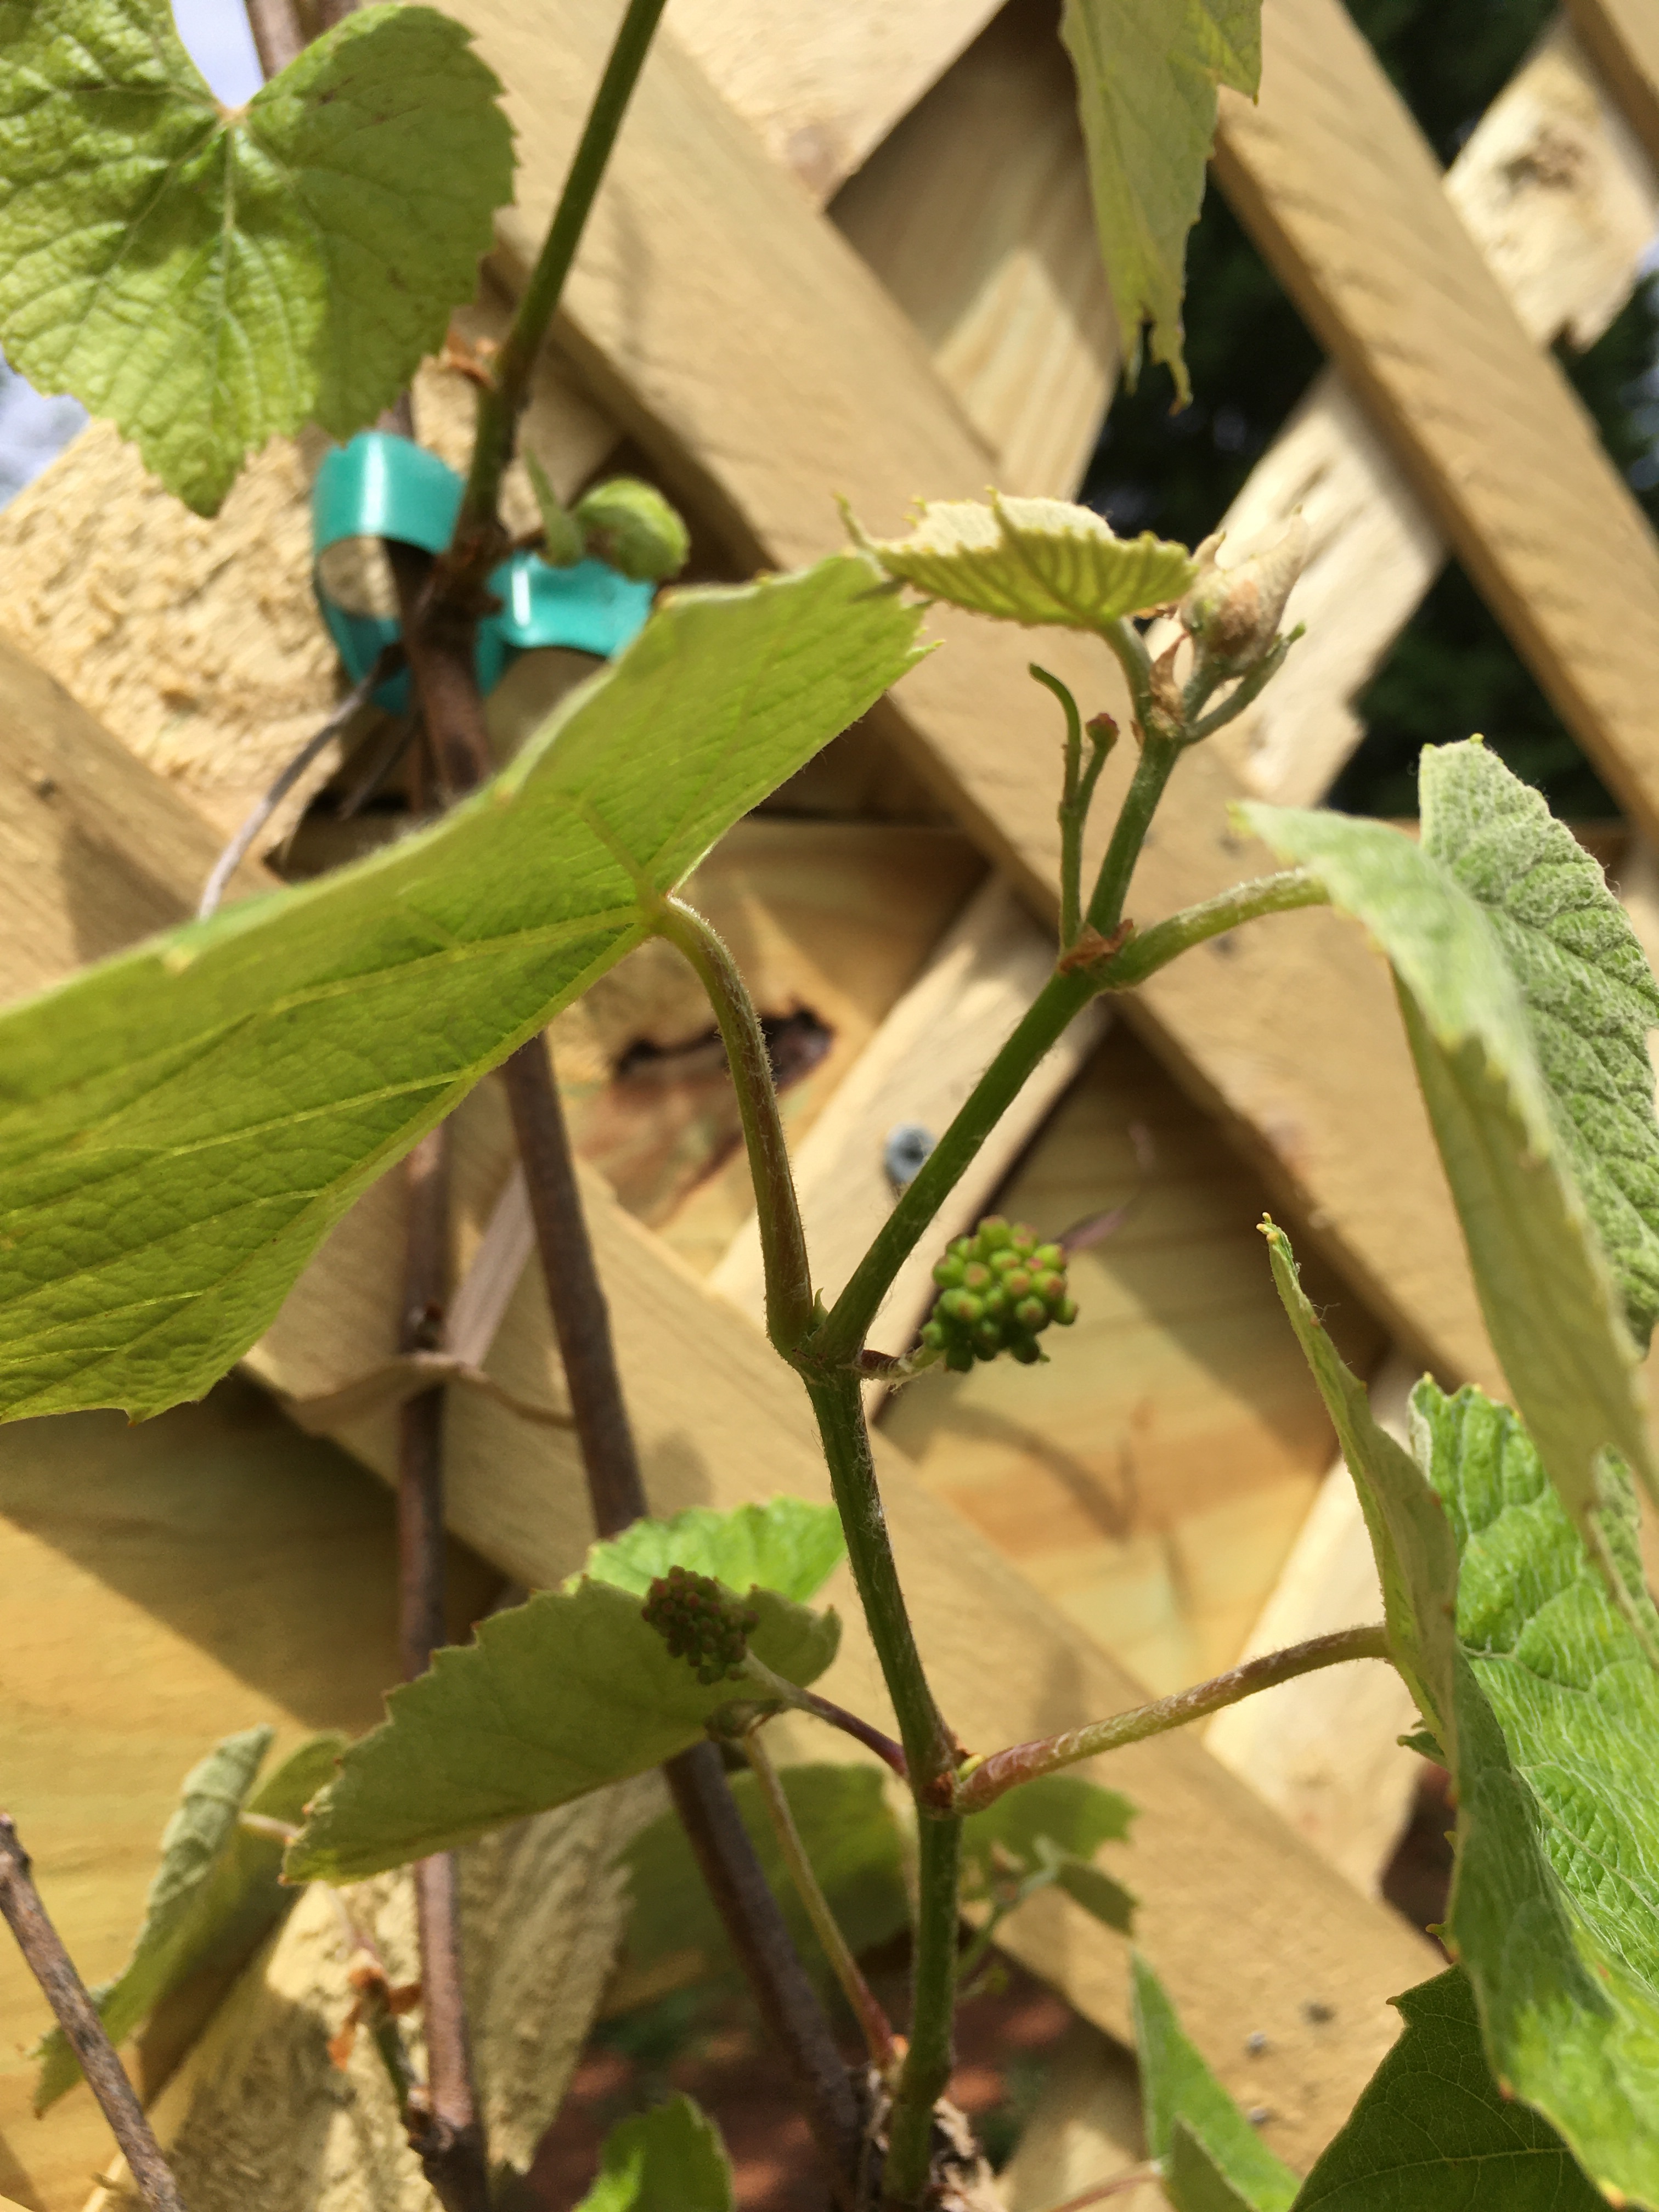
Grapes:
Grape vines attached to arbor.
If you are granted the room, grapes are another great plant to add to your edible landscape. Grapes are very versatile, they can grow on fence posts, poles, trellis, or even chain link fences. As long as whatever they are growing on can support the weight of the vines, grapes are a possibility. Uncultivated, grapes vines will grow up trees and other vertical shrubs that can support the weight of the vines.
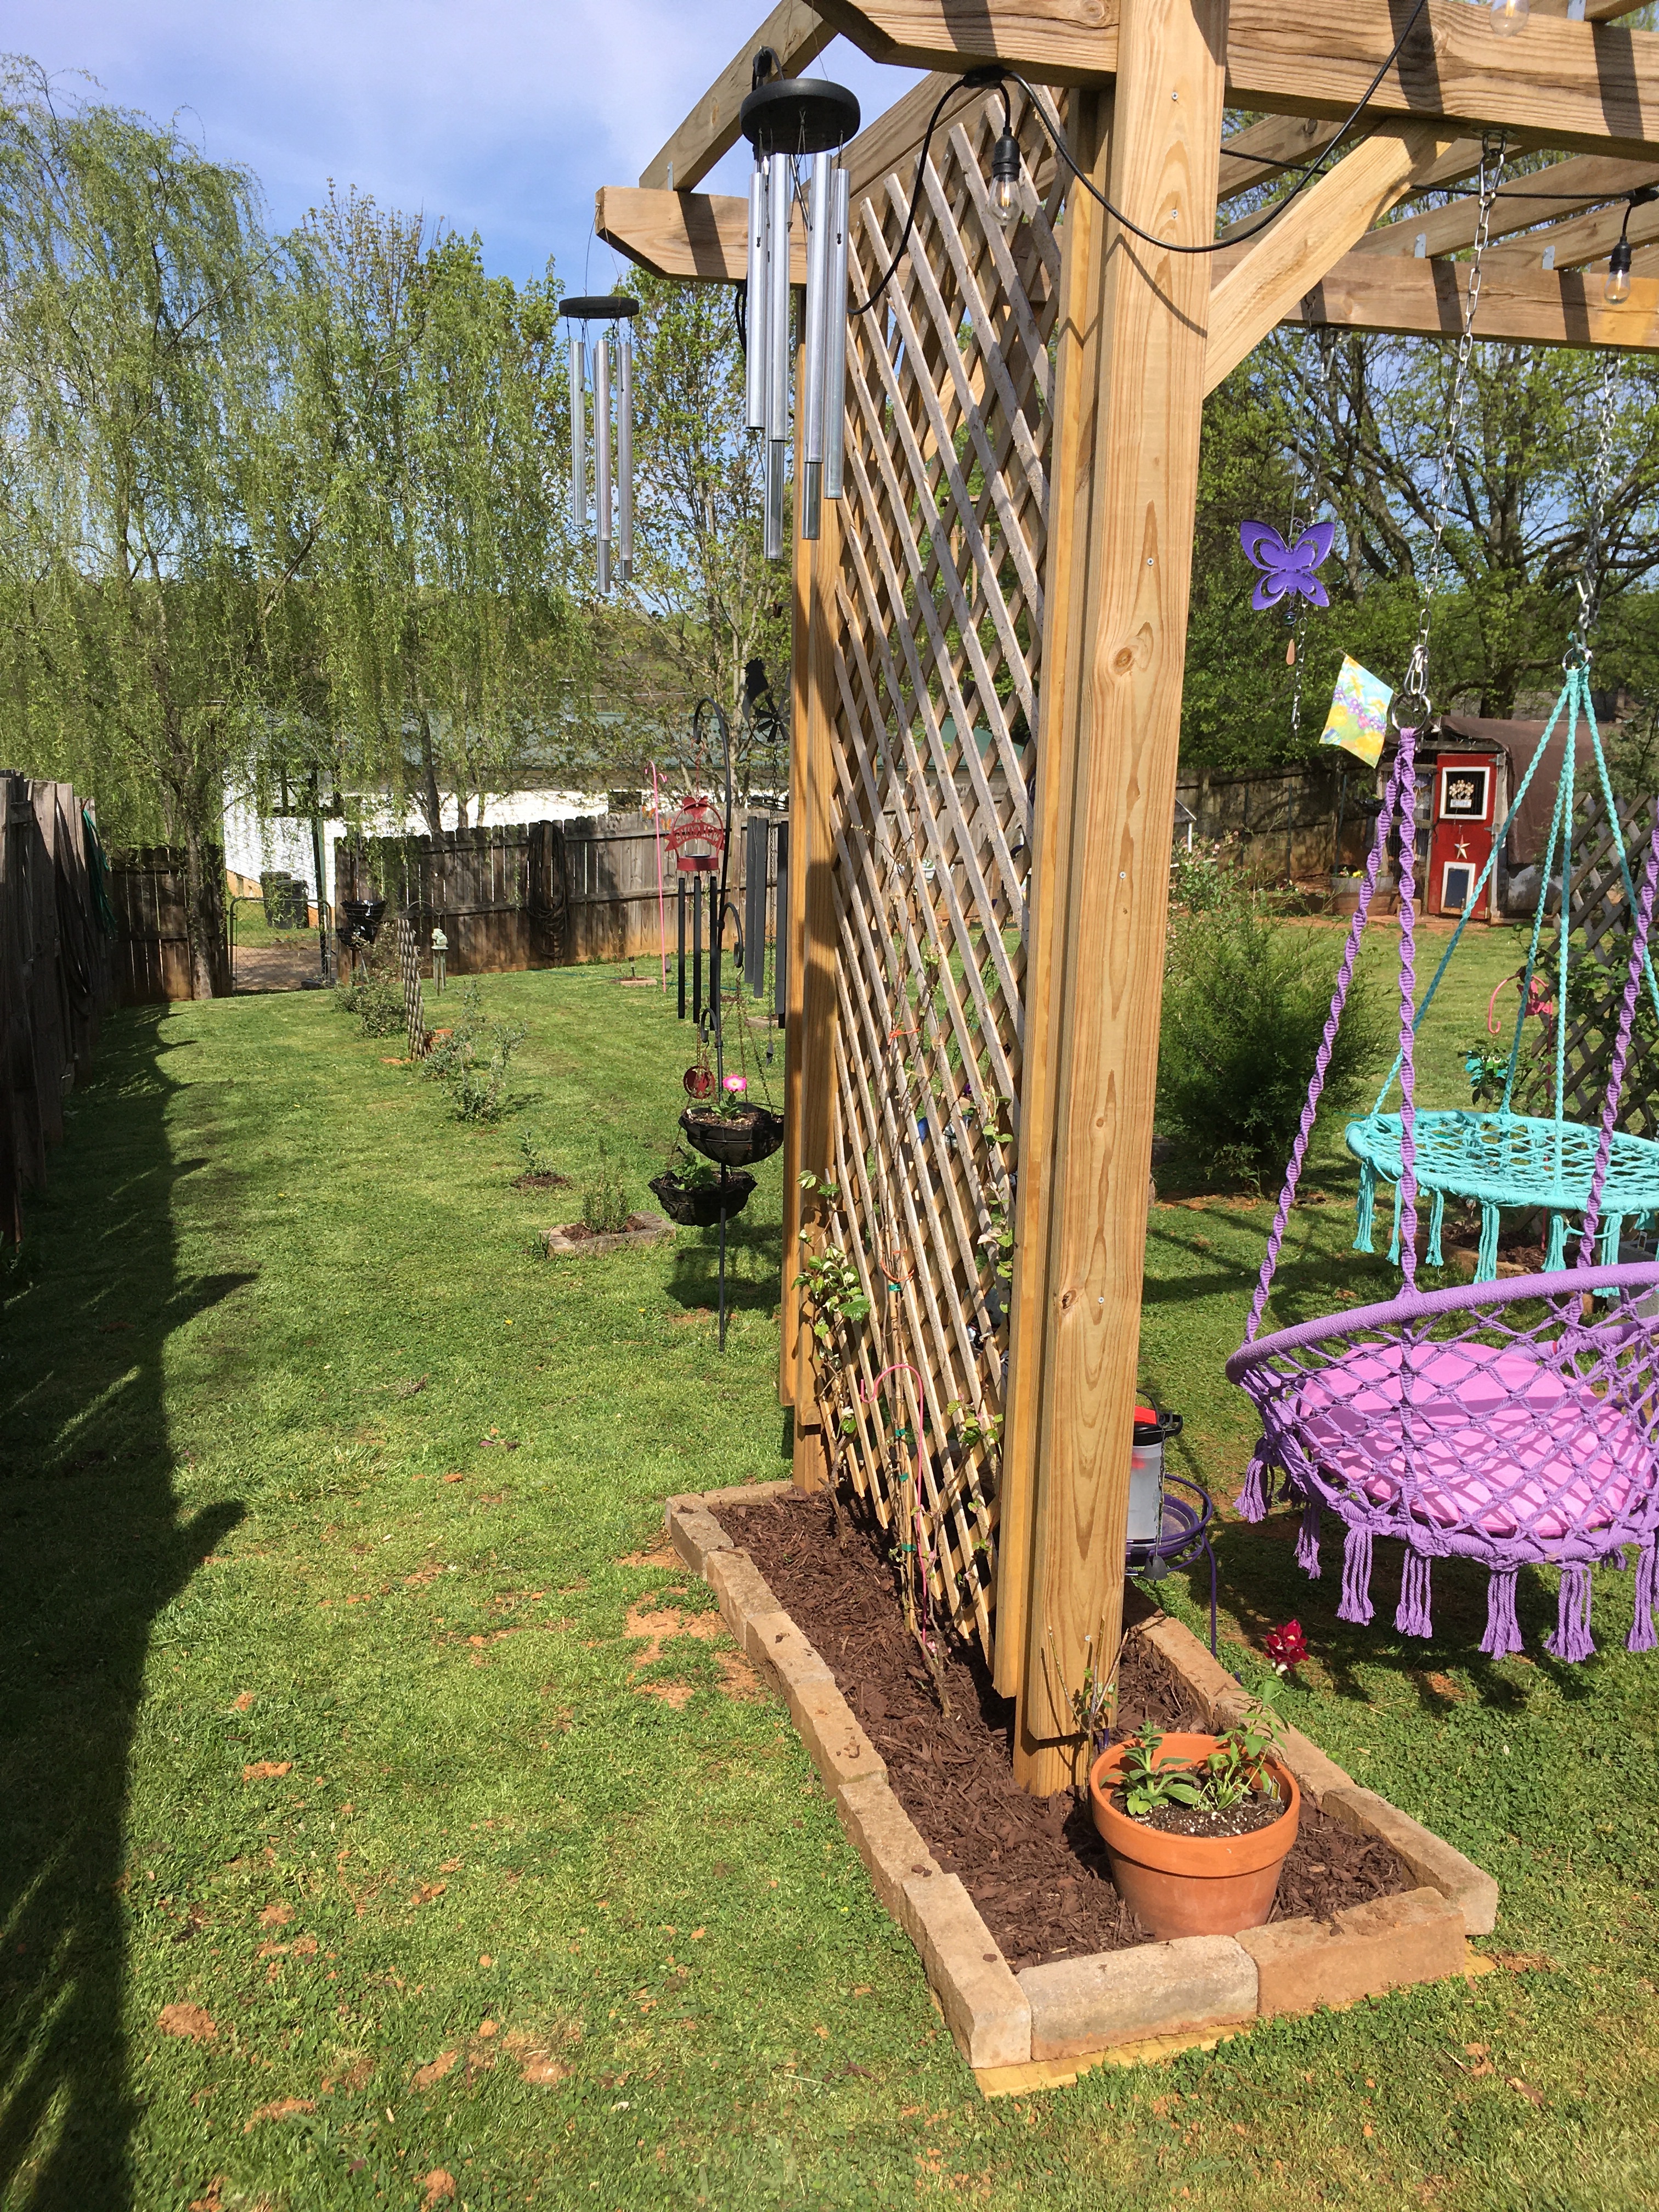
A Grape Arbor is not necessary to grow grapes just the method that I chose. But if you are interested in building a Grape Arbor, a Pergola Arbor is a great asset as it can double as a place to hang a Hammock swing, porch swing, or even a hammock. If you are interested in how we built our Grape Arbor I will link that post here.
Grape clusters on the grape vines.
Unlike Blueberries and other berries, grapes need something to trellis on. To have a successful grape harvest, the vines must be kept off the ground. Grapes also need lots of pruning. I prune my grapes every January, cutting off the dead vines and securing the previous season’s growth to the trellis. Come March/April when the grape vines come out of dormancy, they will grow from the dormant vine and continue their journey up the trellis.
Horticultural/mineral oil spray that I use on my grape vines and other vines that need a hand in dealing with insect loads. Found at Tractor Supply and other feed/farm stores.
You will need to spray your grape vines to keep insects at bay. I use an organic gardening spray that works well at keeping the bugs off and will not harm the chickens or other wildlife in my backyard (just the bugs). It can be found at Tractor Supply or other farm/feed stores.
Neem oil is also a good option but will need to be sprayed more often. I spray my grape vines 3-4 times a year. Once as the grape vines start to bud, then again after they leaf out, again in the mid-season (June-July), and a month or so before harvest. This spray schedule keeps the bugs from eating the leaves and stripping my vines throughout the growing season. Make sure to spray early in the morning or late evening to keep from burning the leaves.
Raspberry:
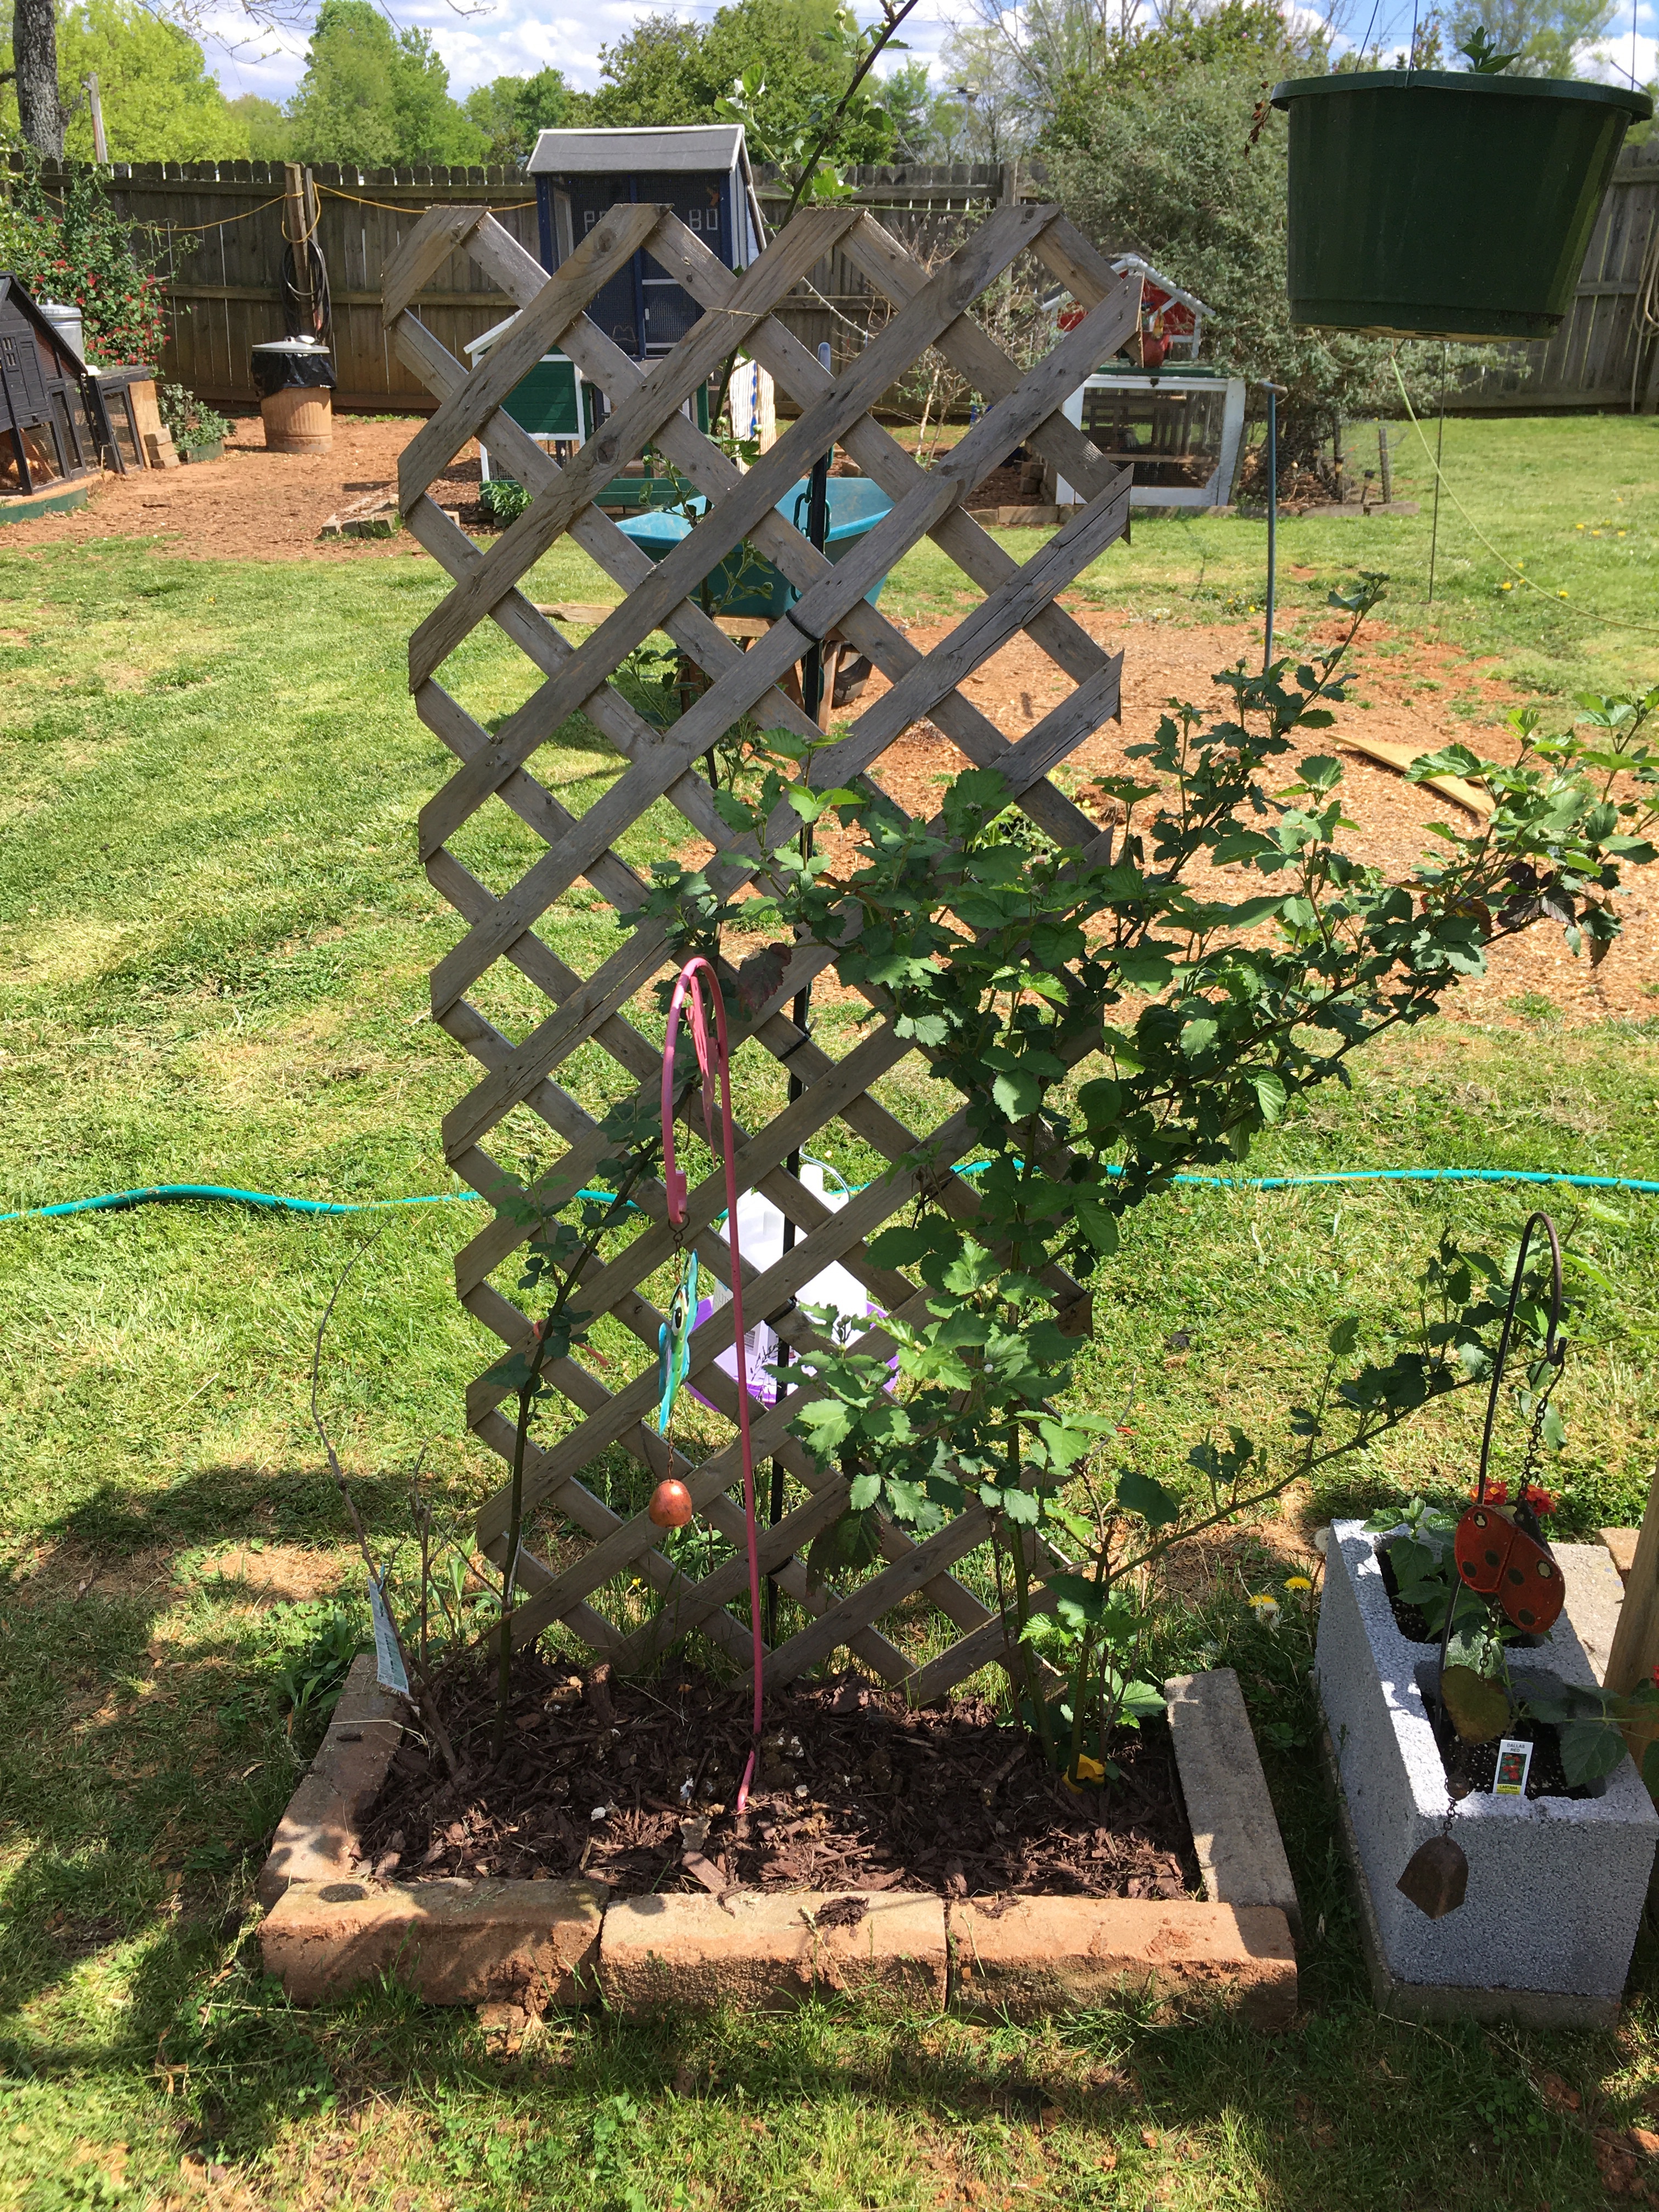
Raspberries planted at back of the Grape Arbor.
Another beautiful plant to add to an edible landscape is raspberry bushes. Newly planted this year, I have the raspberry bushes planted at the back of the arbor. As they grow (like the blackberries, raspberries need a trellis) I will attach them to the grape arbor and let them trellis up the arbor along with the grapes and the blackberries. I have one raspberry bush that survived our cold winter, the rest sadly perished. This year I bought a hardier variety that is cold hardy down to -20. Hopefully, with these new varieties, I will not suffer any more losses of my raspberry bushes.
Butterfly Bushes:
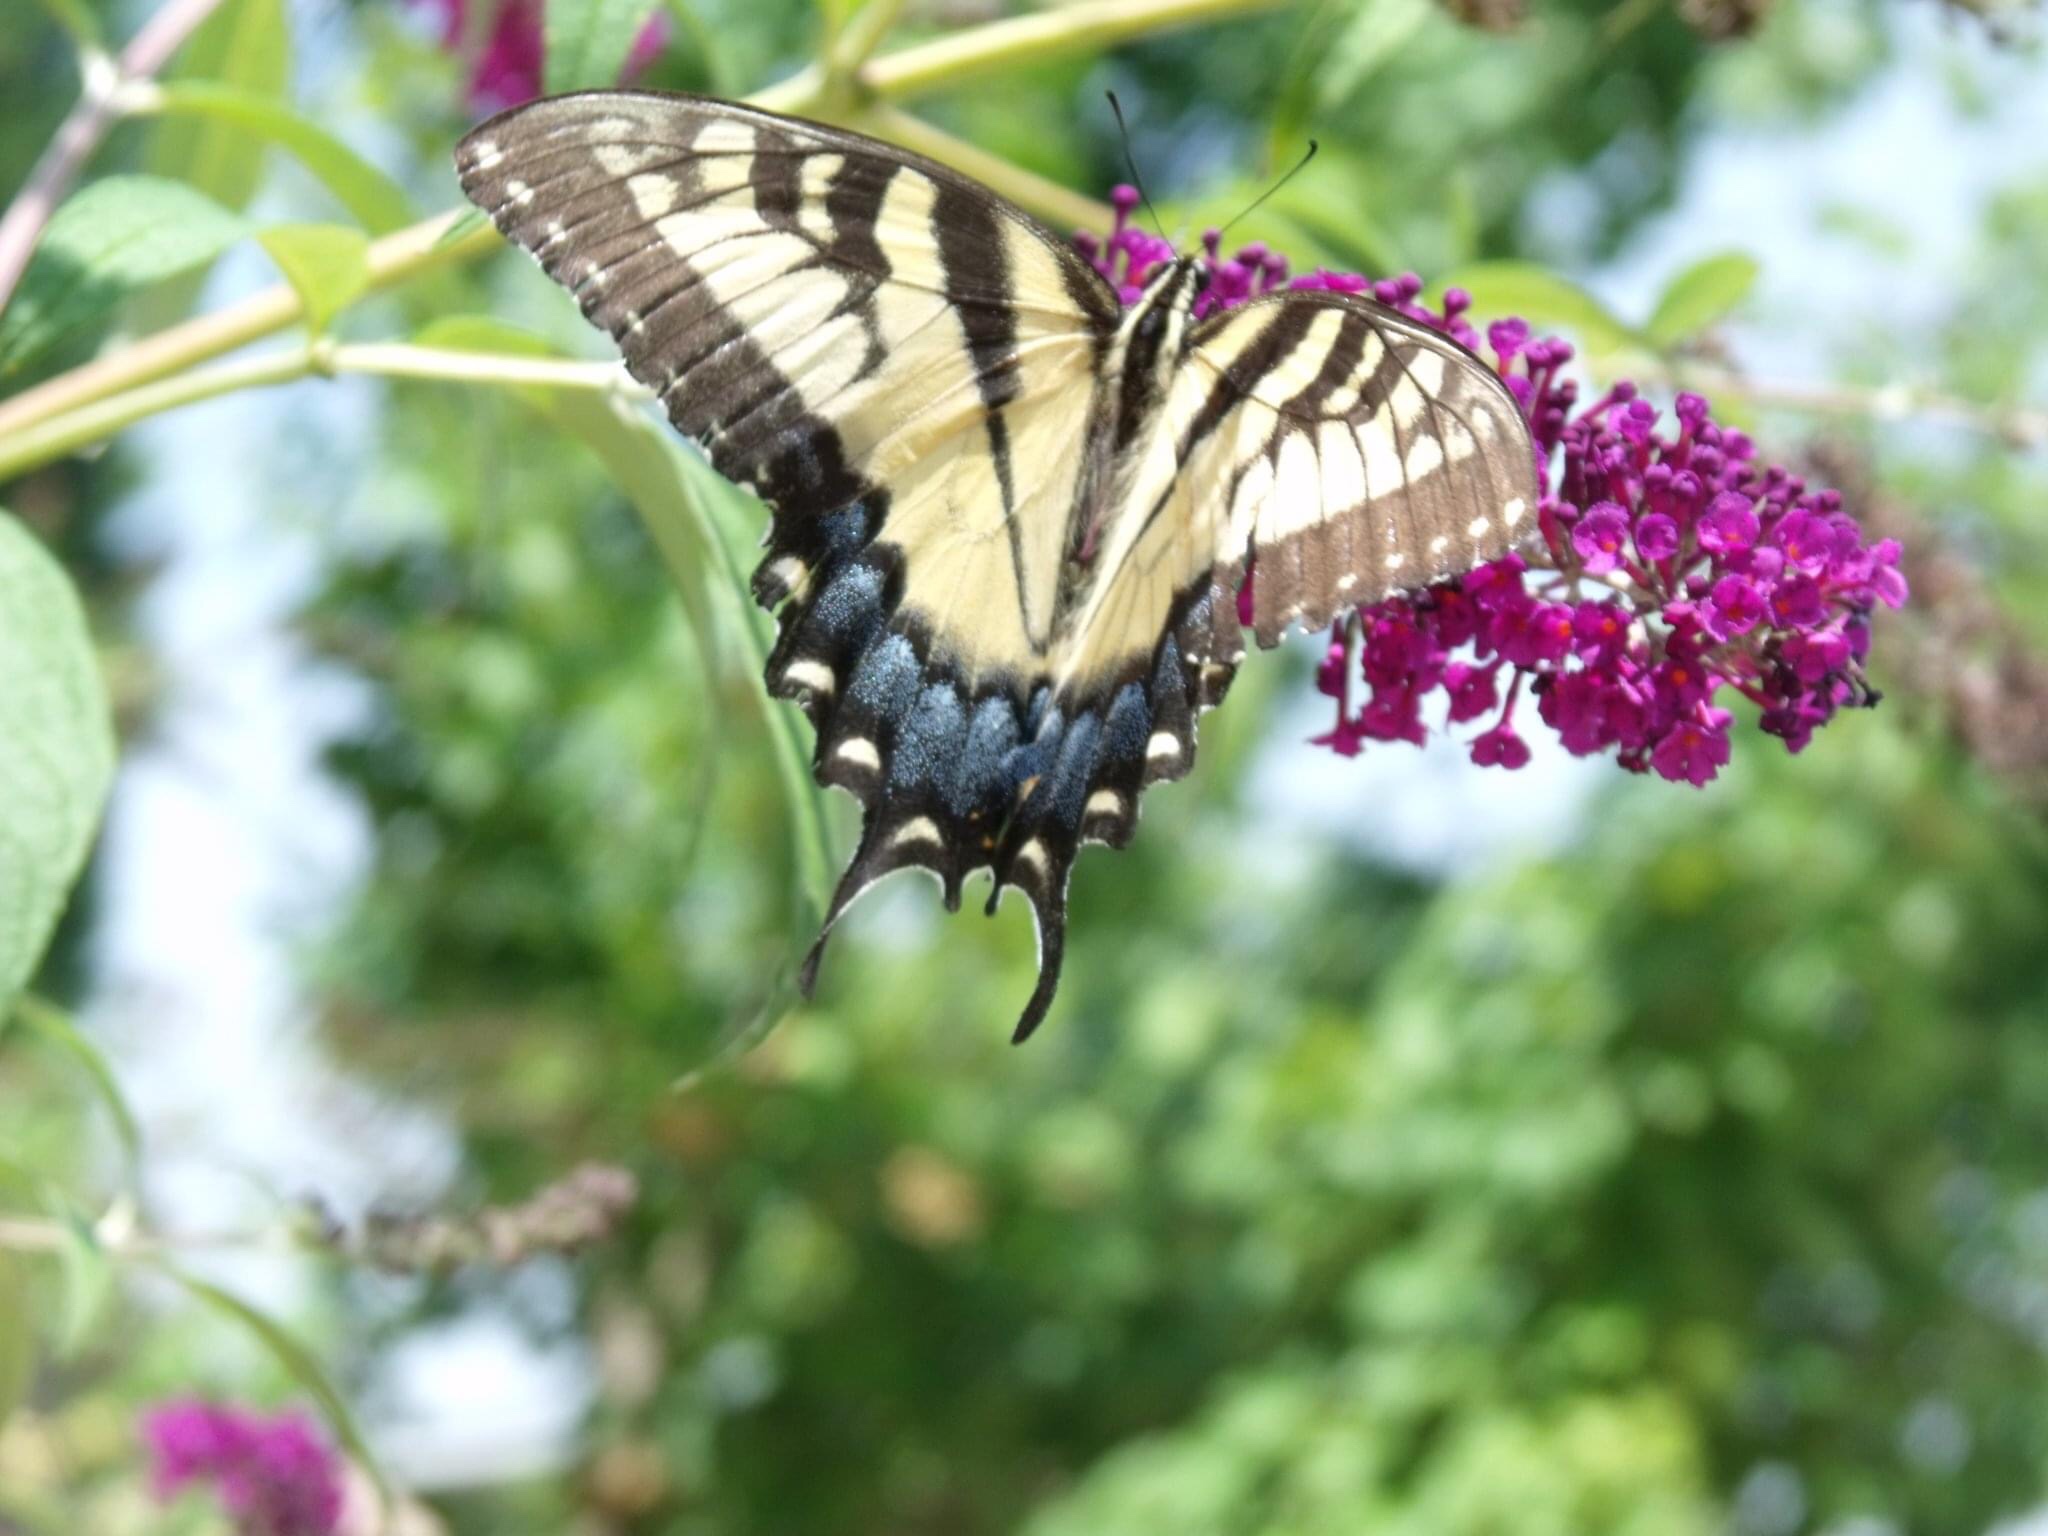
Butterfly bush row opposite the berry row heading to the Grape ArborYellow Swallow-tail butterfly grazing on a Black Night Butterfly bush bloom.
Although not edible (by humans anyway), butterfly bushes are a great plant to add to an edible landscape. Not only are they beautiful, but a stately butterfly bush will attract pollinators to your yard. Everything from butterflies, hummingbirds, bumble bees, honeybees, and hummingbird moths will flock to the butterfly bushes to feed off the nectar of the large blooms.
In mid-summer when the bushes are in full bloom, there is a frenzy of activity around the butterfly bushes. Near the berry row, many of these valuable pollinators visit the neighboring berry bushes and continue to pollinate creating a high yield.
Spices and Herbs:
MintKitchen Patio Herb container GardenChocolate mint, rosemary, and sage grow in my kitchen window gardenMintSageKitchen spice gardenSageDill and other spicesSpice and Herb gardens surround my home and property. I grow just about all the spices and herbs that I use in cooking and insincere making.
Another way to add edible plants to your property is that of herbs. Most herbs are flowering plants that have beautiful blooms that attract bees, butterflies, and other important pollinators.
I grow just about all the herbs and spices that I use in cooking and for incense making. I rarely have to buy herbs because I harvest and dry the herbs from my property. Everything from Basil to lavender I grow in my gardens.
In the fall, I harvest the spices and herbs and use them in cooking, teas, baking, and incense. At the end of this post, I will share one of my favorite dried herb incense recipes that I have to fragrance my home.
Vegetable Gardens:
Veggie garden patrolled by my the extermination crew.
Veggie gardens need no introduction, these gardens no matter the size is a great way to add edible landscaping to your property. I have several veggie gardens. One functions as a kitchen garden, and the other I grow corn, pumpkins, sunflowers, and other fall/winter goodies.
The girls patrol all my veggie gardens, eating bugs off the plants and tilling the soil in search of worms. My girls are a great asset in organic gardening, their natural talents reduce my need for any bug-eliminating regimen. I may lose a tomato or two to a curious chicken, but I plant enough for everyone to get a fair share.
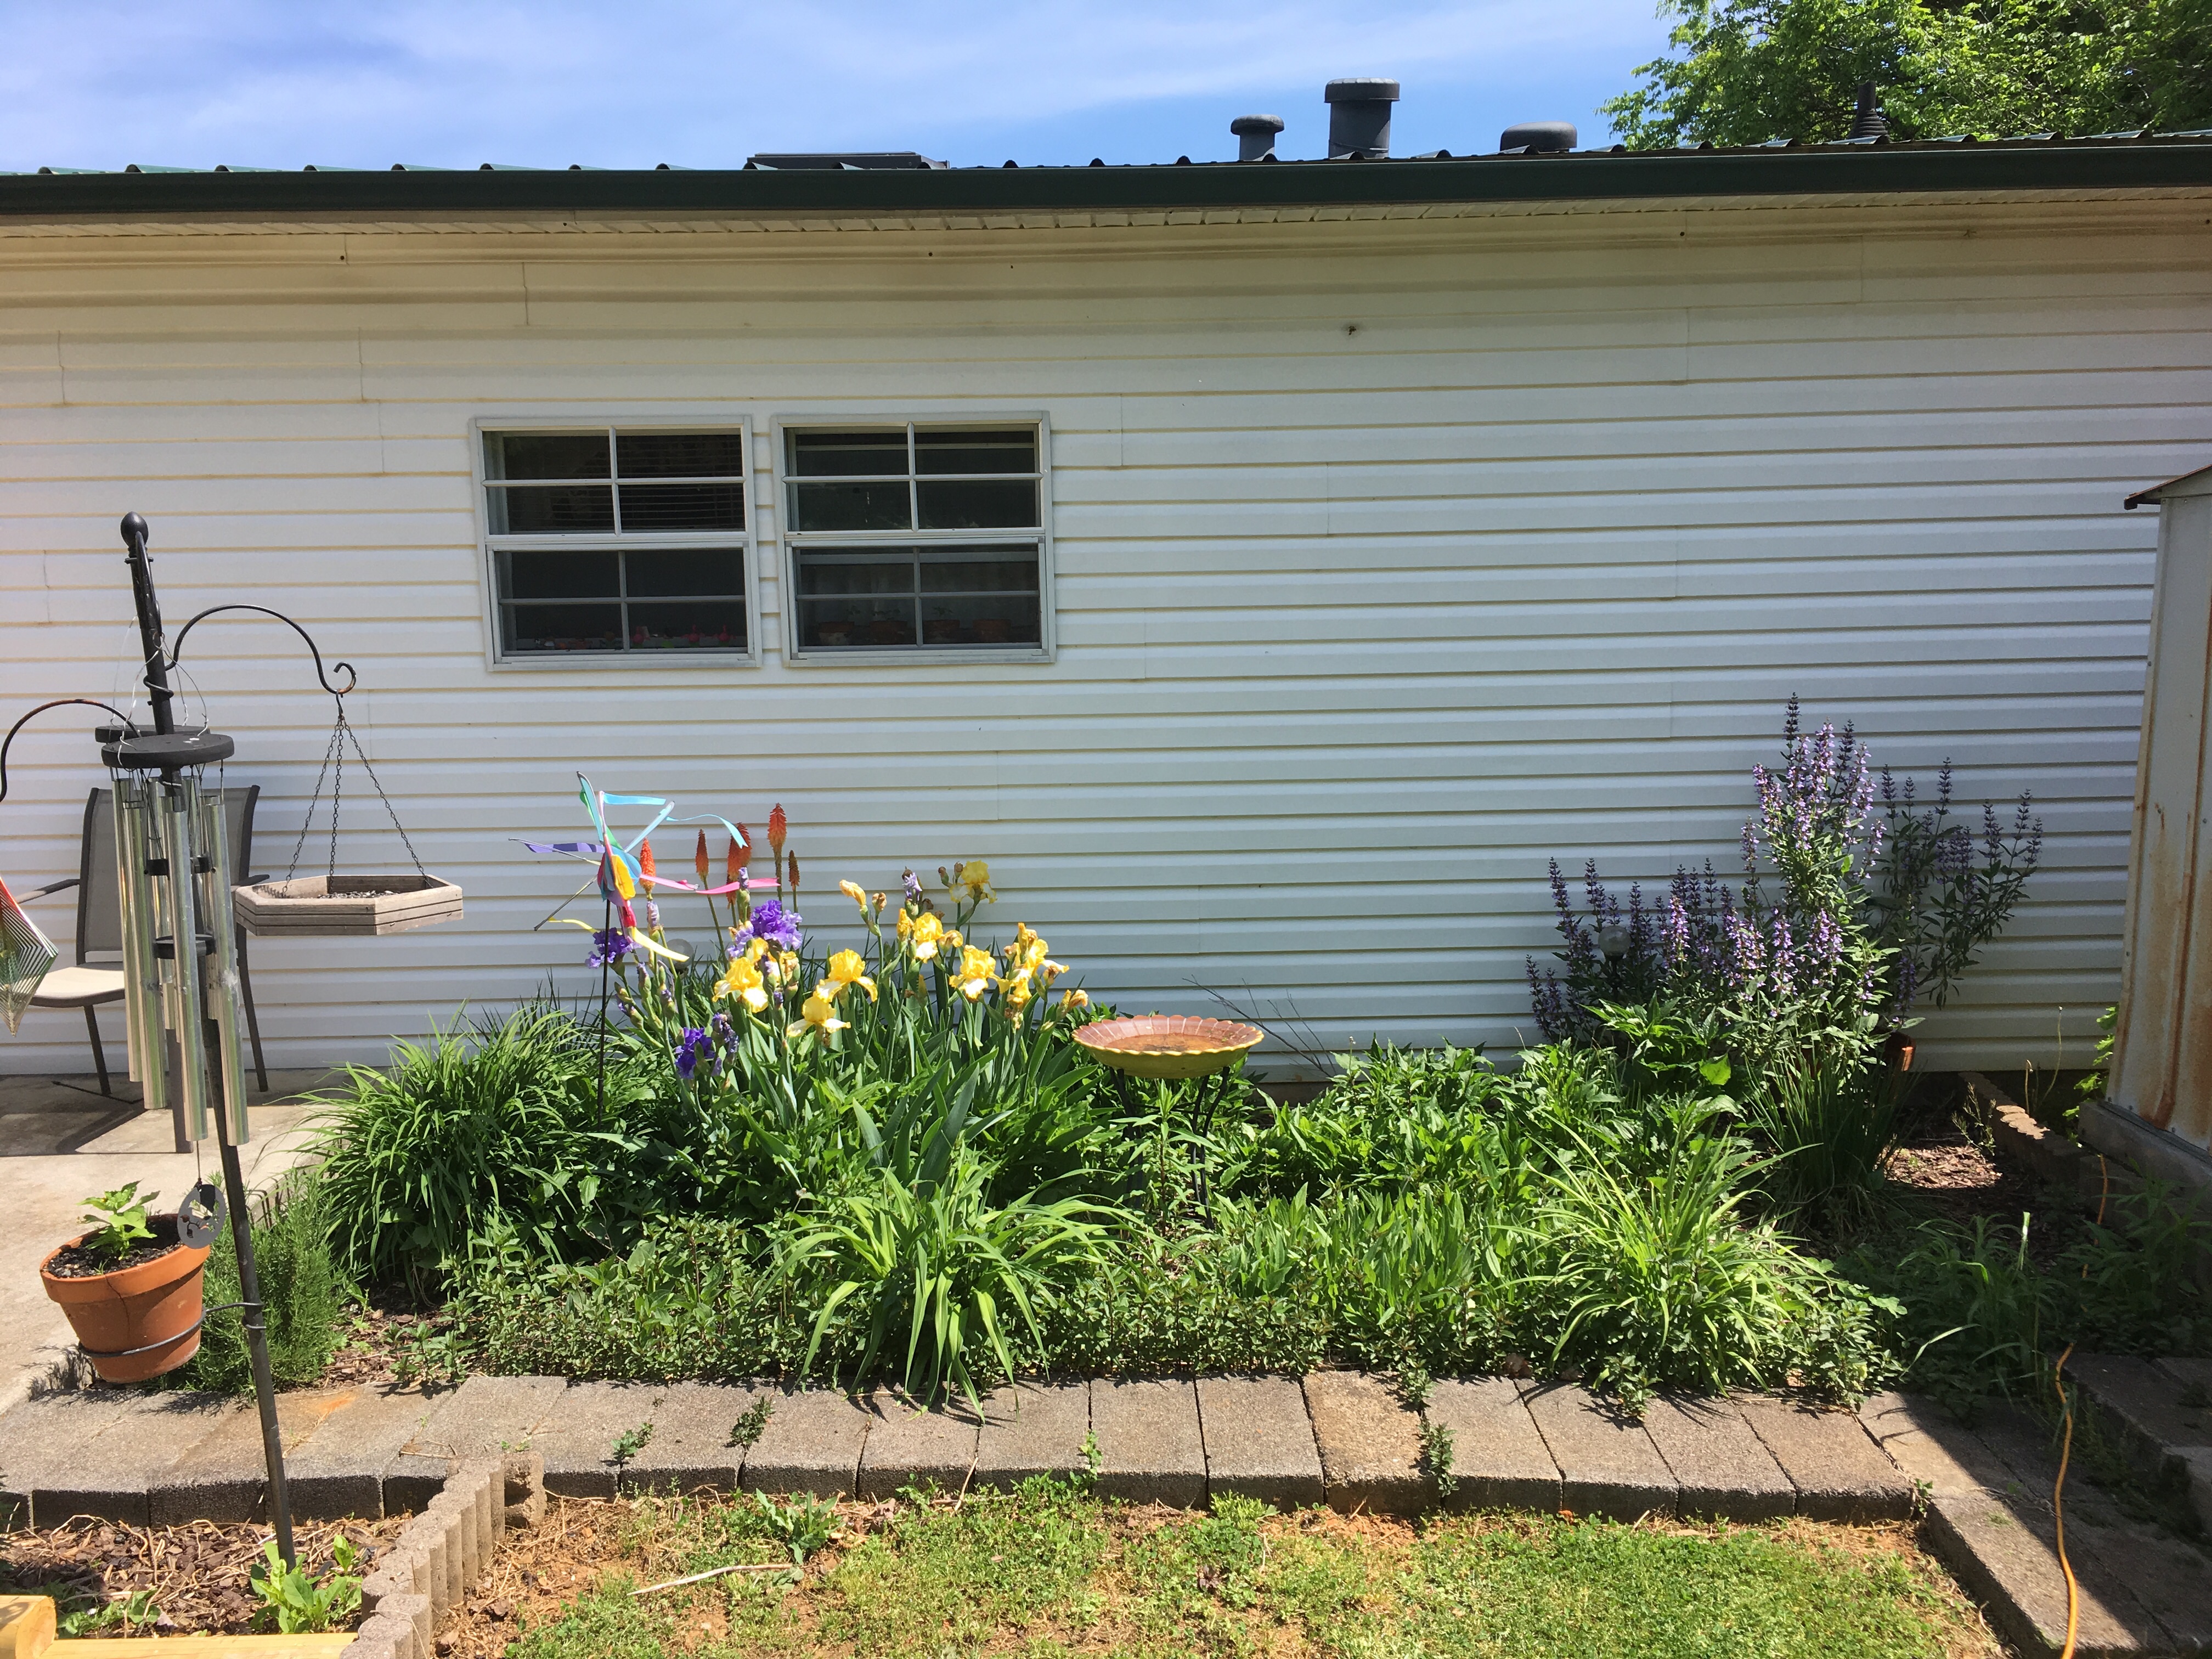
Flower Gardens:
Flower Gardens
Although not edible (by humans) I do have an abundance of flower gardens that surround my home and property. These gardens provide food for necessary pollinators such as butterflies and bees which in turn assist me in increasing a high yield from my edible landscaping. It is through these beneficial insects that we can feed our families and put food on the table.
In an attempt to aid the bee populations, I do not spay any insecticide near my home. Many of my gardens contain herbs and spices which naturally deter many pest insects that would otherwise enter my home.
Chickens:
Given that this is a blog that is primarily focused on raising backyard chickens, how do my girls factor into edible landscaping?
The simple answer is composting. The girls create a very nutritious compost in their coops through their digestive processes. Due to the presence of a gizzard in their digestive system, chickens process everything they consume. When added to the gardens, litter from the coops is the best plant food that money can buy. Because my girls are fed an organic diet, their compost is also chemical free.
Every spring I spread the compost the girls have made in their coops throughout the winter. Chicken coop shaving and poo are high in nitrogen and other minerals, beneficial to plants. Due to the compost from the coops, my gardens are lush and produce high yields.
Many visitors to my farm ask me what I feed my gardens to produce such beautiful blooms and large vegetables. My answer is chicken poo. My homestead is powered by my girls. They are the secret to my success.
Recipe:
As promised, I leave my recipe for natural incense that I created using spices and herbs from my garden. This recipe is very versatile and can be tweaked given aromatic preferences.
The Kuntry Klucker’s Home Herb Insence
For this recipe, you will need an electric wax warmer or a wax warmer that is warmed by a tea light or other source of heat.
1/8 to 1/4 tsp olive oil
1-2 TBS dried rosemary
1-2 TBS dried sage
1-2 TBS Dried lavender
1 TBS Basil
Other things that can be added: Tree resins such as frankincense, dragons’ blood, myrrh, copal, or benzoin. Drops of essential oils can also be added.
In the wax warmer, place a small amount of olive oil, just enough to cover the bottom of the wax warmer. Mix all the dried spices in a small bowl and add to the wax warmer on top of the oil. Turn on the wax burner or light tea light under the warmer. After a few minutes of heating, a spicy yet calming aroma will be released by the herbs simmering in the oil. You can add other aromas as well, such as essential oils or resins to bring the aroma to your liking. This is an all-natural way to fragrance your home without releasing harmful substances in the air such as chemicals that are often added to candles and other wax or oil fragrances.
During the winter, and for culinary purposes I grow herbs indoors under grow lights so I can make my special insence and have fresh herbs at my fingertips.
Dried spices and herbs in a tea light heated cast iron wax warmer.
I am a published author, multi-disciplinary writer, and blog contributor. If you enjoy this blog, please visit some of my other sites.
If you enjoyed this post, please peck the subscribe button. As always, thanks for reading. Till next time, keep on crowing.
If you have any questions about raising chickens or edible landscaping, feel free to post them in the comments or drop me an email. Kuntryklucker@gmail.com.
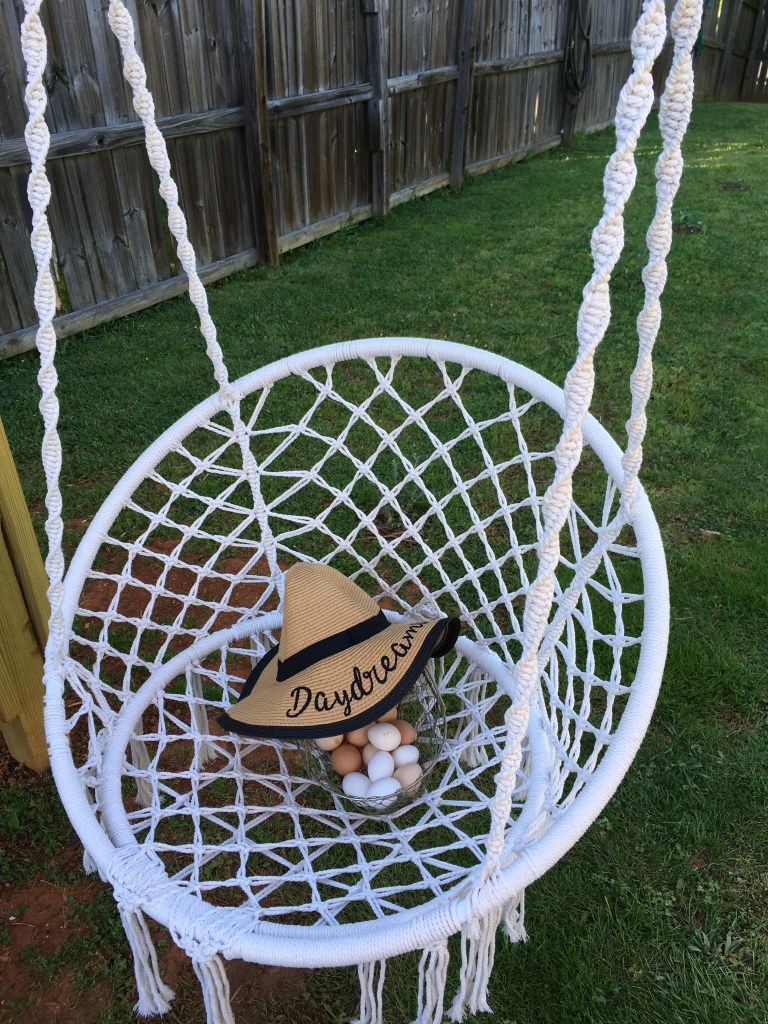
Basket full of the days eggs resting on a hammock chair hanging from the Grape Arbor.
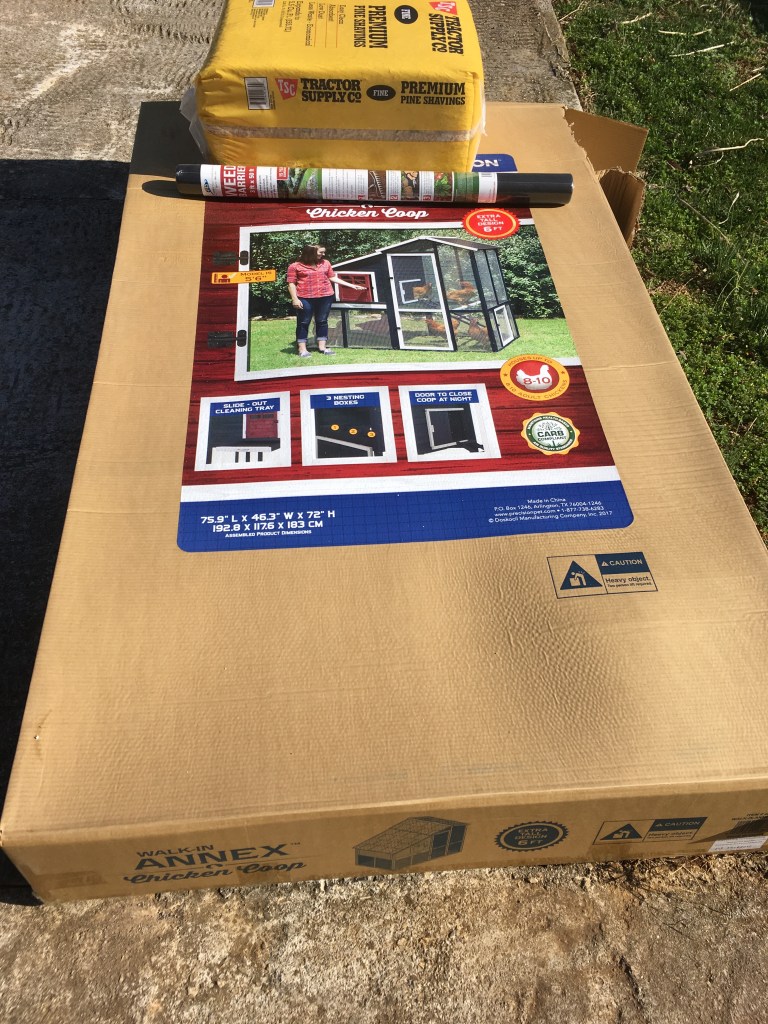
Coops come in two forms, hand-built and prefab. Hand-built chicken coops are built piece by piece by the owner or hired professional. Prefab coops sold in farm and feed stores come in large boxes and only require a screwdriver and a partner to assemble. Unpainted, equipped with one layer of hardware cloth, basic latches, and made of light wood, prefab coops require a little TLC before they are ready to house residents. To see how I prepare my coops for operation please click here.
The TARDIS and Bantam Botique
One of the most important decisions in starting a new flock is that of housing. With many options available on the market, it can be hard to decide which is best for your flock and budget.
Because of these qualities, they are often looked down upon as inferior and subpar to their hand-built counterparts. It has been my experience over the past decade of owning multiple prefab coops that this is a myth based on fear and misconception.
My prefab coops boxed and building process.
I currently maintain 7 coops, 5 are prefab coops. My oldest, The Bantam Boutique, has 7 years under its wing, and Henwarts, the youngest, has just passed 4 years of operation.
I built 2 coops by hand, the rest are prefab coops purchased from feed and farm stores in my local area. My experience with these coops has been very positive and serves my flock well. It is my goal with this post and my experience over the past decade to challenge these fears with reason and my documented experience.
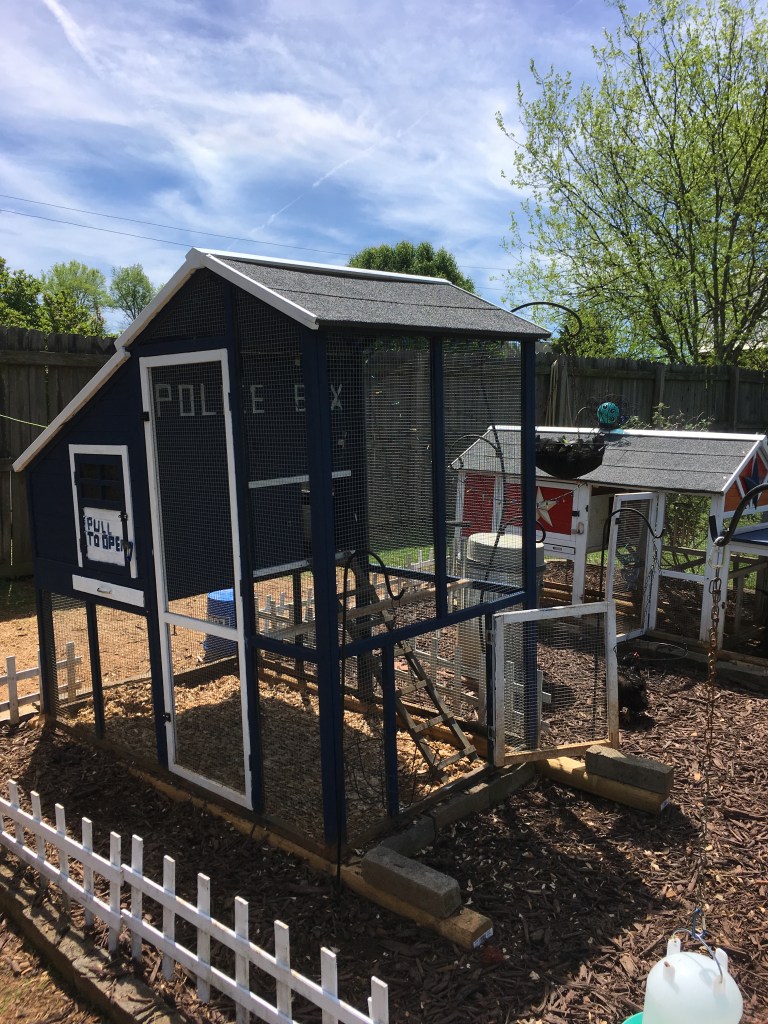
My prefab coops: Henwarts, Roy’s Roost The TARDIS and Betsy’s Bliss
Earlier this month, my farm sustain a tornado that caused enough damage to warrant filing a homeowner’s claim to cover the damage and replace needed items. Through this event, I am able to asses the weather worthiness of my prefab “coop-hood”.
The tornado that moved through my area was an F1 with winds exceeding 90+ miles per house. Our damage includes uprooted trees, destroyed wood privacy fence sections, and only 1 of my prefab coops.
Our large willow tree was uprooted and thrown into the fence. The wind attempted to lift the TARDIS and throw but secured to its foundation, this was not achieved. The wind did however push it off the foundation and destroyed the roof.
Our large willow tree was uprooted and thrown into the fence. The wind attempted to lift the TARDIS unsuccessfully off of the foundation. In the process, the roof and structure were damaged.
Many of my neighbors have similar damage, trees uprooted and thrown into cars, sheds, and houses. We were fortunate that we did not sustain any home or vehicle damage or lose any of our flock members. All my girls are accounted for and unharmed, even those residing in the TARDIS at the time of this event.
I want to show that although one of our coops was damaged the forces were extreme. The TARDIS encountered winds above 90+ mph, which damaged property and uprooted trees in my neighborhood. Furthermore, the TARDIS was the only prefab coop that was damaged.
Once winds exceed a critical value, the damage is inevitable, laws of physics take over, and we are just along for the ride as Mother Nature exhibits her power and our inability to control her.
It is through this experience that I can testify to the wind worthiness of a prefab coop that is mounted and maintained. I put all my prefab coops through a mounting process to increase their wind durability and resistance. My process was conceptual until now. Tested and withstanding an assault from a confirmed tornado, I can honestly say that prefab coops are a worthy investment and weather worthy if they are maintained and mounted.
Many try to persuade and discourage chicken keepers from purchasing these coops, unfairly stigmatizing them because they lack the proper experience and knowledge of a properly mounted and maintained prefab coop. When these stipulations are met, prefab chicken coops are worthy homes for a backyard flock.
I have attached a video assessing our property damage including the TARDIS. In the video, I dispel myths about prefab coops and their durability. To watch this video click Here.
All of my coops are covered under my home owners insurance policy. Along with the other property and tree damage we sustained, I have added the TARDIS to our claim. Once finalized, I will purchase another coop to replace the TARDIS and follow my mounting procedures as they have proven affective.
I hope that through this experience I have put your mind at ease regarding prefab coops. Yes, these homes are a worthy investment and make a great home for your girls.
If you have any questions, please post in the comments, and I get back to you promptly.
I am a multi-disciplinary writer, blogger, and web content creator.
In the coming days, the United States is going to experience some of the coldest weather in almost 40 years. A polar cyclone with the pressure of a category 3 hurricane will descend on the middle and eastern half of the country. Numerous advisers and warnings are in place in anticipation of the polar airmass.
For backyard chicken keepers, this presents unprecedented challenges. Throughout the past decade of owning chickens, I have never encountered temperatures that are forecasted for the coming days. Like many backyard chicken keepers, I am making preparations to weather the worst of old man winter. Below I have some tips to help you prepare your flock for severe winter weather.
Wrap to buffer the winter winds.
Help your flock buffer the worst of the winter winds by wrapping your coop in construction-grade plastic or feed bags. Supplying your flock with a windbreaker will aid them in the ability to keep warm. Chickens are well adapted to living outdoors and keeping warm by generating body heat and trapping it with their feathers. If a cold blast of wind lifts their feathers, they will lose all the heat that worked hard to achieve. Installing a windbreak around the coop will have the added purpose of keeping the elements out of the coop and pen. During times of frigid weather, keep your flock confined to the coop and pen. Chickens can freeze to death if they are subject to cold bitter winds for sustained periods.
Provide plenty of feed.
To keep warm in cold weather, chickens will consume extra calories to help them generate necessary body heat. In times of severe winter weather, it is important to make sure that your flock has access to plenty of food. To ensure that all members have access to calories needed provide several feeders. Offer them high-calorie treats such as a scratch or cracked corn. While I don’t treat my flock too often because it dilutes the nutrition they need from their feed, in times of severe winter weather I make an exception.
Offer bordom busters
While winter weather rages, confining flocks to the safety of the coop and pen, they can get bored. To prevent boredom related behavior issues, provide essentials to keep your backyard flock mentally engaged. Place a sandbox in the pen and fill it with play sand, in a plastic bottle poke small holes and fill them with scratch, scatter mealworms on the pen floor, and provide hours of pecking fun with a flock block.
Liquid water is essential.
When temperatures plummet, water is necessary. In addition to increased calorie consumption, water aids chickens in regulating their body temperature. Take steps to make sure that your flock has drinkable water. Employ a heated waterer, make a tin-heated water base or haul fresh unfrozen water out to your flock several times a day.
A note on heat lamps.
Although it may be tempting to supply a heating source in your coop, refrain from doing so. Heat lamps are dangerous, and responsible for many tragic coop, house, and barn fires. Your flock comes factory installed with down coats, the same coats that we put on in cold weather, they are wearing. Chickens do not need heat, rather assist their efforts in keeping warm by implementing the steps aforementioned in this post.
Providing your flock with a wind-free environment, plenty of food, and clean drinkable water is all they require; they can do the rest.
I hope these tips help as your make preparations for the coldest temperatures in decades. You are not alone, backyard chicken keepers all over the nation share the same concerns, I am here to offer a little direction. If you have any questions, please post in the comments, I will check often and get back to you promptly.
I am a multi-disciplinary writer, blogger, and web content creator. If you like this post, peck the subscribe button.
As chicken enthusiasts, we spend many hours decorating our coops, shopping for just the right accents to tie the coop together. While the girls might not appreciate our efforts, as a chicken owners, we want our girls to have a nice place to call home. Backyard chickens provide many things eggs, companionship, entertainment, fun, and decoration. Today I invite you inside and show you how I use my chickens to decorate my home.
My house is a simple, one-level ranch-style home. Some people see simplicity as mundane, I see simplicity as a blank canvas. The hub of my home is the kitchen. As a family, we spend many hours cooking, gathering, and sharing life’s stories in this room. Naturally, it’s my favorite room in the house. As a chicken keeper my kitchen theme is chickens.
First, I decided what colors to reflect my country chicken theme. I decided on sage and dark brown. I painted the cabinets to incorporate these colors. The lighter sage color offers fun, dark brown below brings grounding. The butcher block wood countertop adds an overall farmhouse feeling to the room.
To break up the brown, I hung towels over the bottom cabinets. The towels add an extra touch with chicken embroidery. On the floor in front of the cabinets, I have rugs with the incorporated colors of sage and brown.
The pantry is free-standing in one corner of the kitchen. To tie the color of the cabinets together, it is the same dark brown.
The space above the cabinets is a decorating platform. I have collected various chicken theme objects that I continuously add. Because the top of the cabinets is shrouded in a shadow, I weave some mini LED lights to illuminate my collection.
Over the sink, I adorned the window with ruffle curtains in a country chicken print. The curtains have various sage and brown hues.
Opposite the stove, nestled in the breakfast nook, stands an antique drop-leaf table. Painted a yellow accent color on the table rests an indoor spice garden. Above hangs a Tiffany stained glass light fixture. This light fixture introduces splashes of yellow and sunflowers into the overall kitchen decor theme.
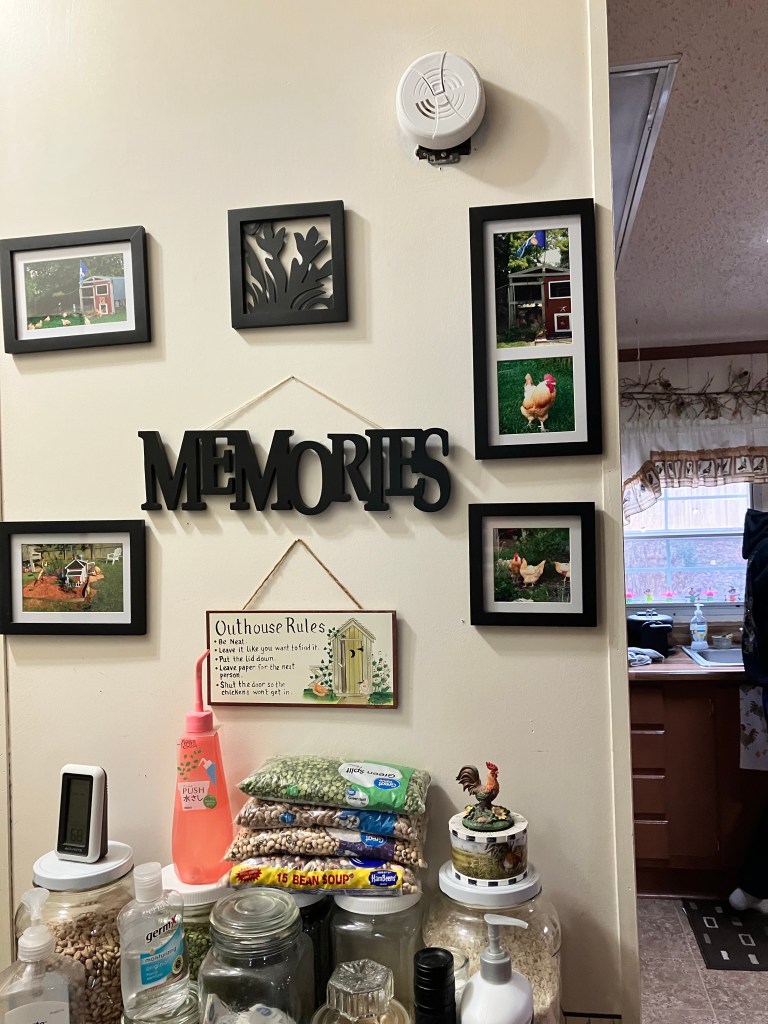
Pictures of my girls comprise the wall decorations. In the hallway leading to the guest/hall bathroom, hang photos taken of the girls throughout the years. Guests that visit my home stop and take in the pictorial journey of my ladies.
Above a canning shelf hang photos of my first flock of Buff Orpingtons.
In the corner of the dining room, a triple-tier metal basket holds eggs collected from my flock. As a free-standing storage basket, this allows eggs to be kept at room temperature while saving much-needed counter space.
Above the egg tier, hang more pictures of my flock. Directly across from the front door, this display initiates many conversations about the lavish life of my girls.
Throughout my home, accents of my chickens are seen. From the sofa to the living room plant display, my girls are the focus of my farmhouse.
Keeping backyard chickens has many benefits beyond the humble egg. You can use images, eggs, and other gifts from your girls to decorate your homes. Many make wreaths from feathers shed during molting, ornaments from egg shells, and decorations from feed bags. It only takes a bit of imagination and a little creativity to create a farmhouse theme utilizing your flock.
I am a published author, multi-disciplinary writer, and blog contributor. If you like this blog, please visit my writing portfolio.
Daylight is retreating, leaves cover the ground and frost blankets the early morning hours. This is natures way of telling us that a change of season is upon us. As backyard chicken keepers, it’s time to prepare the coop and flock for the coming cold weather and winter precipitation. Old man winter is on his way.
For new keepers, the first winter with chickens can be a time of apprehension and anxiety. I know these feelings all too well I was there 12 years ago with my flock as winter approached. Fortunately, winterizing a chicken coop is simple with minimal cost, no more than the cost of a bag of feed.
The TARDIS wrapped and ready for winter.
Chickens are simple creatures; they need a clean and dry place to call home. Contrary to popular opinion, chickens do not require heaters or other “creature comforts” to weather the worst of old man winter. Chickens come factory installed with down coats; they need a barrier around their coop and pen to buffer the worst winter winds and weather.
The Kuntry Klucker protected as the snow blankets the ground. The ladies and gents are warm and cozy inside.
Typically, I use construction grade plastic to buffer the worst of old man winter. This year, with rising inflation and supply issues, I decided to wrap my coops with feeds bags.
We are all familiar with these feed bags. They are tough heavy bags sold for 25 or 50 pounds at farm/feed stores. Due to the weight, they have to contain, they are made of tough material. They are water and weather-resistant and make excellent barriers to buffer winter winds and precipitation.
Purina 50 lb feed bags.
The procedure for this project is fairly straight forward. Remove the ends of the bags by cutting away the reinforced seam, then cut the bags down the side to allow them to lay flat. With a staple gun, simply staple the bags to the wood around the coop and pen. This is best done with a few helpers, someone can prepare the bags, another can assist in positioning the bags against the wood. That’s it, it’s that simple to prepare your coop and flock for winter.