Backyard Chicken Health Inspection Guide: Preventing Illness in Your Flock

Buff, Silver-lace, and Golden lace Polishes gathered for routine health inspections.

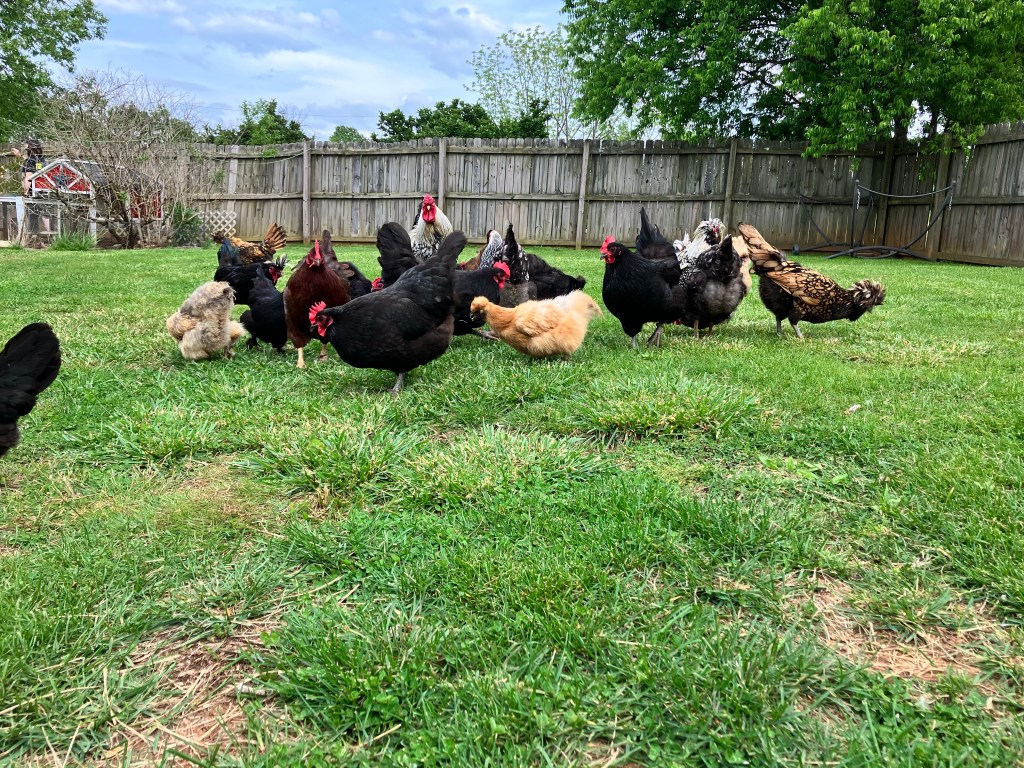
Performing routine health inspections on chickens is essential and a prerequisite for a healthy flock. Like a check-up at a physician’s office, health inspections for chickens are much the same. Catching problematic pathologies before they occur requires routine health inspections.

I will discuss the process and procedure for conducting successful health inspections in a backyard flock. Beginning at the head down to the body and tail, I will include all the vital indications to prevent illness in the backyard flock.

Head, Eyes, Comb, and Waddles:

Apollo (White Crested Polish Hen) posing as I inspect her eyes for indications of ill health.

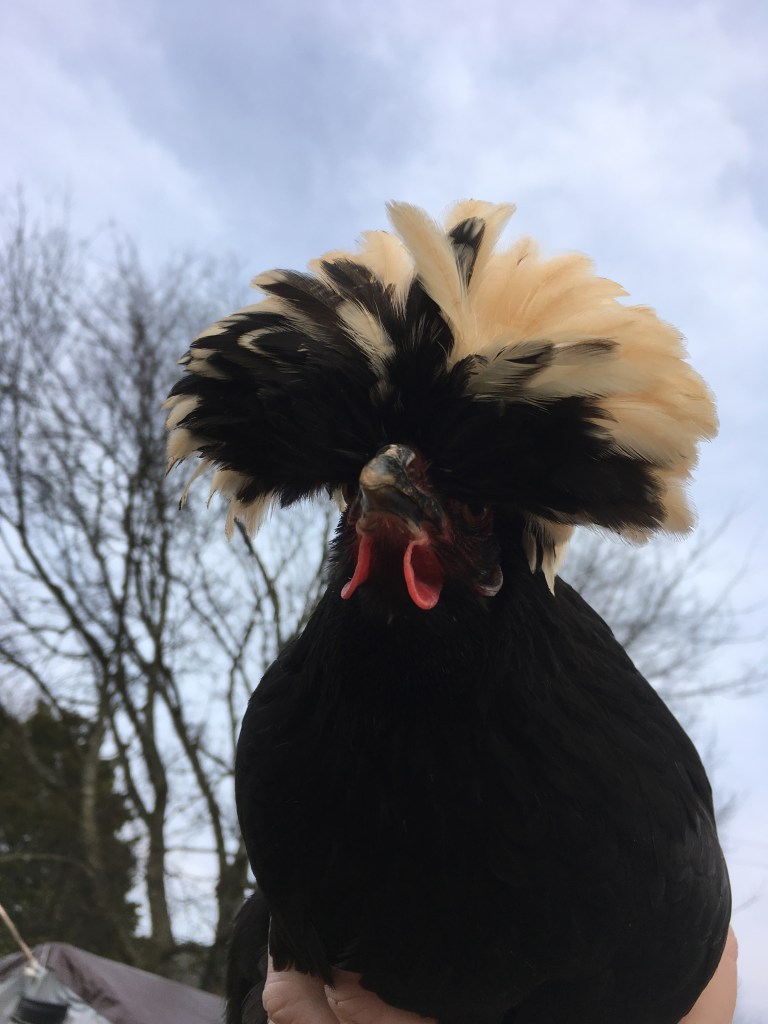
Starting at the crown of the head, inspect for mites and lice on the individual. If mites and lice are present treatment will be required. The eyes should be clear and free of debris. If crusting is present around the eye, gently wipe it away with a paper towel moistened with clean, warm water.

Dracula (Silver Lace Easter Egger) shaking his waddles for the camera.

The comb and waddles should be red and warm to the touch. Dried blood or pecking marks indicate flock disharmony and bullying. Monitor the flock and take appropriate actions to rectify the problem by isolating the bully or establishing a bachelor pen if roosters are sparring.

Legions or sores indicate fowl pocks (a common virus) or parasites such as fleas or ticks. Treatment with Eprinex will clear up external parasite infections. I have a video on my YouTube Channel showing my methodology to treat external parasites in my flock.

Neck:

Buff and Golden Lace Polish hens hunting and pecking as they search for delicious morsels.

Moving down the body, examine the neck of the bird. Feathers should be clean, and the base of the shaft should be visible. If clumps or residue surrounding the base of the quill is noticed, this indicates the presence of lice. Treatment with eprinex is warranted to address these external parasites.

Wings:

Lestat (White Crested Polish Rooster) proudly displaying his feathers to attract his favorite hens.

The wings of birds are among one of the favorite places for external parasites to congregate. Due to the warmth and protection from disruption, mites and lice can live rent-free. Parting the feathers and exposing the skin, tiny moving dark spots indicate red fowl mites. These small parasites feed on the host’s blood and must be addressed. Again, Eprinex works very well to address and abruptly stop a mite and lice infestation on the bird.

Tail and Vent:

Clean and health fluffy bottoms of a Buff Silkie, Black Australorp, and Silver Lace Wyandotte Rooster.

Like the wings, the vent is a favorite place for mites and lice to congregate. Due to the inability of the bird to preen this location, mites and lice will multiply unencumbered. Treatment for external parasites will rectify the infestation.

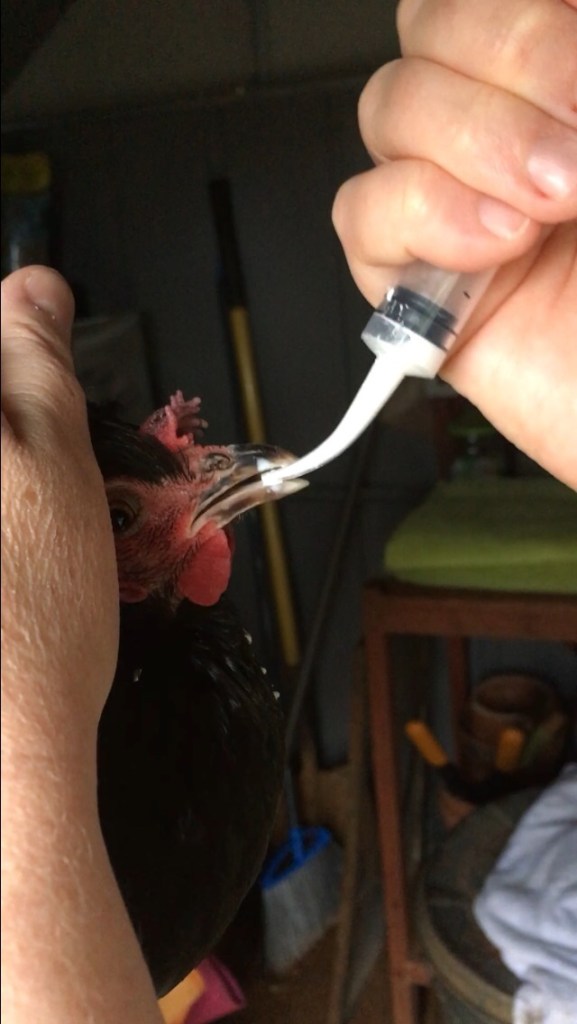
If the vent area is dirty or caked with dried or wet excrement, this indicates worms. Left untreated, intestinal worms will weaken and eventually cause death in affected individuals. Natural wormers such as Diamateous earth, pumpkin seeds, or apple cider vinegar will not address a high worm load in chickens. Worm infections should be treated with products developed to kill worms and the eggs in the intestinal tract. Another indication of worms is finding roundworms on the poop boards or worms visible in the eggs. See the video on my YouTube Channel using my flock to demonstrate proper dosage and administration.

Shanks, Feet, and Toes:

Bumblefoot in a Buff Orpingtons Hen

The shanks (legs) of the chicken should be neat; the scales should lie uniformly. Uplifted scales are a sign of leg mites and can be addressed by soaking the legs in warm Epsom salt, followed by applying Vaseline to the legs to smother the mites. Treatment with Eprinex is also helpful in advanced infestations.

The pad of the foot should be clean and without puncture wounds or signs of trauma. If a round scab is present on the foot, this is bumblefoot and can be addressed with simple steps to remove the corn (infection) and wrapped in gauze and vet wrap for healing. Bumblefoot is common in backyard flocks and not necessarily a reflection of poor flock management. For instructions on how to treat bumblefoot, please see my blog post on treatment in my flock.

Take care to use proper protection when treating bumblefoot

Use caution when treating bumblefoot as these infections are usually staph infections and zoonotic (passing from one species to another) and can affect humans. Medical gloves and masks for treatment are recommended. Sanitize all instruments with bleach to kill any bacteria before storage.

Routine health inspections are key for proper flock husbandry as problematic illnesses can be caught early and prevented through preventative efforts. For more information on caring for backyard chickens, please visit my YouTube Channel.

Stan (BHI 3303) Tyrannosaurus Rex and I. Perot Natural History Museum. Dallas, Texas.

I am a multi-disciplinary writer, blogger, and web content creator. To see more of my work visit my online writing portfolio and other sites.

Coffee and Coelophysis – A blog about dinosaurs!

Mesozoic plants at the National Botanical Gardens. Washington, D.C.

The Introvert Cafe – A mental health blog

As always, thanks for reading. Till next time, keep on crowing!

Me peering through an orbital fenestra of a Tyrannosaurus Rex. Cincinnati Natural History Museaum.

~ The Kuntry Klucker Crew ~

Healthy and happy backyard chicken flock strolling on a freshly cut spring lawn.

Why Does My Hen Have a Dirty Vent?

Dirty vents are not only unattractive but a sign that something is wrong. In this post, I will discuss the reasons for dirty vents in chickens and how to treat conditions that cause this problem.

A healthy Buff Silkie fluffy bottom.

A chicken is not supposed to have a dirty vent; underlying conditions and environmental factors cause excrement to be runny, sticking to feathers surrounding the vent and causing a messy and unsightly situation. Some conditions are as simple as placing supplements in the water; others require a closer examination and treatment.

Worms:

Treating worms in a bantam cochin hen with SafeGuard.

One of the most common reasons for dirty vents in chickens is worms. Intestinal worms wreak havoc on the digestive tract, causing malnutrition and dirty vents. Worm infections are evident in dropping.

A chicken’s body can withstand a baseline worm parasitic load without ill effects. Once the parasite load exceeds the point at which the body can manage the load, health problems will result. Worms visible in the droppings or on the dropping board when cleaning the coop are a reliable indication that the parasitic load has reached a critical point. At this point, it is advisable to treat the flock for worms. Once the flock has completed treatment, dirty vents associated with worms will resolve.

I have a post and YouTube video detailing the correct dosage and procedure for worming a flock.

Mites and Lice:

Treating mites and lice in a Silver Lace Wyandotte Hen with Eprinex.

Like worms, mites and lice will deplete a chicken of energy, leaving them anemic and lethargic. Dirty vents are one of the first indications that an individual may be dealing with a mite and lice infestation. To determine if mites and lice are present, pick up the chicken and examine the vent area for small dark brown to red bugs crawling on the skin; these are red fowl mites and are detrimental to the individual. They multiply fast and will suck the lifeblood out of a chicken in a short about of time.

Lice live in the feathers of a bird and will cause dirty vents and extreme discomfort to the individual. Like mites, lice will congregate around the vent area, appearing as light brown or tan bugs crawling on the feathers. In a progressive lice infestation, bundles of eggs will be visible on the quill near the skin.

Treatment for mites and lice is simple and requires one topical product to address both parasites. I have a blog post and YouTube Video demonstrating the correct dosage and procedure for treating mites and lice using my flock as examples.

Egg laying Issues:

Silkie eggs on a nesting pad.

Egg-laying issues such as soft-shelled eggs can result in dirty vents in hens. During the formation of the egg, reproductive medullary bone deposits form the shell around the yolk cell. When the calcium supply in the hen’s body is low, soft-shelled eggs cause the egg to break during the laying phase.

Adding supplemental calcium to the flock’s diet will address soft-shelled eggs. Most poultry feed contains calcium for hard shells that the hen’s body uses quickly. Oyster shells available at farm/feed stores add valuable long-absorption calcium that the hen’s body will process over 24 hours, providing the resources for hard shells that do not break during laying.

Oyster shells for stronger eggshells.

Offer oyster shells in a separate container in the pen or where the flock eats. The hens can determine the amount of supplemental calcium their body requires and will consume from the available oyster shells. Keep oyster shells available for laying hens during active laying periods. The hen’s body will use the long-absorption calcium to produce hard eggshells, reducing dirty vents.

Heat-Related Issues:

Apollo and Aphrodite (White Crested Polish hens) enjoying a summer evening sampling from a pot of marigolds.

A hen will drink more water during excessive heat and high humidity. The unbalance in the gut biome results in loose excrement and dirty vents. Adding electrolytes and probiotics to the flock water will address this issue. Not all electrolytes are alike; purchase a probiotic marketed for use in poultry. While watermelon and cucumbers are a nice treat for a hot summer day, they lack the essential electrolyte balance that a hen’s body needs during extreme heat.

A product I readily provide for my flock is Rooster Booster Vitamins and Electrolytes, found at Tractor Supply. Containing Lactobacillus, this product promotes a balanced gut biome during extreme heat. Since I have started using this, dirty vents due to summer temperatures have notably decreased.

Vent Gleet:

Unlike parasitic or environmental causes, vent gleet is an inflammation of the cloaca (the vent), causing an unsightly condition called cloacitis. The most obvious symptom of cloacitis is a yellowish discharge from the vent that sticks to the feathers around the vent area and presents with a foul odor. In addition to the aforementioned, a hen will have a bloated abdomen, and the vent area can appear red and inflamed.

Treatment for vent gleet involves a two-pronged approach with probiotics – Rooster Booster administered in water mentioned above – and anti-fungal cream. Begin treatment by isolating the affected hen from the flock. Wash the vent area with warm water and mild soap to remove the debris and dried excrement from the feathers. Carefully cut away feathers from the vent if necessary.

Monistat 7-day cream – treatment for yeast infections in women – works well for vent gleet in hens. For hens, apply a pea-sized amount of the cream externally around her vent daily. Repeat for 5-7 days or until the redness has subsided around the vent. Continue to keep the hen in isolation for treatment till her condition improves. In my experience, vent gleet treated with probiotics and anti-fungal cream will resolve in two weeks.

Buff Orpington hen’s healthy fluffy butt.

I am a multi-disciplinary writer, published author, and web content creator. If you like this post, consider visiting some of my other blogs.

Coffee and Coelophysis – A blog about dinosaurs.

Chicken Math University – A blog about homeschooling

The Introvert Cafe – A mental health blog.

If you have any questions or comments, please leave a comment or reach out to kuntryklucker@gmail.com. I check my email daily and will get back to you as soon as I can.

Thanks for reading! Till next time, keep on crowing!

~ The Kuntry Klucker Crew ~

Mites and Lice in Backyard Chickens.

Old man winter has finally made his appearance, temperatures fall, snow covers the ground, a perfect storm for mites and lice to plague a backyard flock.

It’s no coincidence that mites and lice thrive in these conditions. During winter and early spring, mites and lice become a problem area for many backyard chicken keepers. Your once beautiful flock now has messy feathers, pale combs, and dirty bottoms. What is a keeper to do?

First, do not fear mites and lice, they are a natural part of a backyard chickens’ life and a badge of honor. If your chickens have mites and lice, it is proof that they are living the good life. Chickens that have access to the outdoors, grass, sunshine, and fresh air will most likely come down with a case of mites and lice at some point in their lives.

Mites and lice live in the environment. Typically contracted from wild birds, they can also be contracted through small mammals like mice, rats, moles, or rabbits. There is no way to avoid mites/lice in your flock, a control method is the best treatment.

When I first started keeping chickens 11 years ago, I feared the dreaded mite and lice season. I was afraid that I would catch the mites from my birds or that I would not know how to handle the situation.

First, let me put one fear to rest. The mites and lice that plague birds are not the same mites and lice that plague humans. The mites/lice that affect birds are species specific. They cannot thrive on our bodies for several reasons.

1. We do not have feathers.

Mites and lice that affect birds need feathers to sustain their lifecycle. Our daily routines of bathing, washing our cloths and hair make it impossible for these mites to exist on our bodies for long. If your birds have a severe mite/lice outbreak the little beasties may crawl on you giving you a case of the Heebie Jeeves, but I assure you, a simple change of clothes and a shower will render them gone. They are a mind over matter situation.

2. We do not provide them with the necessary resources to carry on their lifecycle.

Avian mites/lice need a specific environment to sustain their life cycle. Denied their breeding environment (i.e., feathers), avian mites/lice cannot survive on our bodies, thus you will not be affected by them. To my knowledge, Northern Fowl Mites (the most common mite that affects chickens) are not zoonotic (carries pathogens, from one species to another). Meaning that humans cannot acquire any diseases from the mites/lice that affect our flocks. We just get a case of the creepy crawlies, that’s about it.

Mites and lice usually reside near the vent area on chickens except crested breeds. Mites and Lice can also be found on the heads of crested breeds in addition to the vent area.

How do identify Mites/Lice on your birds.

Mites and lice prefer these areas for several reasons.

1. It is warm with ample blood supply

2. The birds are unable to preen these areas, thus the mites and lice can accomplish their life cycles uninterrupted.

On birds, mites will look like small little red, black, or brown spots that are moving on the skin. If your bird has a severe case of mites, it may just look like a mass of dark dirt covering their skin. These are Northern Fowl Mites, the most common mite that affects chickens. Left untreated, an army of these little beasties can kill a bird through blood loss (their food) which will cause anemia in the birds. Thus, if not addressed, death.

Lice

Lice on birds are usually found in the same place as the mites. The vent areas and head of crested breeds.

Unlike mites, lice will exist only on the feathers. A cluster of lice eggs will look like a mass of debris that is congrated at the quill of the feather as it meets the skin.

Like the mites, a keeper will be able to see the adult lice crawl on the feathers. Lice are usually sand to light brown color depending on the species.

Both mites/lice will cause a bird to look lethargic, have a pale comb, and a dirty bottom. Lice will add the additional signature of unkept feathers that appear broken, ratty, or disheveled. Both mites and lice will weaken a bird making them more susceptible to illness and in worst cases, death.

How to handle mites/lice in chickens:

There are several ways to approach mites/lice in a backyard chicken flock. Several products are available that address these situations in your birds. I will detail several that I have used in the past along with my methods of application. Disclaimer, these are strategies that I use that have proven successful for me. Please note that I am not a veterinary scientist just a fellow backyard keeper that has been around the block a time or two.

The go-to in my mite/lice arsenal is Elector PSP. This product is in liquid form that is diluted in a spray bottle and sprayed directly on the birds. Due to legislation in some areas, it can be hard to obtain and carries an MSRP of $150 or so if you can find it. Unfortunately, it is usually not carried in most farm/feed stores. I have ordered it in the past from Amazon but as of late they no longer carry it. Due to many of the supply chain disruptions caused by COVID-19, I have been unable to replace the supply that I bought nearly 7 years ago. Hopefully, it will become available soon.

Elector PSP pro.— The pro of Elector PSP is that it kills on contact and brings the mite/lice situation to an abrupt end. It does need to be reapplied 10-14 days after the first application to kill any eggs that hatch. No egg withdrawal is required when using this product. In addition to spraying, it directly on the birds, I will also spray the inside of the coops and nesting boxes to rid the environment of the little beasties. I have had very good results with Elector PSP.

Electro Cons.—The con of Elector PSP is price and availability.

My second go-to in my mite/lice arsenal is Eprinex. As with Electors PCP, this product is in liquid form and is applied directly to the skin. However, unlike Elector, Eprinex has an egg withdrawal of 14 days after each application. Eprinex is applied in the same manner as flea and tick treatment for cats and dogs. Apply Eprinex directly to the skin behind the head of your birds. I will also apply a drop on top of the head for my crested breeds, such as the Polish and Silkie. These breeds often experience mites/lice on top of their heads due to their inability to preen this area. In 14 days, reapply to address any mites that hatched after the first application.

Eprinex application directions

Using a syringe with the needle removed, apply 3/4 cc for standard-size breeds, for bantam breeds, apply 1/2 cc directly to the skin behind the neck. Although designed for cattle, Eprinex is safe for use on chickens in small amounts.

Eprinex works by absorbing into the oil of the skin. When the mites and lice bite the birds, they encounter the Eprinex and are killed. After the first application, reapply in 14 days. Egg withdrawal should be observed for 14 days after application. This means that from start to finish, mandatory egg withdrawal should be observed for 28-30 days.

Eprinex is available at most farm/feed stores and carries an MSRP of around $50. The only con with Eprinex is a mandatory egg withdrawal. I have a large flock, so I will apply Eprinex to one breed at a time, reducing the effects of egg withdrawal. I have used Eprinex for many years with great success.

Permethrin-10

As with Elector PSP, when treating your flock for mites you will also need to treat the coops. When using Eprinex, I will mix a solution of Permethrin 10 livestock spray and spray my coops and nesting boxes. This combined with Eprinex will bring the mite/lice situation to an abrupt halt.

Additional methods.

During the winter months, I will supply my flocks with a sandbox containing a mixture of sand and peat moss. My girls will readily use this for dustbathing while the ground is snow-covered or wet. This allows them to maintain their natural behaviors that aid in mite and lice prevention.

As you can see, mites, while a very common occurrence in backyard flocks is very easy to address and treat. While they can be a pain to deal with, remember that your girls are living the good life if they come down with a case of the little beastie. Your girls have access to fresh air, sunshine, grass, and nature, something that many chickens are denied.

I hope this post help put the dreaded mites and lice season in their perspective place. They are nothing to fear and are very easily treated with multiple products available.

To watch a video on treating chickens for mites and lice chick here.

I am a published author, multi-disciplinary writer, and blog contributor. If you enjoyed this blog, please visit some of my other sites.

Coffee and Coelophysis – A blog about Dinosaurs!

Chicken Math University – Adventures in Homeschooling

If you liked this post, please peck the subscribe button. As always, thanks for reading. Till next time, keep on crowing.

We’re on Facebook! Drop by and say hi. We’re always happy to see new folks and show you around the “coop-hood”.

~ The Kuntry Klucker Crew ~