How to Treat Heat-Related Illness in Backyard Chickens.

Miss Sweet Pea (Buff Orpington Hen) surrounded by a halo of light from the morning sun.

While cold weather issues often take precedence in the minds of backyard chicken keepers, heat-related illnesses are usually more deadly to backyard flocks. Unlike cold weather bringing snow and ice, hot weather is more dangerous than cold and wet weather combined. Dehydration and heat stroke can decimate a flock in minutes if proper precautions are not taken to avoid these issues.

In this post, I will discuss how soaring summer temperatures affect chicken physiology and how to avoid, treat, and prevent heat-related illnesses.

Chicken Physiology, Body Plan, and Dehydration:

Image Credit: Noelle K. Moser. Aphrodite and Lady Me (White Crested Polish hen and Black Silkie hen, respectively) caught sampling freshly potted petunias.

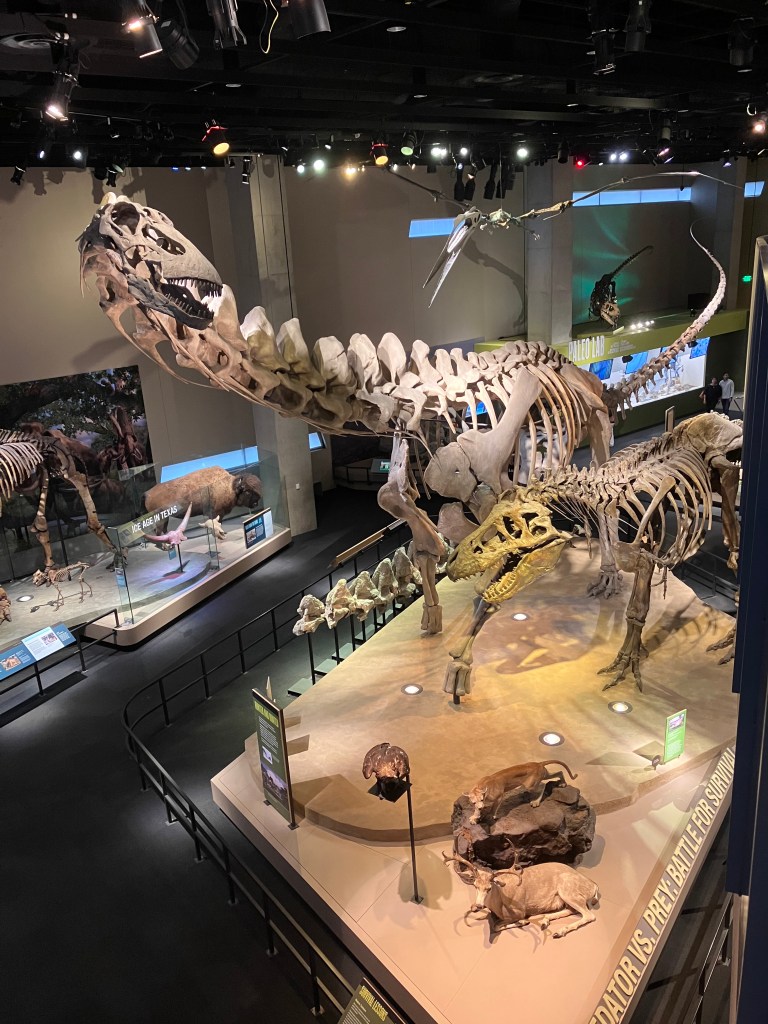
Related to the mighty Tyrannosaurus Rex, chickens are theropods and can trace their lineage back to the common ancestor of dinosaurs. (Brusatte, 2018).

All birds – chickens included – are dinosaurs. Specifically, birds are a type of theropod rooted in the dinosaur family tree that contains the same ferocious meat-eaters as T-Rex and Velociraptor (Brusatte, 2018).

Birds perch within an advanced group of dinosaurs called paravians – a subgroup of a theropod that traded in the brute body plan of their gargantuan ancestors for larger brains, sharpened acute senses, and smaller, lighter bodies that permitted progressive lifestyles above their land-dwelling relatives. Anatomically, chickens have many common characteristics that define the body plan of these magnificent creatures.

Image Credit: Noelle K. Moser. Tyrannosaurus Rex. Perot Natural History Museum. Dallas, Texas.

Chickens and all birds have a unique body plan visible in the skeleton. Comparing the skeleton of Tyrannosaurus Rex with modern chickens yields similar anatomical attributes. T-Rex has a skull attached to a spine, ribs, and two legs with splayed toes, providing swift bipedal locomotion. Focusing on the appendicular skeleton, we see that T-Rex and modern chickens have an S-shaped skeleton. The reason is that body plans do not have unlimited parts from which evolution can choose but rather build upon earlier ancestral shapes (Horner, 2009).

Image Credit: Noelle K. Moser. Profile of skeletal body plan of Tyrannosaurus Rex which survives in birds and chickens today. National Natural History Museum. Washington, D.C.

While it’s easy to say that these features are of birds, they are not attributes of birds at all but of dinosaurs.

Image Credit: Noelle K. Moser. Saurischian dinosaurs – Alamosaurus and Tyrannosaurus Rex – locked in the battle of predator and prey. Perot Natural History Museum. Dallas, Texas.

Like the nightly T-Rex, chickens are related to saurischians – the line of the dinosaur family tree that contains both the giant sauropods and theropods – possessed skeletal pneumaticity – spaces for air in their bones.

Skeletal pneumaticity produces hollow bones that lighten the skeleton, allowing for a wide range of motion. Without pneumaticity, sauropods would be unable to lift their long necks, and giant theropods would lack the agility and ability to run because their skeletons would be far too heavy.

In birds, air sacks are an ultra-efficient lung oxygen system. This flow-through inhalation and exhalation provide the high-energy birds need during flight. Evolving one hundred million years before birds took flight, this is the true secret to their ability to take to the skies.

While pneumaticity is an incredible anatomical adaption inherited from their ferocious ancestors, it also makes birds vulnerable to dehydration. In warm weather, this ultra-efficient lung oxygen system requires access to water for optimal performance. In backyard chickens, readily available water is crucial to prevent dehydration. In extreme heat, chickens can dehydrate fast, causing compromised health and death.

Image Credit: Noelle K. Moser. Me looking through the fenestrae (Pneumaticity in T-Rex anatomy to make the skull lighter) of MOR 555 – Tyrannosaurus Rex. Natural History Museum. Cincinnati, Ohio.

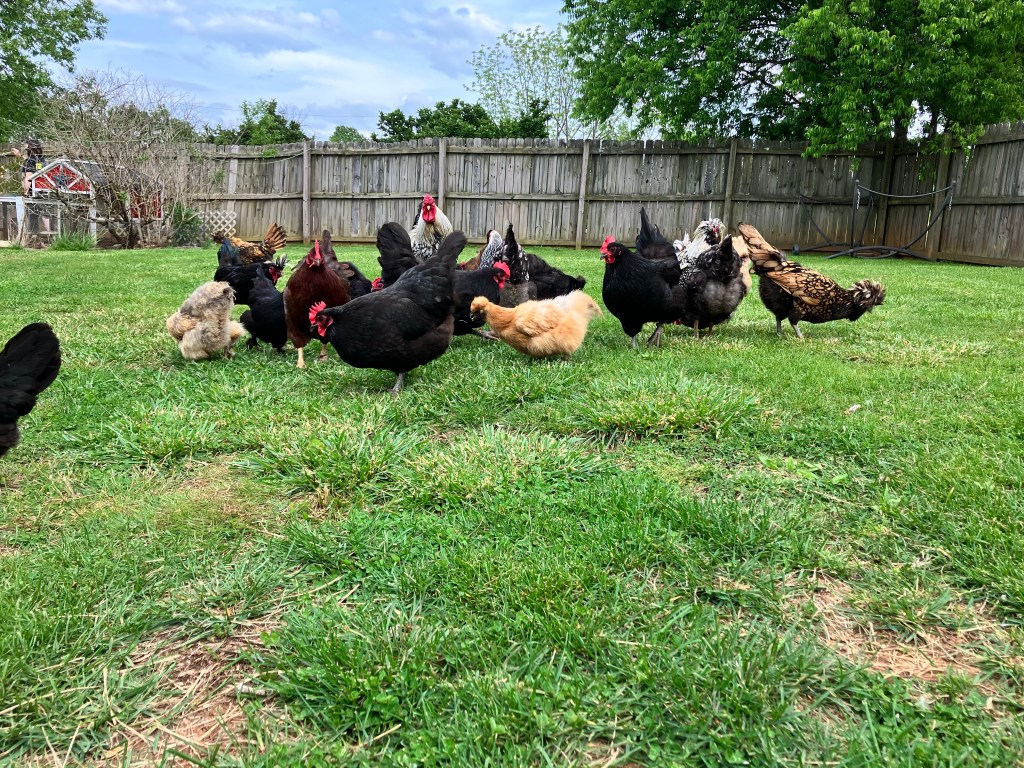
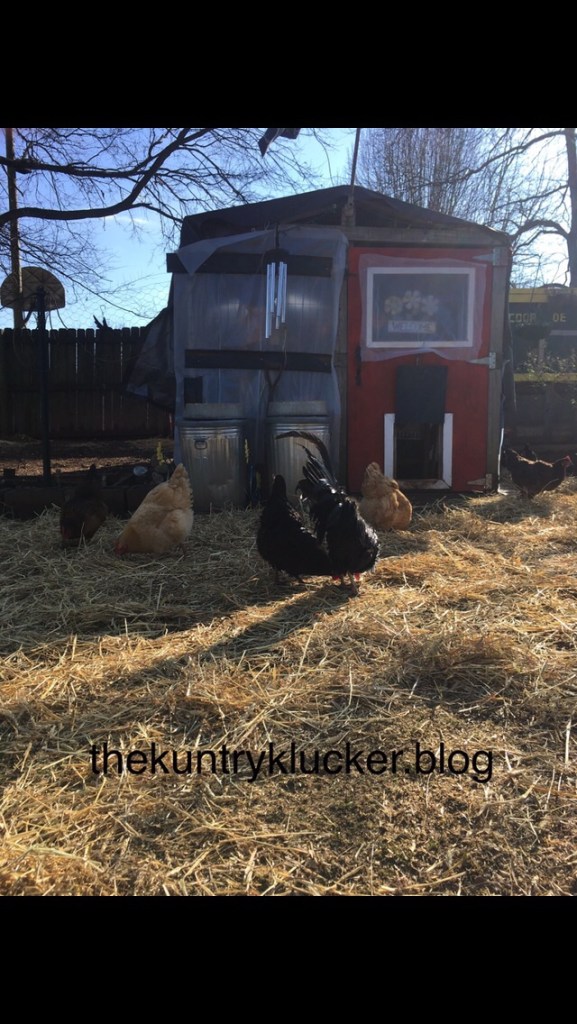
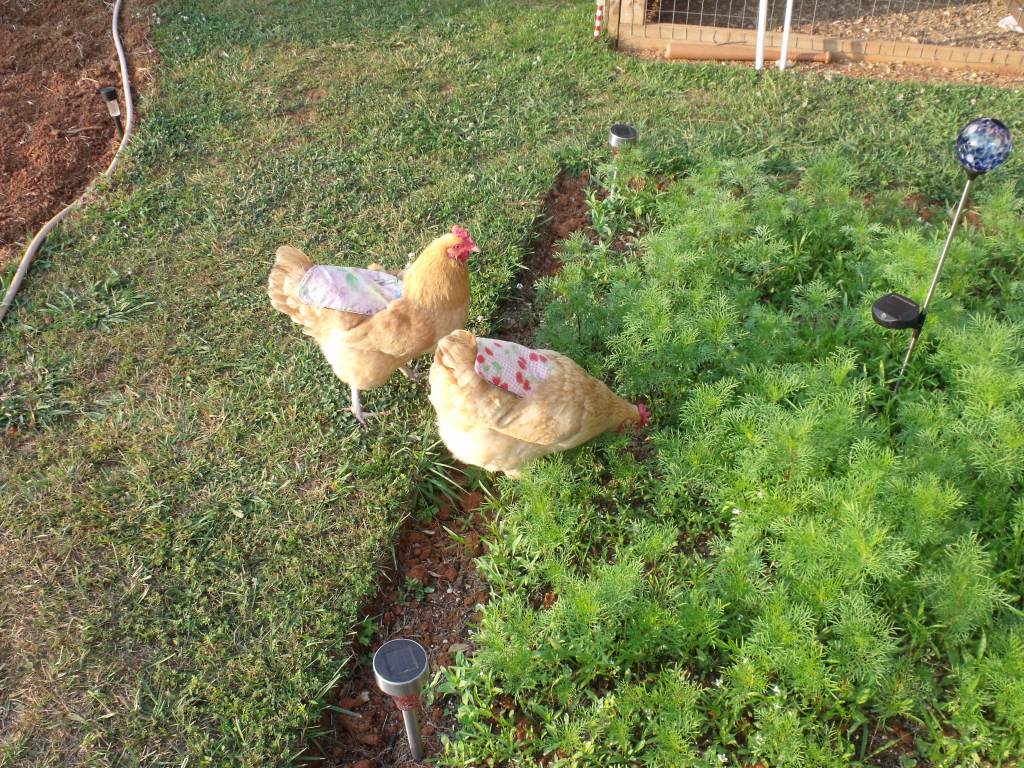
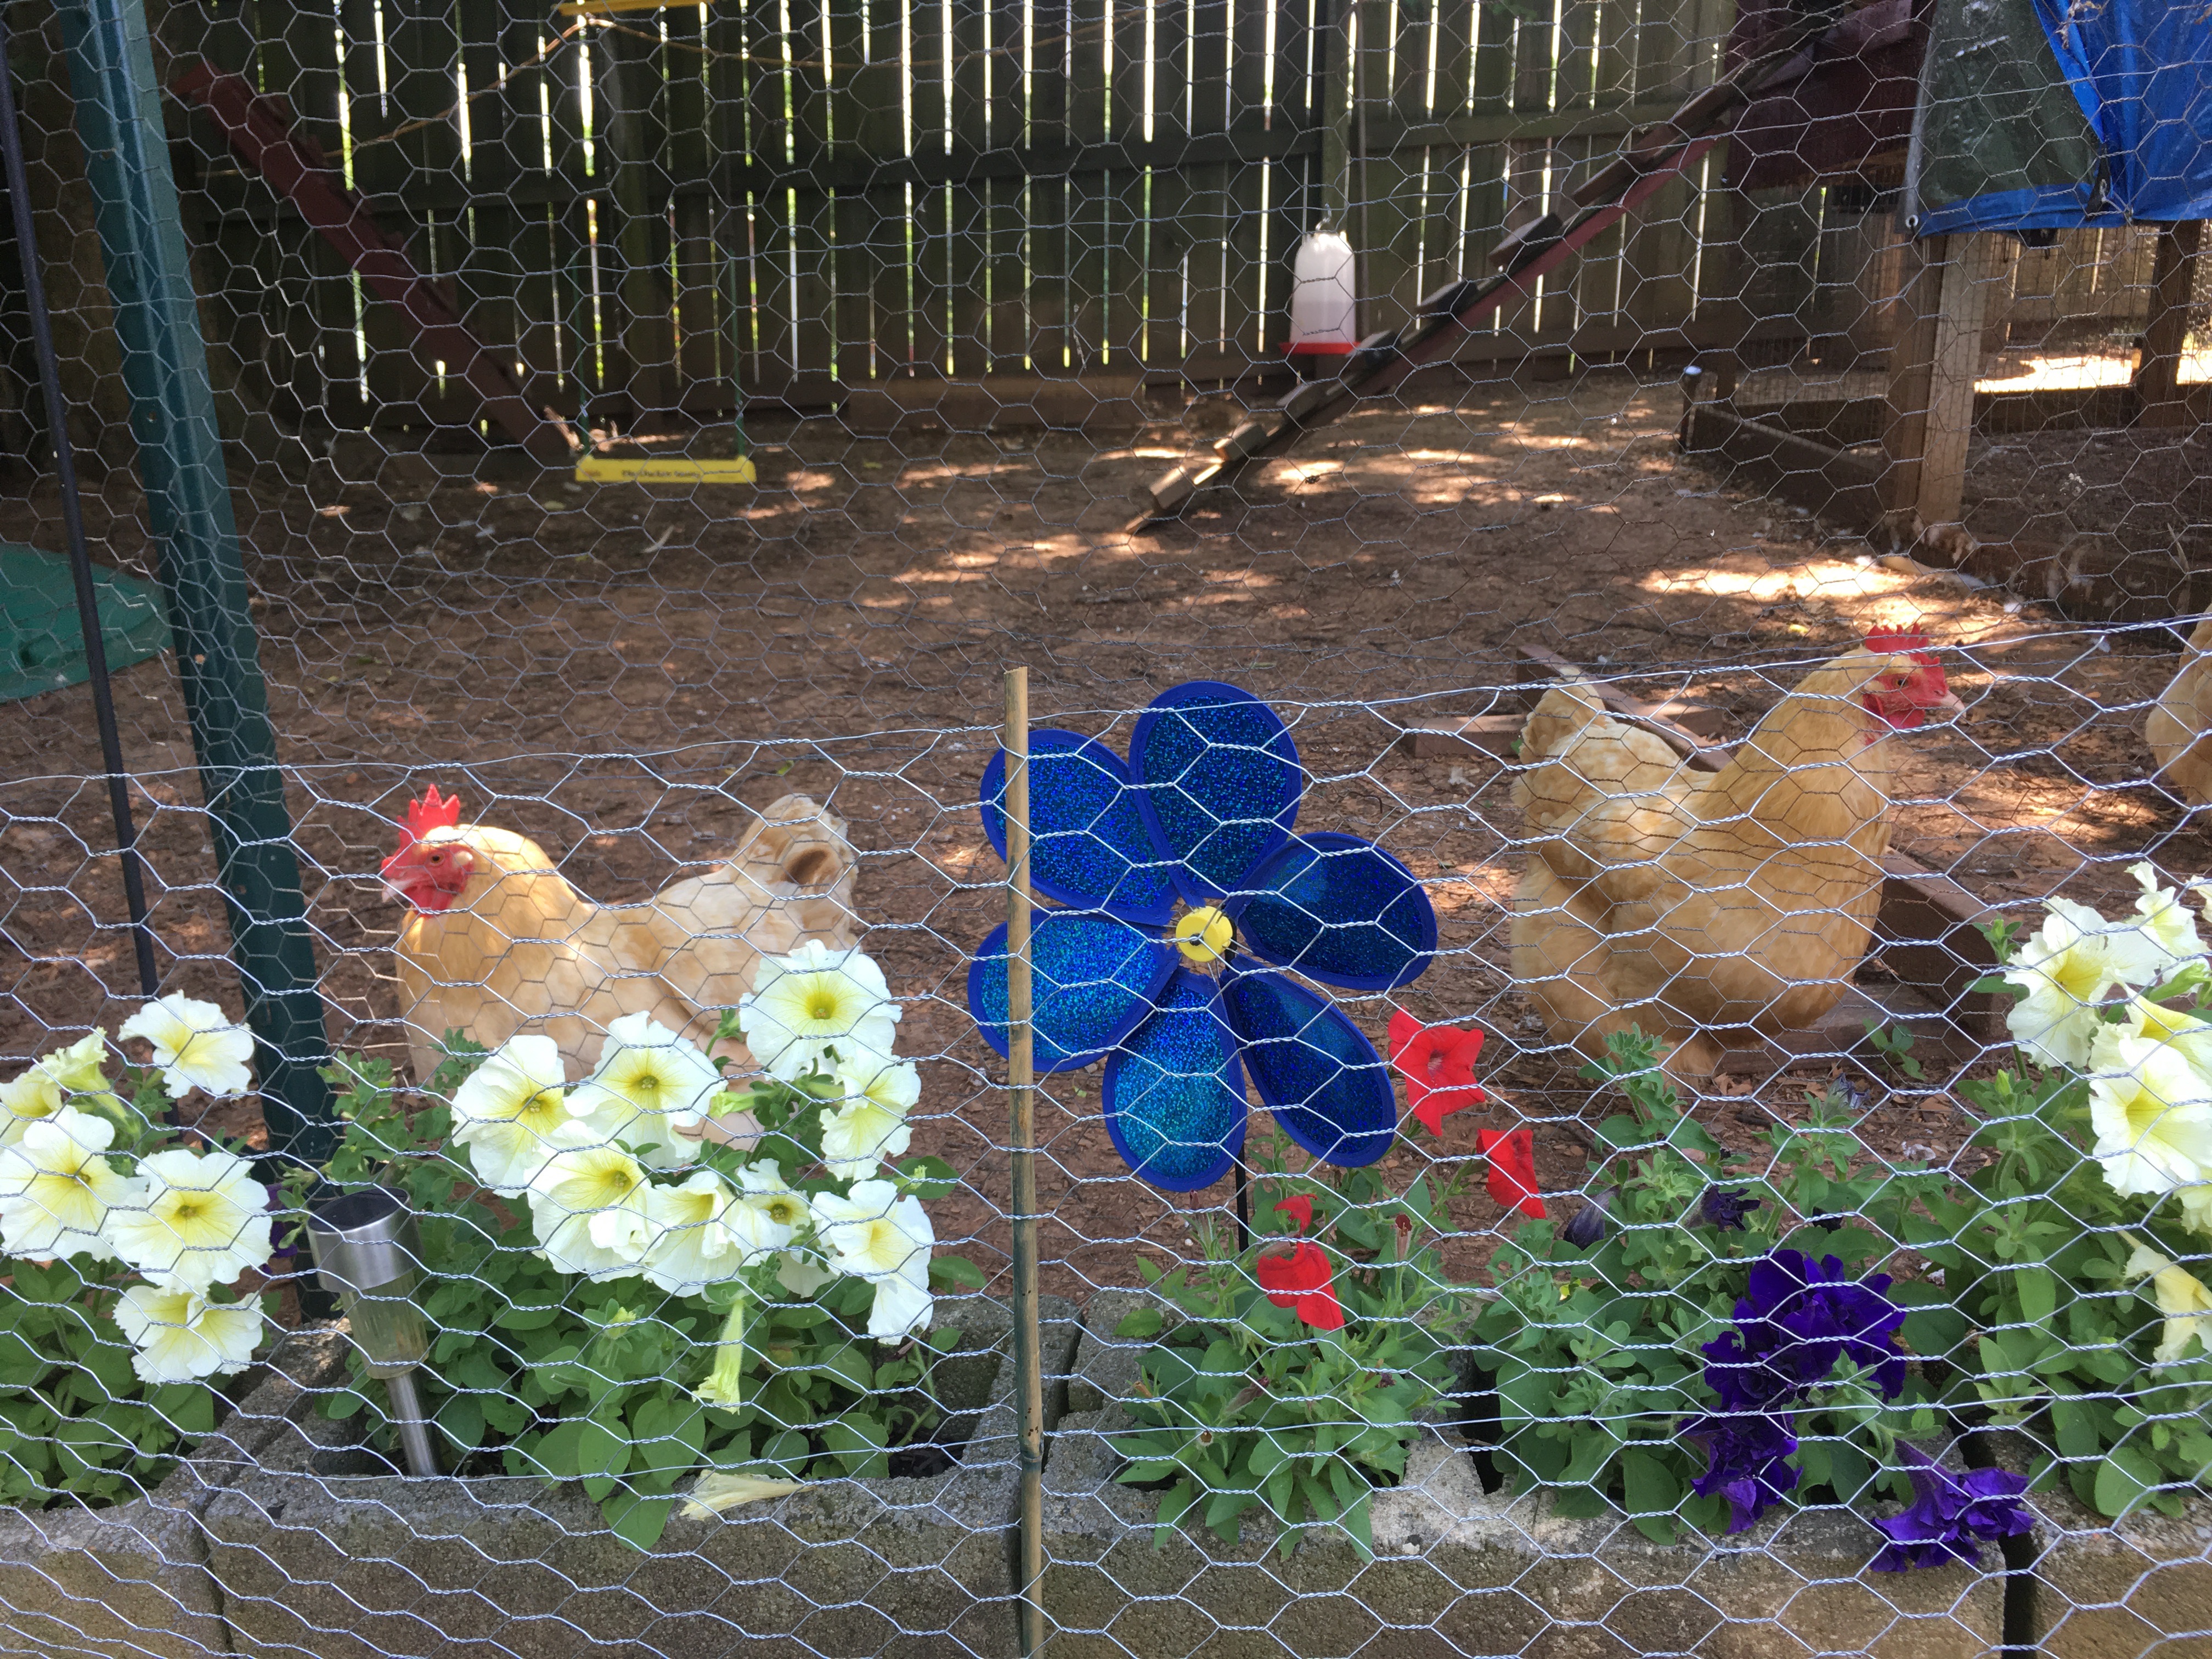
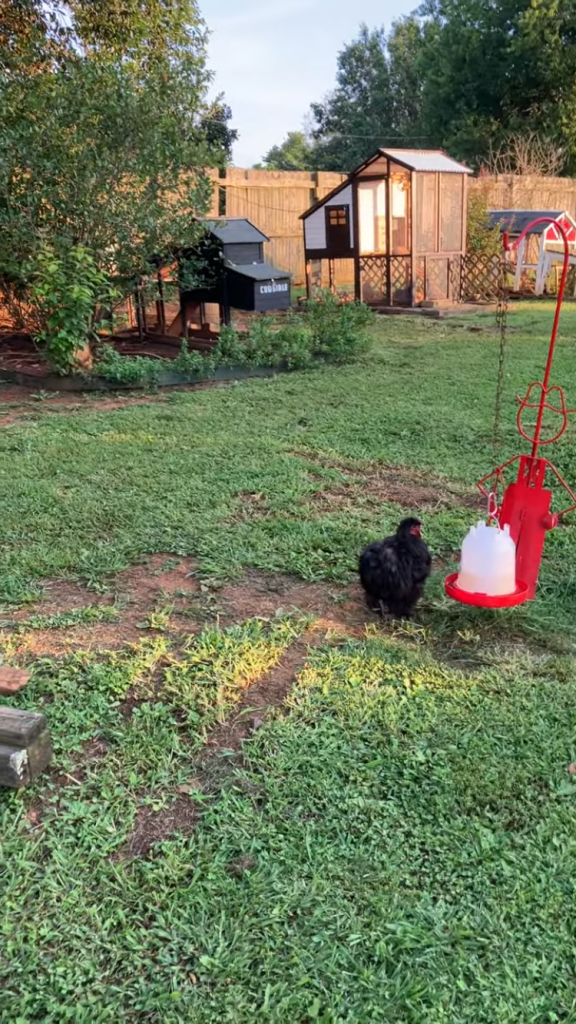
Preventing dehydration in backyard chickens is crucial in hot weather. Water needs to be accessible at all times and if free-ranging in multiple locations. In my backyard, I have multiple waterers suspended from red Shepard hooks.

Image Credit: Noelle K. Moser. My flock free ranging in the backyard with multiple watering locations visible for easy access.

When free ranging a backyard flock, it is necessary to keep water in easy reach from several locations. If the only water source is at a distance chickens can dehydrate before they can access water.

Image Credit: Noelle K. Moser. Mickey Smith (Black Silkie Rooster) drinking from one of the many watering stations placed throughout the backyard.

Electrolytes:

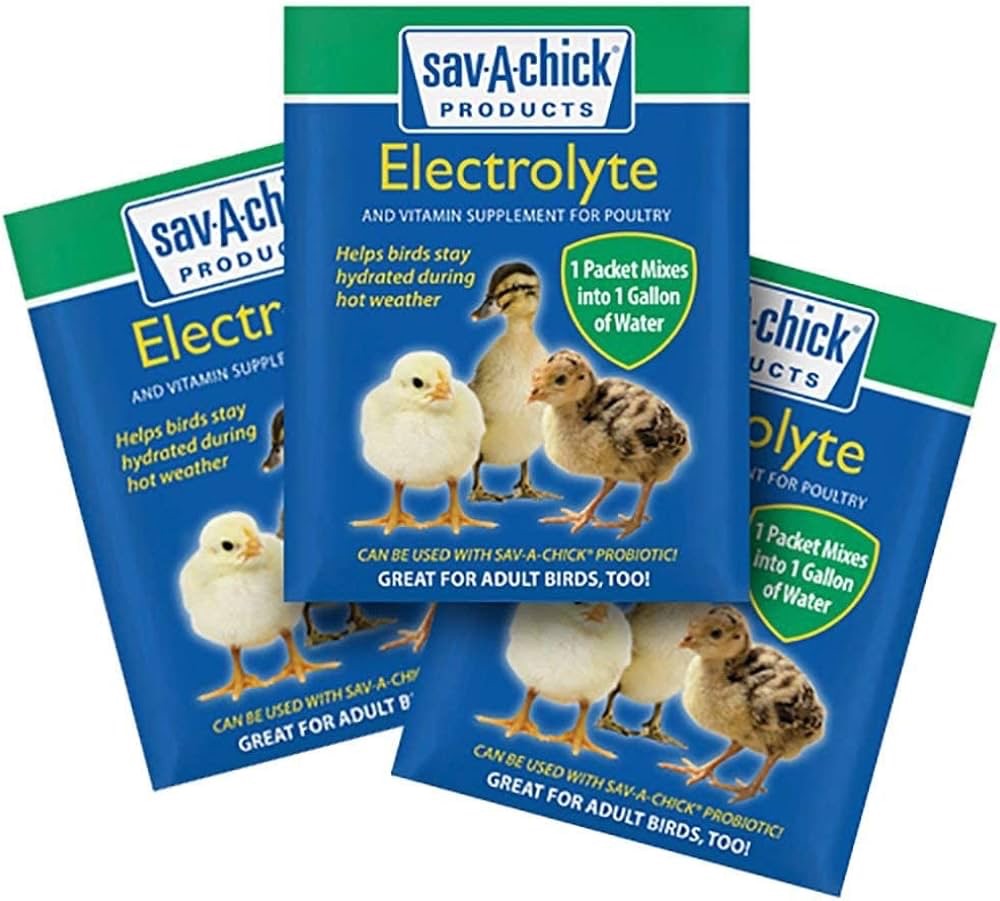
Like Gatorade for humans, electrolytes are necessary for optimal flock health in hot weather. When temperatures soar, I add electrolytes to my flock’s water daily. Following package instructions for administration, electrolytes for poultry will aid in supporting the chicken’s body providing proper hydration.

Shade:

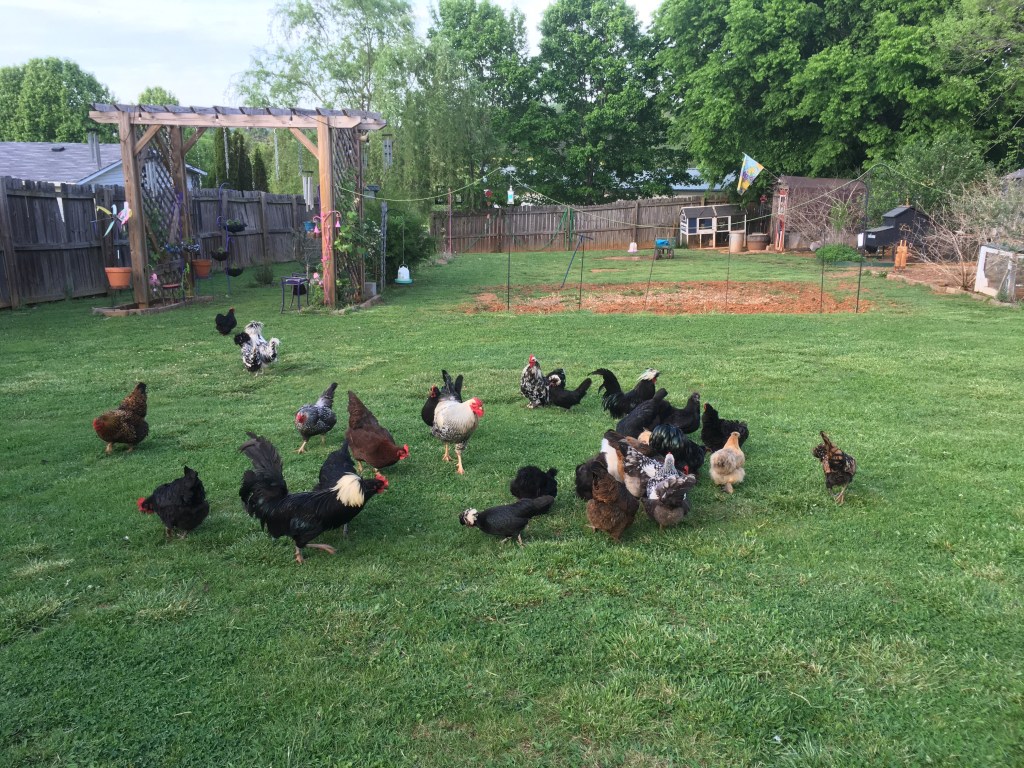
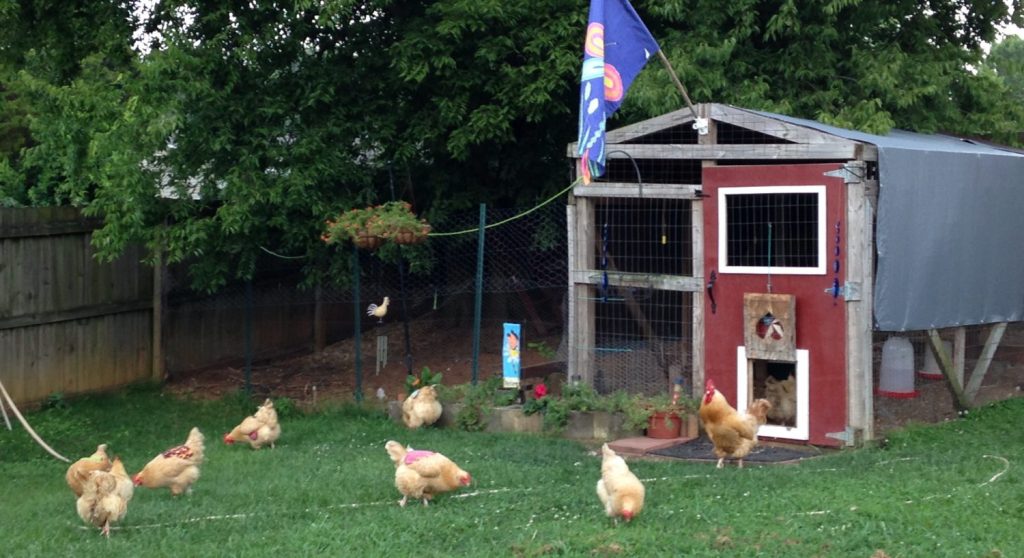
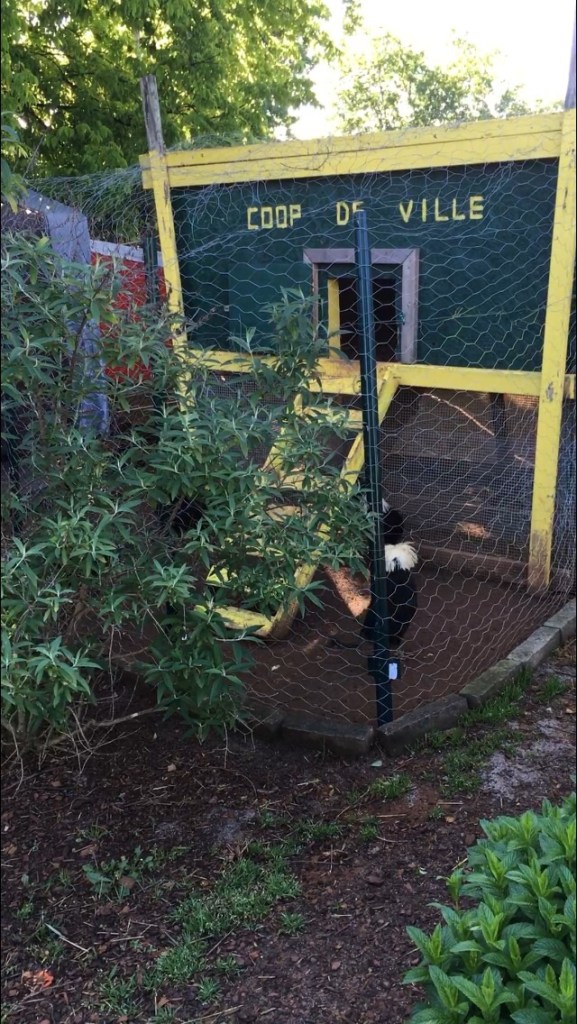
Whether in the coop/pen or free-ranging, shade is key for optimal flock health in hot weather. In allowing the flock to free range in a backyard, plant pushes or trees that provide shade from the hot afternoon sun. If the free ranging area is too small, simple canopy tents are a great alternative.

Image Credit: Noelle K. Moser. The Kuntry Klucker crew seeking shade under a large tree in the corner of the free ranging yard.

In my backyard, I have multiple areas providing shade for the flock. I also post watering stations near these locations to help the flock stay hydrated while they rest in the shade.

Provide Chicken A/C:

Another trick of the trade is to provide your flock chicken A/C. During the hottest part of the day, use a hose to saturate a favorite shaded spot for the flock. The water will cool the ground and the chickens will rest on the cool ground acting as A/C that will help the flock stay cool. If your property allows, placing a misting host on the ground will also provide this cooling effect. The chickens will come and go out of the mist as needed depending on individual comfort levels.

Image Credit: Noelle K. Moser. The Coop De Ville crew taking advantage the freshly moistened ground in a shaded spot on a hot summer day.

Treating Heat Illness in Backyard Flocks:

The signs of heat illness in chickens are much the same in humans. Lifelessness, exhaustion, lack of appetite, pale comb, dry mouth, passing out, and death.

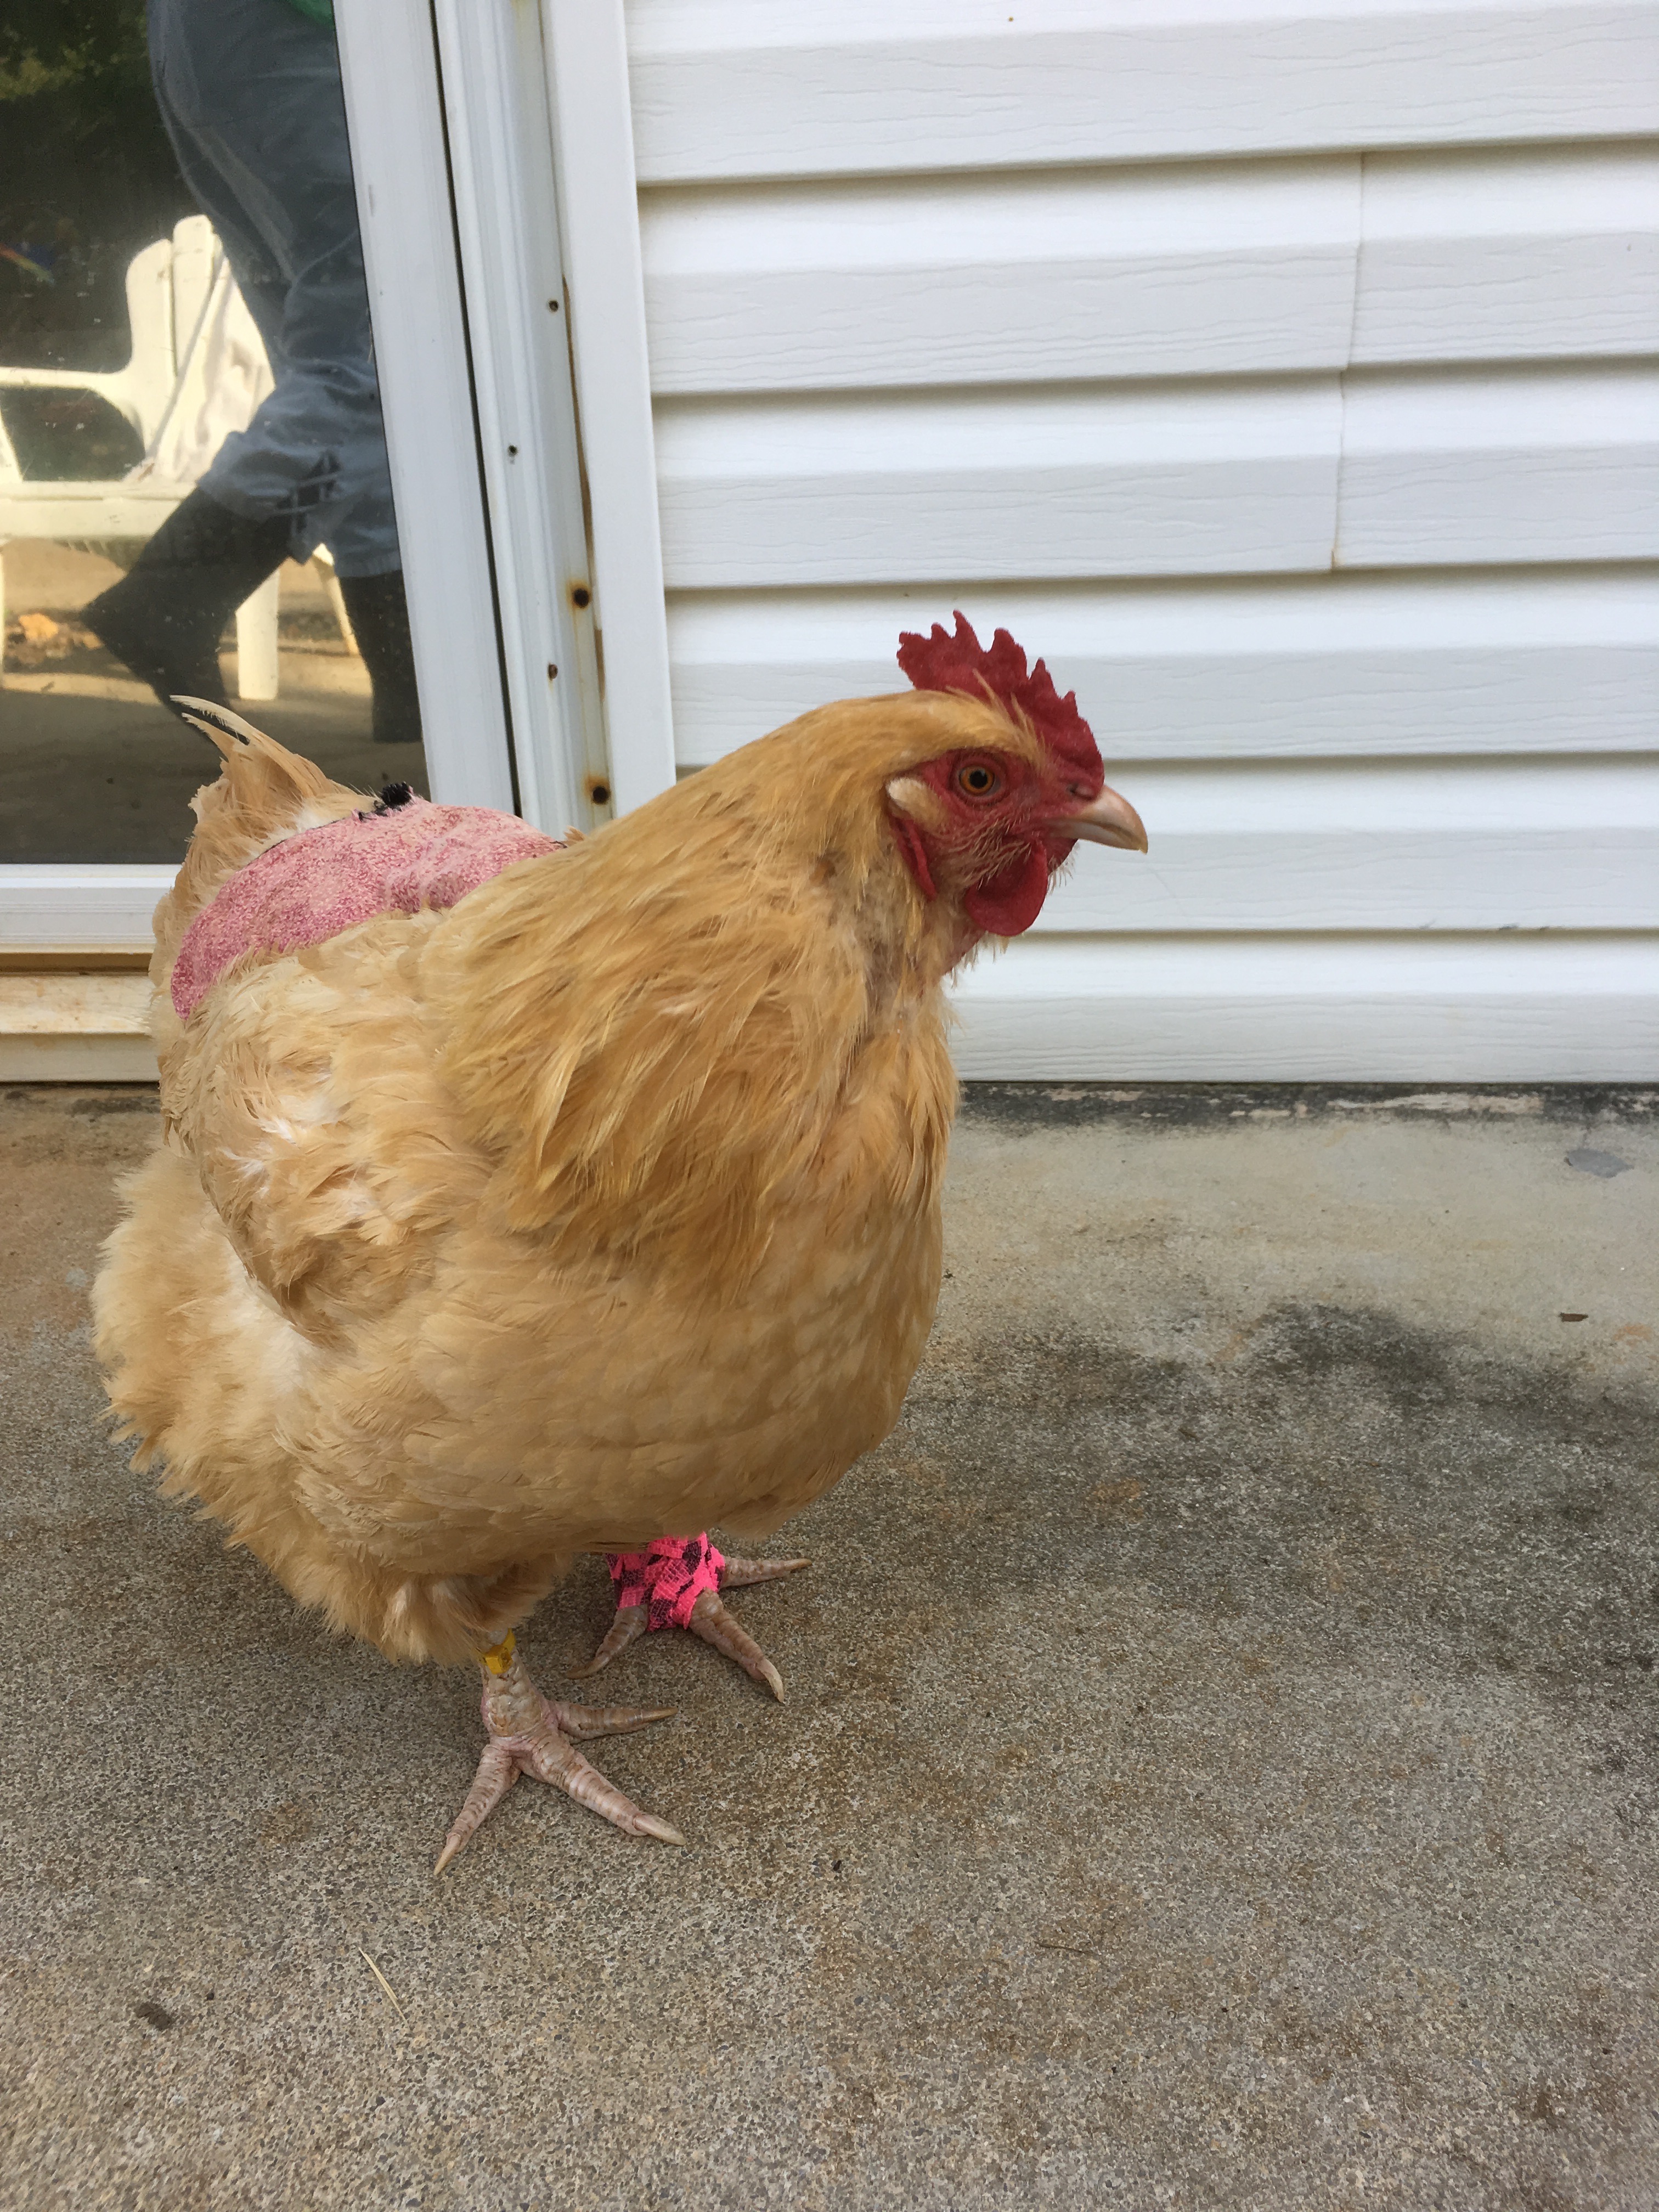
If you notice any of the above symptoms in a flock member, immediate action is required. The first measure is to take the heat-affected individual to water. Many times, the heat-stressed bird needs quick access to water. If the individual is strong enough to drink, this will quickly rectify the situation. Keep the ill individual near the watering source in a pen or shaded location to recover.

Image Credit: Noelle K. Moser. Me using a syringe to orally administer wormer to a black Cochin bantam hen.

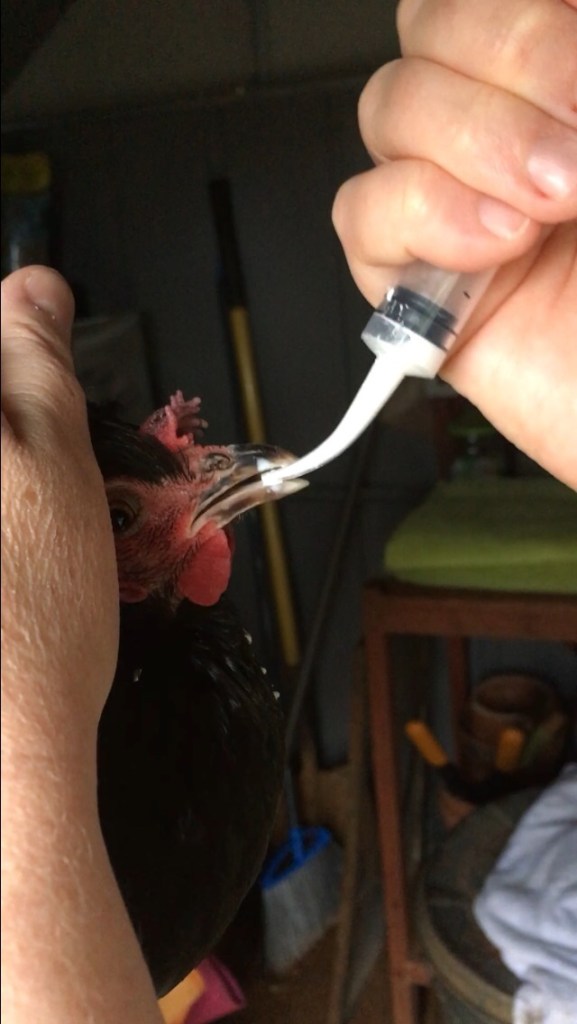
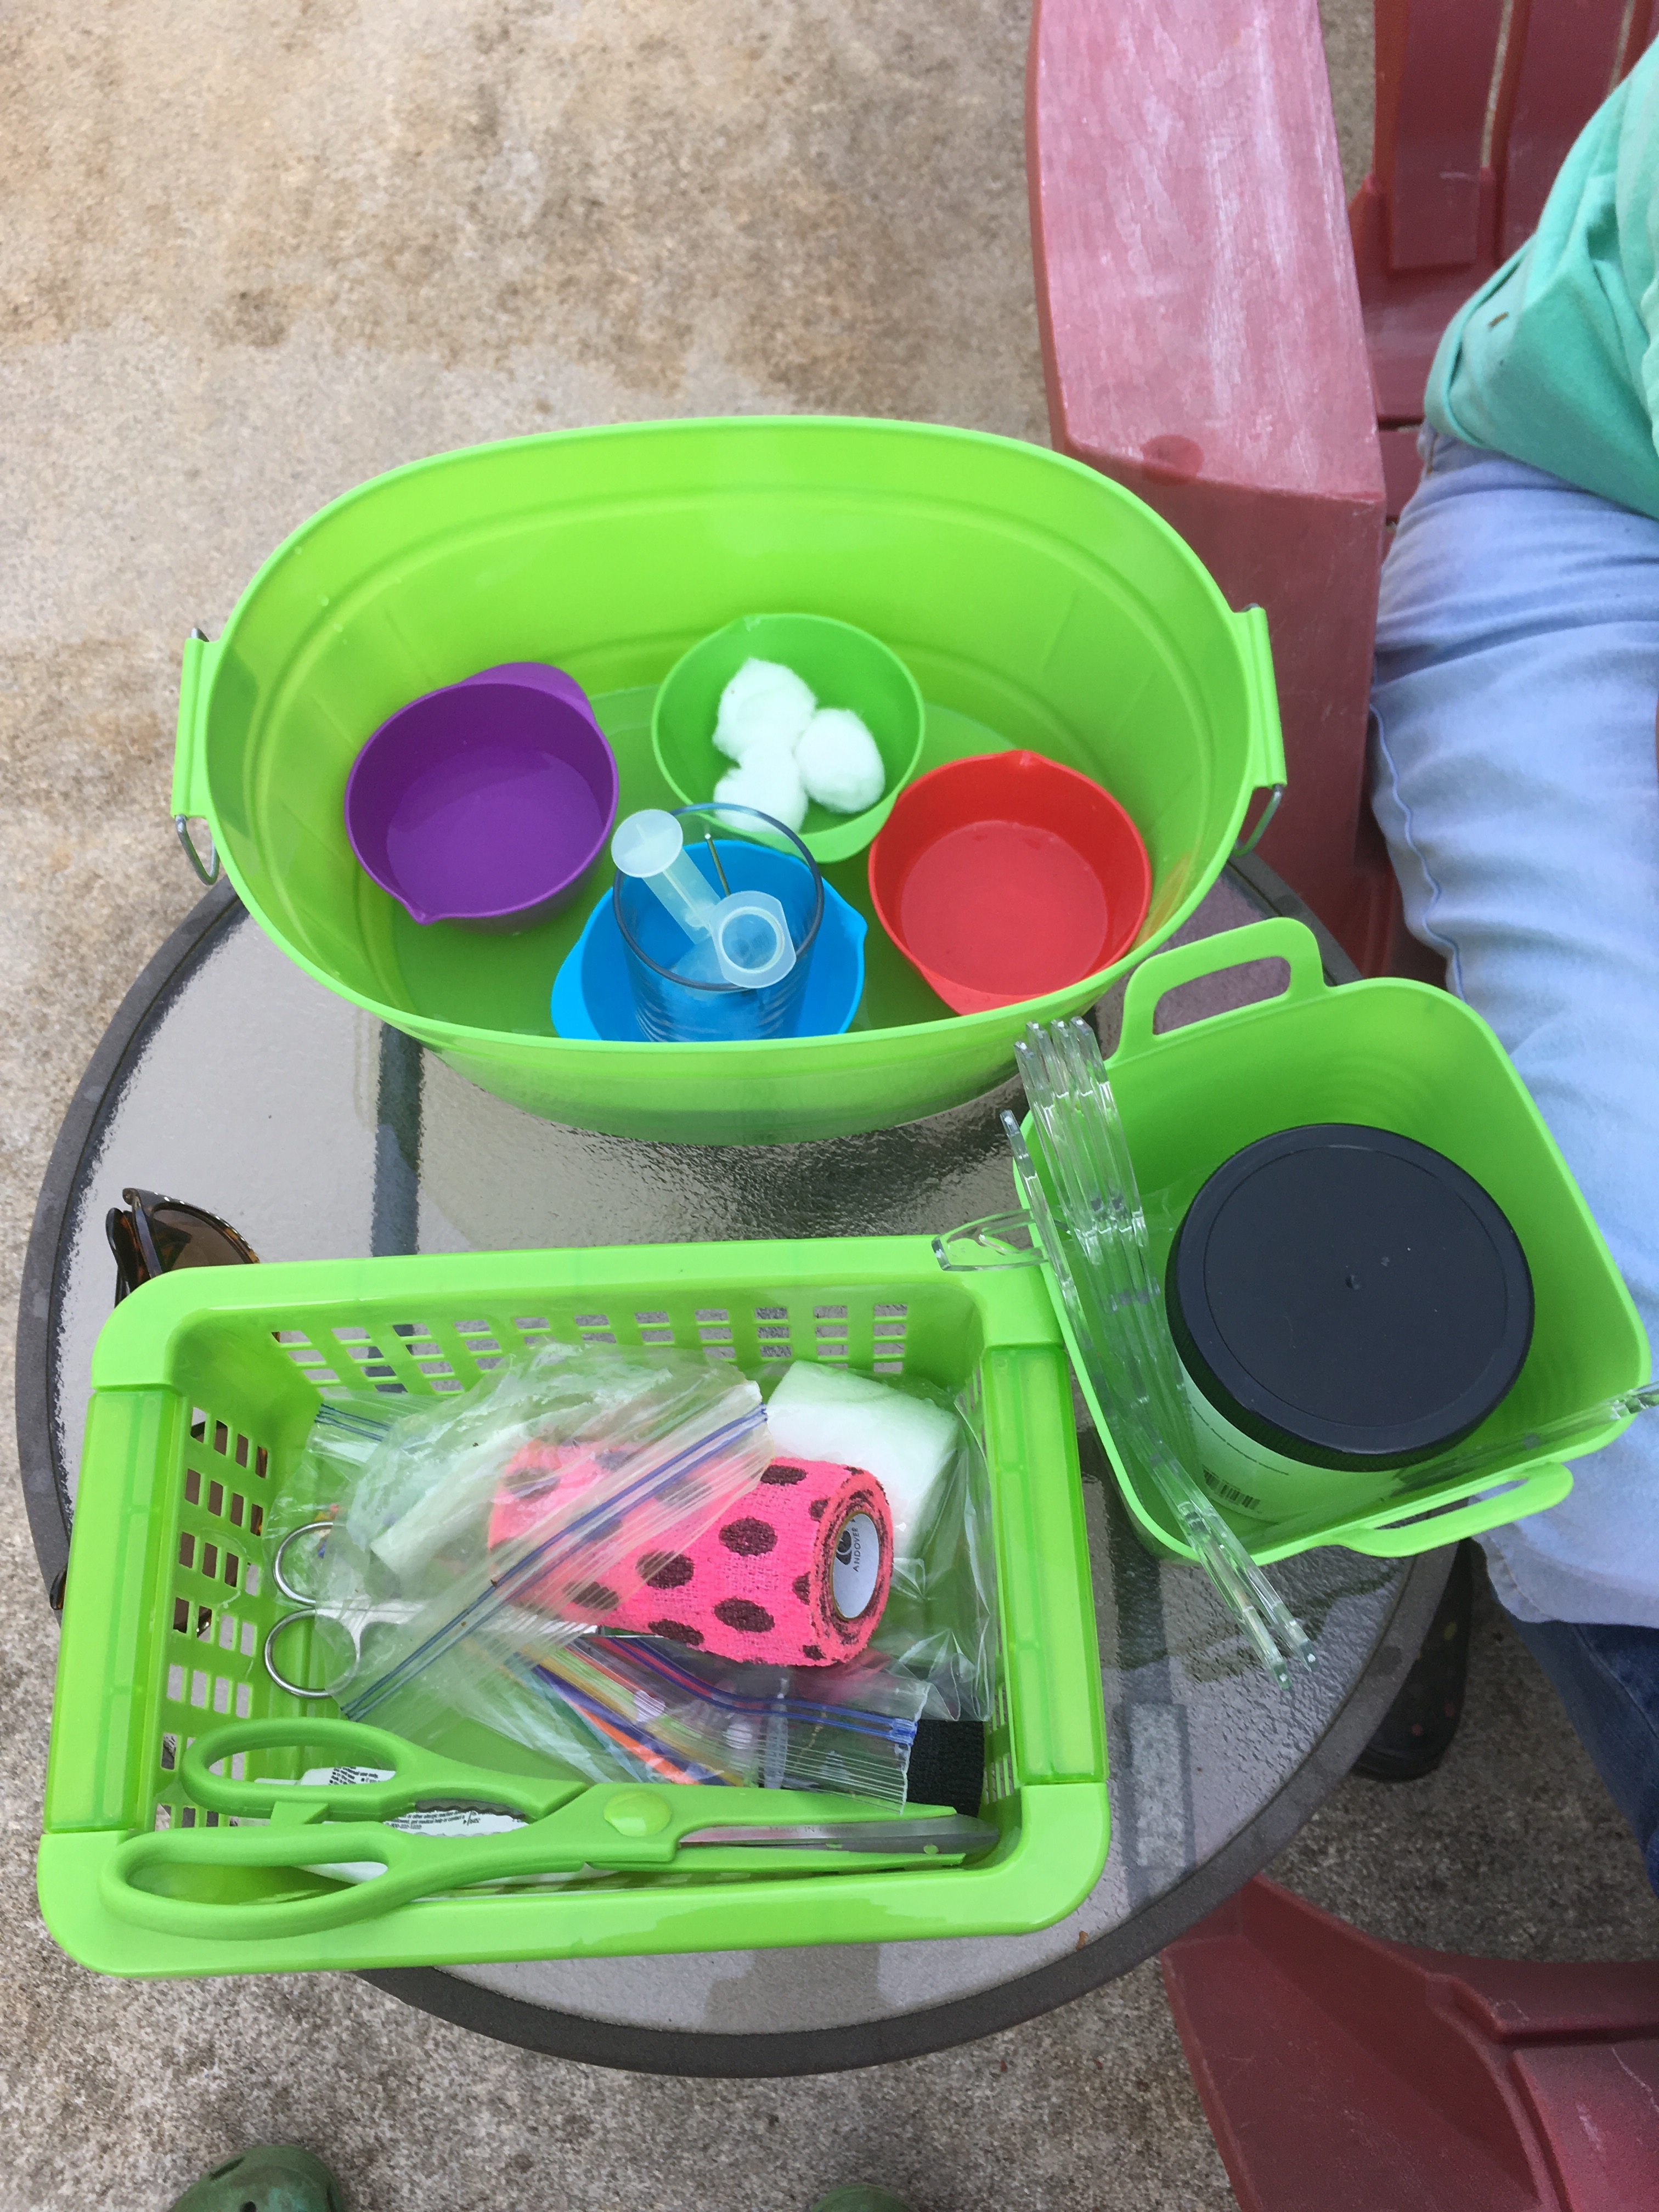
If the heat illness is more severe, direct administration may be necessary. Using a syringe with the needle removed, provide water mixed with electrolytes directly to the affected flock member. When given orally, the patient will drink the water, providing relief.

Note of caution: do NOT force the water down their throat; chickens have a passage in the back of their mouth that leads directly to the lungs. Instead, slowly administer the water and allow the bird to drink the water.

I have a video on my YouTube Channel demonstrating the correct oral administration using Wormer. While this video focuses on worming a backyard flock, the oral methodology is the same. The skills here can be extrapolated and transferred to heat-related illnesses in backyard chickens.

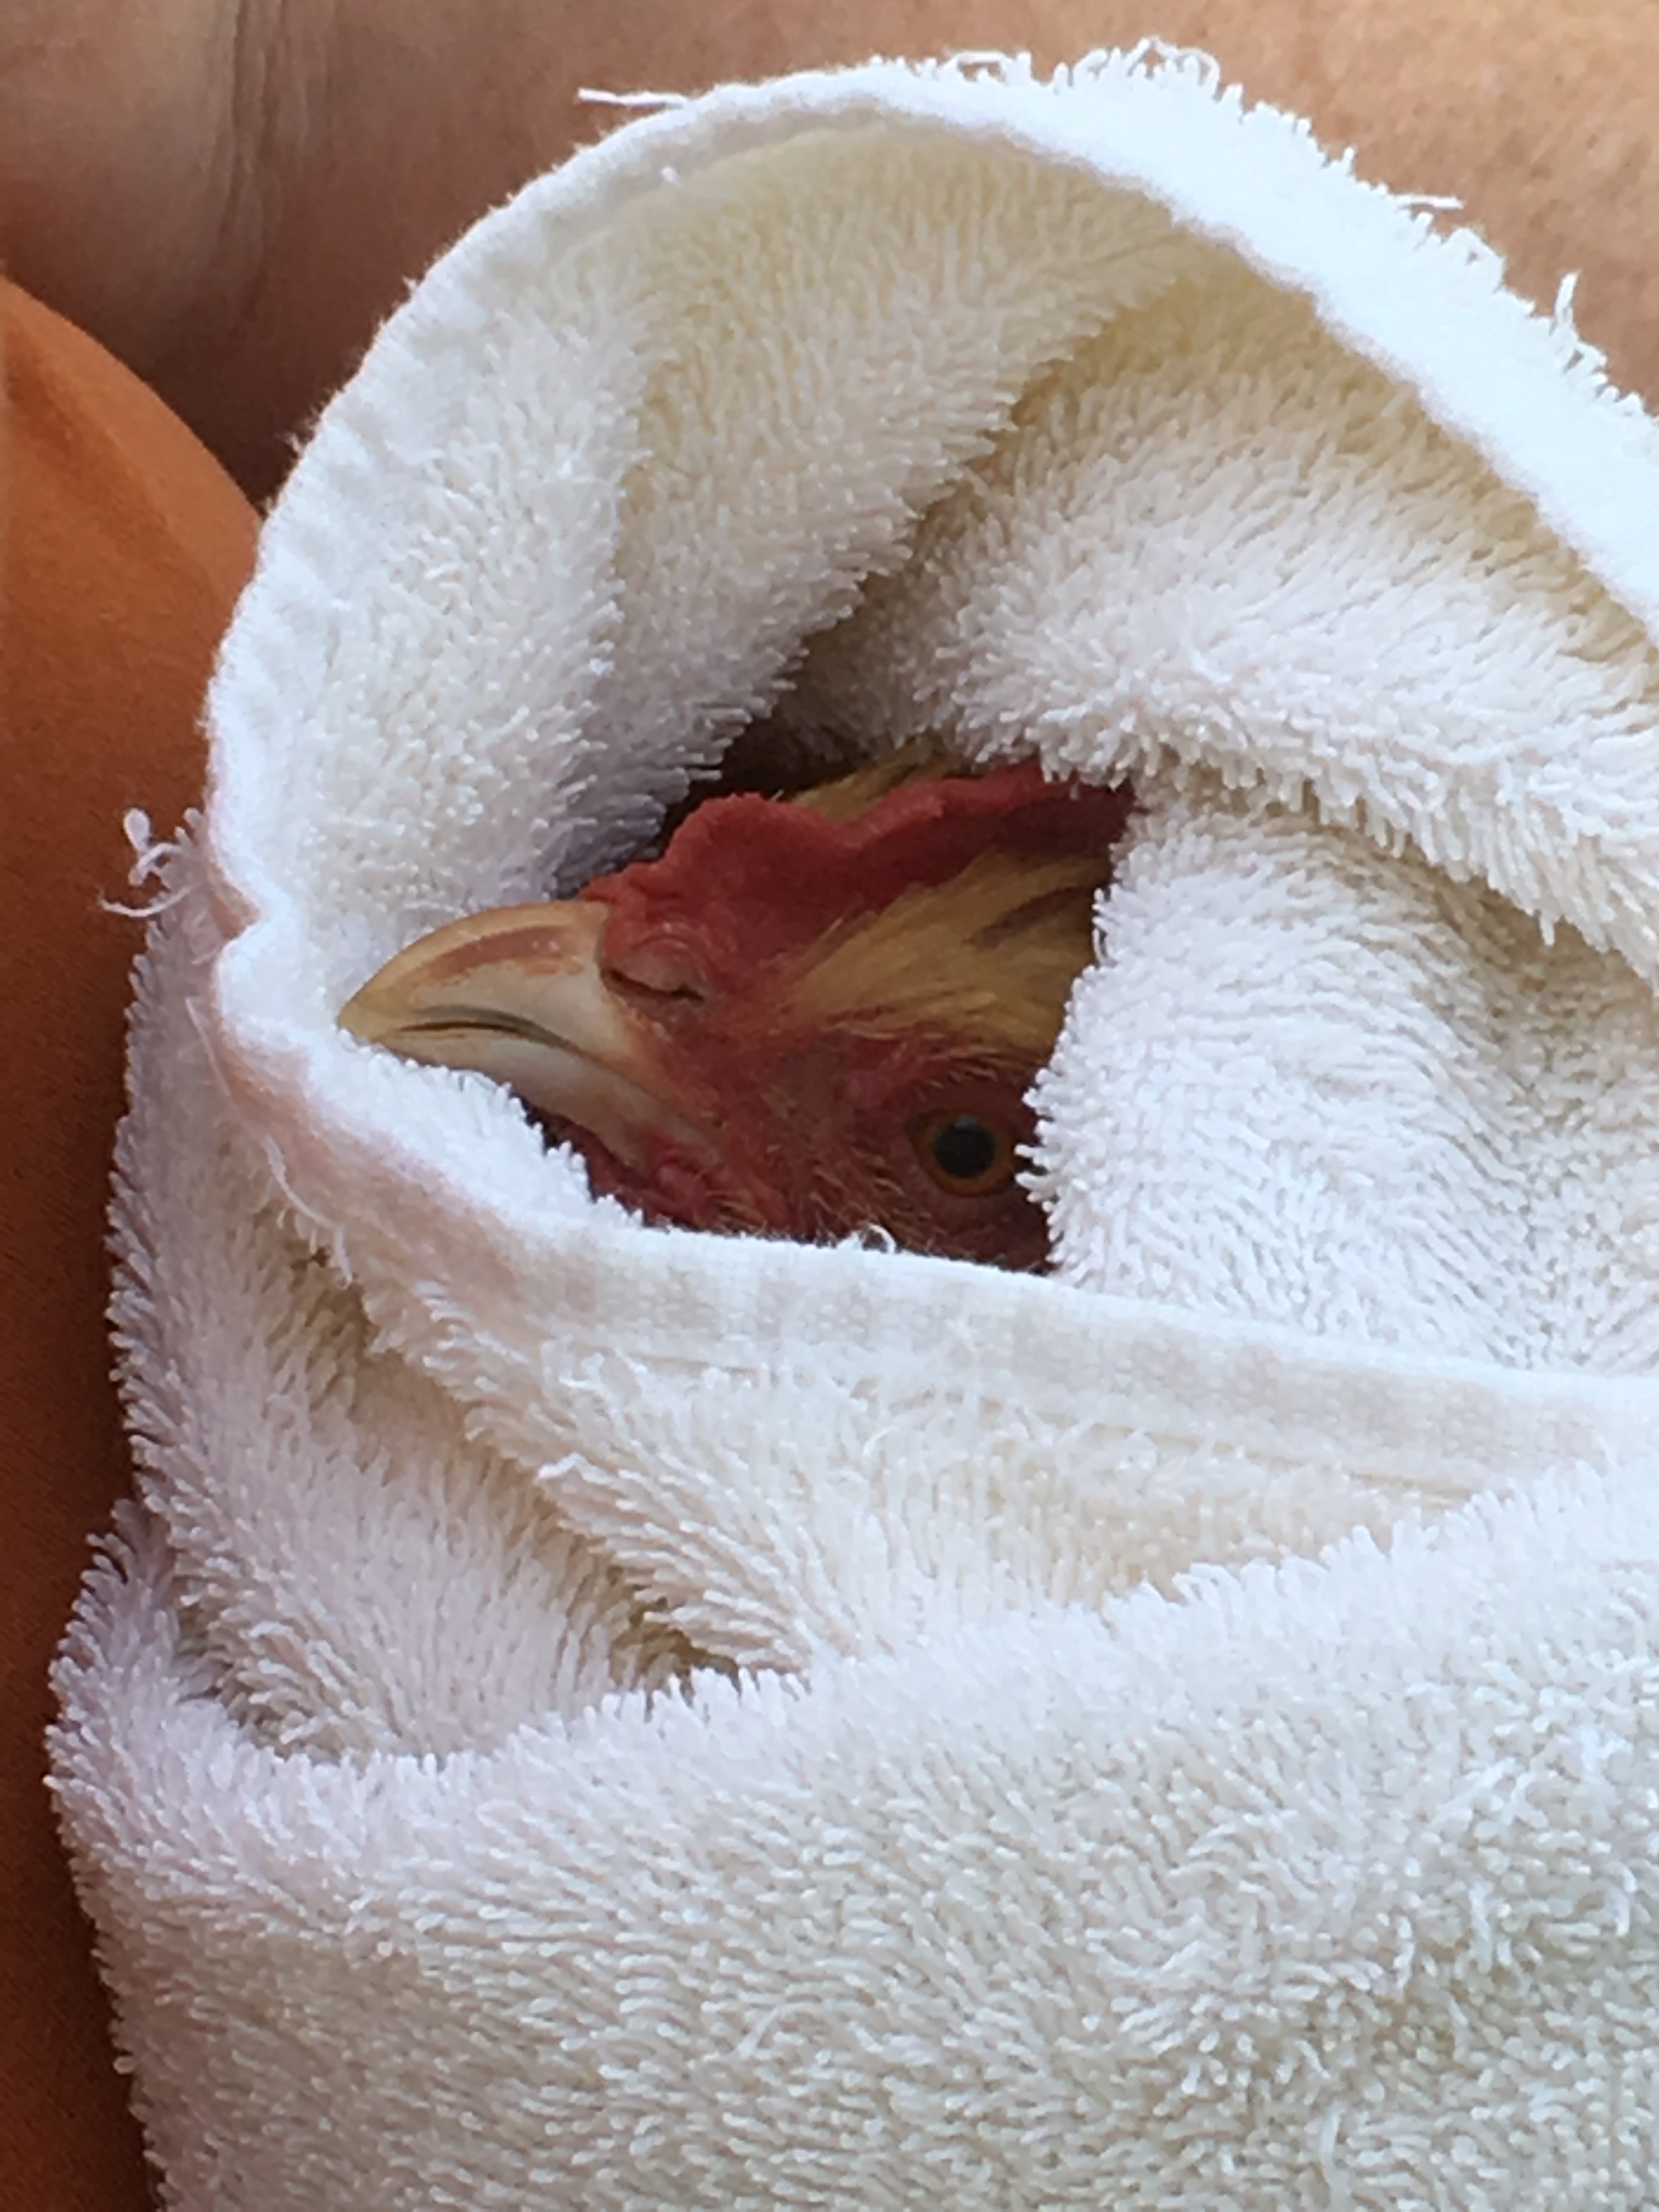
If possible, isolate the heat-stressed member to a cool shaded place such as a laundry room, mud room, or shaded location in the pen, and over several hours, administer water in small doses to help the member recover from the heat-related illness.

Most chickens treated for heat stress in this manner make a full recovery and no ill health is observed.

I hope this post has helped treat a heat-stressed backyard flock. Like cold weather challenges, hot weather has associated risks that need to be addressed to have a happy and healthy backyard flock. If you have any questions feel free to reach out, by leaving a comment or dropping me an email at kuntryklucker@gmail.com

Image Credit: Noelle K. Moser. Daspletosaurus Torous (Jurassic ancestor of Tyrannosaurus Rex), cast of Tyrannosaurus Rex (MOR 555 skull) and I. Cincinnati Natural History Museum. Cincinnati, Ohio.

I am a multi-disciplinary writer, blogger, and online content creator. If you like this post, please visit my online writing portfolio or other sites.

Coffee and Coelophysis – A blog about dinosaurs!

Introvert Cafe – A mental Health blog.

As always, thanks for reading. Till next time, keep on crowing!

~ The Kuntry Klucker Crew ~

Resources:

Brusatte, Steve. The Rise and Fall of the Dinosaurs: A History of Their Lost World. William Marrow of Harper Collins Publishers. New York, NY. 2018. Pts. 270.

Horner, Jack. How to Build a Dinosaur. Plume, Published by Penguin Group. London, England. 2009. Pts. 8,9.

Backyard Chicken Health Inspection Guide: Preventing Illness in Your Flock

Buff, Silver-lace, and Golden lace Polishes gathered for routine health inspections.

Performing routine health inspections on chickens is essential and a prerequisite for a healthy flock. Like a check-up at a physician’s office, health inspections for chickens are much the same. Catching problematic pathologies before they occur requires routine health inspections.

I will discuss the process and procedure for conducting successful health inspections in a backyard flock. Beginning at the head down to the body and tail, I will include all the vital indications to prevent illness in the backyard flock.

Head, Eyes, Comb, and Waddles:

Apollo (White Crested Polish Hen) posing as I inspect her eyes for indications of ill health.

Starting at the crown of the head, inspect for mites and lice on the individual. If mites and lice are present treatment will be required. The eyes should be clear and free of debris. If crusting is present around the eye, gently wipe it away with a paper towel moistened with clean, warm water.

Dracula (Silver Lace Easter Egger) shaking his waddles for the camera.

The comb and waddles should be red and warm to the touch. Dried blood or pecking marks indicate flock disharmony and bullying. Monitor the flock and take appropriate actions to rectify the problem by isolating the bully or establishing a bachelor pen if roosters are sparring.

Legions or sores indicate fowl pocks (a common virus) or parasites such as fleas or ticks. Treatment with Eprinex will clear up external parasite infections. I have a video on my YouTube Channel showing my methodology to treat external parasites in my flock.

Neck:

Buff and Golden Lace Polish hens hunting and pecking as they search for delicious morsels.

Moving down the body, examine the neck of the bird. Feathers should be clean, and the base of the shaft should be visible. If clumps or residue surrounding the base of the quill is noticed, this indicates the presence of lice. Treatment with eprinex is warranted to address these external parasites.

Wings:

Lestat (White Crested Polish Rooster) proudly displaying his feathers to attract his favorite hens.

The wings of birds are among one of the favorite places for external parasites to congregate. Due to the warmth and protection from disruption, mites and lice can live rent-free. Parting the feathers and exposing the skin, tiny moving dark spots indicate red fowl mites. These small parasites feed on the host’s blood and must be addressed. Again, Eprinex works very well to address and abruptly stop a mite and lice infestation on the bird.

Tail and Vent:

Clean and health fluffy bottoms of a Buff Silkie, Black Australorp, and Silver Lace Wyandotte Rooster.

Like the wings, the vent is a favorite place for mites and lice to congregate. Due to the inability of the bird to preen this location, mites and lice will multiply unencumbered. Treatment for external parasites will rectify the infestation.

If the vent area is dirty or caked with dried or wet excrement, this indicates worms. Left untreated, intestinal worms will weaken and eventually cause death in affected individuals. Natural wormers such as Diamateous earth, pumpkin seeds, or apple cider vinegar will not address a high worm load in chickens. Worm infections should be treated with products developed to kill worms and the eggs in the intestinal tract. Another indication of worms is finding roundworms on the poop boards or worms visible in the eggs. See the video on my YouTube Channel using my flock to demonstrate proper dosage and administration.

Shanks, Feet, and Toes:

Bumblefoot in a Buff Orpingtons Hen

The shanks (legs) of the chicken should be neat; the scales should lie uniformly. Uplifted scales are a sign of leg mites and can be addressed by soaking the legs in warm Epsom salt, followed by applying Vaseline to the legs to smother the mites. Treatment with Eprinex is also helpful in advanced infestations.

The pad of the foot should be clean and without puncture wounds or signs of trauma. If a round scab is present on the foot, this is bumblefoot and can be addressed with simple steps to remove the corn (infection) and wrapped in gauze and vet wrap for healing. Bumblefoot is common in backyard flocks and not necessarily a reflection of poor flock management. For instructions on how to treat bumblefoot, please see my blog post on treatment in my flock.

Take care to use proper protection when treating bumblefoot

Use caution when treating bumblefoot as these infections are usually staph infections and zoonotic (passing from one species to another) and can affect humans. Medical gloves and masks for treatment are recommended. Sanitize all instruments with bleach to kill any bacteria before storage.

Routine health inspections are key for proper flock husbandry as problematic illnesses can be caught early and prevented through preventative efforts. For more information on caring for backyard chickens, please visit my YouTube Channel.

Stan (BHI 3303) Tyrannosaurus Rex and I. Perot Natural History Museum. Dallas, Texas.

I am a multi-disciplinary writer, blogger, and web content creator. To see more of my work visit my online writing portfolio and other sites.

Coffee and Coelophysis – A blog about dinosaurs!

Mesozoic plants at the National Botanical Gardens. Washington, D.C.

The Introvert Cafe – A mental health blog

As always, thanks for reading. Till next time, keep on crowing!

Me peering through an orbital fenestra of a Tyrannosaurus Rex. Cincinnati Natural History Museaum.

~ The Kuntry Klucker Crew ~

Healthy and happy backyard chicken flock strolling on a freshly cut spring lawn.

Why Does My Hen Have a Dirty Vent?

Dirty vents are not only unattractive but a sign that something is wrong. In this post, I will discuss the reasons for dirty vents in chickens and how to treat conditions that cause this problem.

A healthy Buff Silkie fluffy bottom.

A chicken is not supposed to have a dirty vent; underlying conditions and environmental factors cause excrement to be runny, sticking to feathers surrounding the vent and causing a messy and unsightly situation. Some conditions are as simple as placing supplements in the water; others require a closer examination and treatment.

Worms:

Treating worms in a bantam cochin hen with SafeGuard.

One of the most common reasons for dirty vents in chickens is worms. Intestinal worms wreak havoc on the digestive tract, causing malnutrition and dirty vents. Worm infections are evident in dropping.

A chicken’s body can withstand a baseline worm parasitic load without ill effects. Once the parasite load exceeds the point at which the body can manage the load, health problems will result. Worms visible in the droppings or on the dropping board when cleaning the coop are a reliable indication that the parasitic load has reached a critical point. At this point, it is advisable to treat the flock for worms. Once the flock has completed treatment, dirty vents associated with worms will resolve.

I have a post and YouTube video detailing the correct dosage and procedure for worming a flock.

Mites and Lice:

Treating mites and lice in a Silver Lace Wyandotte Hen with Eprinex.

Like worms, mites and lice will deplete a chicken of energy, leaving them anemic and lethargic. Dirty vents are one of the first indications that an individual may be dealing with a mite and lice infestation. To determine if mites and lice are present, pick up the chicken and examine the vent area for small dark brown to red bugs crawling on the skin; these are red fowl mites and are detrimental to the individual. They multiply fast and will suck the lifeblood out of a chicken in a short about of time.

Lice live in the feathers of a bird and will cause dirty vents and extreme discomfort to the individual. Like mites, lice will congregate around the vent area, appearing as light brown or tan bugs crawling on the feathers. In a progressive lice infestation, bundles of eggs will be visible on the quill near the skin.

Treatment for mites and lice is simple and requires one topical product to address both parasites. I have a blog post and YouTube Video demonstrating the correct dosage and procedure for treating mites and lice using my flock as examples.

Egg laying Issues:

Silkie eggs on a nesting pad.

Egg-laying issues such as soft-shelled eggs can result in dirty vents in hens. During the formation of the egg, reproductive medullary bone deposits form the shell around the yolk cell. When the calcium supply in the hen’s body is low, soft-shelled eggs cause the egg to break during the laying phase.

Adding supplemental calcium to the flock’s diet will address soft-shelled eggs. Most poultry feed contains calcium for hard shells that the hen’s body uses quickly. Oyster shells available at farm/feed stores add valuable long-absorption calcium that the hen’s body will process over 24 hours, providing the resources for hard shells that do not break during laying.

Oyster shells for stronger eggshells.

Offer oyster shells in a separate container in the pen or where the flock eats. The hens can determine the amount of supplemental calcium their body requires and will consume from the available oyster shells. Keep oyster shells available for laying hens during active laying periods. The hen’s body will use the long-absorption calcium to produce hard eggshells, reducing dirty vents.

Heat-Related Issues:

Apollo and Aphrodite (White Crested Polish hens) enjoying a summer evening sampling from a pot of marigolds.

A hen will drink more water during excessive heat and high humidity. The unbalance in the gut biome results in loose excrement and dirty vents. Adding electrolytes and probiotics to the flock water will address this issue. Not all electrolytes are alike; purchase a probiotic marketed for use in poultry. While watermelon and cucumbers are a nice treat for a hot summer day, they lack the essential electrolyte balance that a hen’s body needs during extreme heat.

A product I readily provide for my flock is Rooster Booster Vitamins and Electrolytes, found at Tractor Supply. Containing Lactobacillus, this product promotes a balanced gut biome during extreme heat. Since I have started using this, dirty vents due to summer temperatures have notably decreased.

Vent Gleet:

Unlike parasitic or environmental causes, vent gleet is an inflammation of the cloaca (the vent), causing an unsightly condition called cloacitis. The most obvious symptom of cloacitis is a yellowish discharge from the vent that sticks to the feathers around the vent area and presents with a foul odor. In addition to the aforementioned, a hen will have a bloated abdomen, and the vent area can appear red and inflamed.

Treatment for vent gleet involves a two-pronged approach with probiotics – Rooster Booster administered in water mentioned above – and anti-fungal cream. Begin treatment by isolating the affected hen from the flock. Wash the vent area with warm water and mild soap to remove the debris and dried excrement from the feathers. Carefully cut away feathers from the vent if necessary.

Monistat 7-day cream – treatment for yeast infections in women – works well for vent gleet in hens. For hens, apply a pea-sized amount of the cream externally around her vent daily. Repeat for 5-7 days or until the redness has subsided around the vent. Continue to keep the hen in isolation for treatment till her condition improves. In my experience, vent gleet treated with probiotics and anti-fungal cream will resolve in two weeks.

Buff Orpington hen’s healthy fluffy butt.

I am a multi-disciplinary writer, published author, and web content creator. If you like this post, consider visiting some of my other blogs.

Coffee and Coelophysis – A blog about dinosaurs.

Chicken Math University – A blog about homeschooling

The Introvert Cafe – A mental health blog.

If you have any questions or comments, please leave a comment or reach out to kuntryklucker@gmail.com. I check my email daily and will get back to you as soon as I can.

Thanks for reading! Till next time, keep on crowing!

~ The Kuntry Klucker Crew ~

Treating Worms in Backyard Chickens.

As the Autumnal Equinix approaches the long days of summer finally retreating, this is a perfect time to consider worming your flock. Chickens, if allowed to free range, will spend most of the “dog days of summer” dining on, bugs, weeds, grass, and other delectables they find scurrying about. Worms are mostly associated with dogs, such as the dreaded heartworm, but chickens can also contract worms as well. Because most backyard chicken flocks have access to green grass, sunshine, fresh air, and bugs, they will most likely pick up worms.

While worms in your flock may be a scary prospect to face, take heart, the fact that your flock needs routine deworming means your ladies are living the good life. Look at deworming your flock as a badge of honor, a testament to the freedom and contact with the outside world that many chickens are denied.

Got Worms?

Knowing that worms are a given in a backyard flock that lives the good life, how it is determined that a flock has worms?

The worms that infect the digestive tract of chickens are large roundworms. They are most often discovered while cleaning the coop or removing the poop from the previous night’s roost. Worms present in chicken dropping will look like fine angel hair spaghetti (I know the word picture is rather discussing, sorry about that). The worms may or may not be moving, however, it will be clear to any keeper that white spaghetti strands found on your coop floor are not a normal occurrence.

If you find worms on the floor of your coops when cleaning, this indicates that not only does your flock have worms but the load within their bodies is escalated. Allow me to explain.

A chicken’s body can handle a worm load within the normal parameters. Chickens evolved to live outdoors in constant contact with these parasites. Their bodies up to a certain point can tolerate a normal worm load in their digestive tract while remaining healthy. It is when this balance becomes compromised that problems arise. One of the indications of problems is finding worms on the floor of your coop when cleaning.

What problems do an unchecked heavy worm load cause?

Chickens with a heavy worm load will succumb to several health issues, the most common is weight loss. If you notice a hen who has begun to look rather skinny despite eating well, she may have a higher-than-normal worm load within her body.

You will also notice chickens with worms will have a dirty vent area, often caused by runny poop which sticks to their vent feathers. Listless is also common in chickens with a heavy worm load. The worms in the digestive tract consume energy from the food they eat. This will leave hens with a heavy worm load weak and often present with an appearance of ill health. A hen who does not move very much or does not leave the coop during the day is most likely weak and suffering from a worm overload.

If the worm load in the hen’s body is allowed to persist keepers can find worms in the eggs. In the end, a heavy worm load will eventually result in the death of the hen. Worms in a flock will need to be addressed.

So how does a keeper deal with worms in their flock?

Treating your flock for worms is a very easy and straightforward procedure. To address this issue in your flock you will need several things a dewormer, a syringe with the needle removed, and a partner.

To date, there is no dewormer on the market that is FDA approved for chickens. What this means is that the FDA has not specifically set aside funds and performed a test to determine the effectiveness of dewormers developed specifically for chickens. Do not let this bother you, it is safe to use dewormers produced for other livestock administered at certain doses that are safe for chickens.

**Disclaimer** The following is my methodology for deworming my flock. Keep in mind I am not a professionally trained veterinarian nor am I suggesting that my opinions should replace proper vet care given the situation. I share this information based on my experience in treating worms in my flock throughout the past decade. I do have some resources that validate my methodology.

For treating worms in my flock, I use Safeguard dewormer marketed for goats. I like Safeguard because it is a broad-spectrum dewormer. Not only will it treat roundworms in your flock, but it will also treat other worms as well (gape worms, flatworms, lungworms, etc.).

Safe Guard dewormer-available OTC at most farm/feed stores

Safeguard is sold OTC (Over the counter) at most farm/feed stores, it carries an MSRP of about $30-$50 depending on location.

To deworm with Safeguard you will need to orally administer the dewormer to every individual in your flock. This dewormer is NOT mixed in food or water, it has to be administered following a specific dosage directly to the bird.

For Bantam, breeds administer 1/2cc or 1/2 ml. (metric system measurements; I cc converts to 1 ml)

For Standard breeds administer 3/4 cc or 3/4 ml

Safe Guard Dewormer in syringe.

Using the measurement indications on your syringe, measure the correct dosage directly from the bottle (do not dilute) and put it directly into the beak of the chicken. The chicken will need to swallow the dewormer, so if they spit it out, you will need to try again.

Leah (bantam cochin) orally injesting Safe Guard Dewormer.

I have found through experience that obtaining a syringe with a curved tip is best when orally administering a dewormer to the flock. These syringes are often stocked by dentists and oral surgery offices. When I visit my dentist for my annual cleaning, (in addition to the oral care sample bag) I will ask for some of their curve-tipped syringes for my chickens. They happily oblige my rather strange request.

Once your flock has been dewormed, you will need to administer it again in 10-14 days. The first dose of dewormer will kill all of the live worms that reside in the digestive tract of your birds. The second dose will kill and remove any eggs that may have hatched during the first dosing.

Note: during treatment, you will need to observe a 20–28-day egg withdrawal. Any eggs laid during treatment are not edible for human consumption. In addition to residue from the dewormer, it is possible to get worm fragments in your eggs. If you sell your eggs, advise your customers that you will not be able to sell any eggs till the egg withdrawal period has passed.

Once your flock has completed the deworming treatment process, your flock will be free of worms and your health status should improve.

Another Note: It is not necessary to deworm as a preventative, this does more harm than good. A chicken’s body has evolved to handle a certain worm load without any ill effects on health. Only when you notice an indication of an advanced worm load in your flock do you need to act. If you worm your flock as a preventative, you will reduce the natural ability of your flock to regulate a worm load within set evolutionary parameters.

Think of it like antibacterial soap. If we constantly wash our hands with antibacterial soap, we reduce our body’s natural ability to build immunity to the normal bacteria in our environment. Thus, reducing our body’s natural ability to adapt to the contact of these particular normal microbes. The same is applied to your flock. It may be tempting to act as a preventative but in the end, your flock will incur more harm than benefit.

Only deworm when signs of increased worm load are present in your flock.

Below I will link a video from my YouTube channel demonstrating deworming my flock. This will allow you to see my methodology and process so you can address worms in your flock.

I hope this post has helped you navigate worms and the process of deworming your flock.

I am a published author, multi-disciplinary writer, and blog contributor. If you like my work, please visit some of my other sites.

Knowledge of the Spheres – Exploring the Celestial Spheres!

Coffee and Coelophysis – A blog about dinosaurs.

Chicken Math University – Adventures in Homeschooling

If you like this blog, please peck the subscribe button. As always, thanks for reading. Till next time, keep on crowing!

~ The Kuntry Klucker Crew~

Bird Flu: What a Keeper Should Know.

Nothing strikes fear faster in a backyard chicken keeper than the threat of a highly contagious pathogen that could wipe out their entire flock. Bird flu is a concern and for good reason.

Over the past decade, my flock and I have weathered many bird flu watch scenarios together. During a particularly tense scenario, our little farm was two counties away from a large commercial farm that had to euthanize all of its birds. It is a scary thought for a backyard keeper who considers their flock pets or companion animals.

Although the thought of bird flu affecting your flock is scary, I am here to help put a bit of perspective into the equation and arm you with a realistic plan to help protect you and your flock.

To borrow a line from The Hitchhiker’s Guide to The Galaxy, step one: DON’T PANIC!!! I agree with Douglas Adams 100%. Stay calm and always carry a towel.

I will start with detailing to you how I handle a bird flu scare.

Bird flu strains generally originate in Asia. There are several strains of bird flu, like the human flu, and the RNA is constantly changing and mutating. The pathogen then travels to the United States via “air mail” within migratory bird flocks as they migrate from place to place. Waterfowl are the most common vectors, but they can also be carried via songbirds and other wild birds.

When I hear of bird flu outbreaks in Asia, I pay attention, just being aware that a strain has emerged. If it stays in Asia that’s good, if it makes its way out, that’s something to pay attention to.

Image Credit: Public Domain

There are several flyways that waterfowl migratory birds take that can bring the flu into the country. My flock is most affected by the Mississippi and Atlantic Flyways.

Once the virus has been reported in the United States, I pay close attention. I don’t panic, I will still allow my flock to free range and maintain their coops normally.

Smaug (silver lace Wyandotte rooster) keeping watch over his girls in the backyard.

Once there are reports of bird flu in private farms or commerical farms within two states from my location, I will start my bird flu watch readiness plans.

During this time, I will allow no one to visit my birds or tour my farm, I will stop selling eggs, and I will cancel plans to adopt any new birds for the time being. Bird flu can easily be transmitted by these means, as I am at greater risk of myself being the vector that brings the pathogen to my flock. In the same accord, when I return from the feed store, I will change my clothes before I enter the flock environment. I will also up my biosecurity practices. I always practice good biosecurity, but during a possible flu impact, I will pay special attention to these safeguards.

Silver Lace Polish coop on lockdown.

Once the flu has entered my state, I will put my flock on lockdown. I only reserve this action when the threat becomes imminent. During a lockdown, my entire flock will be confined to their coop and pen. All my coops have covered runs, they will not come into contact with any wild birds, likewise, the wild birds will have no access to the flock. I will then strictly manage who enters these pens and biosecurity practices before entering the backyard and coops.

The Kuntry Klucker Crew enjoying digging in a sand box of scratch duirng bird flu lockdown.

Once on lockdown, the flock will generally have to stay in this state till the treat passes. Depending on the month (spring vs fall) it could be longer or shorter. In 2016 when bird flu was detected just two counties away, my flock was on lockdown for about a month before it was safe to allow them to free range again.

White Crested Polish and Silkie crew on lockdown.

I have only needed to put my flock on lockdown once, this was the year when the bird flu wreaked havoc in the United States sparking an egg shortage. Our little farm was only two counties away from the commercial farms that were affected. Although tense, I didn’t panic. I worked to the extent of my limits to protect my flock, after that it’s up to fate.

TARDIS crew digging in the sand for scratch during lockdown.

My flock has bird flu. What do I do?

However, if the worst-case scenario does occur and my flock is affected by bird flu, I ready myself for what I call my “Code Red Action Plan.”

If you suspect that your flock has contracted bird flu, a keeper needs to act fast. Bird flu is very easy to identify in a flock. The affected birds will become lifeless, the combs will be purple, and death will occur very fast (24 hours or less; multiple birds may die at once). If you have any birds that exhibit these signs, your flock has bird flu, and as a keeper, you have only hours to react.

Bird flu will not only wipe out your flock in a matter of days, but depending on the strain, those close to the affected birds can become affected. Some Bird flu strains are zoonotic and thus humans can contract it from their birds, although this is rare, it’s worth knowing. The main impact will be the quick depopulation of your birds due to deaths from the virus.

The first thing a keeper should do if they suspect their flock has bird flu is to call the USDA or their State Veterinarian. These numbers can be easily found via Google search. Once you have alerted them to the condition of your flock, an inspector will be dispatched to your farm to test your birds.

If bird flu is positive, you will be contacted by a federal agent to assist you in managing bird flu in your flock. Should a large quantity of your bird be affected or deceased in most cases they will reimburse you for your lost birds.

Some may wonder if you have to report bird flu in your flock. The answer is YES!!! A keeper is legally obligated to report suspected bird flu cases in their flock. Failure to do so is considered a crime and a keeper could be prosecuted, so yes, you have to report your flock’s condition. The good news is, if your birds all perish, most states will reimburse the keeper for their lost birds.

In some states, inspectors may be dispatched to test flocks within a certain distance of a known case. For example, currently in Indiana bird flu has been reported and dramatically affected several commercial farms. Several of my fellow feathered friend keepers were shocked to have an inspector knock on their door to inspect their flocks. In some cases, this will happen, and keepers are stunned to have inspectors show up at their door to inspect birds. All my friends affected had clean bills of health for their flocks which was a huge relief. But yes, depending on the state and the outbreak reported, this can happen.

What I am doing now? Currently, bird flu is within two states in my location. My birds are still free ranging in the backyard while I pay attention to the reports. Right now, I’m relaxed, not putting too much energy or concern into the situation. I have upped my biosecurity measures and am not allowing any visitors to my flock or adopting new birds. Other than that, it’s business as usual.

However, if reports of bird flu are found in my state of Tennessee, I will then pay closer attention. I will concern myself with the proximity and the rate of affection and prepare to put my flock on lockdown. The girls and I have been through this before, I’m sure we’ll do it again.

I respect the pathogen that causes bird flu, but I don’t panic over it. Typically, small backyard flocks are rarely affected but it can happen here and there. Backyard keepers typically take better care of their birds, living conditions are improved, and most backyard flocks have access to sunshine, a natural environment, and green grass as compared to the commercial flock which often suffer catastrophic bird flu repercussions. All of this helps increase your flock’s immunity, but it’s not full proof. So don’t panic, just have a preparation plan in the back of your mind if needed.

This post was intended to put some perspective into a bird flu scare and equip keepers with measures to protect their backyard flocks. I hope that I have achieved this objective. Bird flu is concerning but keepers don’t need to panic.

As always, thanks for reading. If you have any questions, please leave them in the comments or you can e-mail us a kuntryklucker@gmail.com

I am a published author, multi-disciplinary writer, and blog contributor. If you like this blog, please visit some of my other sites.

Knowledge of the Spheres – Exploring the Celestial Spheres!

Coffee and Coelophysis – A blog about Dinosaurs!

Chicken Math University – Adventures in Homeschooling.

If you enjoyed this post, please peck the subscribe button. Till next time, keep on crowing!

~ The Kuntry Klucker Crew ~

Mites and Lice in Backyard Chickens.

Old man winter has finally made his appearance, temperatures fall, snow covers the ground, a perfect storm for mites and lice to plague a backyard flock.

It’s no coincidence that mites and lice thrive in these conditions. During winter and early spring, mites and lice become a problem area for many backyard chicken keepers. Your once beautiful flock now has messy feathers, pale combs, and dirty bottoms. What is a keeper to do?

First, do not fear mites and lice, they are a natural part of a backyard chickens’ life and a badge of honor. If your chickens have mites and lice, it is proof that they are living the good life. Chickens that have access to the outdoors, grass, sunshine, and fresh air will most likely come down with a case of mites and lice at some point in their lives.

Mites and lice live in the environment. Typically contracted from wild birds, they can also be contracted through small mammals like mice, rats, moles, or rabbits. There is no way to avoid mites/lice in your flock, a control method is the best treatment.

When I first started keeping chickens 11 years ago, I feared the dreaded mite and lice season. I was afraid that I would catch the mites from my birds or that I would not know how to handle the situation.

First, let me put one fear to rest. The mites and lice that plague birds are not the same mites and lice that plague humans. The mites/lice that affect birds are species specific. They cannot thrive on our bodies for several reasons.

1. We do not have feathers.

Mites and lice that affect birds need feathers to sustain their lifecycle. Our daily routines of bathing, washing our cloths and hair make it impossible for these mites to exist on our bodies for long. If your birds have a severe mite/lice outbreak the little beasties may crawl on you giving you a case of the Heebie Jeeves, but I assure you, a simple change of clothes and a shower will render them gone. They are a mind over matter situation.

2. We do not provide them with the necessary resources to carry on their lifecycle.

Avian mites/lice need a specific environment to sustain their life cycle. Denied their breeding environment (i.e., feathers), avian mites/lice cannot survive on our bodies, thus you will not be affected by them. To my knowledge, Northern Fowl Mites (the most common mite that affects chickens) are not zoonotic (carries pathogens, from one species to another). Meaning that humans cannot acquire any diseases from the mites/lice that affect our flocks. We just get a case of the creepy crawlies, that’s about it.

Mites and lice usually reside near the vent area on chickens except crested breeds. Mites and Lice can also be found on the heads of crested breeds in addition to the vent area.

How do identify Mites/Lice on your birds.

Mites and lice prefer these areas for several reasons.

1. It is warm with ample blood supply

2. The birds are unable to preen these areas, thus the mites and lice can accomplish their life cycles uninterrupted.

On birds, mites will look like small little red, black, or brown spots that are moving on the skin. If your bird has a severe case of mites, it may just look like a mass of dark dirt covering their skin. These are Northern Fowl Mites, the most common mite that affects chickens. Left untreated, an army of these little beasties can kill a bird through blood loss (their food) which will cause anemia in the birds. Thus, if not addressed, death.

Lice

Lice on birds are usually found in the same place as the mites. The vent areas and head of crested breeds.

Unlike mites, lice will exist only on the feathers. A cluster of lice eggs will look like a mass of debris that is congrated at the quill of the feather as it meets the skin.

Like the mites, a keeper will be able to see the adult lice crawl on the feathers. Lice are usually sand to light brown color depending on the species.

Both mites/lice will cause a bird to look lethargic, have a pale comb, and a dirty bottom. Lice will add the additional signature of unkept feathers that appear broken, ratty, or disheveled. Both mites and lice will weaken a bird making them more susceptible to illness and in worst cases, death.

How to handle mites/lice in chickens:

There are several ways to approach mites/lice in a backyard chicken flock. Several products are available that address these situations in your birds. I will detail several that I have used in the past along with my methods of application. Disclaimer, these are strategies that I use that have proven successful for me. Please note that I am not a veterinary scientist just a fellow backyard keeper that has been around the block a time or two.

The go-to in my mite/lice arsenal is Elector PSP. This product is in liquid form that is diluted in a spray bottle and sprayed directly on the birds. Due to legislation in some areas, it can be hard to obtain and carries an MSRP of $150 or so if you can find it. Unfortunately, it is usually not carried in most farm/feed stores. I have ordered it in the past from Amazon but as of late they no longer carry it. Due to many of the supply chain disruptions caused by COVID-19, I have been unable to replace the supply that I bought nearly 7 years ago. Hopefully, it will become available soon.

Elector PSP pro.— The pro of Elector PSP is that it kills on contact and brings the mite/lice situation to an abrupt end. It does need to be reapplied 10-14 days after the first application to kill any eggs that hatch. No egg withdrawal is required when using this product. In addition to spraying, it directly on the birds, I will also spray the inside of the coops and nesting boxes to rid the environment of the little beasties. I have had very good results with Elector PSP.

Electro Cons.—The con of Elector PSP is price and availability.

My second go-to in my mite/lice arsenal is Eprinex. As with Electors PCP, this product is in liquid form and is applied directly to the skin. However, unlike Elector, Eprinex has an egg withdrawal of 14 days after each application. Eprinex is applied in the same manner as flea and tick treatment for cats and dogs. Apply Eprinex directly to the skin behind the head of your birds. I will also apply a drop on top of the head for my crested breeds, such as the Polish and Silkie. These breeds often experience mites/lice on top of their heads due to their inability to preen this area. In 14 days, reapply to address any mites that hatched after the first application.

Eprinex application directions

Using a syringe with the needle removed, apply 3/4 cc for standard-size breeds, for bantam breeds, apply 1/2 cc directly to the skin behind the neck. Although designed for cattle, Eprinex is safe for use on chickens in small amounts.

Eprinex works by absorbing into the oil of the skin. When the mites and lice bite the birds, they encounter the Eprinex and are killed. After the first application, reapply in 14 days. Egg withdrawal should be observed for 14 days after application. This means that from start to finish, mandatory egg withdrawal should be observed for 28-30 days.

Eprinex is available at most farm/feed stores and carries an MSRP of around $50. The only con with Eprinex is a mandatory egg withdrawal. I have a large flock, so I will apply Eprinex to one breed at a time, reducing the effects of egg withdrawal. I have used Eprinex for many years with great success.

Permethrin-10

As with Elector PSP, when treating your flock for mites you will also need to treat the coops. When using Eprinex, I will mix a solution of Permethrin 10 livestock spray and spray my coops and nesting boxes. This combined with Eprinex will bring the mite/lice situation to an abrupt halt.

Additional methods.

During the winter months, I will supply my flocks with a sandbox containing a mixture of sand and peat moss. My girls will readily use this for dustbathing while the ground is snow-covered or wet. This allows them to maintain their natural behaviors that aid in mite and lice prevention.

As you can see, mites, while a very common occurrence in backyard flocks is very easy to address and treat. While they can be a pain to deal with, remember that your girls are living the good life if they come down with a case of the little beastie. Your girls have access to fresh air, sunshine, grass, and nature, something that many chickens are denied.

I hope this post help put the dreaded mites and lice season in their perspective place. They are nothing to fear and are very easily treated with multiple products available.

To watch a video on treating chickens for mites and lice chick here.

I am a published author, multi-disciplinary writer, and blog contributor. If you enjoyed this blog, please visit some of my other sites.

Coffee and Coelophysis – A blog about Dinosaurs!

Chicken Math University – Adventures in Homeschooling

If you liked this post, please peck the subscribe button. As always, thanks for reading. Till next time, keep on crowing.

We’re on Facebook! Drop by and say hi. We’re always happy to see new folks and show you around the “coop-hood”.

~ The Kuntry Klucker Crew ~

Can Backyard Chickens make you sick?

Hi everyone!! I hope your summer has been well and that you packed all the fun into it as humanly possible. I know I have been absent for a while; it’s been a busy summer. It’s funny how the summer months can turn an average functioning family into a frenzy. Well, that is what summer has been like for us, been busy with activities and of course keeping up what the girls, growing and harvesting season. With the majority of the gardens work behind me I wanted to take the time to touch on a subject that I have been asked by several of my followers. Can owning backyard chickens make you sick?

Earlier this month the CDC released an article/report that backyard chickens are responsible for salmonella outbreaks across the country. Sickening people even sending some to the hospital, but so far, no deaths have occurred, well that’s good. As fear ridding as this sounds, I want to take the time and put my two cents in and tell my side of the story as a backyard chicken keeper.

The long and short of it is Yes, backyard chickens can make you sick, but so can your cat, dog, and pet parrot. You see any animal that lays eggs carries the salmonella bacteria, this includes, pet turtles, snakes, bearded dragons, and of course backyard chickens. It is a bacterium that all egg laying animals/reptiles carry in their body. This is why it is advisable that one wash your hands good with soap and water after handling. It a pretty simple common-sense step to take to avoid illness after contact with pets that can carry the salmonella bacteria. Not that this gets your cat and dog off free and easy without incident. Cats and dogs especially if they are allowed to run free outside can also make you sick. They too can come into contact with pathogens that can be transmitted to you. So really your small flock of backyard chickens are no more dangerous to your health then fluffy or fido.

So why does the CDC single out backyard chickens? Well, I think that the answer is twofold. One, keeping backyard chickens has a direct impact on the factory farm producers of eggs and for some, meat for the table. When consumers take it upon themselves to have a say in where their food comes from the big factory farm producers take a big hit.

It does not help their matters that the backyard chicken movement has exploded by leaps and bounds. Keeping backyard chickens is no more common than a family having a dog roaming the backyard. Even cities have passed laws to allow residents to keep a small number of hens in the small plots behind their homes. It’s a movement that is growing every year which is one reason why people like me who blog about backyard chickens are seeing a huge increase in readers. Potential keepers are seeking out information on how to care and sustain a small backyard flock, this is where people like me come into play.

Secondly, I think part of the problem is that people are cuddling their chickens like they would a cat or dog and inadvertently getting sick in the process. The CDC is right when they state that you should not kiss your pet chickens or allow young kids to hold chicks. This is because young children have an increased risk of putting their hands in their mouths after interacting with chicks. But this same rule can be applied to any pet, not just backyard chickens.

So, what is my stance you may be asking? Well to put it simply, wash your hands! I have been a keeper of backyard chickens for almost 10 years now, I have never become sick due to handling or having contact with my flock. The only chicken I have contracted illness from and took ill was from chicken that I ordered at a restaurant.

IMG_1470

My girls have never made me sick in anyway or caused any ill effect in the entire time I have been keeping chickens. Protecting yourself and your family from illness takes nothing more than a commonsense approach. Whenever I come inside from interacting the girls the first thing, I do is wash my hands well with soap and water. I don’t need to submerge myself in alcohol or bleach, a simple thorough hand washing is all that is needed. Additionally, I only wear my “coop” cloths into the backyard when interacting with my girls. Not only is this just a good common-sense move, but it also keeps me from getting my nice cloths dirty. Chickens can be messy so I would not want to wear nice cloths to the backyard anyway. So, wearing clothes that I don’t mind getting dirty that I wear nowhere else and take off and put directly in the washer after coming inside is nothing more than common sense.

So, as you can see just taking simple steps after spending time with the girls is all that is needed. One need not be afraid to own or handle backyard chickens because all that is needed to protect yourself a simple act of washing your hands well after contact.

Now, as far as kissing backyard chickens this is probably advice well worth taken. I love my girls, but I never kiss them for several reasons. Chickens are very interested in human eyeballs, they look like treats to them, I cannot tell you how many times I have seen pics of people on Facebook after getting pecked in the eye by their chicken. It hurts and, in some cases, and cause irreversible damage. So, to keep my eyes safe I keep my face well out of the way of the curiosity of a chicken. It just makes perfect sense.

Secondly, kissing your chicken can be hazardous for your health. I know that a lot of people do, but the line stops there for me. I will tell my girls how much a love them and how pretty they are, but my lips are never laid on them. They live outside bathe in dirt and can carry some pathogens on their feathers that I would rather not have in my mouth. So, my love line stops there, I do not kiss my birds. So, yes, backyard chickens can make you sick but the routes to avoid this are very simple and only require soap, water, and facial/eyeball distance.

IMG_1830

So, enjoy your backyard birds just make sure to wash your hands and keep your eyes and lips away from their curious beaks. If you practice good hygienic commonsense, you will have a very happy relationship with your girls enjoying all the benefits of having backyard chickens.

I am a published author, multi-disciplinary writer and blog contributor. If you like this blog, please visit some of my other sites.

Coffee and Coelophysis – A blog about dinosaurs!

Chicken Math University – Adventures in Homeschooling.

Knowledge of the Spheres – Exploring the Celestial Spheres.

If you liked this post, peck the subscribe button.

As always, thanks for reading. Till next time, keep on crowing.

~ The Kuntry Klucker Crew ~

IMG_1838

How to Treat Bumble foot in Backyard Chickens.

IMG_0238.jpg

Along with the fun of raising backyard chickens, there are times when care needs to be taken to assure the well-being of our feathered friends. Last summer I had a few of my girls come down with a condition called bumble foot. I know it’s a funny sounding word, what it basically amounts to is an infection in the pad of their foot. Now, the chicken has an amazing ability to heal and recover from a variety of wounds and conditions. Often times I am most certain that an ailment will take the life of one of my girls and as it turns out they, make an amazing recovery.

So what is bumble foot exactly? Basically, it is caused by a very small puncture wound on the chicken’s foot. As the chicken’s body attempts to heal itself, a “corn” is formed in the soft tissue of the foot, creating a very painful condition called bumble foot. Although it is not inherently common in backyard flocks, it does happen from time to time.

My girls came down with the condition by injuring their feet by tree branches that fell into their outdoor run area after several severe spring storms ripped through our area. Some of the branches were sharp and a few of the girls obtained small wounds on their feet before I could get everything cleaned up. Even something as simple as digging in mulch can cause a splinter to get infected and cause bumble foot in a chicken. So, there are a variety of things that can cause bumble foot to grow in the soft tissue of even pampered backyard divas.

Although the condition sounds severe, it is actually rather simple to treat. All it takes is some time and attention. There are many ways to treat the infection. Some chicken owners will actually cut the infection out of the foot. I would only do this is only in extreme conditions. Although this would remove the infection from the bird very quickly, I would hate to cause this much pain to one of my girls. This procedure honestly is much better handled by a vet who has the proper pain management to perform this method of addressing bumble foot. I take a bit gentler approach, working with the chicken’s body to draw out the infection with as little pain as possible. I call it the salve method. I will detail below with pictures how to treat the infection using salve.

First, you will need to catch the patient that needs the bumble foot infection addressed. It is best to wrap the patient in a towel. This will keep the bird calm and make it easier for your assistant to hold. That is right, I forgot to mention that you will need a helper for this little project. My helper today is my mom, Mary. She loves my girls and enjoys holding and talking to our patient throughout the entire procedure.

img_0180

Our patient today is Miss Pea. She is one of the last remaining girls that is still recovering from a bumble foot infection. Her infection is slow to heal, mainly because she is the largest of all my hens. She puts a lot of weight on her feet which does tend to make the healing process slower. Nonetheless, she takes her Pedi days in stride.

Ok, now that you have your patient wrapped in a towel, give the patient to you assistant and let them hold the bird for you. This will make it easier for you to use both your hands to work on the bumble foot infection.

img_0175
img_0183

One very important note here: Make sure that you wear gloves!!! Bumble foot is a bacterial infection. Many bacteria live in the ground, it is possible that some bumble foot infection can actually contain the staph bacteria making them staph infections. So to protect yourself, make sure that you wear a good pair of quality medical exam gloves. Also, see that your assistant wears that same quality medical exam gloves.

Ok, now for the procedure, make sure that you have a stocked medical kit. You will need: Gloves, Peroxide, rubbing Alcohol, cotton balls, scissors, rolled gauze, antibacterial cream such as triple antibiotic cream, salve, and vet wrap. Here are my supplies laid out and ready to use.

img_0178

Ok, now that you have your patient and your assistant holding your patient, it’s time to begin. Isolate the foot that has the infection and secure the other foot under the towel. A chicken will have the natural reaction to kick with the other foot, so that foot need to be secured. You don’t want the claws from the other foot to put holes in your gloves.

img_0177

Take a cotton ball, dip it into some alcohol or peroxide and wipe the foot clean. Removing all debris and disinfecting the foot pad. Chickens’ feet can be very dirty. Sometimes it helps to soak the foot in a tub of warm Epsom salt water to further clean the feet and allow the skin to soften.

After you have cleaned the foot, inspect the wound. This is Miss Pea’s foot; she has a pretty large bumble foot infection. As you can see, they are usually circular in nature and can be very deep. After I cleaned her foot, I put a dab of Salve on her foot. Just enough to cover the wound, you don’t need to smear the whole foot in Salve.

img_0199

Now is a good time to talk about Salve. I swear by this product. The purpose of Salve is to soften the skin allowing the body to expel the infection. It is often used for horses to pull pebbles and other objects out of their hove’s. It is non-toxic and painless for the bird. It is a wonderful product. I would not keep chickens without this in my chicken first aid kit. It is found at Tractor Supply and costs about $20 a tub. It will last you literally forever. It is black, smells awful, looks like tar but will works miracles on bumble foot infection. I also use it on my kids when they get splinters or other cut wounds.

img_0939
img_0940

Once you put the Salve on the patients cleaned and disinfected foot, place some gauze on top of it. The gauze will keep the salve next to the skin and offer some protection for the wound.

img_0203

Now that you have the wound Salved and gauzed, it is time to wrap the foot. This keeps the gauze in place and prevents dirt and other things from contaminating the wound causing more infection to grow.

A chicken’s foot is a bit of a challenge to wrap, but once you get the hang of it its rather easy. First you will need to cut 2-3 strips of vet wrap about 10-12 inches long. Start several inches up the bird legs and wrap the vet wrap around her leg. Then, as you reach the toes just weave the vet wrap in-between the toes, making sure to cover the bottom of the foot completely. A note here, DO NOT make the vet wrap too tight. You are not trying to provide compression. You are simply holding the gauze in place and preventing dirt from infecting the wound further. Wrapping too tight will cut off circulation to the patient’s foot causing severe leg problems. Keep the wrap rather loose, vet wrap will stick to itself so there is no need to wrap the foot too tight. I would rather that you question whether it is too loose than too tight.

img_0212
img_0176

Once you have the patients foot wrapped. They are good to go, a free bird. You can allow your patient to roam with the rest of the flock. All I caution about is do not let their foot get wet. So, if you are expecting rain in the forecast, make sure that they do not step in mud or puddles. Secure your patient to the pen for the day if the weather is going to be bad. If the foot does gets wet, it could cause further infection and delay recovery. However, if their foot gets wet just remove the bandage, disinfect, apply more salve and rewrap. It’s not a big deal, it happened to me several times when we would get a freak shower. So, I just rewrapped her and called it a day.

img_0238

Once they have their foot fashions on, return the patient to the flock and check the wound in a few days. I go no longer than a week, every 2-3 days is ideal. The Salve will work to pull the infection from the body bring with its puss and the corn. Simply remove the gauze, disinfect the foot with either alcohol or peroxide apply more salve, and wrap.

The Salve method takes a while to completely clear the infection. A bad bumble foot infection can take several months to completely clear up. This is the disadvantage of using the Salve vs cutting the infection out. However, the Salve is painless and very effective. The surgical method requires an individual to have a tough stomach when it comes to blood and puss. Not only is it bloody but it is very painful unless numbing medication is properly administered. This procedure is best left to a vet. Additionally, when you cut into a bird you risk the very real possibility of severe life-threatening infection. This is because if the bacterium in foot gets into the blood stream it could be life threatening for the bird. I would much rather use a method that takes a bit longer but is painless and reduces the infection rather than possibly making it worse. The Salve will work, it is absolutely amazing, will save you hundreds on vet bills, and be painless for the patient.

Bumble foot, although sounding daunting is a very simple condition to treat. Using the right methods, it is painless for the bird and returns their quality of life once fully recovered.

I hope that this post has helped anyone who is struggling with how to address bumble foot in backyard chickens.

I am a published author, multi-disciplinary writer and blog contributor. If you like this blog, please visti some of my other sites.

Coffee and Coelophysis – A blog about dinosaurs!

Chicken Math University – Adventures in Homeschooling

Knowledge of the Spheres – Exploring the Celestial Spheres

If you liked this post, peck the subscribe button.

As always, the girls and I thank you for stopping by. Remember to keep on crowing and we will see you next time.

~The Kuntry Klucker Crew~

DSCF4984